Advertisement
Quick Links
Models/Modelos/Modèles
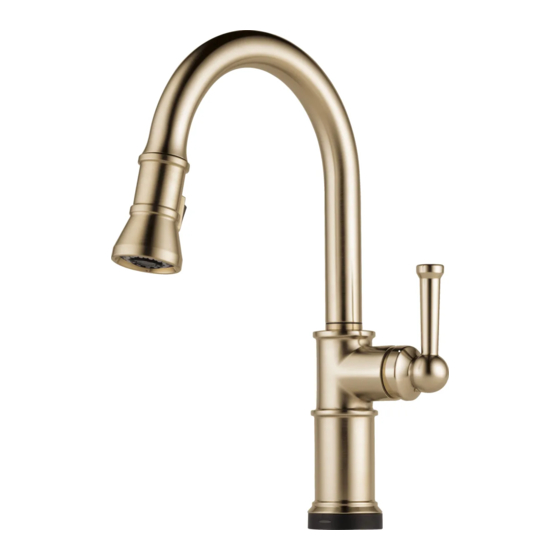
64025LF , 64925LF
Series/Series/Seria
ARTESSO
®
Write purchased model number here.
Escriba aquí el número del modelo comprado.
Inscrivez le numéro de modèle ici.
RP71451
Optional Escutcheon
La opción de Chapetón
Plaque de finition en option
Specify Finish / Especifíque el Acabado / Précisez le Fini
WARNING: THIS FAUCET IS NOT TO BE USED WITH PORTABLE DISHWASHERS!
ADVERTENCIA: ¡SESTA LLAVE NO SE DEBE UTILIZAR CON MAQUINAS
LAVAPLATOS PORTATILES!
AVERTISSEMENT: ON NE DOIT PAS BRANCHER UN LAVE-VAISSELE PORTATIF
SUR CE ROBINET!
You may need:
Usted puede necesitar:
Articles dont vous pouvez avoir besoin :
For easy installation of your Brizo
will need:
• To READ ALL the instructions completely before beginning.
• To READ ALL warnings, care, and maintenance information.
Para instalación fácil de su llave Brizo
usted necesitará:
• LEER TODAS las instrucciones completamente antes
de empezar.
• LEER TODOS los avisos, cuidados, e información
de mantenimiento.
Pour installer votre robinet Brizo
facilement, vous devez:
• LIRE TOUTES les instructions avant de débuter;
• LIRE TOUS les avertissements ainsi que toutes les
instructions de nettoyage et d'entretien;
www.brizo.com
80051
64025LF
64925LF
faucet you
®
®
®
PULL-DOWN KITCHEN AND PREP TOUCH FAUCETS
LLAVE DE AGUA-GRIFO EXTRAÍBLE PARA COCINAS Y
FREGADEROS PARA PREPARATIVOS
ROBINETS À AFFLEUREMENT ET À BEC RÉTRACTABLE
POUR ÉVIER D'ÎLOT ET ÉVIER DE CUISINE
Note: This equipment has been tested and found to comply with the limits for a Class
B digital device, pursuant to part 15 of the FCC Rules. These limits are designed to
provide reasonable protection against harmful interference in a residential installation.
This equipment generates, uses and can radiate radio frequency energy and, if not
installed and used in accordance with the instructions, may cause harmful interference
to radio communications. However, there is no guarantee that interference will not
occur in a particular installation. If this equipment does cause harmful interference to
radio or television reception, which can be determined by turning the equipment off
and on, the user is encouraged to try to correct the interference by one or more of the
following measures:
• Reorient or relocate the receiving antenna.
• Increase the separation between the equipment and receiver.
• Connect the equipment into an outlet on a circuit different from that to which the
receiver is connected.
• Consult the dealer or an experienced radio/TV technician for help.
Modifications not expressly approved by the manufacturer could void the user's
authority to operate the equipment under FCC rules.
Nota: Este equipo ha sido probado y ha demostrado cumplir con los límites establecidos
para los dispositivos digitales de Clase B, según la Parte 15 de las normas FCC.
Estos límites están diseñados para proporcionar una protección razonable contra las
interferencias perjudiciales en una instalación residencial. Este equipo genera, utiliza
y puede irradiar energía de radiofrecuencia y, si no se instala y utiliza de acuerdo con
las instrucciones, puede causar interferencias perjudiciales en las comunicaciones por
radio. Sin embargo, no hay garantía que la interferencia no ocurrirá en una instalación
en particular. Si este equipo causa interferencias perjudiciales en la recepción de radio
o televisión, lo cual se puede determinar encendiéndolo y apagándolo, se recomienda
al usuario que intente corregir la interferencia mediante una o más de las siguientes
medidas:
• Cambie la orientación o ubicación de la antena receptora.
• Aumente la separación entre el equipo y el receptor.
• Conecte el equipo a un tomacorriente en un circuito diferente de aquel al que está
conectado el receptor.
• Consulte al distribuidor o a un técnico experto en radio / TV para obtener ayuda.
Las modificaciones no aprobadas expresamente por el fabricante pueden anular la
autoridad del usuario para operar el equipo bajo las reglas de la FCC.
Note : Cet équipement a fait l'objet d'essais qui ont indiqué qu'il respecte les limites
applicables aux appareils numériques de classe B aux termes de la partie 15 des
règles de la FCC. Ces limites sont établies pour offrir une protection raisonnable
contre le brouillage nocif dans une installation résidentielle. Cet équipement génère,
utilise et peut rayonner de l'énergie radiofréquence et, s'il n'est pas installé et utilisé
conformément aux instructions, il peut brouiller les communications radio. Cependant,
rien ne garantit qu'il n'y aura pas de brouillage dans une installation en particulier.
Si cet équipement brouille la réception d'une radio ou d'un téléviseur, ce qui peut
être déterminé en mettant l'équipement sous tension et hors tension, l'utilisateur est
encouragé à tenter d'éliminer le brouillage en prenant une ou plus d'une des mesures
suivantes :
• réorienter ou déplacer l'antenne réceptrice;
• augmenter la distance entre l'équipement et le récepteur;
• raccorder l'équipement à un circuit différent de celui auquel le récepteur est raccordé;
• consulter le concessionnaire ou un technicien spécialiste des radios et des téléviseurs
pour obtenir de l'aide.
Toute modification non expressément approuvée par le fabricant peut annuler
l'autorisation qu'a l'utilisateur d'exploiter l'équipement aux termes des règles de la FCC.
80051
1
1/4/17
Rev. F
Advertisement

Related Manuals for Brizo ARTESSO 64925LF


Summarization of Contents
Top Mount Sink Installation
Faucet Dimensions
Faucet hole diameter, deck thickness, and sink bowl clearance for top mount sinks.
Installation Steps
Procedures for shutting off water, placing faucet, and securing.
Under Mount Sink Installation
Faucet Dimensions
Faucet hole diameter, deck thickness, and sink bowl clearance for under mount sinks.
Installation Steps
Procedures for shutting off water, placing faucet, and securing.
Custom Fit Connections
Supply Line Connection
Details on connecting fittings, tubing length, and securing nuts for PEX lines.
PEX Tubing Guidance
Guidance for custom PEX tubing lengths and plastic sleeve installation.
Flushing Supply Lines
Preparation for Flushing
Place bucket, move handle, and prepare for water flow.
Flushing Procedure
Steps to open and close supply stops to remove debris.
Wire Connections
Part Identification
Identifies parts required for wire connection steps.
Solenoid Wire Attachment
Steps to attach wire from solenoid to mounting shank.
Solenoid Assembly Connection
Connect faucet wire to solenoid port and route through guide.
Battery Installation
Inserting Batteries
Instructions for loading AA or C batteries correctly into the box.
Battery Box Placement
Finding and securing a convenient location for the battery box.
Maintenance and Troubleshooting
Low Flow Resolution
Steps to diagnose and resolve very low water flow issues.
Leak Resolution
Procedures for fixing leaks from handle or spout outlet.
Manual Bypass Operation
Shut Off Water Supplies
Turning off hot and cold water supplies before bypass.
Disconnect Wires and Hose
Moving handle, disconnecting wires, and detaching hose.
Connect Hose to Outlet
Attaching the hose directly to the water outlet for manual bypass.
Ensure Connection
Pulling down moderately to ensure the manual bypass connection is secure.
Solenoid Troubleshooting
Red Light Errors
Steps for replacing batteries or solenoid kit for red light errors.
No Water Flow Issues
Troubleshooting steps when LED is proper but no water flows.
No LED Display
Steps to check connections, replace batteries, or spout assembly.
LED Light Indicators
Explains LED colors and patterns indicating water temperature.
Limited Warranty Information
Parts and Finish Warranty
Coverage for parts and finishes for original purchasers.
Electronic Parts and Batteries Warranty
Warranty for electronic components and batteries.
Need help?
Do you have a question about the ARTESSO 64925LF and is the answer not in the manual?
Questions and answers