Table of Contents
Advertisement
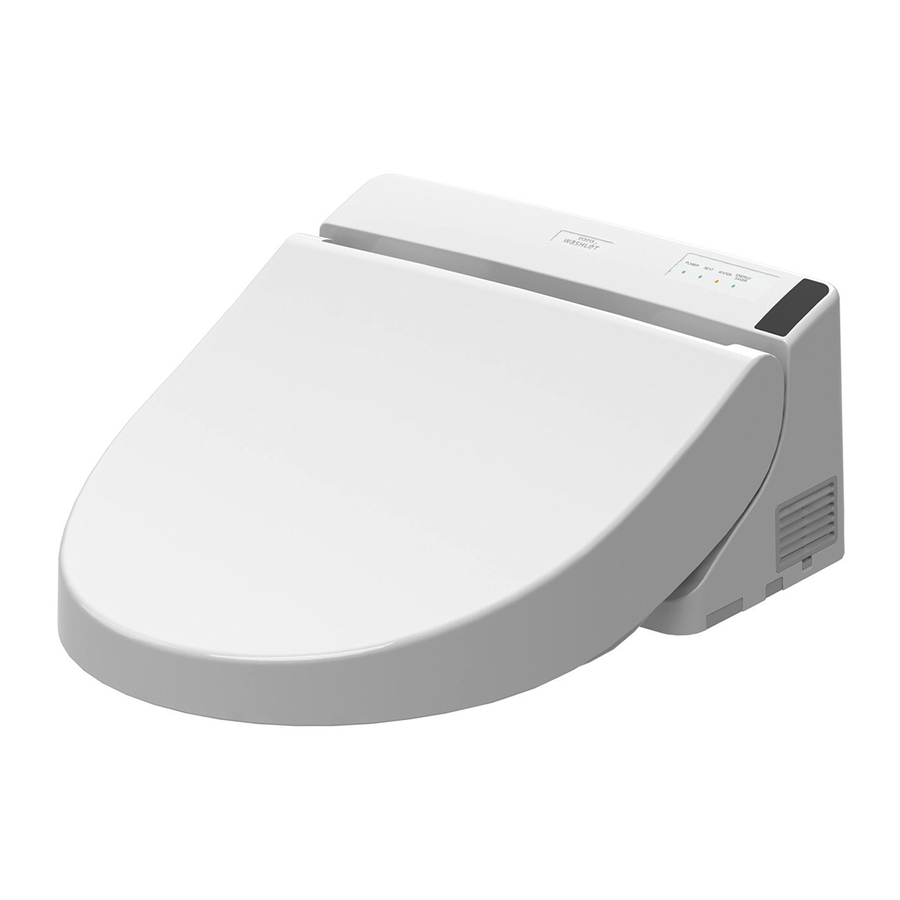
WASHLET
TCF6531
***
TCF6530
***
■ Thank you for your recent purchase of the product. Please read the enclosed
information to ensure the safe use of your product.
■ Be sure to read this Instruction Manual before using your product and keep it in a
safe place for future reference.
Instruction Manual
with Warranty Information
See Page 46.
Advertisement
Table of Contents

Related Manuals for Toto Washlet TCF6530 Series


Summary of Contents for Toto Washlet TCF6530 Series
- Page 1 Instruction Manual with Warranty Information See Page 46. WASHLET TCF6531 TCF6530 ■ Thank you for your recent purchase of the product. Please read the enclosed information to ensure the safe use of your product. ■ Be sure to read this Instruction Manual before using your product and keep it in a safe place for future reference.
- Page 2 What functions are available on your product? Check your model name and write a check mark in this field as needed. Product name (Model) WASHLET Part No. TCF6531 TCF6530 Ref. Your Model Functions Page ● ● Rear cleansing Rear soft cleansing ●...
-
Page 3: Table Of Contents
Table of Contents Safety Precautions ....4 Operational Precautions .... 9 Parts Names ......10 Preparation ......12 Basic Operations ..... 14 Automatic Functions ....18 DEODORIZER, PRE-MIST Temperature Adjustment..20 Product name, Energy Saver Feature ..... 22 Part No. Main unit ........ -
Page 4: Safety Precautions
Safety Precautions These precautions are important for safe usage. Be sure to follow them and use the product correctly. Symbols and Meanings WARNING May result in death or serious injury. CAUTION May result in injury or property damage. The following symbols are used to indicate important safety instructions for the use of the product. Symbol Meaning This symbol indicates a prohibited use of the product. - Page 5 WARNING Do not use the Washlet if a malfunction occurs. In the following cases, switch the breaker on the distribution board to OFF and close the shutoff valve. Close the water shutoff valve to stop water supply. Possible malfunctions: ...
- Page 6 Safety Precautions (Continued) WARNING Beware of irritation or burn Improper use of the toilet seat may cause irritation or burn. When sitting for a long time on the toilet seat, switch the toilet seat temperature adjustment to "OFF". When any of the following persons use a heated seat or warm air drying, someone should switch the toilet seat temperature adjustment to "OFF"...
- Page 7 WARNING Preliminary studies in females suggest that overuse of continuous spraying can increase the possibility of vaginal mucosa drying and potential reduction in desirable microbial organisms. Although these studies have not been validated, please consult your healthcare provider for concerns regarding whether these circumstances may apply to you. More importantly, if you are an individual suffering from any immune defi...
- Page 8 Safety Precautions (Continued) CAUTION To prevent a sudden water leak, do not remove the water fi lter drain valve when the shutoff valve is open. Doing so will cause water to spurt out. (Refer to Page 31 for instructions on cleaning the water fi lter drain valve.) Do not fold or crush the water supply hose;...
-
Page 9: Operational Precautions
Operational Precautions ■ For prevention of malfunctions ■ For prevention of damage ● Do not block the remote control transmitter or receiver. ● Wipe plastic areas such as the main unit and < About the seat switch > remote control with a Dry cloth or tissue ●... -
Page 10: Parts Names
Parts Names Toilet lid cushion Product name,part no., etc. Toilet lid Seat switch (Built-in) Warm air outlet cover Warm a Wand cover Wand Power plug Heated seat Heated Shutoff valve (Page.13) Power cord Water supply hose... - Page 11 Main display Right side of main unit Deodorizer outlet ENERGY SAVER LED WATER LED Main unit removal button (Page.28) SEAT LED Deodorizing fi lter (Page.27) POWER LED Remote control receiver Toilet seat cushions Left side of main unit TCF6530 Water fi lter drain valve (Page 31) Cover Water drain plug (Page 40)
-
Page 12: Preparation
Preparation Using the Product for the First Time 1.Insert the battery If the remote control is secured (for anti theft) Remove the remote control from the hanger. Remove the screw from the remote control fi xture. Remote control (View from side) Remote control Wall Hanger... - Page 13 2.Turn on the power 3.Open the shutoff valve Fully open the shutoff valve. Switch the breaker on the distribution board to ON. The wand extends and then retracts. Check that the POWER LED on the main display is lit up. Shutoff valve...
-
Page 14: Basic Operations
Basic Operations Press a button on the remote control; a beep sounds when the main unit receives the signal. Stopping [STOP] Stops the operation. Cleansing [REAR] Cleanses your rear. [SOFT] Washes your rear with mild water pressure. *The mode changes between [SOFT] (Flickering) and [REAR] (Lit) each time the button is pressed. - Page 15 ● Functions that operate when a button is pressed during "REAR", "SOFT", or "FRONT" cleansing. [OSCILLATING] The wand moves back and forth to ● wash your rear thoroughly. The setting changes between "ON" and ● "OFF" each time the button is pressed. [POSITION] The wand position can be adjusted to ●...
- Page 16 Basic Operations About the Menu Screen This section is an overview of the settings that can be confi gured with the remote control. See the corresponding pages for the detailed descriptions. Remote control back side TEMPERATURE SETTING WATER Remote controller display SEAT DRYER...
- Page 17 Level 1 Level 2 Level 3 CLEANING WAND CLEANING MODE ON/OFF ENERGY SAVER 1. AUTO ENERGY SAVER Menu Screen MENU 1. CLEANING 2. ENERGY AUTO SAVER CLEANING FUNCTIONS 3. AUTO 1. PRE-MIST 1. CLEANING FUNCTIONS 2. DEODORIZER 4. OTHER SETTINGS OTHER SETTINGS 1.
-
Page 18: Automatic Functions
Automatic Functions Cleaning Features As you As you sit As you stand up* approach Deodorizer stops DEODORIZER ➝It stops after about 2 minutes Starts the deodorizer A mist is sprayed inside the toilet bowl to make it more diffi cult for dirt to adhere PRE-MIST A mist is sprayed inside the toilet bowl. - Page 19 Changing Note settings If dirt adheres... ■ If dirt adheres to the wand during use, you can extend the wand to clean it. ●Cleaning the wand (Page 30) DEODORIZER ON/OFF (Page 34) • The pre-mist will not spray for about ...
-
Page 20: Temperature Adjustment
Temperature Adjustment Warm Water / Toilet Seat / Drying You can adjust the temperature levels or turn the settings to "OFF". to select the Press [TEMP]. item you want to set. TEMPERATURE TEMPERATURE SETTING SETTING WATER WATER SEAT SEAT DRYER DRYER TEMPERATURE SETTING... - Page 21 <Settings complete> to select the temperature level. TEMPERATURE SETTING WATER SEAT DRYER Warm water OFF Low High Press temperature until "OFF" appears. When "OFF" is set, the WATER LED will go off. Toilet seat OFF Low High Press temperature until "OFF"...
-
Page 22: Energy Saver Feature
Energy Saver Feature You can save energy by turning the toilet seat heater to a low temperature (or turning the heater "OFF") during periods when the toilet will be used infrequently. It takes about 10 days for the product to determine the periods when it is used relatively less frequently. When energy saver is set Type Situation... - Page 23 When energy saver is in operation Toilet seat Warm water heater heater Example) Time period with infrequent use (from 9:00PM to 6:00AM): Low Time period the toilet is never used (8:00AM to 5:00PM): OFF Time period with infrequent use temperature temperature temperature (Orange)
- Page 24 Energy Saver Feature How to set Press [MENU]. to select ENERGY "ENERGY SAVER" and then SAVER press [ENTER]. MENU 1. CLEANING 2. ENERGY SAVER 3. AUTO Remote controller display Select keys : Select an item : Select a setting [ENTER] [MENU] The ENERGY SAVER LED will be lit if the energy saver feature is working.
- Page 25 to select ENERGY SAVER "AUTO ENERGY 1. AUTO ENERGY SAVER". SAVER to select ENERGY AUTO SAVER "ON" or "OFF" ENERGY 1. AUTO ENERGY SAVER and then press SAVER [ENTER]. (To return➝...
-
Page 26: Main Unit
Maintenance Main Unit WARNING (Perform daily) Always turn off the breaker on the distribution board before cleaning, maintenance or examination. (Failure to do so may cause electric shock or malfunction, resulting in a breakdown.) Soft cloth soaked in water • Toilet paper •... -
Page 27: Deodorizing Filter
Deodorizing fi lter (Perform monthly) <If you notice odors> Switch the breaker on the distribution board to OFF. Remove the deodorizing fi lter. Hold the knob and pull outward. Do not pull with undue force. (May cause damage or malfunctions) Deodorizing fi... -
Page 28: Gap Between The Main Unit And The Toilet Bowl
Maintenance Gap between the Main Unit and Toilet Bowl (Perform monthly) You can remove the main unit to clean the top of the toilet bowl and the bottom of the main unit. Soft cloth soaked in water Toilet paper, etc. (May cause damage.) Switch the breaker on the If the breaker on the distribution board is not turned distribution board to OFF. -
Page 29: Gap Between The Main Unit And The Toilet Lid
Gap between the Main Unit and the Toilet Lid (Perform monthly) The toilet lid can be removed for thorough cleaning. Soft cloth soaked in water Toilet paper, etc. (May cause damage.) Switch the breaker on the Removing and Reinstalling distribution board to OFF. Remove the toilet lid. -
Page 30: Wand
Maintenance Wand (Perform monthly) <Wand cleaning> If you notice dirt Soft cloth soaked in water Toilet paper, etc. (May cause damage.) Extend the wand. Operate with the buttons on the back side of the remote control. Press [MENU]. to select "CLEANING". Press [ENTER]. -
Page 31: Water Filter Drain Valve
Water fi lter drain valve (Perform once every 6 months) <If you think the water pressure has weakened> Close the shutoff valve. Remove the cover and water The water supply stops. fi lter drain valve. Loosen with a fl at-head screwdriver and CAUTION then pull. -
Page 32: Changing Settings
Changing Settings Setting List Setting Types PRE-MIST AUTO CLEANING FUNCTIONS DEODORIZER BEEP OTHER SETTING LOCK SETTINGS PERSONAL SETTING LOCK... - Page 33 Setting Ref. Available Settings* Page Set whether or not to spray mist ON/OFF automatically after sitting on the toilet seat Page 34 Set whether or not to deodorize ON/OFF automatically after sitting on the toilet seat ...
- Page 34 Changing Settings CLEANING Press [MENU]. MENU Set whether or not to spray select "AUTO 1. CLEANING mist automatically after FUNCTION" 2. ENERGY sitting on the toilet seat SAVER and then press PRE-MIST 3. AUTO FUNCTIONS [ENTER]. 4. OTHER SETTING to select AUTO FUNCTIONS "CLEANING"...
- Page 35 to select CLEANING "PRE-MIST". 1. PRE-MIST 2. DEODORIZER to select CLEANING "ON/OFF" and then PRE-MIST 1. PRE-MIST press [ENTER]. 2. DEODORIZER (To return➝ to select CLEANING "DEODORIZER". 1. PRE-MIST 2. DEODORIZER to select CLEANING "ON/OFF" and then DEODORIZER 1. PRE-MIST press [ENTER].
- Page 36 Changing Settings OTHER SETTINGS Press [MENU]. Set whether or not to make a beep sound MENU BEEP select 1. CLEANING "OTHER 2. ENERGY SAVER SETTING" 3. AUTO FUNCTIONS and then 4. OTHER SETTINGS press [ENTER]. Set whether or not to use the setting lock SETTING LOCK...
- Page 37 to select OTHER SETTINGS "BEEP". 1. BEEP to select OTHER SETTINGS "ON/OFF" and then BEEP 1. BEEP press [ENTER]. (To return➝ to select OTHER SETTINGS "SETTING LOCK". 1. BEEP 2. SETTING LOCK to select OTHER SETTINGS "ON/OFF" and then SETTING LOCK 1....
-
Page 38: What To Do
What to Do? If you cannot operate with the remote control The batteries may have worn out. Replace the batteries. ■ Replacing the batteries Switch the breaker on the distribution board to OFF. The POWER LED goes off. Remove the remote control from the hanger. (Page12) Open the battery cover and replace the AA batteries. - Page 39 Freeze damage prevention (continued) Drain the pipe. (4) Drain the water from the water supply hose. (1) Extend the wand. Operate with the buttons on the back Water supply hose side of the remote control. Horizontally 1. Press [MENU]. 2.
-
Page 40: Long Periods Of Disuse
What to Do? Long Periods of Disuse If the toilet is in a location you will not visit for a long time, drain the water. (The water in the tank may become contaminated and cause skin irritation or other problems.) How to drain the water Drain the water from the toilet tank. -
Page 41: Troubleshooting
Troubleshooting First, try the actions described on pages 41 to 44. If the problem CAUTION persists, consult the installer, seller or the contact listed on the back cover of this manual. If a water leak occurs, close the shutoff valve. Please check fi... - Page 42 Troubleshooting Rear and Rear soft, front cleansing, wand Ref. Trouble Please check Page ● When the temperature is low, it takes time for the wand to come out after the remote control button is pressed because the water must be warmed up fi rst. ●...
- Page 43 Warm air drying Ref. Trouble Please check Page The dryer ● Is the remote control preset temperature set to a low level? temperature is low ● The feature stops automatically after 10 minutes of continuous use. Stops in the middle ●...
- Page 44 Troubleshooting Deodorizer Ref. Trouble Please check Page ● Is "DEODORIZER" set to "OFF"? ➞Set to "ON". The deodorizer ● Even after sitting down, you do not hear operation sounds. seems to be not ➞Sit back on the toilet seat. working ●...
-
Page 45: Specifi Cations
0°C to 40°C Dimensions W 391 mm × D 531 mm × H 188 mm W 391 mm × D 480 mm × H 188 mm Weight About 5 kg * Temperature around the warm air outlet measured by TOTO. -
Page 46: Warranty
4. This warranty gives you specific legal rights. You may have other rights which vary from country to country. 5. T o obtain warranty repair service under this warranty, you must take the product or deliver it prepaid to a TOTO service facility, together with a letter stating the problem, or contact a TOTO distributor or product service contractor, or directly to TOTO sales office. - Page 48 101, Kamla Executive Park, Opp. Vazir Glass Works, PVT. LTD Off. Andheri Kurla Road, Andheri (East), Mumbai 400 059, India. Phone : +91-22-4022-3717 / 3718 Fax : +91-22-4022-3719 http://asia.toto.com/ R. 810, Daeha Business Centre, 360 Kim Ma St., Ba Dình Dist., Ha Noi City TOTO VIETNAM Phone : +84-4-37714354 Fax : +84-4-37714355 http://toto.com.vn/...
Need help?
Do you have a question about the Washlet TCF6530 Series and is the answer not in the manual?
Questions and answers