Table of Contents
Troubleshooting

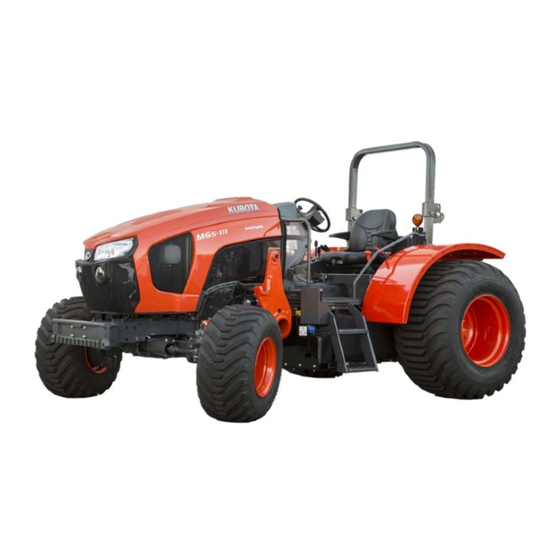
Related Manuals for Kubota M6L-111


Summarization of Contents
OPERATOR'S MANUAL
MODELS M6S-111 M6L-111 M6H-101
Identifies the tractor models covered by this manual.
UNIVERSAL SYMBOLS
General Symbols
Overview of general symbols used on the tractor.
Engine-related Symbols
Symbols related to engine functions and indicators.
Vehicle body-related Symbols
Symbols related to tractor body and drive systems.
Hydraulic and Electric Symbols
Hydraulic-related Symbols
Symbols for hydraulic system controls and functions.
Electric-related Symbols
Symbols for electrical system indicators and signals.
SAFE OPERATION
1. General Safety Precautions
Essential safety guidelines for tractor operation.
Tractor Operation Safety
2. CAB and ROPS Safety
Safety considerations for Cab and Roll-Over Protective Structures.
1. Starting to Operate the Tractor
Procedures for safely starting the tractor engine.
Safe Operation Practices
2. Working the Tractor Safely
Guidelines for safe tractor operation during work.
3. Safety for Children
Precautions to ensure child safety around the tractor.
4. Operating on Slopes Safely
Safety measures for operating the tractor on slopes.
Road Driving Safety
5. Driving the Tractor on the Road
Safety guidelines for road travel with the tractor.
Parking and PTO Operation
PARKING THE TRACTOR
Steps for safely parking the tractor.
OPERATING THE PTO
Safe procedures for operating the Power Take-Off.
Tractor Servicing and Attachments
USING 3-POINT HITCH
Guidance on using the 3-point hitch system.
SERVICING THE TRACTOR
General information on tractor maintenance.
WARRANTY AND SCRAPPING
WARRANTY
Information regarding the tractor's warranty coverage.
SCRAPPING THE TRACTOR AND ITS PROCEDURE
Procedure for safely disposing of the tractor.
SPECIFICATIONS
SPECIFICATION TABLE (M6S-111)
Detailed technical specifications for the M6S-111 model.
Tractor Specifications
SPECIFICATION TABLE (M6L-111)
Detailed technical specifications for the M6L-111 model.
SPECIFICATION TABLE (M6H-101)
Detailed technical specifications for the M6H-101 model.
TRAVELING SPEEDS
TRAVELING SPEEDS (M6S-111)
Table of traveling speeds for the M6S-111 model.
TRAVELING SPEEDS (M6L-111)
Table of traveling speeds for the M6L-111 model.
TRAVELING SPEEDS (M6H-101)
Table of traveling speeds for the M6H-101 model.
IMPLEMENT LIMITATIONS
IMPLEMENT SPECIFICATION TABLE
Specifications for various compatible implements.
INSTRUMENT PANEL AND CONTROLS
SWITCHES AND HAND CONTROLS (ALL MODELS)
Identification of switches and controls on the steering column.
INSTRUMENT PANEL (ALL MODELS)
Layout and identification of instrument panel gauges and indicators.
FOOT AND HAND CONTROLS (M6S-111)
Identification of controls in the operator's station for M6S-111.
FOOT AND HAND CONTROLS (M6L-111)
Identification of controls in the operator's station for M6L-111.
FOOT AND HAND CONTROLS (M6H-101)
Identification of controls in the operator's station for M6H-101.
PRE-OPERATION CHECK
DAILY CHECK
Routine checks to perform before operating the tractor.
OPERATING THE ENGINE
EXHAUST AFTERTREATMENT DEVICES
Information on emission control systems.
DIESEL PARTICULATE FILTER (DPF) MUFFLER
Details on the DPF system and its operation.
DPF Regeneration Procedures
2. DPF Regeneration Process
Explanation of DPF regeneration methods.
3. Operating Procedure for Auto Regeneration Mode
Steps for performing automatic DPF regeneration.
3.1 PM Warning Level and Required Procedures
Understanding PM levels and necessary regeneration actions.
4. Operating Procedure for Regeneration Inhibit Mode
Steps for operating the tractor in regeneration inhibit mode.
4.1 PM Warning Level and Required Procedures
PM warning levels and required actions in inhibit mode.
5. Operating Procedure for Parked Regeneration
Steps for performing parked DPF regeneration.
SCR Muffler System
6. Tips on Diesel Particulate Filter (DPF) Regeneration
Recommendations for optimizing DPF regeneration.
1. Outline of the SCR
Overview of the Selective Catalytic Reduction system.
2. DEF/AdBlue®
Information on Diesel Exhaust Fluid (DEF) / AdBlue®.
SCR System Warnings and Measures
3. Warning Indication and Countermeasures
How to interpret and respond to SCR system warnings.
3.1 SCR System Inducement Display on the LCD
Explanation of SCR system messages on the LCD.
3.2 SCR System Icon on Inducement Display
Meaning of SCR system icons displayed on the LCD.
3.3 Diagnostic Trouble Code (DTC)
Understanding diagnostic trouble codes for the SCR system.
SCR System Displays and Measures
3.4 SCR System Inducement Display and Measures
Detailed display information and required actions for SCR system issues.
Starting the Engine
4. Storing and Handling DEF/AdBlue®
Proper storage and handling procedures for DEF/AdBlue®.
Engine Starting Procedures
7. Check the Easy Checker™ Indicators
How to check and interpret Easy Checker™ indicators.
9. Turn the Key to “START” Position and Release when the Engine Starts
Procedure for starting the engine using the key switch.
1. Checking Easy Checker™ Indicators
Detailed check of Easy Checker™ indicators.
Operating in Freezing Conditions
OPERATING THE ENGINE IN FREEZING CONDITIONS
Special procedures for operating in cold weather.
1. Antifrost Heater for Oil Separator (if equipped)
Checking the antifrost heater for the oil separator.
2. Block Heater (if equipped)
Information on the optional engine block heater.
Engine Temperature and Shutdown
3. Engine Low Temperature Regulation
Regulation of engine speed in low temperatures.
4. DEF/AdBlue® Freeze Warning
Warning for DEF/AdBlue® freezing conditions.
STOPPING THE ENGINE
Correct procedure for shutting down the engine.
WARMING UP THE ENGINE
Procedure for warming up the engine before operation.
Engine Warm-up and Jump Starting
1. Warm-up and Transmission Fluid at Low Temperature Range
Warm-up procedures for low temperatures.
JUMP STARTING
Safe procedures for jump starting the tractor battery.
OPERATING THE TRACTOR
OPERATING NEW TRACTOR
Guidelines for breaking in a new tractor.
1. Do Not Operate the Tractor at Full Speed for the First 50 Hours
Break-in period recommendations for new tractors.
2. Changing Lubricating Oil for New Tractors
Recommended oil change intervals for new tractors.
BOARDING AND LEAVING THE TRACTOR
Safe practices for mounting and dismounting the tractor.
OPERATING FOLDABLE ROPS
Safety precautions for operating with foldable ROPS.
ROPS Operation
1. Folding the ROPS
Procedure for folding the Roll-Over Protective Structure.
ROPS Adjustment
2. Raising the ROPS to Upright Position
Procedure for raising the ROPS to its upright position.
Adjusting Foldable ROPS
2. Raise the ROPS to the Upright Position.
Steps to raise the ROPS to its upright position.
3. Adjusting the Foldable ROPS
Instructions for adjusting the foldable ROPS.
Tractor Starting Procedures
1. Muffler (M6L-111)
Information specific to the M6L-111 muffler.
2. Adjusting the Operator's Position
Adjusting the operator's seat and controls for comfort.
3. Selecting Light Switch Positions
Guide to operating the tractor's light switches.
4. Checking the Brake Pedal
Procedure for inspecting the tractor's brake pedals.
7. Selecting the Travel Speed
How to select different travel speeds.
Operator Controls and Adjustments
2. Operator's Seat
Details on adjusting the operator's seat.
4. Tilt Steering Adjustment
Instructions for adjusting the steering wheel tilt.
5. Light Switch
Guide to operating the tractor's light switches.
Seat Belt Safety
3. Seat Belt
Instructions and safety warnings for using the seat belt.
Lighting and Signaling
6. Turn Signal Switch and Hazard Light Switch
Operation of turn signal and hazard light switches.
Tractor Controls
7. Front Work Light Switch
Procedure for operating the front work lights.
8. Horn Button
Instructions for using the tractor's horn.
9. Brake Pedals (Right and Left)
Safety and adjustment information for brake pedals.
Clutch Pedal Operation
10. Clutch Pedal
Safety warnings and usage instructions for the clutch pedal.
Travel Speed Control
11. Travel Speed Control
Explanation of how to control tractor travel speed.
Gear Shifting and Speed Controls
12. Main Gear Shift Lever
Procedure for operating the main gear shift lever.
13. Range Gear Shift Lever
Instructions for shifting the range gear.
14. Hydraulic-Shuttle Shift Lever
Operation of the hydraulic shuttle shift lever.
15. Dual Speed Shift Switch (Dual Speed Model)
Operation of the dual speed shift switch.
16. Clutch-Off Switch
Safety and operation of the clutch-off switch.
Creep Lever Operation
17. Creep Lever
Instructions for using the creep lever for low speeds.
Front Wheel Drive System
18. Front-Wheel Drive Lever
Procedure for engaging the front-wheel drive.
18.1 4WD Indicator
Explanation of the 4WD indicator light.
Tractor Operation Details
18.2 Front-Wheel Drive Usage
Situations where front-wheel drive is beneficial.
19. Hand Throttle Lever
Operation of the hand throttle lever.
20. Foot Throttle
Operation of the foot throttle.
21. Parking Brake Lever
Procedure for engaging and releasing the parking brake.
Tractor Status Checks
STOPPING THE TRACTOR
Correct procedure for safely stopping the tractor.
CHECK DURING DRIVING
Monitoring tractor systems while in operation.
1. Engine Over-Speed Limiting Indicator
Understanding the engine over-speed warning indicator.
2. Easy Checker™
Interpreting and responding to Easy Checker™ warnings.
Instrument Panel Indicators
Engine Warning Indicators
Explanation of various engine warning indicators.
DEF/AdBlue® System Warning
Warning indicators related to the DEF/AdBlue® system.
Fuel Level Warning
Indicator for low fuel level.
Water Separator Warning
Indicator for water in the fuel system.
DEF/AdBlue® Level Warning
Indicator for low DEF/AdBlue® level.
Air Cleaner Warning
Indicator for a clogged air cleaner.
Electrical Charge Warning
Indicator for battery charging system issues.
Gauges and Indicators
Master System Warning
General warning indicator for system issues.
3. Fuel Gauge
How to read and use the fuel gauge.
4. DEF/AdBlue® Gauge
How to read and use the DEF/AdBlue® gauge.
5. Coolant Temperature Gauge
How to read the coolant temperature gauge.
Tachometer and LCD Monitor
6. Tachometer
Information on reading the engine tachometer.
LCD MONITOR
Overview of the Liquid Crystal Display monitor.
LCD Monitor Settings
1. Various Setting Mode
Accessing and navigating the tractor's setting modes.
1.1 Clock Setting
Procedure for setting the tractor's clock.
LCD Monitor Configuration
1.2 Setting the Clock Display ON/OFF
Instructions for enabling or disabling the clock display.
1.3 Setting the Tire Circumference
Procedure for setting tire circumference for accurate speed display.
PTO Speed Display Setting
1.4 Setting the Unit
How to set measurement units (Inch/cm).
1.5 Setting the PTO Speed Display
Procedure to select PTO speed display mode.
Performance Monitor Functions
2. Performance Monitor
Information on using the performance monitor.
ELECTRONIC ENGINE CONTROL
1. RPM Dual Memory Setting
Setting and using dual engine RPM memory.
2. Constant RPM Management Control
Operating the Constant RPM Management system.
OPERATING TECHNIQUES
1. Differential Lock
Safe operation and engagement of the differential lock.
Tractor Operation Guidelines
2. Operating the Tractor on a Road
Safety and operational advice for road driving.
3. Operating on Slopes and Rough Terrain
Safety precautions for slopes and rough terrain.
4. Transporting the Tractor Safely
Guidelines for safely transporting the tractor.
Tractor Utilities
5. Directions for Use of Power Steering
Information on operating the power steering system.
6. Trailer Electrical Outlet
Description of the trailer electrical outlet functionality.
7. Electrical Outlet
Details on the tractor's electrical outlets.
PTO Operation
1. PTO Clutch Control Lever
Operation of the PTO clutch control lever.
PTO System Details
2. PTO Clutch Indicator
Explanation of the PTO clutch engagement indicator.
3. PTO RPM Display
How to check PTO speed on the LCD monitor.
4. 1000 RPM PTO Shaft (If Equipped)
Information on the 1000 RPM PTO shaft.
PTO Shaft Maintenance
5. PTO Shaft Cover and Shaft Cap
Proper use and maintenance of PTO shaft covers and caps.
3-POINT HITCH AND DRAWBAR
3-POINT HITCH SETUP
Procedures for setting up the 3-point hitch.
3-Point Hitch Setup Procedures
2. Attaching and Detaching Implements
Safety guidelines for attaching/detaching implements.
1. Selecting the Holes of Lower Links
How to select lower link attachment holes.
2. Adjusting Lateral Float
Procedure for adjusting lateral float on the 3-point hitch.
3. Selecting the Top Link Mounting Holes
Guidance on selecting top link mounting holes.
Hitch Component Adjustments
4. Draft Stopper
How to use and adjust the draft stopper.
5. Drawbar
Instructions for the tractor's drawbar.
6. Lifting Rod (Left)
Procedure and safety for the left lifting rod.
7. Lifting Rod (Right)
Procedure and safety for the right lifting rod.
Hitch Linkage Components
8. Top Link
Adjusting the top link for implement angle.
9. Telescopic Stabilizers
Adjusting telescopic stabilizers for implement sway control.
10. Telescopic Lower Links
Instructions for attaching implements with lower links.
DRAWBAR
1. Adjusting Drawbar Length
How to adjust the length of the tractor's drawbar.
2. Swing Drawbar
Instructions for assembling and using the swing drawbar.
HYDRAULIC UNIT
3-POINT HITCH CONTROL SYSTEM
Controls for the 3-point hitch system.
1. Draft Stopper
Using the draft stopper to reduce vibrations.
2. Position Control
Controlling implement working depth.
3. Draft Control
Automatic control of implement draft.
Hydraulic Control System
4. Mixed Control
Combining position and draft control for implements.
5. Float Control
Using float control for free movement of lower links.
6. 3-Point Hitch Lowering Speed
Adjusting the lowering speed of the 3-point hitch.
REMOTE HYDRAULIC CONTROL SYSTEM
System for controlling external hydraulic devices.
1. Remote Control Valve
Description of available remote control valves.
Remote Hydraulic Control
2. Remote Control Valve Lever
Operation of remote control valve levers.
3. Remote Control Valve Coupler
Connecting and disconnecting hydraulic couplers.
Flow Control Valve Operation
4. Flow Control Valve (Option)
Information on the optional flow control valve.
4.1 Adjusting the Flow Rate
Procedure for adjusting the flow rate of the control valve.
4.2 Positions and Advantages of the Flow Control Valve
Benefits and operating positions of the flow control valve.
TIRES, WHEELS, AND BALLAST (M6S-111)
TIRES
Information regarding tractor tires and inflation.
1. Inflation Pressure
Recommended tire inflation pressures.
WHEEL ADJUSTMENT
2. Dual Tires
Note on dual tire usage.
1. Front Wheels-2WD
Adjusting front wheel tread for 2WD models.
Front Wheel Adjustments
2. Front Wheels-4WD
Adjusting front wheel tread for 4WD models.
2.1 Front Jack Point
Safe locations for jacking the front axle.
3. Adjusting Front Wheel Turning Stopper Bolt
Adjusting the front wheel turning angle.
Rear Wheel Adjustments
4. Rear Wheels
Procedure for adjusting rear wheel tread width.
BALLAST AND WEIGHTS
4.1 Rear Jack Point
Safe locations for jacking the rear axle.
1. Front Ballast
Adding front ballast for stability and traction.
1.1 Front End Weights (Option)
Attaching optional front end weights.
Rear Ballast
2. Rear Ballast
Adding rear ballast for traction and stability.
2.1 Cast Iron Disc
Using cast iron discs for rear wheel weight.
2.2 Liquid Ballast in Rear Tires
Procedure for liquid ballast in rear tires.
TIRES, WHEELS, AND BALLAST (M6L-111)
TIRES
Information on tractor tires and inflation pressure.
1. Inflation Pressure
Recommended tire inflation pressures for M6L-111.
WHEEL ADJUSTMENT (M6L-111)
2. Dual Tires
Note regarding dual tire installation.
1. Front Wheels
Adjusting front wheel tread width for M6L-111.
1.1 Front Jack Point
Safe jacking points for the front axle.
Rear Wheel Adjustments (M6L-111)
2. Rear Wheels
Procedure for adjusting rear wheel tread width.
Fender Height Adjustment
2.1 Rear Jack Point
Safe jacking points for the rear axle.
2.2 Adjusting Fender Height
How to adjust fender height based on tire size.
TIRES, WHEELS, AND BALLAST (M6H-101)
TIRES
Information on tractor tires and inflation pressure.
1. Inflation Pressure
Recommended tire inflation pressures for M6H-101.
WHEEL ADJUSTMENT (M6H-101)
2. Dual Tires
Note regarding dual tire installation.
Front Wheel Adjustments (M6H-101)
1. Front Wheels
Adjusting front wheel tread width for M6H-101.
Front Axle Jacking and Stopper Bolt
1.1 Front Jack Point
Safe jacking points for the front axle.
2. Adjusting Front Wheel Turning Stopper Bolt
Adjusting the front wheel turning angle.
Rear Wheel Adjustments (M6H-101)
3. Rear Wheels
Procedure for adjusting rear wheel tread width.
BALLAST AND WEIGHTS (M6H-101)
3.1 Rear Jack Point
Safe jacking points for the rear axle.
4. Handrails and Auxiliary Steps
Safety and usage of handrails and auxiliary steps.
1. Front Ballast
Adding front ballast for stability and traction.
Front and Rear Ballast
1.1 Front End Weights (Option)
Attaching optional front end weights.
2. Rear Ballast
Adding rear ballast for traction and stability.
2.1 Cast Iron Disc
Using cast iron discs for rear wheel weight.
2.2 Liquid Ballast in Rear Tires
Procedure for liquid ballast in rear tires.
MAINTENANCE
SERVICE INTERVALS
Schedule for routine maintenance tasks.
LUBRICANTS, FUEL AND COOLANT
1. Biodiesel Fuel (BDF) B0-B5
Guidelines for using Biodiesel Fuel blends.
PERIODIC SERVICE
WASTE DISPOSAL
Proper procedures for disposing of waste materials.
HOW TO OPEN THE HOOD
Instructions for safely opening the tractor hood.
Daily Inspection Procedures
1. Walk Around Inspection
Visual inspection of the tractor before operation.
2. Checking and Refueling
Procedures for checking fuel level and refueling safely.
Checking Engine Compartment
3. Checking Antifrost Heater for Oil Separator (if equipped)
Inspection of the antifrost heater for the oil separator.
DEF/AdBlue® System Check
4. Checking DEF/AdBlue® Level and Adding Fluid
Procedure for checking and adding DEF/AdBlue®.
Fluid Level Checks
5. Checking Water Separator
Procedure for checking and draining the water separator.
6. Checking Engine Oil Level
Procedure for checking the engine oil level.
Fluid Level Checks (Continued)
7. Checking Transmission Fluid Level
Procedure for checking the transmission fluid level.
8. Checking Coolant Level
Procedure for checking the engine coolant level.
Component Cleaning and Checks
9. Cleaning Evacuator Valve
Procedure for cleaning the evacuator valve.
10. Cleaning Grill, Radiator Screen, Oil Cooler, Fuel Cooler, and Battery Mount
Cleaning cooling system components and battery mount.
11. Checking DPF/SCR Muffler
Inspection of the DPF/SCR muffler for safety.
Brake and Indicator Checks
12. Checking Brake Pedal
Inspection of brake pedals for proper function.
13. Checking Parking Brake
Procedure for checking the parking brake.
14. Checking Gauges, Meter and Easy Checker™
Inspection of instrument panel gauges and indicators.
Initial and 50-Hour Service
15. Checking Headlight, Turn Signal Light, Hazard Light, and So On
Checking all exterior lights for proper operation.
16. Checking Seat Belt and ROPS
Inspection of seat belt and ROPS condition.
17. Checking Movable Parts
Checking tractor levers and pedals for smooth movement.
INITIAL 50 HOURS
Maintenance tasks after the first 50 operating hours.
1. Changing Engine Oil
Procedure for changing engine oil.
2. Replacing Engine Oil Filter
Procedure for replacing the engine oil filter.
EVERY 50 HOURS
Maintenance tasks to be performed every 50 hours.
1. Checking Engine Start System
Testing the tractor's engine start system safety features.
50-Hour Service Checks
1.4 Checking Operator Presence Control (OPC) System
Testing the operator presence control system.
2. Checking Wheel Bolt Torque
Checking and tightening wheel bolt torque.
Tie-Rod Dust Cover Check
3. Checking Tie-Rod Dust Cover
Inspect tie-rod dust covers for damage.
EVERY 100 HOURS MAINTENANCE
1. Lubricating Grease Fittings
Lubricating grease fittings at specified intervals.
Air Cleaner and Belt Tension
2. Cleaning Air Cleaner Primary Element
Procedure for cleaning the air cleaner primary element.
3. Adjusting Fan Belt Tension
How to adjust the fan belt tension.
Brake Pedal Adjustments
4. Adjusting Brake Pedal
General procedure for adjusting brake pedals.
4.1 Checking Brake Pedal Free Travel
Checking brake pedal free travel.
4.2 Checking Brake Pedal Stroke
Checking brake pedal stroke.
Brake System Checks
4.3 Checking Equalizer Working Level (Anti-Imbalance Device)
Checking the brake equalizer function.
5. Adjusting Parking Brake Lever
Procedure for adjusting the parking brake lever.
Battery Condition Checks
6. Checking Battery Condition
How to check the tractor's battery condition.
6.1 How to Read Indicator
Interpreting the battery condition indicator.
Battery Charging and Storage
6.2 Charging the Battery
Safe procedures for charging the tractor battery.
6.3 Directions for Battery Storage
Guidelines for storing the tractor battery.
1. Adjusting Toe-in
Procedure for adjusting front wheel toe-in.
Front Wheel Alignment
1.1 Adjusting Toe-in Procedure
Detailed steps for adjusting toe-in.
2. Draining Fuel Tank Water
Procedure for draining water from the fuel tank.
Water Separator Cleaning
1. Cleaning Water Separator
Procedure for cleaning the water separator.
EVERY 500 HOURS MAINTENANCE
2. Lubricating Grease Fitting (M6S-111 2WD only)
Lubricating specific grease fittings on M6S-111 2WD.
1. Changing Engine Oil
Procedure for changing the engine oil.
Filter Replacement
2. Replacing Engine Oil Filter
Procedure for replacing the engine oil filter.
3. Replacing Fuel Filter
Procedure for replacing the fuel filter.
4. Replacing Hydraulic Oil Filter
Procedure for replacing the hydraulic oil filter.
Hose and Line Checks
5. Checking Power Steering Line
Checking power steering lines and clamps.
6. Checking Radiator Hose and Clamp
Checking radiator hoses and clamps.
Engine Cooling and Fuel Line Checks
6.1 Overheating Countermeasures
Actions to take in case of engine overheating.
7. Checking Fuel Line
Checking the fuel lines and hose clamps.
Air Intake and Oil Cooler Lines
2. If the hoses and clamps are found to be worn or damaged...
Repair or replace worn hoses and clamps.
8. Checking Intake Air Line
Checking intake air lines and hose clamps.
EVERY 600 HOURS MAINTENANCE
2. If the hoses and clamps are found to be worn or damaged...
Repair or replace worn hoses and clamps.
9. Checking Oil Cooler Line
Checking oil cooler lines and hose clamps.
1. Adjusting Front Axle Pivot
Procedure for adjusting the front axle pivot.
Pivot and Brake Adjustments
2. Adjusting King-Pin Pivot
Procedure for adjusting the king-pin pivot.
3. Changing Brake Oil
Procedure for changing brake fluid.
1. Changing Transmission Fluid
Procedure for changing transmission fluid.
Fluid Changes for Drive Axles
2. Changing Front Differential Case Oil
Procedure for changing front differential case oil.
3. Changing Front Axle Gear Case Oil
Procedure for changing front axle gear case oil.
EVERY 1000 HOURS OR 1 YEAR MAINTENANCE
4. Adjusting Engine Valve Clearance
Consult dealer for engine valve clearance adjustment.
1. Replacing Air Cleaner Primary Element and Secondary Element
Replacing air cleaner elements.
2. Checking Exhaust Manifold
Consult dealer for exhaust manifold check.
1. Checking Fuel Injection Nozzle (Active Test)
Consult dealer for fuel injection nozzle check.
2. Checking DEF/AdBlue® Injector Tip
Consult dealer for DEF/AdBlue® injector tip check.
3. Checking DEF/AdBlue® Line
Checking DEF/AdBlue® lines for connection and damage.
1500 Hour Service
4. Replacing Oil Separator Element
Procedure for replacing the oil separator element.
5. Checking Positive Crankcase Ventilation (PCV) Valve
Consult dealer for PCV valve check.
EVERY 2000 HOURS OR 2 YEARS MAINTENANCE
6. Checking and Cleaning EGR Cooler
Consult dealer for EGR cooler check and cleaning.
1. Flushing Cooling System and Changing Coolant
Procedure for flushing the cooling system and changing coolant.
Antifreeze and 3000 Hour Service
2. Antifreeze
Information and safety precautions for using antifreeze.
1. Checking Turbocharger
Consult dealer for turbocharger check.
2. Checking Supply Pump
Consult dealer for supply pump check.
3. Checking Intake Air Heater
Consult dealer for intake air heater check.
4. Checking and Cleaning EGR System
Consult dealer for EGR system check and cleaning.
3000 Hour Maintenance
5. Cleaning DPF Muffler
Procedure for cleaning the DPF muffler.
6. Checking DEF/AdBlue® Injector
Consult dealer for DEF/AdBlue® injector check.
7. Replacing DEF/AdBlue® Pump Filter
Procedure for replacing the DEF/AdBlue® pump filter.
9000 Hour and Annual Maintenance
1. Replacing DEF/AdBlue® Tank Filter
Consult dealer for replacing DEF/AdBlue® tank filter.
1. Checking Antifrost Heater for Oil Separator (if equipped)
Checking the antifrost heater for oil separator.
2. Checking DPF Differential Pressure Sensor Pipe
Consult dealer for checking DPF differential pressure sensor pipe.
3. Checking EGR Pipe
Consult dealer for checking EGR pipe.
1. Cleaning Master Cylinder Filter
Consult dealer for cleaning master cylinder filter.
2. Replacing Oil Separator Hose
Consult dealer for replacing oil separator hose.
3. Replacing Positive Crankcase Ventilation (PCV) Valve Hose
Consult dealer for replacing PCV valve hose.
4. Replacing DPF Differential Pressure Sensor Hose
Consult dealer for replacing DPF pressure sensor hose.
5. Replacing EGR Cooler Hose
Consult dealer for replacing EGR cooler hose.
6. Replacing Brake Hose
Consult dealer for replacing brake hose.
Service As Required
7. Replacing Boost Sensor Hose
Consult dealer for replacing boost sensor hose.
1. Replacing Parking Brake Cable
Consult dealer for replacing parking brake cable.
1. Replacing Radiator Hose (Water Pipes)
Replacing radiator hoses and clamps.
2. Replacing Fuel Lines
Consult dealer for replacing fuel lines.
3. Replacing Intake Air Line
Consult dealer for replacing intake air line.
4. Replacing Oil Cooler Line
Consult dealer for replacing oil cooler line.
5. Replacing Power Steering Line
Consult dealer for replacing power steering line.
6. Replacing Master Cylinder Kit
Consult dealer for replacing master cylinder kit.
7. Replacing Equalizer Kit
Consult dealer for replacing equalizer kit.
8. Replacing Brake Seal 1 and 2
Consult dealer for replacing brake seals.
1. Bleeding Fuel System
Procedure for bleeding air from the fuel system.
Periodic Service Procedures
2. Bleeding Brake System
Consult dealer for bleeding the brake system.
3. Draining Clutch Housing Water
Procedure for draining water from the clutch housing.
4. Replacing Fuses
Procedure for replacing blown fuses.
Electrical Component Replacement
5. Replacing Slow-Blow Fuses
Procedure for replacing slow-blow fuses.
6. Replacing Light Bulb
Instructions for replacing light bulbs.
7. Replacing Head Lamp
Procedure for replacing the headlamp bulb.
STORAGE PROCEDURES
TRACTOR STORAGE
Guidelines for storing the tractor for extended periods.
REMOVING THE TRACTOR FROM STORAGE
Steps for preparing the tractor after storage.
TROUBLESHOOTING
ENGINE TROUBLESHOOTING
Diagnosing and resolving engine-related problems.
OPTIONS
LIST OF OPTIONS
List of available optional equipment for the tractor.
Need help?
Do you have a question about the M6L-111 and is the answer not in the manual?
Questions and answers