
Related Manuals for Tescom STS 1000A 3 Pole


Summary of Contents for Tescom STS 1000A 3 Pole
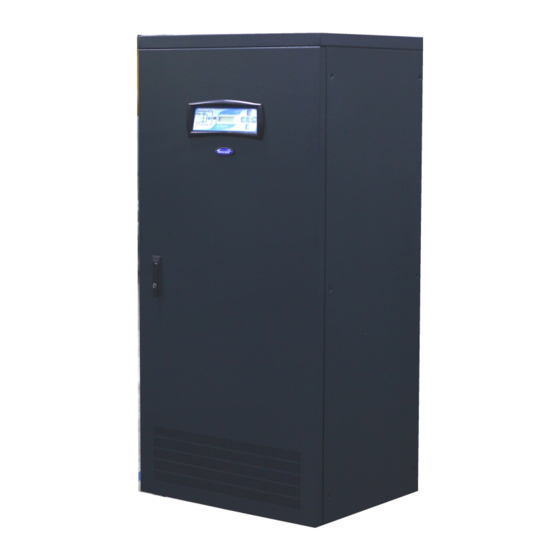
- Page 1 Static Transfer Switch 100 / 150 / 200 / 250 / 300 / 400 / 600 / 800 /1000 A 3 POLE / 4 POLE User Manual...
- Page 2 No part of this manual may be reproduced, even partially, without express authorisation of the manufacturer. Due to a policy of continuous improvement, the manufacturer reserves the right to modify the product described herein at any time without advance notice.
- Page 3 Protective equipment to be worn No maintenance operations must be carried out on the device without wearing the Personal Protective Equipment (PPE) described below. Personnel involved in the installation or maintenance of the equipment must not wear clothes with wide sleeves or laces, belts, bracelets or other items that may be dangerous, especially if they are metallic.
- Page 4 Emergency interventions The following information is of a general nature. First aid interventions Company regulations and traditional procedures should be followed for any first aid intervention that may be required. Fire fighting measures 1. Do not use water to put out a fire, but only fire extinguishers that are suitable for use with electrical and electronic equipment.
-
Page 5: Table Of Contents
SUMMARY STORAGE....................................INSTALLATION ENVIRONMENT.................................9 PRELIMINARY OPERATIONS..................................9 PACKING CASE CHECK ..................................9 CONTENTS CHECK ...................................9 POSITIONING .......................................9 PRELIMINARY INFORMATION..................................10 ELECTRICAL CONNECTIONS ..................................11 FRONT INTERNAL VIEW OF THE STS ..............................12 CONNECTION PROCEDURE..................................14 3-POLE POWER SOURCE CONNECTION ..........................15 4-POLE POWER SOURCE CONNECTION ..........................16 INITIAL SWITCH-ON PROCEDURE................................17 OPERATIONAL TESTING: ............................ - Page 7 Many thanks for choosing our product in order to protect your equipment STS automatic static transfer switch (STS), is a device that enables automatic or manual transfer between two AC power supply sources, ensuring a transfer time of less than ¼ of a cycle. The use of STS static transfer switches within an electrical distribution system provides a means of secure protection against any potential disruption of the power supply, due to interruptions of the supply source or failure of the distribution lines caused by...
- Page 8 STANDARDS AND COMPLIANCE NORMS OF DESCRIPTION YEAR REFERENCE General and safety requirements 2005 IEC 62310-1 Electromagnetic compatibility (EMC) 2006 IEC 62310-2 requirements Table no. 1...
-
Page 9: Storage
STORAGE If the STS is not to be installed immediately, it must be stored in its original packing and be shielded from humidity and bad weather. The storage room must have the following characteristics: Temperature: -10° ÷ +50°C Relative humidity 90% max INSTALLATION ENVIRONMENT Follow these recommendations when choosing the installation environment:... -
Page 10: Preliminary Information
Cable entry is positioned at the bottom of the STS through an opening in the cabinet base. It is also possible to install the input and output cables from above by locating the cables in a vertical channel. The power and communications cables must all be connected from the front of the cabinet. channel. -
Page 11: Electrical Connections
These are the recommended cable size by the manufacturer. Cable Cable MODEL 3 Pole MODEL 4 Pole Cable Phase Neutral Earth/Ground STS 100A 3 Pole STS 100A 4 Pole 35 mm 50 mm 16 mm STS 150A 3 Pole STS 150A 4 Pole 50 mm... -
Page 12: Front Internal View Of The Sts
FRONT INTERNAL VIEW OF THE STS 3 POLE SW6 Manual Volt free contact outputs transfer Switch Power supply EPO Input back-up RS232 Port SW3 Output I/P SW I/P SW SW4 maintenance bypass SW Switch Source 1 - Source 2 Figure no. 2 a - 100 / 150 / 200 / 250 / 300 / 400A / 600A / 800A / 1000A... - Page 13 4 POLE SW6 Manual Volt free contact outputs transfer Switch Power supply EPO Input back-up RS232 Port SW3 Output I/P SW I/P SW SW4 Maintenance Bypass SW Switch Source 1 - Source 2 Figure no. 2 b - 100 / 150 / 200 / 250 / 300 / 400A / 600A / 800A / 1000A...
-
Page 14: Connection Procedure
CONNECTION PROCEDURE 1. Open the front door of the STS and remove the metal panel at the bottom of the cabinet to access the connection terminals and the ground bus bar. 2. Before making any connections verify that all the STS switches are open and, therefore, in OFF position (SW1, SW2, SW3 and SW4). -
Page 15: 3-Pole Power Source Connection
3-POLE POWER SOURCE CONNECTION The input and output terminals of the three-pole STS are illustrated in the figures below: 100A-150A-200A-250A-300A-400A-600A-800A-1000A Figure no. 3 Figure no. 4... -
Page 16: 4-Pole Power Source Connection
4-POLE POWER SOURCE CONNECTION The input and output terminals of the four-pole STS are illustrated in the figures below: The neutral line of the two input power sources are completely isolated from the output neutral line. 100A-150A-200A-250A-300A-400A-600A-800A-1000A SOURCE 1 SOURCE 2 3 PHASE 3 PHASE NPUT 3 PHASE INPUT... -
Page 17: Initial Switch-On Procedure
INITIAL SWITCH-ON PROCEDURE • Verify that all switches are in OFF position SW1 – MCCB input 1 in the OFF position SW2 – MCCB input 2 in the OFF position SW3 – MCCB output in the OFF position SW4 – MCCB by-pass switch for maintenance in the central position (0) with the safety lock SW6 –... -
Page 18: Operational Testing
OPERATIONAL TESTING: When the STS is operating normally, it is possible to simulate supply outages by using the STS input switches, or by using the switches located upstream from the STS. During this process confirm that the load switches from one source to the other smoothly and that no disruption to the connected load occurs. -
Page 19: Procedure For Return To Normal Operation From Maintenance By-Pass
PROCEDURE FOR RETURN TO NORMAL OPERATION FROM MAINTENANCE BY-PASS It is possible to return to normal operation, from the maintenance by-pass mode, without causing any disruption to the load. In order to do this follow the steps illustrated below. 1- Switch on input switches SW1 and SW2 2- Confirm that the manual XFER switch SW6 is in the maintenance source position, and ensure that the corresponding static switch (either SS1 or SS2) -
Page 20: Shut Down Procedure
SHUT DOWN PROCEDURE 2- Switch off the output switch SW3 1- Switch off all of the loads which are connected to STS output 3- Switch off the input switches SW1 and SW2 4- Confirm that the Maintenance Bypass Switch SW4 is in the “0”... -
Page 21: Remote Communications And Commands
REMOTE COMMUNICATIONS AND COMMANDS Open the cabinet door to access the interface cards. Figure no. 7 VOLT FREE CONTACT OUTPUT Relays 1 User programmable (default set up A1: S1 NOT OK) Relays 2 User programmable (default set up A2: S2 NOT OK) Relays 3 User programmable (default set up A3: SYNC NOT OK) Relays 4... -
Page 22: External Epo
► RELAY FUNCTION TABLE COMMON ALARM S1 NOT OK S2 NOT OK SYNC NOT OK OVERLOAD NSYNC INHIBIT XFER INHIBIT OUT NOT OK S1 OUT NOT OK S2 SUPPLY1 FAIL SUPPLY2 FAIL OVERTEMP. MAN.XFER.S1 MAN XFER.S2 OUT SW OFF IN.SW.1 OFF IN.SW.2 OFF S1 BLACKOUT S1 BLACKOUT... -
Page 23: Communications Interface
COMMUNICATIONS INTERFACE Different kinds of communications interface are available: Serial Communication via RS232 RS232 Duplexer ML100 (optional) STS NET TCP/IP Eternet Card (optional) For communications over greater distances RS485 is also available RS232 hardware Baud rate 2400 baud connection 3 wire (RX,TX,GND) Bits 8 bits Parity... - Page 24 RS232 Pinouts Figure no. 10 Security of the RS232 serial port The serial port of the STS interacts with the PC so that the PC can transmit all commands to the STS. To prevent unauthorised access to the STS two levels of security measures are available: 1) The user can enable or disable the RS232 serial port from the OPTIONS MENU.
-
Page 25: Sts Manager Software
STS MANAGER SOFTWARE The STS MANAGER programme makes it possible to monitor and control the static transfer switch from a PC. This programme includes 4 different menus: MEASURES – USER OPTIONS – CONTROL – LOG EVENT. MEASURES menu: it is possible to monitor the status of the STS and to... - Page 26 CONTROL menu: the user can perform manual or automatic switching from the preferred source to the alternative source and vice versa as well as send other auxiliary commands. Figure no. 13 LOG EVENT menu: all events logged by the STS can be viewed.
-
Page 27: Optional Rs232 Duplexer
OPTIONAL RS232 DUPLEXER If two independent RS232 serial ports are required a duplex adaptor may be inserted, on request, to allow a double serial connection as shown in the figure below. RS232 Connection 1 and connection 2 both require a CC05 cable to communicate with the remote terminal. Figure no. -
Page 28: Optional Power Input
Connection of the RS232 serial port and TCP/IP network Figure no. 18 The STS Manager software supports both RS232 serial connections and TCP/IP Ethernet network connections. OPTIONAL POWER INPUT An external power source is required to power the system logic in the event that both input sources are not available simultaneously;... -
Page 29: Description Of Sts Operations
DESCRIPTION OF STS OPERATIONS BLOCK DIAGRAM Figure no. 20 This switch is a thermally and magnetic protected type and Source 1 input circuit breaker (MCCB) switches off source 1 input This switch is a thermally and magnetic protected type and Source 2 input circuit breaker (MCCB) switches off source 2 input This switch isolates the output from the STS. -
Page 30: Description Of The System
DESCRIPTION OF THE SYSTEM The static transfer system provides a guaranteed means of switching between two alternative and independent power sources thus ensuring a continued supply of power to any critical load. The switching can either be AUTOMATIC should the incoming supply fall outside the predefined window of operation (user-defined), or MANUAL should an operator want to force switching between the two input supply sources from the mimic display panel or via a remote connection. -
Page 31: Automatic Transfer Mode
Automatic Transfer Mode : The STS constantly monitors the voltage and frequency of both input sources. When the two sources are in synchronisation if the source powering the load goes out of tolerance (with respect to voltage or frequency), the STS automatically transfers the load onto the alternative power source in less than 5msec. -
Page 32: Manual Transfer Mode (Sw6 Switch)
MANUAL Transfer Mode (SW6 Switch): A manual transfer may be performed from the mimic display panel, or by means of the selector switch SW6 located behind the front panel. During normal operation of the STS, selector switch SW6 must be in the AUTO position. -
Page 33: Electrical Data
ELECTRICAL DATA INPUT 180-264 Vac 3 Phase + Neutral Input voltage ( 230Vac is the default nominal input voltage ) Adjustable VOLT_L and VOLT_H shown in the Input voltage – error window ADJUST MENU Default -10 + 10% (208-250Vac) Input voltage distortion Less than 15% Fast input voltage error Adjustable OUTAGE shown in the ADJUST MENU... -
Page 34: Control Panel Functions
CONTROL PANEL FUNCTIONS The front door of the STS has a control panel with a 2x16 alphanumeric character LCD display, a mimic panel with LEDs to show the status of the Static Switch and a keyboard to control the various menus and submenus. A diagram of the control panel is illustrated below in order to simplify the description of the LEDs and keyboard functions. - Page 35 On : source 1 is the preferred source Source 1 preferred lamp (priority) Off : source 1 is the alternate source On : source 2 is the preferred source Source 2 preferred lamp (priority) Off : source 2 is the alternate source On : source 1 input is OK Source 1 input monitor lamp Off : source 1 input failed...
-
Page 36: Menu Functions
MENU FUNCTIONS Main Functions: The display has two lines; the first line shows the status of the STS and the parameters measured and it is also possible to scroll through the MAIN MENU, whilst the second line of the display shows any alarm messages. - Page 37 STATUS MESSAGES LEVEL This group of messages provides the user with general information on the status of the device. The following messages may be displayed: ON PREFERRED: this message indicates that the source selected as preferred is switched onto the STS output (the load is being supplied by the preferred source) ON ALTERNATIVE: this message indicates that the non preferred (alternative) source is switched onto the STS output.
- Page 38 ► COMMAND MENU The following commands are available in this menu: S1=< 045 XFER >=S2 This command can be used for manual switching from one source to the other and vice versa LEFT BUTTON Manual transfer to source 1 ENTER BUTTON Automatic transfer (STS decides and tries to stay on preferred source) RIGHT BUTTON Manual transfer to source 1...
- Page 39 ► ALARMS MENU The STS is provided with a real time clock which records all events and alarms according to date of occurrence. All the events and alarms can be seen in the order in which they occurred. 000>191007 10:30: This shows that the last alarm recorded was on 19/10/2007 at 10.30 and the number of the event is 000.
- Page 40 ► OPTIONS MENU This menu contains operating modes and user-configurable parameters. A USER PASSWORD is required to enter the OPTIONS MENU, so as to protect these parameters. The default value of USER PSW is 0000 The following parameters are configurable. PREFERRED: Source 1 or 2 The + or –...
- Page 41 INH.RESET: (AUTO or MANUAL) After an alarm causing the SCRs to open and the subsequent loss of power to the load, the user can decide to automatically or manually reset the alarm. AUTO the alarm is automatically reset and at the end of the “alarm hold time” the STS goes back to powering the load.
- Page 42 OPTION MENU - DEFAULT PARAMETERS CONFIGURATIONS PARAMETERS DEFAULT AVAILABLES PREFERRED Source 1 Source 1 or 2 R-XFER ON / OFF D.R-XFER 16 ÷ 127 sec. 16 sec. OVLOAD Enable / Disable Disable AL HOLD 8 ÷64 sec. 10 sec. NSYNC. TR 0 current, delay, disable 0 current OVL.
- Page 43 ► ADJUST MENU A SERVICE PASSWORD is required for access to the ADJUST MENU in order to protect certain parameter setting. (see SERVICE PASSWORD paragraph) This menu has been created exclusively for the support service and to adjust certain parameters. These parameters can be accessed in 2 different ways: - by entering the service password from mimic panel - by entering the password from a PC connected via RS232...
- Page 44 ► SERVICE PASSWORD The Adjust menu function requires a service password which is a 4 digit numerical code. The service personnel for the STS unit should know the service password, therefore only authorised and well trained engineers could access this menu. ►...
-
Page 45: Troubleshooting
TROUBLESHOOTING Only authorised persons can repair the device. In the event of a failure or persistent problems the unit should be shut down. Control the unit as follows. Be prepared to answer these questions before calling for technical assistance: 1. First, take note of the AXX error code which will be displayed on the second line of the LCD panel 2. - Page 47 AGKK7306 10/2020...
Need help?
Do you have a question about the STS 1000A 3 Pole and is the answer not in the manual?
Questions and answers