Advertisement
Quick Links
Instruction Manual
Omegon® Pro Cameras
veLOX, veTEC, GUIDE
English Version 8.2019 Rev. A, Art.-Nr. 61031-61045, 63068-63070
Reproduction of part or all of the contents of this document in any form is expressly prohibited other than for individual use only. All text, images and labels are property of Nimax Gmbh.
Advertisement

Related Manuals for Omegon Pro GUIDE 2000C

Summarization of Contents
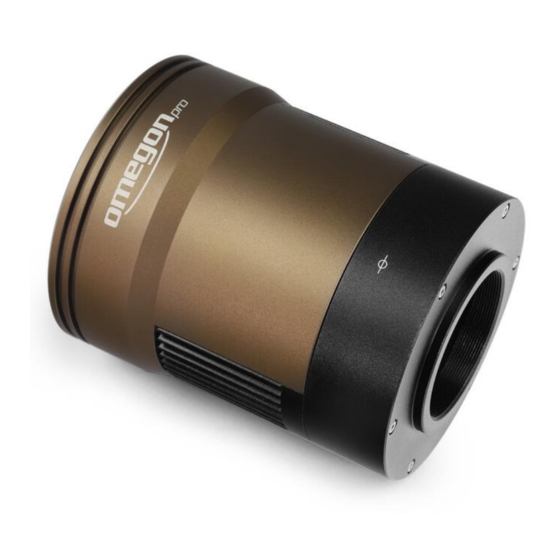
veLOX & GUIDE Parts Explanation
veLOX/GUIDE CNC Aluminium Body
Light but sturdy body protects the camera from damage.
veLOX/GUIDE 1.25" Neck
Front part fits most telescopes; includes 1.25" extender with filter thread.
veLOX/GUIDE CS-mount
Allows attachment of accessories like CCTV lenses; includes 5mm spacer for C-mount.
veLOX/GUIDE ST4 Port
Equipped with ST4 autoguider port and cable for easy autoguiding use.
veLOX/GUIDE USB2 or USB3 Port
Connects camera to PC for data transfer and power; USB3 enables high framerates.
veLOX/GUIDE Sensor Plane Marking
Marks sensor plane for correct positioning and backfocus distance in setups.
veTEC Camera Parts Explanation
veTEC CNC Aluminium Body
Light but sturdy body protects the camera from damage.
veTEC T2 Thread
Female M42x0.75 thread for equipment connection; includes 2" nosepiece adapter.
veTEC USB3 Port
Connects camera to PC for data transfer and power; USB3 enables high framerates.
veTEC 12V DC Power Input
Required for thermoelectric cooling; uses 12V 3A DC power supply with 5.5x2.1 centre positive plug.
veTEC USB Hub
Integrated hub connects devices to PC; allows GUIDE camera to act as autoguider with veTEC.
veTEC Status Lights
LEDs indicate power (PWR), PC connection (SYS), and cooling (TEC, FAN) status.
veTEC TEC Cooling
Cools sensor up to 40°C below ambient, reducing noise with a fan and cooling fins.
veTEC Sensor Plane Marking
Marks sensor plane for correct positioning and backfocus distance in setups.
veTEC Desiccant Plug
Absorbs moisture in sensor chamber to prevent freezing; desiccant can be dried and reused.
Integrated Filter Technology
Color Cameras UV-IR-cut Filter
Removes UV/IR light for accurate visible color capture; transmits 400-700 nm.
Mono Cameras No Filter
Transmits all wavelengths; requires user-added filters for specific wavelength sensitivity.
Included Software and Drivers
Omegon AstroPhotoCapture
Capture software providing a basic interface to control astro cameras for images and videos.
ASCOM & DirectShow Drivers
Drivers for controlling cameras with astrophotography software like SharpCap via ASCOM or DirectShow.
Omegon Pro SDK
Software Development Kit providing tools and documentation for developers to make applications compatible.
Installing AstroPhotoCapture & Connecting Camera
Steps to install the capture software and connect the camera to a PC for activation.
Connecting to PHD2 for Autoguiding
Download and Install PHD2
Download and install the latest stable version of PHD2 from openphdguiding.org for autoguiding.
Connect Camera and Mount
Connect camera to PC via USB and to mount via ST4 cable for autoguiding setup.
Configure PHD2 Connection
Select 'Omegon Pro Camera' and 'On-camera' for ST4 port in PHD2's Connect Equipment menu.
Installing ASCOM & DShow Drivers with SharpCap
Install ASCOM Platform
Download and install the latest ASCOM platform from ascom-standards.org for camera control.
Install Omegon Pro Drivers
Run ASCOMCameraDriver.exe and ASCOMToupST4Setup.exe for ASCOM/ST4 compatibility.
Select Camera in Astrophotography Software
Choose ASCOM Omegon ProCamera Driver or OmegonProCam (DirectShow) in software's camera select menu.
Finding Optimal Focus
Initial Setup and Live View
Point telescope at a bright star, connect camera, start AstroPhotoCapture, and enable live view.
Adjusting Telescope Focus
Slowly turn telescope focus knob, letting vibrations settle, until stars appear as small discs.
Fine-tuning Focus
Decrease exposure time for faster live view refresh; zoom to make stars appear smallest.
Recording Video for Solar-System Astrophotography
Ensure USB 3 Connection
Ensure veLOX or veTEC camera is connected to a USB 3 port for high frame rates.
Configure Capture Settings
Set 8-bit RGB, focus object, use short exposure (10-30ms) and adjust Gain for correct exposure.
Utilize Region of Interest (ROI)
Specify ROI around the planet to improve frame rate by excluding uninteresting regions.
Start Recording and Post-Processing
Specify video length, destination, suffix, start recording, and process video with RegiStax or AutoStakkert.
Taking Long Exposures for Deep Sky Photography
Deep Sky USB 3 Connection
Ensure veLOX or veTEC camera is connected to a USB 3 port for optimal performance.
Object Acquisition and Preview
Focus on object, set 12/14/16-bit RAW, use 30s exposure at high Gain for preview images.
Determine Maximum Exposure Time
Make preview exposures with increasing times to find max exposure before tracking errors cause streaks.
Adjust Gain and Enable Cooling
Set Gain to avoid overexposure (stars not white); enable cooling for noise reduction.
Set Exposure Quantity and Format
Enter desired image quantity; recommend TIFF format for uncompressed, full bit-depth saving.
Choose Destination and Start Sequence
Select destination folder for images and click 'Start Sequence' to begin exposures.
Image Stacking Recommendation
Stacking more images reduces noise; recommend free program DeepSkyStacker.
Need help?
Do you have a question about the Pro GUIDE 2000C and is the answer not in the manual?
Questions and answers