
Related Manuals for Hydronix Hydro-Hub

Summary of Contents for Hydronix Hydro-Hub
- Page 1 Hydro-View / Hydro-Hub User Guide To re-order quote part number: HD0864 Revision: 1.0.0 Revision date: August 2019...
- Page 2 CUSTOMER FEEDBACK Hydronix is continually looking to improve not only its products but also the services that we offer to our customers. If you have any suggestions about how we can do this or if you have any other feedback that would be helpful, please complete our short form at www.hydronix.com/contact/hydronix_feedback.php.
- Page 3 +1 888 887 4822 (Toll Free) +1 231 439 5001 European Office Covers Central Europe, Russia and South Africa Tel: +49 2563 4858 Fax: +49 2563 5016 French Office Tel: +33 652 04 89 04 Hydro-View / Hydro-Hub User Guide HD0864 Rev 1.0.0 3...
- Page 4 Hydro-View / Hydro-Hub User Guide HD0864 Rev 1.0.0...
- Page 5 Revision history Revision Software Date Description of Change Version 1.0.0 1.0.0.0 August 2019 First Release Hydro-View / Hydro-Hub User Guide HD0864 Rev 1.0.0 5...
- Page 6 Hydro-View / Hydro-Hub User Guide HD0864 Rev 1.0.0...
-
Page 7: Table Of Contents
Copy a Calibration from the Sensor to the Database ............. 69 Appendix A Quick Start Rules ......................71 Quick Start Rules ........................71 Appendix B Document Cross Reference ..................73 Document Cross Reference ....................73 Hydro-View / Hydro-Hub User Guide HD0864 Rev 1.0.0 7... - Page 8 Hydro-View / Hydro-Hub User Guide HD0864 Rev 1.0.0...
- Page 9 Figure 5: Installing the Mounting Brackets ..................16 Figure 6: Control Panel Cut-out......................16 Figure 7: Hydro-View Installed in a Control Panel ................17 Figure 8: Rear View of the Hydro-Hub ..................... 17 Figure 9: Hydro-Hub DIN rail Mounting Brackets ................18 Figure 10: Removing the Hydro-Hub from the DIN Rail ..............
- Page 10 Figure 50: User Accounts ........................ 40 Figure 51: System Settings ......................40 Figure 52: IP Address ........................40 Figure 53: Hydro-View Web Browser Access ................... 41 Figure 54: Hydro-Hub IP Address ....................41 Figure 55: Hydro-Hub Web Browser Access ..................42 Figure 56: Hydro-Com Ethernet Search ...................
- Page 11 Figure 117: Selected Points ......................68 Figure 118: Calibration Points Added to the Graph................68 Figure 119: Calibration Graph Displaying All Available Measurement Modes ........69 Figure 120: Sensor Calibration Tab....................69 Hydro-View / Hydro-Hub User Guide HD0864 Rev 1.0.0 11...
- Page 12 Hydro-View / Hydro-Hub User Guide HD0864 Rev 1.0.0...
-
Page 13: Chapter 1 Introduction
Chapter 1 Introduction The Hydro-View touch screen computer and Hydro-Hub access point are devices that enable remote connection to Hydronix microwave moisture sensors for viewing data as well as sensor calibration and configuration. This user guide details the operation and installation of both units. - Page 14 Chapter 1 Introduction Hydro-View / Hydro-Hub User Guide HD0864 Rev 1.0.0...
-
Page 15: Chapter 2 Mechanical Installation
A ground stud is positioned at the bottom left of the unit (viewed from the rear). Mounting The Hydro-View is designed to be mounted in a control panel with a maximum thickness of 3mm. The unit is supplied with four mounting brackets one for each side. -
Page 16: Figure 4: Mounting Brackets
To install the side mounting brackets, insert into the slot and slide down. For the top and lower brackets insert into the slot and slide right. Figure 5: Installing the Mounting Brackets To install the Hydro-View into a Control panel or enclosure a cut-out of 265mm x 168mm is required. Control Panel or Enclosure 1.00mm Min... -
Page 17: Hydro-Hub
Mechanical Installation Chapter 2 To install the Hydro-View, remove the mounting brackets and insert the unit through the cut-out. Re-fit the mounting brackets and tighten the screws evenly to pull the fascia towards the control panel. Ensure the gasket is compressed against the control panel. -
Page 18: Figure 9: Hydro-Hub Din Rail Mounting Brackets
DIN rail mounting brackets. Figure 9: Hydro-Hub DIN rail Mounting Brackets To remove the Hydro-Hub from the DIN rail push down on the top and tilt the underside of the unit away from the rail. Hydro-View / Hydro-Hub User Guide HD0864 Rev 1.0.0... -
Page 19: Figure 10: Removing The Hydro-Hub From The Din Rail
Mechanical Installation Chapter 2 Figure 10: Removing the Hydro-Hub from the DIN Rail Hydro-View / Hydro-Hub User Guide HD0864 Rev 1.0.0 19... - Page 20 Chapter 2 Mechanical Installation Hydro-View / Hydro-Hub User Guide HD0864 Rev 1.0.0...
-
Page 21: Chapter 3 Electrical Installation
This chapter details the electrical installation of the Hydro-Hub / Hydro-View. The connections required will depend on the configuration and integration requirements of the system design. All images shown in this chapter are of the Hydro-View, however the Hydro-Hub utilises the same connection layout and configuration. -
Page 22: Connection Pin Assignments
To comply with EMC regulations, the sensor drain wire (shield) must be connected to the earth connection stud on the Hydro-View / Hydro-Hub. Communications 1.3.1 RS485 This unit has two separate RS485 communication connections. Hydro-View / Hydro-Hub User Guide HD0864 Rev 1.0.0... -
Page 23: Figure 13: Rs485 Wiring
RS485 networks are designed to have a single master communicating with the sensors, as a result it is not possible to allow the Control system and Hydro-View / Hydro-Hub to communicate at the same time. The Input RS485 is configured to enable the communications from the control system and the Hydro-View / Hydro-Hub to be marshalled. -
Page 24: Figure 15: Hydro-View / Hydro-Hub Marshalling The Rs485
Sensor RS485 Control System Hydro-View/Hydro-Hub Sensor Figure 15: Hydro-View / Hydro-Hub Marshalling the RS485 Field Bus This terminal is for a dedicated field bus expansion module. This module is purchased separately. See the associated user guide for connection details. Expansion Board Digital Inputs The optional expansion board digital inputs can be utilised to select a calibration to use with the connected sensors. - Page 25 It is essential that the temperature is maintained below 80°C to ensure the electronics are not damaged. The output is a voltage free contact and must have a load connected. Hydro-View / Hydro-Hub User Guide HD0864 Rev 1.0.0 25...
-
Page 26: Figure 17: Alarm Output Wiring
Figure 17: Alarm Output Wiring Ethernet The Ethernet port is provided to enable the Hydro-View / Hydro-Hub to be connected to a local network. Once connected to the network, remote access to the unit is possible using Hydro- Com or any compatible internet browser. -
Page 27: Chapter 4 System Overview
Chapter 6 for details. Figure 19: Sensor Setup Live Display The Live Display section is used to display live values from any connected sensor on the network. Figure 20: Live Display Hydro-View / Hydro-Hub User Guide HD0864 Rev 1.0.0 27... -
Page 28: Figure 21: Locked Display
Figure 23: Live Display Configuration Additional Live displays can be added by clicking on the Add a Display button. Trend The output of each sensor can be displayed graphically by selecting the Trend tab. Hydro-View / Hydro-Hub User Guide HD0864 Rev 1.0.0... -
Page 29: Figure 24: Trend Graph
Click the Save Display button to save the configuration. Figure 26: Save Live Display When the software is restarted the saved sensor values will be automatically displayed. Figure 27: Live Display after Reboot Hydro-View / Hydro-Hub User Guide HD0864 Rev 1.0.0 29... -
Page 30: Figure 28: Lock Display
The Trending and Logging section enables the user to log any connected sensor value to a text file. When using the Hydro-View a USB memory stick must to be inserted into the unit using one of the available USB ports to store the data. The USB memory stick must be FAT32 formatted and a maximum size of 32GB. -
Page 31: Figure 32: Trending And Logging Setup
Click Stop Logging to stop the logging. Figure 35: Stop Logging Once the logging has stopped the data can be downloaded. If using a Hydro-View touch screen unit the data is downloaded to the attached USB memory stick. If using a remote... -
Page 32: Figure 36: Download Log
Systems utilising Fieldbus communications require this address to be configured to match the connected device. Datasheet Version This is the Fieldbus datasheet installed on the unit. This must match the datasheet used on the connected device. Hydro-View / Hydro-Hub User Guide HD0864 Rev 1.0.0... -
Page 33: Figure 39: Upgrade Software
To upgrade the Hydro-Net software the upgrade file must be downloaded from the Hydronix web site: https://www.hydronix.com To upgrade the software on a Hydro-View the file must be stored on a USB memory stick inserted into the unit. To upgrade the software, click Upgrade (Figure 39) and select the software upgrade file. -
Page 34: Figure 42: Ip Address Settings
It is recommended to leave the Baud rate set to Auto Baud. Note: If communication issues are encountered it is recommended to configure the communication as Fixed Baud 9600. Figure 43: Sensor Communication Setup Hydro-View / Hydro-Hub User Guide HD0864 Rev 1.0.0... -
Page 35: Figure 44: Modify Login Password
Changing the default passwords is possible by selecting Change Password next to the required access level. To modify the password, enter the existing and new password. Figure 44: Modify Login Password Hydro-View / Hydro-Hub User Guide HD0864 Rev 1.0.0 35... -
Page 36: Figure 45: Search Sensor Network
System Overview Search (Sensor) Once activated, the Hydro-View will automatically initiate a search of the RS485 network to find any connected sensors. To communicate with a sensor that has been added to the network after start-up or to manually search, click the search button (Figure 45). -
Page 37: Figure 48: Expansion Board Test
The test will also calculate the Sensor address and calibration number selected using the input signals (Figure 48). If the expansion board is not fitted the indicator lights will not be visible. Digital Input Test Calculated sensor/Calibration values Figure 48: Expansion Board Test Hydro-View / Hydro-Hub User Guide HD0864 Rev 1.0.0 37... - Page 38 Chapter 4 System Overview Hydro-View / Hydro-Hub User Guide HD0864 Rev 1.0.0...
-
Page 39: Chapter 5 Remote Access
Chrome, Edge, Firefox, Safari and Internet Explorer 11 Setting up a Connection To remotely access the unit, using a compatible web browser, connect the Hydro-View / Hydro- Hub to the local Ethernet network. Hydro-View / Hydro-Hub User Guide HD0864 Rev 1.0.0 39... -
Page 40: Figure 50: User Accounts
2.2.1 Hydro-View To setup a remote connection to the Hydro-View the IP Address of the unit must be known. The Hydro-View IP address is recorded in the system settings. After switching on the Hydro-View the IP address can be located using the following steps. -
Page 41: Figure 53: Hydro-View Web Browser Access
Hydro-Com will search for available devices. Any connected devices will be listed. Figure 54: Hydro-Hub IP Address If more than one Hydronix Ethernet device is connected to the network, ensure the IP address of any previously configured devices is known before searching. It is recommended to clear the Ethernet list before searching for a Hydro-Hub on the network. -
Page 42: Remote Connection Using Hydro-Com
Remote Access Figure 55: Hydro-Hub Web Browser Access Multicast DNS Access If only one Hydro-View / Hydro-Hub is connected to the local network, it is possible to access the unit by typing the following address into the browser: http://hydrohub.Local:5000 Note: To access the Hydro-Net software using this link the computer running the browser must have Bonjour Print Services software installed. -
Page 43: Web Api (Asp.net)
Select the sensor to configure / Monitor using Hydro-Com. 4 Web API (asp.net) The Hydro-Net API allows developers to quickly and easily interface with a Hydronix sensor network using a web service. The Hydro-Net API sends all data responses as JSON Objects. For details on using the API see the Hydro-Net API Developers Guide HD0801. - Page 44 Chapter 5 Remote Access Hydro-View / Hydro-Hub User Guide HD0864 Rev 1.0.0...
-
Page 45: Chapter 6 Sensor Setup
The sensor configuration section is divided into four sections. Live Values Figure 60: Live Values Selector The Live Values section displays the current output of the sensor. All output values are displayed as a number and graphically. Hydro-View / Hydro-Hub User Guide HD0864 Rev 1.0.0 45... -
Page 46: Figure 61: Live Values
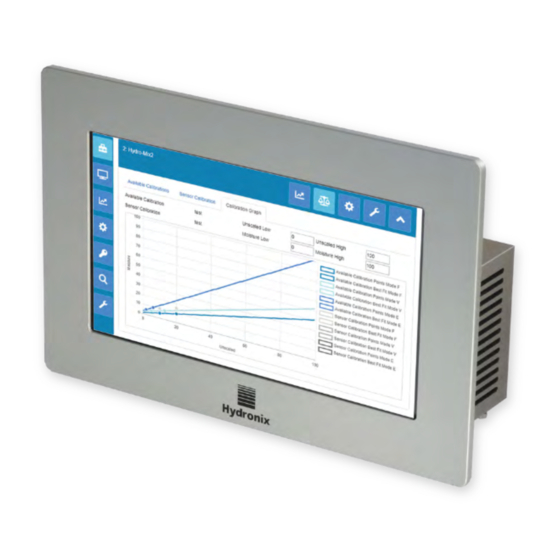
These are the values that are currently in use by the sensor. 2.2.3 Calibration Graph The Calibration Graph enables the user to view the calibration data graphically Sensor Settings Figure 63: Sensor Settings Selector The Sensor Settings are divided into seven sections. Hydro-View / Hydro-Hub User Guide HD0864 Rev 1.0.0... -
Page 47: Figure 64: Sensor Details
Note: If a remote connection is being used the file should be saved to a local drive on your machine and not a network drive. If a Hydro-View unit is used the file must be saved to a USB Memory stick. -
Page 48: Figure 65: Analogues
The Output Variable Mode selector configures which measurement mode is used for the output type. The option is only available on Moisture and Unscaled Output types. The available Measurement Modes (F, E, V and Legacy) are dependent on the sensor connected. Hydro-View / Hydro-Hub User Guide HD0864 Rev 1.0.0... -
Page 49: Figure 66: Digital I/O
See the Configuration and Calibration Guide HD0679 for detail of how to configure the filtering in the sensor. • Filtering Time (Smoothing Time) • Slew Rate + • Slew Rate – • Digital Signal Processing (DSP) • Filter Include set point Hydro-View / Hydro-Hub User Guide HD0864 Rev 1.0.0 49... -
Page 50: Figure 68: Averaging
The output alarm will be activated when the moisture deviation is below the limit for the set time. This is useful in mixer applications and for continuous flowing materials where a stable signal is required. Hydro-View / Hydro-Hub User Guide HD0864 Rev 1.0.0... -
Page 51: Figure 69: Temperature Compensation
(0) value relates to the measurement in air and 100 relates to water. This is used to give a raw output value from a Hydronix sensor which ranges from 0 to 100 and is called the Unscaled value. -
Page 52: Figure 71: Air/Water Factory Calibration
Air reading box. Figure 73: Update Air Calibration To upload the factory settings to the sensor, press the ‘Save’ button. Figure 74: Save Factory Settings Hydro-View / Hydro-Hub User Guide HD0864 Rev 1.0.0... -
Page 53: Figure 75: Autocal
Note: For conveyor belts or free fall applications, an Air and Water calibration is still required. Figure 77: Successful AutoCal Procedure Note: For the most consistent performance it is recommended that a full Air and Water calibration is performed. See page 51 for details Hydro-View / Hydro-Hub User Guide HD0864 Rev 1.0.0 53... -
Page 54: Figure 78: Diagnostics Selector
Air value. When a hand is placed on the ceramic face plate the frequency and amplitude should be within the Factory Air and Water range. Contact Hydronix support for assistance if the sensor does not operate within the Air/Water span. support@Hydronix.com Figure 80 shows the typical resonator response with the sensor in air and with a hand on the ceramic (Some sensor will display the graph as a peak instead of a trough). -
Page 55: Figure 80: Typical Resonator Response
Figure 82: Current Sensor Output Values 2.4.4 Hardware Test The Hardware Test frame enables the user to test the operation of the analogue outputs, current loops and the digital I/O’s. Hydro-View / Hydro-Hub User Guide HD0864 Rev 1.0.0 55... -
Page 56: Figure 83: Hardware Test Frame
Output frame. The current status of both Digital I/O’s is displayed, and Digital IO 2 can be set as an input or output to confirm the correct operation. The test is only performed once the Start button is pressed. Figure 85: Digital Output Control Hydro-View / Hydro-Hub User Guide HD0864 Rev 1.0.0... -
Page 57: Chapter 7 Calibration
The calibration procedure for mixer applications where water is added under controlled conditions to reach a specified moisture value is performed by the mixer control system or a Hydronix Hydro- Control and not by the Hydro-Net software. -
Page 58: Figure 87: Calibration Data Table
When the latest versions of Hydronix microwave moisture sensors (Firmware HS0102 or higher) are connected to legacy products, such as Hydro-Com pre 2.0.0 and Hydro-View IV pre 2.0.0, the sensor will only have the coefficients for one measurement mode stored. This will be displayed in the sensor calibration tab under ‘Legacy Coefficients’. -
Page 59: Figure 90: Remote Averaging
‘Raw’. See the Hydronix Sensor Configuration and Calibration Guide HD0679 or the appropriate sensor user guide for more details on how to set the averaging functionality for specific applications. -
Page 60: Figure 91: Sensor Averaging Started
The Unscaled values for all available measurement modes are included in the chart (Figure 94). Figure 94: Average Unscaled Added to Calibration Chart Multiple Unscaled values can be added to the chart as required (Figure 95). Figure 95: Multiple Unscaled Values Hydro-View / Hydro-Hub User Guide HD0864 Rev 1.0.0... -
Page 61: Figure 96: Moisture % Added To Chart
An ideal calibration where the best fit line passes through every point will result in an R² of 1. Figure 98: Updated Calibration Coefficients Click the Calibration graph tab to display the graph (Figure 99). Hydro-View / Hydro-Hub User Guide HD0864 Rev 1.0.0 61... -
Page 62: Figure 99: Expanded Calibration Graph
Quick Start Rules are only available with selected sensors. Hydro-Net software will display the ‘Quick Start Rules’ selection box if it is available with the connected sensor (Figure 101). Figure 101: Quick Start Rules Selector Hydro-View / Hydro-Hub User Guide HD0864 Rev 1.0.0... -
Page 63: Figure 102: Quick Start Rules Applied
Rules enabled. The data does not satisfy the complete criteria and as a result, a warning message is displayed as shown. The B and C calibration coefficients that describe this line have been modified. Figure 102: Quick Start Rules Applied Hydro-View / Hydro-Hub User Guide HD0864 Rev 1.0.0 63... -
Page 64: Calibration Procedure
Place all collected material in an air-tight bucket or bag to ensure no moisture is allowed to escape. Hydro-View / Hydro-Hub User Guide HD0864 Rev 1.0.0... -
Page 65: Figure 104: Collection Bucket
Weigh a clean empty heat proof bowl. 150.00 g Figure 108: Clean Bowl 10. Place a minimum of 500g of the material in the bowl. All other material must remain in the airtight container until required. Hydro-View / Hydro-Hub User Guide HD0864 Rev 1.0.0 65... -
Page 66: Figure 109: Air-Tight Seal
Figure 112: Break-Up Lumps 14. Re-heat the material in the microwave for another five minutes. Weigh the material and record the result. 625.00 g Figure 113: Weigh Material Again Hydro-View / Hydro-Hub User Guide HD0864 Rev 1.0.0... - Page 67 If the sub-samples are not within 0.3% moisture the test must be repeated. Variations in the results indicate possible sampling or laboratory errors. 19. Manually add the moisture % result to the calibration chart Hydro-View / Hydro-Hub User Guide HD0864 Rev 1.0.0 67...
-
Page 68: Figure 114: Moisture Added To The Data Table
23. It is now possible to evaluate the points and to inspect the best fit line that has been generated. The output from Hydronix moisture sensors is linear to moisture change so accurately collected and analysed samples should be on, or very close, to the best fit line. -
Page 69: Copy A Calibration From The Sensor To The Database
To update the calibration open the Sensor Calibration Tab and select Update Calibration. Once updated the calibration data can be viewed in the available calibration tab by selecting it from the calibration selector. Hydro-View / Hydro-Hub User Guide HD0864 Rev 1.0.0 69... - Page 70 Chapter 7 Calibration Hydro-View / Hydro-Hub User Guide HD0864 Rev 1.0.0...
-
Page 71: Appendix A Quick Start Rules
If the Unscaled value at zero moisture is less than 5. • If the Unscaled value at zero moisture is greater than 50. • If the resulting slope is greater than the maximum or less than the minimum calibration. Hydro-View / Hydro-Hub User Guide HD0864 Rev 1.0.0 71... - Page 72 Appendix A Quick Start Rules Hydro-View / Hydro-Hub User Guide HD0864 Rev 1.0.0...
-
Page 73: Appendix B Document Cross Reference
Document Number Title HD0801 Hydro-Net API Developers Guide HD0682 Hydro-Com User Guide HD0865 Hydro-View / Hydro-Hub Profibus Configuration Guide Hydro-View / Hydro-Hub User Guide HD0864 Rev 1.0.0 73... - Page 74 Appendix B Document Cross Reference Hydro-View / Hydro-Hub User Guide HD0864 Rev 1.0.0...
- Page 75 Start ............31 AutoCal............48 Junction Box ..........23 Stop ............31 Legacy User Accounts ..........34 Calibration Coefficients ......54 Access Levels ......... 34 Live Display Default Passwords ........35 Add ............27 Modify ............. 35 Hydro-View / Hydro-Hub User Guide HD0864 Rev 1.0.0 75...
Need help?
Do you have a question about the Hydro-Hub and is the answer not in the manual?
Questions and answers