Table of Contents
Advertisement
®
Installation &
Operation Manual
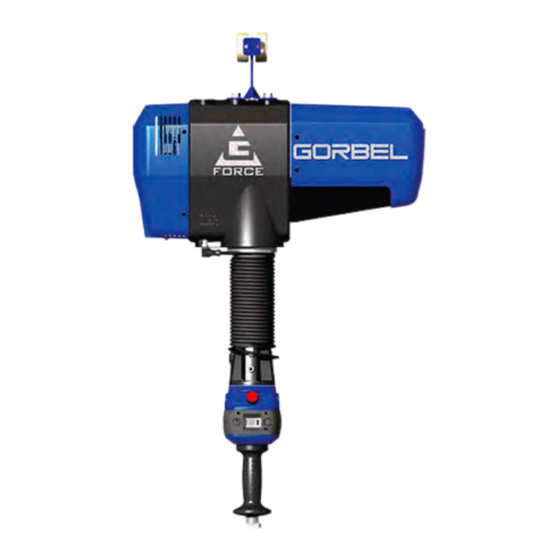
G-Force®
IMPORTANT!
Q and iQ Series
DO NOT DESTROY
Gorbel
Customer Order No. / Serial No.
®
Gorbel
Dealer
®
Go to www.gorbel.com/support/warrantyregistration.aspx
to register your G-Force®, sign up for our Platinum
Service Package and request your free G-Force® Q and
Date
iQ Series Service Manual.
Month
Year
Advertisement
Table of Contents

Related Manuals for GORBEL G-Force Q Series

Summarization of Contents
SAFE HOIST OPERATING GUIDELINES
General Safety Principles
General safety principles for minimizing injury and equipment damage.
Safe Operation Do's and Don'ts
Rules for safe operation, avoiding dangerous practices and taking precautions.
G-FORCE® OPERATIONAL GUIDELINES
Reading Instructions and Pre-Operation Checks
Emphasizes reading instructions and inspecting rope/cord before operation.
Lifting and Load Handling
Center unit over load, avoid swinging, and do not end/side load.
Operational Limits and Warnings
Avoid end stop impacts, note environmental limits, no load on housing.
TOOLING INTEGRATION GUIDELINES
Tooling Attachment and Mounting
Tooling must be retained to G360™ assembly; avoid mounting on handle housing.
Tooling Design and Cable Management
Keep tooling level, balanced; clamp/strain-relieve cables.
CORRECT G-FORCE® INSTALLATION ORIENTATION
Slide Handle Installation Orientation
Illustrates correct orientation for In-Line and Remote Mounted Slide Handles.
Pendant Handle Installation Orientation
Depicts correct orientation for Suspended and Remote Mounted Pendant Handles.
G-FORCE® MAIN ASSEMBLY COMPONENTS
Actuator Assembly Details
Details the actuator assembly containing the servomotor, gearbox, and limit switches.
Coil Cord Assembly Details
Details the coil cord assembly that carries signals from the handle to the actuator.
Handle Assembly Interface
Explains the handle as the main interface between the operator and the lifting device.
INSTALLATION STEPS OVERVIEW
Step 1: Unpacking G-Force®
Instructions for unpacking and verifying G-Force® components.
Step 2: Pre-Assembly and Tools
Lists required tools and materials for pre-assembly.
Step 3: Actuator Assembly Installation
Guides the installation of the actuator assembly onto the trolley.
STEP 4: COIL CORD INSTALLATION
Coil Cord Installation for Handle Types
Lists installation steps for various handle types (Slide, Pendant, Force Sensing).
ELECTRICAL POWER CONNECTION AND INITIAL POWER-UP
Step 6: Electrical Power Connection
Guides connecting the 220 VAC power source to the unit.
Step 7: Initial Power-Up Procedure
Details the procedure for initial power-up and system readiness checks.
LIFT FUNCTIONALITY MODES
Standard Handle Operation Modes
Explains standard slide, pendant, and force sensing handle operation.
Emergency Stop and Float Mode
Details E-stop function and Float Mode operation principles.
PROGRAM MODE FEATURES AND INDICATORS
Program Mode Navigation Overview
Overview of Program Mode, LEDs, and Diagnostic Mode.
LED Indicators Explained
Explains the function of Float Mode LED and System Fault LED.
Diagnostic Mode Functionality
Details Diagnostic Mode for technician measurement and monitoring of components.
SLACK SWITCH AND REMOTE HANDLE CONFIGURATION
Slack Switch Functionality
Explains the slack switch that stops downward motion when rope slack is detected.
Remote Mounted Handle Option
Describes the option to displace the handle from the wire rope for reachability.
CONTROLS INTERFACE FEATURES
Jog Switch Buttons Functionality
Explains jog buttons for wire rope replacement and maintenance.
Service Mode and Communications
Details Service Mode and the communications connector.
PROGRAM MODE NAVIGATION AND LOCKOUT
Entering and Navigating Program Mode
Step-by-step instructions for activating and entering Program Mode.
Program Mode Lockout Feature
Explains the Lockout Feature to prevent tampering in Program Mode.
Safety Program Mode Access
Describes limited menu access when the unit is in fault or SERVICE MODE.
PROGRAM MODE HANDLE OPERATION
Program Mode Button Usage
Details how to use buttons to navigate and select options in Program Mode.
Program Mode Menu Item Selection
Explains how to select menu items and confirm changes in Program Mode.
VIRTUAL LIMITS WARNINGS AND PROGRAM MODE
Virtual Limits Warnings
Important warnings regarding setting virtual limits to prevent issues.
PROGRAM MODE SETTINGS DETAILS
Virtual Limits Settings Configuration
Details for setting upper/lower limits, slow down points, and resume points.
Lift Speed and Response Settings
Configuration for hoist speed and handle control response.
Custom Features Setup
Custom features including Float Mode, overload, and timers.
ADVANCED PROGRAM MODE SETTINGS
Float Mode Anti-Recoil Configuration
Setup for Anti-Recoil detection methods and force limits.
User Programmable Overload Setup
Setting overload limits, operating force limits, and detection sensitivity.
PROGRAM MODE CONFIGURATION OPTIONS
Configure Operating Force Limit
Setting operating force limit for moving loads in air to reduce false overloads.
Excessive Pause Timer Setup
Setting timers for pause behavior in different operational modes.
IQ UNIT PROGRAMMING FEATURES
Force Sensing Handle Setup Options
Options for setting FSH style, startup force, and resetting tare.
Dual Actuator Configuration Menu
Configuring dual actuators as synchronized or independent.
SERVICE MENU AND DIAGNOSTICS
Service Menu Functions
Options for cycle counts, run time, system info, and resetting service indicators.
Diagnostic Mode for I/O Modules
Displays status of inputs/outputs for actuator and expansion I/O blocks.
SPECIAL UNIT FEATURES AND CONFIGURATIONS
Record Unit Configuration
Saves current unit settings, including capacity and overload parameters.
Load Cell Calibration Procedure
Calibrating load cell bias and slope for accurate weight readings.
Preset Feature Configuration List
Predefined sets of Q/iQ feature configurations including factory default.
IQ ACTUATOR I/O MODULE FUNCTIONALITY
Input - Dual Virtual Limit Sets
Switches to a second independent set of virtual limits when turned on.
Output - Service Indicator
Turns on to indicate service is required based on usage hours.
EXPANSION 8-POINT I/O BLOCK FUNCTIONALITY
Input - Dual Load Weight Float Mode
Switches between two pre-programmed load weights in Float Mode.
Input - Anti-drop Feature Control
Manages clamp requests and anti-drop control for tooling.
Input - Auto Home Positioning
Automatically travels to the set home position in vertical travel.
TROUBLESHOOTING GUIDE
Display, Faults, LEDs, and Error Codes
Solutions for LCD issues, faults, warnings, LEDs, and error codes.
Load Movement, Speed, Height, and Actuator Issues
Addresses problems with unit movement, speed, height, and noisy actuators.
Float Mode and Directional Movement Issues
Diagnoses Float Mode problems and directional movement issues.
SYSTEM FAULT DIAGNOSTICS
Command Faults and Corrective Actions
Corrective actions for command faults detected by the PLC.
Command Warnings and Corrective Actions
Corrective actions for system warnings displayed on the LCD.
Drive Faults and Corrective Actions
Troubleshooting steps for drive faults detected in the drive system.
TROUBLESHOOTING LED CHART
Operational State LED Indicators
Explains LED status for E-stop, Program Mode, Faults, and Warnings.
Run Mode and Custom Feature LED Indicators
Details LED status for different run modes and custom features.
Ready Mode and Startup LED Indicators
Explains LED status during startup and when the unit is in Ready Mode.
WIRE ROPE INSPECTION PROCEDURES
Frequent Rope Inspection
Visual inspection of ropes at the start of each shift for gross damage.
Periodic Rope Inspection
Detailed inspection by qualified person based on usage and environment.
WIRE ROPE MAINTENANCE AND REPLACEMENT
Rope Storage and Handling Guidelines
Guidelines for storing and handling rope to prevent damage and deterioration.
Wire Rope Replacement Criteria
Criteria for determining when wire rope needs replacement due to wear or damage.
SLACK SPRING ADJUSTMENT PROCEDURE
Conditions Requiring Slack Spring Adjustment
Situations indicating the need for slack spring adjustment.
Slack Spring Adjustment Steps
Step-by-step process for adjusting the slack spring for proper operation.
INSPECTION AND MAINTENANCE SCHEDULE
Wire Rope and Coil Cord Maintenance
Schedule for inspecting and maintaining wire rope and coil cord.
Handle, Switches, and Air Hose Maintenance
Maintenance for handle, switches, air hose, and load hook.
G-Force Unit and Related Components Check
Visual inspection of the G-Force unit and associated hardware.
Need help?
Do you have a question about the G-Force Q Series and is the answer not in the manual?
Questions and answers