Table of Contents
Advertisement
Advertisement
Table of Contents

Related Manuals for Prototek LineFinder LF2200

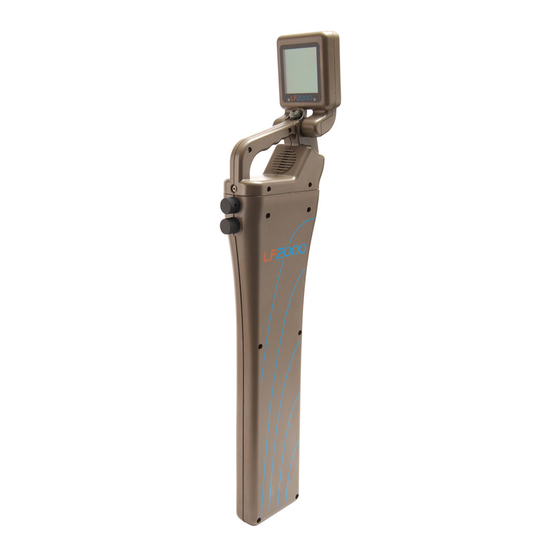
Summary of Contents for Prototek LineFinder LF2200
- Page 1 Prototek LineFinders are available on our web site LF2000 LF2200 www.prototek.net/video-training HOW TO GET THE MOST OUT OF YOUR Scan this with your Smart Phone for help in the field DIGITAL LOCATING TOOLS FROM PROTOTEK BREAKING NEW GROUND UNDERGROUND 0416a...
- Page 2 Your Notes Corporation P. O. Box 1700 19044-B Jensen Way NE Poulsbo, WA 98370 If you cant find the answer in this manual, go to our web site: www.prototek.net or contact us: (800) 541-9123 Fax (360) 779-1510 prototeksales@prototek.net...
- Page 3 Only newer LF2200s include the Menu option of setting the Power Power Mode ........14 frequency. Earlier models (and the LF2100) required Prototek to set the frequency. This user feature can be added to an existing LF2200 “Sniffing” Custom Frequencies .... 17 for those who need it.
- Page 4 Specifications Frequency ..Sondes at 16 Hz, 512 Hz & 8 kHz Having said all that, Prototek remains dedicated to your success in using our tools. We are always available by telephone during business Line tracing at 8, 16, 32 & 64 kHz hours (7:30 AM to 5:00 PM Pacific Time, M-F) to help you understand 4 Custom “sniffable”...
- Page 5 This advice applies whether you’re a rookie at underground locating or “heads-up” locating. an “old pro”. Prototek tools are extremely simple to use, and it’s easy to outsmart yourself if you’re used to more complicated equipment and procedures.
- Page 6 (1/8” plug) available from Prototek. Specifications The SPEAKER is right under the handle. We’ve improved the audio Operating Modes ...........Conductive and Inductive by using a clicking sound, which is more pleasant than the “squeal”...
- Page 7 The Pay particular attention to the Crossing screen on the LF receiver, where you friendly Prototek logo screen greets you, with our walk in a circle around the peak signal to locate the crossing nulls and from phone number, which you should not hesitate to there mark a line through the sonde.
- Page 8 If you run out of signal again, do another “leapfrog”. These are preset line tracing frequencies, for use in conjunction with a line exciter like the Prototek Power Line Tracing Considerations Blue BuzzBox. The frequency you select here must You should plan to use the Power mode on the receiver only for initial survey match the frequency that is set on your line exciter.
- Page 9 Setting Up for Line Tracing Sonde Locating You will need to have access to one end of the line you want to trace, so that you can excite it with your BuzzBox. For Conductive mode you must be able to make a direct metallic connection to the line, or a tracer that accompanies it.
- Page 10 If you are using one of these Prototek tools with another manufacturer’s equipment, the frequency choice will be dictated by which frequencies they have in common, but since the LF2200 can “sniff”...
- Page 11 And now for the depth disclaimers Step 2: The Crossing Screen (do not skip this step!) The best accuracy for depth determination will be found when the transmitter This screen represents the most overlooked step for is no deeper than half of its maximum rated range. For example, use an FV-10 locating with our Digital receivers.
- Page 12 Step 3. Find the Exact Location of the Transmitter Remember that the Crossing Nulls we just marked indicate the direction the transmitter is lying, and Switch to the Sonde screen with another click to the right (“sonde” is another word for transmitter). Walk presumably a pipe it is in lies the same way.
- Page 13 Or does it ? Walk in the direction that the clicks get faster and the number in the center of the screen The appearance of the sonde in this screen is a reliable reaches its highest value. When you have indication that you are directly over the sonde IF you have reached a point where the clicking is fairly rapid and everywhere else you move makes...
- Page 14 Know Your Line Exciter Sonde Locating Blue BuzzBox Select the right Transmitter There are three main considerations when selecting a transmitter (or “sonde”) to send into a line for a locating job: The BuzzBox enclosure is made • choosing the frequency that will work best in the pipe your sonde will be in by Pelican of ultra high-impact (which also must be compatible with your receiver).
- Page 15 Line Tracing At the Jobsite LF2200 Blue BuzzBox with the First turn on the Blue BuzzBox, by turning the frequency knob to one of the choices. At first, a few of the blue LEDs light, then finally all 8 are lit. This Before starting any locating job, please follow these simple steps.
- Page 16 So far, we’ve only “located” the BuzzBox by its signal through the air. Not ex- actly useful. But you have learned how the receiver responds in the presence “Sniffing” Custom Frequencies of a signal generated by the BuzzBox, and it will respond the same way when you’re searching for a line that it has energized.
- Page 17 The LF2200 does not have a Depth screen for Power. will appear to be somewhat “shorter” than a shallow line of the same length. As we have said, locating power using passive methods is at You’ll need to experiment to see how much you should compensate for this. best an approximation, and the lack of accuracy extends to This effect will be noticed in both Inductive and Conductive modes.
- Page 18 Practice detecting the presence of underground power by walking over the area of interest in Power Mode a systematic grid pattern, watching the signal strength number and listening to the clicking getting faster as you near the line. Remember to sweep the LF2200 in an arc while you walk, If you select the choice on the Menu screen with the same way you search for a sonde, in order symbol, you can locate in “Power”...
Need help?
Do you have a question about the LineFinder LF2200 and is the answer not in the manual?
Questions and answers