Advertisement
Advertisement
Table of Contents

Related Manuals for disguise 2x4pro


Summary of Contents for disguise 2x4pro
- Page 1 hardware guide pro & gx range #createtogether...
-
Page 2: Table Of Contents
4x4pro Front panel...................................................3 2x4pro/gx 2 Front panel................................................4 gx 1 Front panel...................................................5 vx 4 Front panel..................................................6 Rear panels....................................................7-8 Powering your pro/gx server...............................................9 Quick start....................................................10 VFC cards.....................................................11 Changing VFC cards..............................................12-15 Support......................................................16 support@disguise.one | www.disguise.one | 1 pro & gx Hardware Guide | Q1 2019... -
Page 3: Welcome
You can also refer to the online guides at help.disguise.one The pro range is disguise’s cutting edge solution for large and complex shows. The 4x4pro, 2x4pro and vx 4 set a standard for power and flexibility. They are suited for the most demanding touring productions, massive multi-projector shows, TV, broadcast and high-quality fixed installs. -
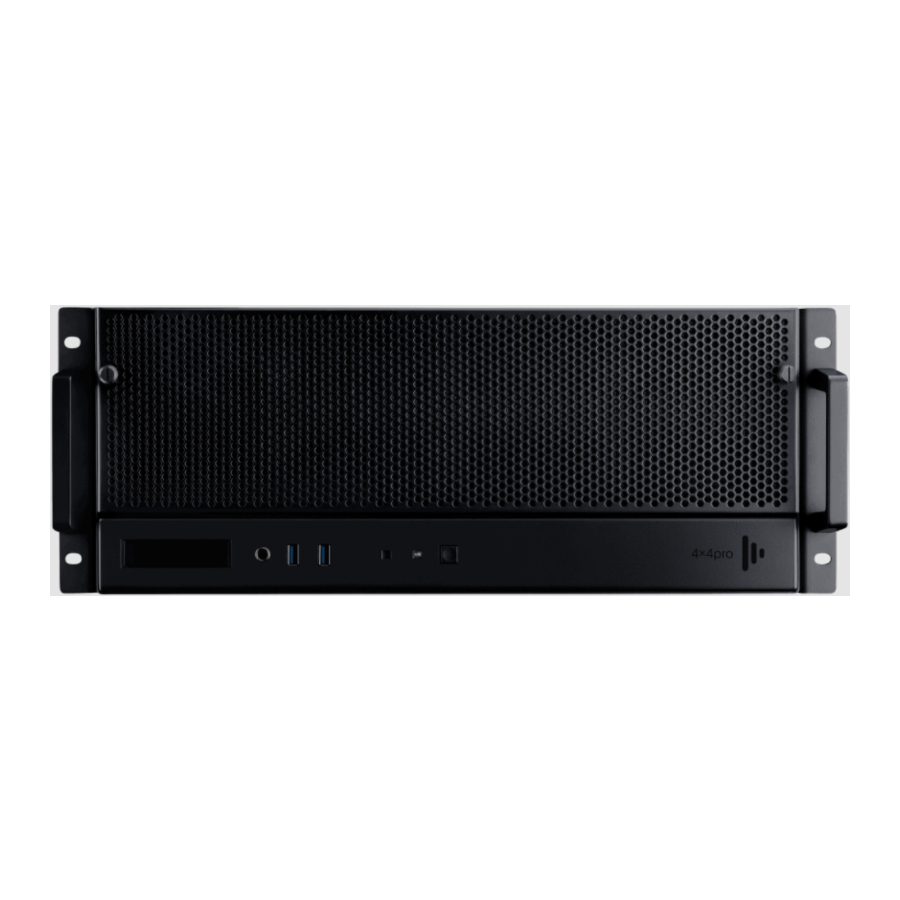
Page 4: 4X4Pro Front Panel
You should regularly inspect the air filter on the front of the unit to prevent loss of cooling efficiency. To remove the air filter material, first remove the screws from the filter housing marked as in the diagram above. Give the filter a clean, replace the filter in the metal frame and reattach the filter brace. support@disguise.one | www.disguise.one | 3 pro & gx Hardware Guide | Q1 2019... -
Page 5: 2X4Pro/Gx 2 Front Panel
You should regularly inspect the air filter on the front of the unit to prevent loss of cooling efficiency. To remove the air filter material, first remove the screws from the filter housing marked as in the diagram above. Give the filter a clean, replace the filter in the metal frame and reattach the filter brace. support@disguise.one | www.disguise.one | 4 pro & gx Hardware Guide | Q1 2019... -
Page 6: Gx 1 Front Panel
You should regularly inspect the air filter on the front of the unit to prevent loss of cooling efficiency. To remove the air filter material carefully unclip the filter from it’s holding tags. Give the filter a clean and replace the filter in the metal frame. support@disguise.one | www.disguise.one | 5 pro & gx Hardware Guide | Q1 2019... -
Page 7: Vx 4 Front Panel
You should regularly inspect the air filter on the front of the unit to prevent loss of cooling efficiency. To remove the air filter material carefully unclip the filter from it’s holding tags. Give the filter a clean and replace the filter in the metal frame. support@disguise.one | www.disguise.one | 6 pro & gx Hardware Guide | Q1 2019... -
Page 8: Rear Panels
Rear panels 4x4pro back plane 2x4pro/gx 2 support@disguise.one | www.disguise.one | 7 pro & gx Hardware Guide | Q1 2019... - Page 9 1 vx 4 < 1 > MGMT < 10 > GENLOCK < 25 > * The vx 4 comes as standard with 4x HDMI VFC as default. support@disguise.one | www.disguise.one | 8 pro & gx Hardware Guide | Q1 2019...
-
Page 10: Powering Your Pro/Gx Server
Left - True1 Powercon and Loop Through connections on rear of unit. Power cable daisy chain Right - Vx 4 Power panel with Tue1 Input. CAUTION RISK OF ELECTRIC SHOCK DO NOT OPEN support@disguise.one | www.disguise.one | 9 pro & gx Hardware Guide | Q1 2019... -
Page 11: Quick Start
Quick start 1. Make sure you have connected a keyboard, mouse, monitor and speakers as shown below. disguise unit connected to peripherals 2. Units in the pro and gx range are fitted with Neutrik powerCON TRUE1 connectors as standard. 3. Use the included power cable with the Neutrik powerCON TRUE1 connector to connect the unit to a power source. -
Page 12: Vfc Cards
Combination of any four cards at one time. gx 1 - Single card at one time. gx 2 - Combination of any two cards at one time. support@disguise.one | www.disguise.one | 11 pro & gx Hardware Guide | Q1 2019... -
Page 13: Changing Vfc Cards
Step 2: Using a Phillips #1 screwdriver loosen the 4x retaining screws on the VFC card you want to replace. The screws are indicated with a red line in the image below. Red lines indicate screw location. Example shows Quad DVI VFC cards support@disguise.one | www.disguise.one | 12 pro & gx Hardware Guide | Q1 2019... - Page 14 Please note: The VFC cards are fragile, be sure to pull straight not flexing the card and if under any resistance do not use excessive force. Avoid touching the exposed electronics. support@disguise.one | www.disguise.one | 13 pro & gx Hardware Guide | Q1 2019...
- Page 15 1: With the gx 1, ensure that the latch is on the right when inserting a card. The plastic guides are located near the base of the server and help align the card with the connector. support@disguise.one | www.disguise.one | 14 pro & gx Hardware Guide | Q1 2019...
- Page 16 Step 7: Fasten the four retaining screws before repeating all of the steps for the next card. To reduce the risk of damaging the threads, do not apply excessive torque to the screws. support@disguise.one | www.disguise.one | 15 pro & gx Hardware Guide | Q1 2019...
-
Page 17: Support
Support Helpful contacts Support Team support@disguise.one Training Team training@disguise.one Sales Team sales@disguise.one Helpful links User Guide help.disguise.one Trial disguise.one/en/get-disguise/get-trial Software Updates disguise.one/download-disguise Additional Designer licenses store.disguise.one support@disguise.one | www.disguise.one | 16 pro & gx Hardware Guide | Q1 2019...
Need help?
Do you have a question about the 2x4pro and is the answer not in the manual?
Questions and answers