
Related Manuals for MAKOI Drum 50


Summary of Contents for MAKOI Drum 50
- Page 1 INSTALLATION AND USER GUIDE FOR MAKOI DRUM FILTERS AND BIODRUMS Scan the QR code for even more information Misprints and printing errors reserved...
-
Page 2: Table Of Contents
TABLE OF CONTENTS 1. Foreword 2 Shortcomings and claims for compensation, disclaimer 2.1 Shortcomings and claims for compensation 2.8 Replacement parts 3. General 3.1 Description of drum filter 3.3 Used symbols and warnings 4 Usage of the filter 5 Application fields 6 Installation/connection 7 Commissioning of the filter 7.1 Positioning the filter... -
Page 3: Foreword
1. Foreword Ma-koi specifications specified in writing as, for instance, stated in this manual. We thank you for the purchase of a Ma-koi drum filter or Bio-drum. This filter is a premium quality product with Any other verbal agreements, for instance during exceptionally high production-standards. -
Page 4: Replacement Parts
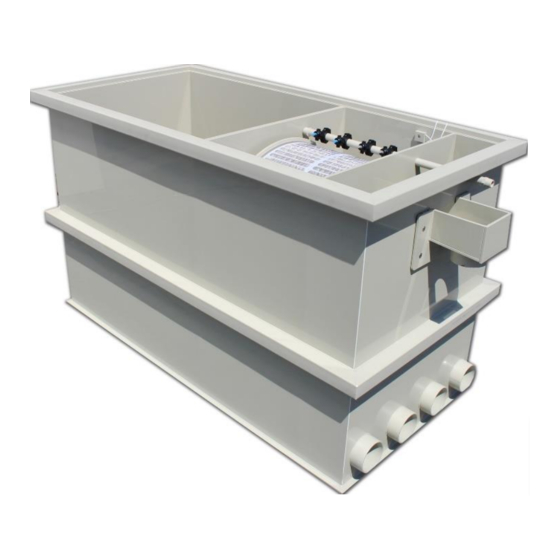
responsible for reporting any transport damage to the 3.1 Description of the drum filter transporter and/or Ma-koi within 24 hours. The untimely The Bio-drum and/or the drum filter consists of a drum checking and reporting of transport damage may lead to sieve that is driven by an electro-motor. -
Page 5: Usage Of The Filter
PLEASE NOTE! ROTATING PARTS! Compare the electrical specifications on the type plate of AUTOMATIC RESTART! the device with the specification of the connection on the power supply. Ensure that the device is connected to a Take adequate measures to ensure that socket with earth and a ground leak switch with a all rotating parts are secured against maximum residual current of 30 mA (DIN VDE 0100T739). -
Page 6: Commissioning Of The Filter
Damage as a result of freezing of water is not covered by installation, the filter During the warranty. may not be connected to the power supply. Remove the plug 7.2 Connecting Gravity from the socket and make sure that the filter cannot be If the water flows into the drum with gravity flow, the activated. -
Page 7: Setting Of Sensor/Float
So pay attention to the following, with regard to a If the float is in lowest position (4), the filter will postpone maximum flow per pipe: the rinsing function, creating more pressure in the drum (not recommended), although in case of a calamity or too The pond water level should not fall too much. -
Page 8: Connecting Motor Drum Filter
You connect the exit of the Rinse pump with a hose (or 7.2.5 Coil frequency even better, PVC) to the ¾’’ cable that is assembled to the Make sure that the coil frequency is not too high. If the pipe with the nozzles. drum is installed in an existing system, the coil frequency will be high over the first days/weeks, because the pond is being ‘cleaned’. -
Page 9: Control Electronics
The control cabinet must be connected to an approved, earthed socket. The electronics must be installed vertically. The electronics may not be assembled unprotected during rain. Per connected side, a maximum of 660 W of auxiliary equipment may be connected. Functions of the green button: Press 1 time: Filter will start to rinse. -
Page 10: Control Electronics For Drum 100 And Bio-Drum 200 With Flushing Channel Connection
magnet contact is connected to 3-4. If it is not connected, the drum will not respond to opening or closing the lid. Display flashes Red-White: Dry-running protection is engaged. You can reset this by pressing the button at the front of the cabinet (drum will then rinse 1 time) if the float is in upper position again. -
Page 11: Connection Of Return To Pond
Specifications may vary as a consequence of technical improvements. Maximum Should this filter in some way not meet the requirements Bio30: 53 cm Drum 30: 20 cm you would expect from Ma-koi, then contact the dealer Bio40: 53 cm Drum 50: 40 cm where you purchased the filter or contact Ma-koi directly.
Need help?
Do you have a question about the Drum 50 and is the answer not in the manual?
Questions and answers