Sign In
Upload
Download
Table of Contents
Contents
Add to my manuals
Delete from my manuals
Share
URL of this page:
HTML Link:
Bookmark this page
Add
Manual will be automatically added to "My Manuals"
Print this page
×
Bookmark added
×
Added to my manuals
Manuals
Brands
Deqx Manuals
Computer Hardware
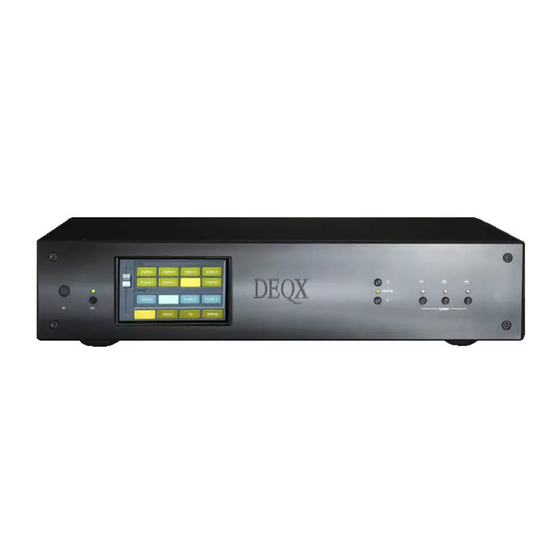
PreMATE
User manual
Deqx PreMATE User Manual
High definition preamp processor
Hide thumbs
1
2
3
4
Table Of Contents
5
6
7
8
9
10
11
12
13
14
15
16
17
18
19
20
21
22
23
24
25
26
27
28
29
30
31
32
33
34
35
36
37
38
39
40
41
42
43
44
45
46
47
48
49
50
51
52
53
54
55
56
57
58
59
60
61
62
63
64
65
66
67
68
69
70
71
72
73
74
75
76
77
78
79
80
81
82
83
84
85
86
87
88
89
90
91
92
93
94
95
96
97
98
99
100
101
102
103
104
105
106
107
108
109
110
111
112
113
114
115
116
117
118
119
120
121
122
123
124
125
126
127
128
129
130
131
132
133
134
135
136
137
138
139
140
141
142
143
144
145
146
147
148
149
150
151
152
153
154
155
156
157
158
159
160
161
162
163
164
165
166
167
168
169
170
171
172
page
of
172
Go
/
172
Contents
Table of Contents
Troubleshooting
Bookmarks
Table of Contents
Table of Contents
1 Welcome to Deqx
System Configurations
How Deqx® Calibration Works
How to Use this Manual
Deqx Pert Consultation
Warranty Registration
Obtaining Support
Anote on Deqx Legacy Products
2 Installation and Connectivity
Unpacking the Unit
Rear Panel Overview
Analog Inputs
Notes on Making and Breaking Connections
Digital Inputs
Analog Outputs
Digital Outputs
Control / Data Interfaces
Trigger Output
Measurement Microphone
Power
Analog Output Example
Digital Output Example
3 The Front Panel
Buttons and Indicator Leds
Standby
Profile Selection
Volume
Touchscreen Display
Special Status Indicators
4 The Deqx Remote
Profile Selection
Input Selection
Olume Mute and Standby
Preference Eq
Table 1. Mapping of EQ Bands to Profile Leds
Table 2. Default Frequency and Q
Notes on Preference EQ
User Mode
Battery Replacement
5 Getting Started with Deqx-Cal
Install the Software
Atour of Deqx-Cal
The DEQX-Cal User Interface
The Main Display Area
The Control Panel and IO Manager
Create a New Project
Connect the Deqx and Power It on
Set up the Measurement Microphone
6 Speaker Measurement
Speaker and Microphone Positioning
Figure 1. Speaker Measurement Setup
Start the Speaker Measurement Wizard
Set Speaker Measurement Parameters
Select the Speaker to be Measured
Set the Measurement Signal Level
Run the Speaker Measurement
Complete the Measurement
7 Speaker Calibration
Create a Calibration Template
Set the Impulse Response Time Window
Set Smoothing
Set the Correction Frequency Limits
Table 3. Lower Frequency Limit Vs Window Length
Set Correction Parameters
Generate the Correction Set
Verify the Correction Filter
Creating Additional Correction Sets
Renaming Correction Filters
T O Re - Open a Calibration Template
8 Subwoofer Measurement and Calibration
Measure the Subwoofer
Figure 2. Subwoofer Measurement Setup
Calibrate the Subwoofer
9 Configuring the Deqx
What Is a Configuration
Create a Configuration
The Configuration Window
Renaming Profiles
The Filter Properties Dialog
Main Filter Tab
Limit Filters Tab
Time/Level Tab
Advanced Tab
Create a Profile with no Correction
Copy Filter Settings between Speakers
Create a Correction Profile
Add a Subwoofer or Subwoofers
Upload the Configuration to the Deqx
Anote on Limit Filters and Delays for Advanced Users
T O Re - Open a Configuration
10 Room Measurement
Room Measurement Setup
Figure 3. Room Measurement Setup
Start the Room Measurement Wizard
Set Room Measurement Parameters
Set Location and Speakers to be Measured
Run the Measurement
T O Open Existing Room Measurements
Assess the Initial Measurement
Speaker Location
Subwoofer Location
Microphone Location
11 Subwoofer Integration
Iew the Room Measurement
Level Matching
Level Matching Stereo Subwoofers
Level Matching a Mono Subwoofer
Calculate Gain Adjustments
Time Alignment
Determine Speaker Delay
Determine Subwoofer Delay
Calculate Relative Delays
Update the Configuration
R Emeasure the Room
12 Room Eq
How to Use Manual Eq
Tips for Manual Room EQ
How to Use Autoset Eq
Fine - Tune Your Results
Update the Configuration
Copying Room EQ Filters
Viewing Multiple Room Measurements
Using Multiple Room Measurements
13 Active Multi-Way Speakers
Active Configurations with Deqx
Figure 4. Passive Two-Way Speaker
Active Speaker Design Considerations
Active Two-Way Speaker
Figure 5. Active Two-Way Speaker
Active Three-Way Speaker
Figure 6. Active Three-Way Speaker
Hybrid Active-Passive Speakers
Figure 7. Hybrid Active-Passive Three-Way Speaker
Measuring Multiple Drivers
Importing Measurements
Calibrating an Active Speaker
Anechoic Tab
Smoothed Measurements Tab
Crossovers Tab
Limits Tab
Configuring an Active Speaker
Correction Filters for Speakers
Correction and Limit Filters for Subwoofers (Two-Way)
Correction and Limit Filters for Woofer-MID Crossover (Three-Way)
Viewing Correction and Limit Filters
Upload to DEQX
Woofer-MID Time Alignment and Level Adjustment (Three-Way)
Woofer Calibration with an in - Room Measurement
Configuring an Active Speaker Without Correction
Subwoofer Integration for a Three - Way Speaker
Advanced Configuration Options
14 Using Multiple Deqx Units
Master - Slave Control
Multi - Amp Stereo Configurations
Figure 8. Connections between Master and Slave DEQX Units
Figure 9. Multi-Way Active Speaker with Master and Slave DEQX
Table 4. Multi-Amp Active Configurations with Two DEQX Units
Multichannel or Home Theater Configurations
Figure 10. Multichannel or Home Theater DEQX System
15 Deqx Control Panel Reference
Io Manager
Input Select
Inputs
Outputs
Setup
Status
System
Equalizer Tab
Configuration Tab
Filters Tab
16 Data Viewer Reference
T O Open a Measurement from the Project Explorer
T O Open Measurements with the Viewer Wizard
The Data Viewer Window
Operating on Measurements
Viewing the Impulse Response
17 Project Explorer Reference
Working with Projects
Project Folders
Explorer Operations
Working with Multiple Projects
18 Options and Customization
Options Dialog
Configuration Tab
Chart Tab
DEQX Tab
Customize Dialog
Commands Tab
Toolbars Tab
Keyboard Tab
Menu Tab
Options Tab
Adding Text Labels to the Configuration Toolbar
Making an Auxiliary Chart Toolbar
Specifications
Usb Audio
Networked Streaming Audio
Analog Gains
Table 5. Analog Input Sensitivity Jumper Settings
Table 6. Analog Output Gain Jumper Settings
Firmware and Eeprom
Table 7. Firmware Upgrade File by DEQX Model
Troubleshooting
Index
Advertisement
Quick Links
1
System Configurations
Download this manual
High Definition Preamp Processor
HDP-4
HDP-5
PreMATE
PreMATE+
HDP-Express II
User Manual
Applies to DEQX-Cal version 3.02.
Revision 1.
Table of
Contents
Previous
Page
Next
Page
1
2
3
4
5
Advertisement
Table of Contents
Need help?
Do you have a question about the PreMATE and is the answer not in the manual?
Ask a question
Questions and answers
Related Manuals for Deqx PreMATE
Computer Hardware DEQX HDP-4 User Manual
High definition preamp processor (172 pages)
Computer Hardware DEQX HDP-5 User Manual
High definition preamp processor (172 pages)
Computer Hardware DEQX HDP-Express II User Manual
High definition preamp processor (172 pages)
Table of Contents
Print
Rename the bookmark
Delete bookmark?
Delete from my manuals?
Login
Sign In
OR
Sign in with Facebook
Sign in with Google
Upload manual
Upload from disk
Upload from URL


Need help?
Do you have a question about the PreMATE and is the answer not in the manual?
Questions and answers