Advertisement
Quick Links
8
027908
4 3 9 3 7 6
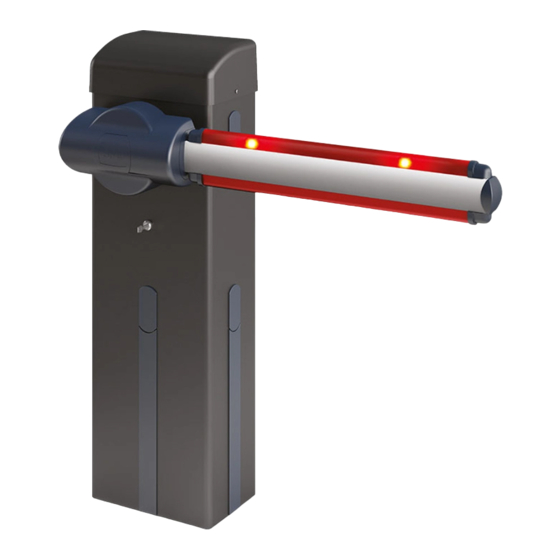
AUTOMATISMO ELETTROMECCANICO PER BARRIERA VEICOLARE
ELECTROMECHANICAL CONTROL DEVICE FOR VEHICULAR BARRIERS
AUTOMATISME ELECTROMECANIQUE POUR BARRIERE POUR VÉHICULES
ELEKTROMECHANISCHER ANTRIEB FÜR FAHRZEUGSCHRANKEN
AUTOMATISMOS ELECTROMECANICOS PARA BARRÉRAS VEHICULAR
ELEKTROMECHANISCH AUTOMATISERINGSSYSTEEM VOOR SLAGBOOM
Attenzione! Leggere attentamente le "Avvertenze" all'interno! Caution! Read "Warnings" inside carefully! Attention! Veuillez lire attentivement les Avertissements qui se trouvent à l'intérieur!
Achtung! Bitte lesen Sie aufmerksam die „Hinweise" im Inneren! ¡Atención¡ Leer atentamente las "Advertencias" en el interior! Let op! Lees de "Waarschuwingen" aan de binnenkant zorgvuldig!
Advertisement

Related Manuals for BFT GIOTTO 60 S BT


Summary of Contents for BFT GIOTTO 60 S BT
- Page 1 027908 4 3 9 3 7 6 AUTOMATISMO ELETTROMECCANICO PER BARRIERA VEICOLARE ELECTROMECHANICAL CONTROL DEVICE FOR VEHICULAR BARRIERS AUTOMATISME ELECTROMECANIQUE POUR BARRIERE POUR VÉHICULES ELEKTROMECHANISCHER ANTRIEB FÜR FAHRZEUGSCHRANKEN AUTOMATISMOS ELECTROMECANICOS PARA BARRÉRAS VEHICULAR ELEKTROMECHANISCH AUTOMATISERINGSSYSTEEM VOOR SLAGBOOM Attenzione! Leggere attentamente le “Avvertenze” all’interno! Caution! Read “Warnings” inside carefully! Attention! Veuillez lire attentivement les Avertissements qui se trouvent à l’intérieur! Achtung! Bitte lesen Sie aufmerksam die „Hinweise“...
- Page 2 INSTALLAZIONE VELOCE-QUICK INSTALLATION-INSTALLATION RAPIDE SCHNELLINSTALLATION-INSTALACIÓN RÁPIDA - SNELLE INSTALLATIE 45° 90° - GIOTTO 30-60 S BT / GIOTTO 30-60 BT...
- Page 3 Con scavo di fondazione: // With foundation plate embedded in ground: // Avec tranchée de fondation: // Mit Fundamentgraben: // Con excavación de cimentación: // Met uitgraving: Non in dotazione Not supplied Ne sont pas fournis Nicht im lieferumfang No asignadas en el equipamiento base Niet meegeleverd Con tiranti: // With anchor bolts: // Avec tirants: // Mit Ankerbolzen: // Con tirantes: // Met spankabels: Non in dotazione...
- Page 4 Non in dotazione Not supplied Ne sont pas fournis Nicht im lieferumfang No asignadas en el equipamiento base Niet meegeleverd 45° Montaggio Asta, Assembly of boom, Montage de la barre, Per montaggio aste fare riferimento ai manuali Montage der Stange, Montaje mástil, Montage stang. See manuals for boom assembly Pour monter les barres consultez les manuels Bitte nehmen Sie für die Montage der Stange auf die Handbücher Bezug...
- Page 5 GIOTTO 30-60 S BT / GIOTTO 30-60 BT -...
- Page 6 Bilanciamento Asta, Boom balancing, Equilibrage de la barre, Auswuchtung der Stange, Balance del mástil, Balancering stang. 45° 0° + 45 ° 90 ° + 45 ° 45° OK - 45 ° - 45 ° 0 ° Collegamenti morsettiera, Terminal board wiring, Branchements sur le bornier, Anschlüsse Klemmleiste, Conexiones tablero de bornes, Aansluitingen aansluitkast.
- Page 7 MENU SIMPLIFIÉ PRESET DEFAULT PARAMÈTRES Monter Temps Fermeture Automatique Descendre Couple ouverture Confirmation/Allumage Couple fermeture afficheur Vitesse Ouverture Vitesse Fermeture Sortir du menu (GIOTTO BT 30/ (GIOTTO BT 30/ (GIOTTO BT 30/ (GIOTTO BT 30/ (GIOTTO BT 30/ GIOTTO S BT 30) GIOTTO S BT 30) GIOTTO S BT 30) GIOTTO S BT 30)
- Page 8 Modi care i valori seguenti no a raggiungere il movimento dell’asta desiderato, Edit the following values until you are happy with boom movement, Modi ez les valeurs suivantes jusqu’à ce que la barre se déplace de la façon voulue, Die folgenden Werte verändern, bis die gewünschte Bewegung der Stange erzielt wird, Modi car los siguientes valores hasta lograr el movimiento deseado del mástil, Onderstaande waarden wijzigen tot de beweging van de gewenste stang bereikt wordt.
- Page 9 Assicurarsi che la molla non sia in tensione, e l’asta non sia montata. Make sure the spring is not under tension and the boom is not fitted. Véri ez si le ressort n'est pas en tension et si la tige n'est pas montée. Sicherstellen, dass die Feder nicht gespannt und die Stange nicht montiertist.
- Page 10 MONTAGGIO LAMPEGGIANTE, FITTING THE FLASHING LIGHT, MONTAGE DU CLIGNOTANT, MONTAGE DER BLINK- LEUCHTE, MONTAJE DEL INDICADOR PARPADEANTE, MONTAGE FOTOCEL Installazione lampeggiante Per l’installazione del lampeggiante fare riferimento ai manuali del lampeggiante Installing the ashing light See the ashing light's manual for instructions on installing the ashing light Installation du clignotant Pour monter le clignotant consultez le manuel du clignotant Bitte nehmen Sie für die Installation der Blinkleuchte auf das Handbuch der Blinkleuchte Bezug...
- Page 11 - GIOTTO 30-60 S BT / GIOTTO 30-60 BT...
- Page 12 ACCES AUX MENUS Fig. 1 Monter Descendre Con firmation / Allumage a icheur para . 1 Voir MENU Sortir du menu para . 2 PARAMÈTRES para . . . logic logic. 1 Voir MENU LOGIQUES logic. 2 logic..radio touche cachee relacher...
- Page 13 LA DÉCLARATION DE CONFORMITÉ PEUT ÊTRE CONSULTÉE SUR LE SITE: particulier, l’écrasement, l’entraînement et le cisaillement par la partie guidée WWW.BFT.IT DANS LA SECTION PRODUITS. et les parties voisines. - Une fois l’installation accomplie, s’assurer que le réglage du moteur est correct et que les systèmes de protection et de déverrouillage fonctionnement correctement.
-
Page 14: Manuel D'installation
MANUEL D’INSTALLATION verticale). Le portillon du caisson doit être dirigé vers l’intérieur de la 2) GENERALITES propriété. En se plaçant au milieu du passage, si le caisson est àgauche, la Barrière électromagnétique compacte adaptée pour limiter les zones privées, barrière est gauche, si le caisson est àdroite, la barrière est droite. les parkings, les accès uniquement prévus pour les véhicules. - Page 15 MANUEL D’INSTALLATION normes harmonisées ou nationales ayant une section indiquée aux protections Eliminer Liste en amont, à la consommation de l’appareil et aux conditions d’installation. effacer 64 ATTENTION! Elimine complètement de la mémoire du récepteur toutes les radiocommandes mémorisées. BORNE DESCRIPTION Lecture code récepteur cod RX Alimentation 230V +/- 10% 50Hz (1=L) (2=N)
- Page 16 MANUEL D’INSTALLATION - Les barres de sécurité du vantail MASTER doivent être connectées à l’unité 4) Avec l’autodiagnostic de l’unité de commande (voir tableau ACCES AUX de commande MASTER; MENU), contrôler si les fonctions sont exactes. Localiser éventuellement - Les barres de sécurité du vantail SLAVE doivent être connectées à l’unité la cause du défaut.
- Page 17 MANUEL D’INSTALLATION TABLEAU “B” MENU LOGIQUES - logic Cochez Logique default Dé nition réglage Description accompli Active la fermeture automatique. Temps Fermeture Exclut la fermeture automatique. Automatique Remarque: la fermeture automatique à la relâche du TIMER ne peut pas être désactivée. Blocage des L’impulsion de start n’a aucun effet pendant la phase d’ouverture.
- Page 18 MANUALE D’USO: MANOVRA MANUALE - USER’S MANUAL: MANUAL OPERATION- MANUEL D’UTILISATION: MANŒUVRE MANUELLE - BEDIENUNGSANLEITUNG: MANUELLES MANÖVER- MANUAL DE USO: ACCIONAMIENTO MANUAL - GEBRUIKSHANDLEIDING: MANUEEL MANOEUVRE Fig. Y GIOTTO 30-60 S BT / GIOTTO 30-60 BT -...
- Page 19 - When cleaning the outside, always cut o mains power. AVVERTENZE PER L’UTILIZZATORE ( I ) - Keep the photocells’ optics and illuminating indicator devices clean. Check that no branches or shrubs interfere with the safety devices. ATTENZIONE! Importanti istruzioni di sicurezza. Leggere e seguire attentamente le - Do not use the automated system if it is in need of repair.
- Page 20 dass Sie mit ihm die für Ihre Anwendung erforderlichen Leistungen erzielen werden. y mantenimiento. Para permitir el acceso, activar el desbloqueo de emergencia (si estuviera Dieses Produkt entspricht den anerkannten Normen der Technik sowie den Sicherheitsbestim- presente). mungen, falls es von quali ziertem Fachpersonal (professioneller Installateur) ordnungsgemäß - Para cualquier intervención directa en la automatización o en la instalación no prevista por el installiert wird.
- Page 21 CZECH REPUBLIC BFT USA 69800 Saint Priest BFT CZ S.R.O. Boca Raton POLAND www.bft-france.com Praha www.bft-usa.com BFT POLSKA SP. Z O.O. www.bft.it GERMANY 05-091 ZĄBKI CHINA BFT TORANTRIEBSSYSTEME Gmb H www.bft.pl TURKEY BFT CHINA 90522 Oberasbach BFT OTOMATIK KAPI SISTEMELERI...
Need help?
Do you have a question about the GIOTTO 60 S BT and is the answer not in the manual?
Questions and answers