Advertisement
OWNER & OPERATOR
INSTRUCTION MANUAL
Model No.
GS-12A
GS-12M
IMPORTANT SAFETY NOTICE
To ensure safe and trouble free performance of you new
German knife slicer, we suggest that all personnel who will
use and maintain the slicer read and understand the manual
before operating the equipment. Should there be any
questions or if we can be of further assistance, please call us
toll free at (800) 500-3519.
www.turboairinc.com
For service contact:
German Knife Inc.
1-800-500-3519
www.turboairinc.com
Advertisement
Table of Contents

Related Manuals for German Knife GS-12M


Summary of Contents for German Knife GS-12M
- Page 1 IMPORTANT SAFETY NOTICE To ensure safe and trouble free performance of you new German knife slicer, we suggest that all personnel who will use and maintain the slicer read and understand the manual before operating the equipment. Should there be any questions or if we can be of further assistance, please call us toll free at (800) 500-3519.
-
Page 2: Table Of Contents
Installation - Proper Grounding Operating Instructions Manual Operation Automatic Operation Cleaning Knife Sharpening Simple Maintenance and Repair Optimal Slicing Performance Troubleshooting Guide Warranty Information German Knife Industries 4184 E. Conant St., Long Beach, CA 90808 Phone : 800-500-3519 Fax : 310-900-1066 www.turboairinc.com... - Page 3 Knife has put several warning labels in English on its slicers. Spanish labels are packed in the shipping carton and can replace the English labels at the owner’s option. For any warning label copies, please contact your nearest representative or German Knife directly for these items at no charge.
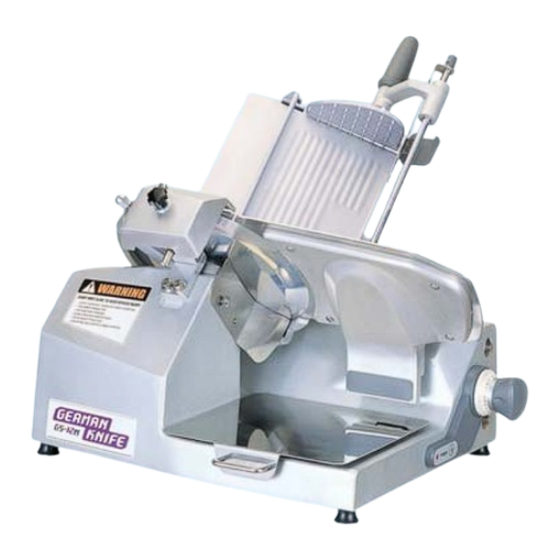
- Page 4 KEY COMPONENT OF GERMAN KNIFE SLICER Food Chute Knife Sharpener End Weight Food Chute Handle Receiving Area Slice Thickness Dial Start/Stop Switch Speed Display Auto Engage Lever Chute Speed Controls GS-12A FRONT VIEW Knife Ring Guard Knife Control Panel - Knife Motor Start/Stop...
- Page 5 • BEFORE CLEANING, SHARPENING, SERVICING, OR REMOVING ANY PARTS, always turn slicer off, turn slice thickness dial clockwise to closed position, remove chute unplug slicer. • USE ONLY GERMAN KNIFE SLICER ACCESSORIES properly installed.
- Page 6 You have no recourse to damage after 24 hours. You should receive with the slicer, rubber feet, mineral oil, owner & operator manual and wall chart. Contact German Knife or your supplier if you did not receive all of these materials. TO AVOID SERIOUS PERSONAL INJURY PROPERLY INSTALL SLICER IN ADEQUATE WORK AREA.
- Page 7 FROM THE POWER CORD OR USE ANY ADAPTER PLUG. (SEE FIG. 5-1, 5-2) 6. Post German Knife safety tips and wall chart close by in a location within easy view of operator. 7. Inspect slicer to ensure all parts have been provided.
-
Page 8: Operating Instructions
OPERATING INSTRUCTIONS SHARP KNIFE TO AVOID SERIOUS PERSONAL INJURY • NEVER touch this machine without training and authorization from your supervisor. You must be at least 18 years old. Read owner and operator manual first. • NEVER TOUCH KNIFE. Keep hands and arms away from all moving parts. •... -
Page 9: Manual Operation
OPERATING INSTRUCTIONS MANUAL SLICER OPERATION : 1. With slicer off, pull the food chute completely toward you and place the product on the food chute. Slice only boneless unfrozen product with the slicer. Use the end weight to hold the food product in place. -
Page 10: Automatic Operation
6. To make the food chute move automatically, move Auto Engage Lever into “AUTOMATIC” position (Fig. 8-1). - Model GS-12A - To adjust the chute speed press the slower or faster buttons (Fig 8-2). The slicer defaults to speed 5 when slicer is unplugged and plugged back in. - Page 11 10. When finished using slicer, make sure slicer is turned “OFF”, the slice thickness dial is turned completely clockwise and the Auto Engage Lever is in the “MANUAL” position. AUTOMATIC SLICER OPERATION : MODEL # STROKES PER MINUTES VARIABLE GS-12A 20 - 60 9 SPEED VARIABLE...
-
Page 12: Cleaning
CLEANING SHARP KNIFE TO AVOID SERIOUS PERSONAL INJURY • BEFORE CLEANING, SHARPENING, SERVICING, OR REMOVING ANY PARTS, always turn slicer off, turn slice thickness dial all the way clockwise, remove chute and unplug slicer. • NEVER attempt to clean slicer with the knife running. •... - Page 13 CLEANING DISASSEMBLY & CLEANING : 1. Turn slice off. 2. Close thickness dial. 3. FOOD CHUTE : Remove the food chute by loosening the food chute release knob that fastens the food chute to the chute arm. Lift the food chute off the chute arm. 4.
- Page 14 CLEANING CAUTION • DO NOT put components in dishwasher. • Dilute detergent per supplier’s instruction. • DO NOT hose down or pressure wash any part of the slicer. • NEVER use scrubber pad, steel wool, or abrasive material to clean the slicer. •...
- Page 15 CLEANING CAUTION DO NOT ALLOW MOISTURE TO GET INTO KNIFE HUB. 9. Now replace the knife cover on top of the knife. Align the bottom notches of the knife cover with the knobs located at the bottom of the knife ring guard (Fig.13-1). The top right of the knife cover also has a hole that fits over a locator pin at the top of the knife ring guard.
- Page 16 CLEANING REASSEMBLY : 1. Install food chute to the original position on the chute arm. Tighten food chute release knob securely to prevent any “play” between the food chute and chute arm. Fig. 14-1 2. Some manual slicers are equipped with a cleaning brace which raises the slicer to allow cleaning underneath.
-
Page 17: Knife Sharpening
KNIFE SHARPENING SHARP KNIFE TO AVOID SERIOUS PERSONAL INJURY • NEVER touch rotating knife. • ALWAYS keep hands clear of all moving parts. • ALWAYS turn off slicer, return Auto Engage Lever to “MANUAL” position, turn slice thickness dial completely clockwise and remove food chute before sharpening. •... - Page 18 KNIFE SHARPENING PREPARING TO SHARPEN : Turn slicer off by pressing the stop button (Automatics only) or by pushing the on/off tab inward. Make sure Auto Engage lever is in “MANUAL” position. (Automatics units only) Fig.16-1 1. Turn slice thickness dial completely clockwise so that slicer table covers knife edge.
- Page 19 KNIFE SHARPENING SHARPENING THE KNIFE : 1. Pull on knob #1 (Fig.17-1) keeping it extended. Also, hold onto lever #2 and swing sharpener in position by lifting upward. 2. Pull out knob #3 (Fig.17-2) 3. Turn knife motor on by pressing the start button. Push the lever counterclockwise (Fig.17-3) to bring stones into contact with the knife.
-
Page 20: Simple Maintenance And Repair
• USE ONLY GERMAN KNIFE SLICER ACCESSORIES properly installed. LUBRICATION : Various slicer parts need to be lubricated periodically using mineral oil. German Knife oil is a light, tasteless and odorless mineral oil that will not contaminate or impart odors or taste to the sliced product. - Page 21 SIMPLE MAINTENANCE AND REPAIR 1. Chute Slide Rods It is necessary to lubricate the food chute slide rods with mineral oil weekly or when it is hard to push. A. Close slicer table. B. Pull food chute handle completely forward (toward operator (Fig.19-1) C.
-
Page 22: Optimal Slicing Performance
It will be necessary to have the sharpener assembly adjusted lower to maintain proper alignment with the knife. We recommend an authorized German Knife Service Company to perform all adjustments and preventive maintenance. By adequately maintaining your slicer, it will provide years of dependable service. The only... -
Page 23: Troubleshooting Guide
TROUBLESHOOTING GUIDE SYMPTOM POSSIBLE CAUSE POSSIBLE SOLUTION Slicer not plugged in Plug-in slicer Slicer will not start breaker tripped Re-set breaker at power box Knife cover removed or not Chute speed light flashing “1” Install knife cover properly installed The power indicator light Knife cover removed or not Install knife cover will flash (Manual type). -
Page 24: Limited Warranty
All warranty claims must be authorized by German Knife or Radiance prior to the purchase of parts or labor. Failure to comply with these warranty policies will result in the voiding of warranty claims.
Need help?
Do you have a question about the GS-12M and is the answer not in the manual?
Questions and answers