Table of Contents
Advertisement
Advertisement
Table of Contents

Related Manuals for LumiraDx Instrument


Summary of Contents for LumiraDx Instrument
- Page 1 Platform User Manual...
- Page 3 Platform User Manual...
-
Page 4: Symbols
Caution - Consult Instructions for Use. Refer to safety-related warnings and precaution notes in the Instructions for Use accompanying this product, e.g. Platform User Manual, Test Strip Product Insert or Quality Control Pack Insert. Indicates that the Instrument can be potentially infectious due to the samples or reagents used. -
Page 5: Instrument Icons And Buttons
Instrument icons and buttons The icons and buttons that appear on the touch-screen during normal operation of the LumiraDx Instrument are shown here, along with their respective meanings. Indicates the patient’s biological sample. Return to the home screen. Info button - used to reveal additional information, such as test or patient information. -
Page 6: Abbreviations
Abbreviations Centers for Disease Control and Prevention Electronic Health Record Health Care Professional Identification Quality Control RFID Radio-Frequency Identification United Kingdom Universal Serial Bus World Health Organization Hospital Information Service Laboratory Information Service Date of Birth... -
Page 7: Important Safety Information
15 cm between the LumiraDx Instrument and their heart device. This User Manual and its content is copyright of LumiraDx Group Limited, 2018 - © All rights reserved, worldwide. Content should be used for use of the LumiraDx Products only and in line with instructions provided. -
Page 9: Overview Of The Lumiradx Platform
Overview of the LumiraDx Platform The LumiraDx Platform is a point of care system which is used for in vitro diagnostic tests. It comprises a portable LumiraDx Instrument and a LumiraDx Test Strip for the required test. This allows healthcare professionals to perform tests using small sample volumes and to view results quickly on the Instrument touch- screen. -
Page 10: Table Of Contents
Contents Symbols Instrument icons and buttons Abbreviations Important safety information Overview of the LumiraDx Platform About this Platform User Manual Introduction 1.1 Intended use 1.2 Important information 1.3 Summary of the test procedure 1.4 Principles of operation 1.5 Storage and operating conditions 1.6 Warnings... - Page 11 4.9 Result History Cleaning and Disinfecting Software Updates Troubleshooting Maintenance and Disposal Instrument Specifications Ancillary Devices 10.1 LumiraDx Barcode Scanner 10.2 LumiraDx USB Memory Stick 10.3 LumiraDx Connect Hub 10.4 LumiraDx Connect App Customer Service 11.1 Warranty References Compliance 13.1 Environmental Practises...
-
Page 12: About This Platform User Manual
“Troubleshooting” chapter. For questions not answered in the LumiraDx Platform User Manual or Product Inserts, please contact Customer Service. Refer to the “Customer Service” chapter of this Platform User Manual for contact information. Please note: Instructions are combined with example screenshots. -
Page 13: Introduction
The LumiraDx Instrument (hereafter referred to as Instrument) is intended for use with the LumiraDx family of Test Strips (hereafter referred to as Test Strips) for the in vitro quantification of various analytes in a range of biological samples (whole blood, plasma, serum, urine) by trained healthcare professionals. -
Page 14: Principles Of Operation
1.4 Principles of operation The LumiraDx platform utilises unitary test strips that contain all of the reagents necessary to perform a test. The Instrument automatically processes the test strip including sample movement, reagent mixing, thermal control and fluorescent reading of the reaction product and provides a calibrated, quantitative result. -
Page 15: Storage And Operating Conditions
The Instrument can be stored or transported at a temperature between -10°C and 50°C (14°F and 122°F). To power on and access the Instrument result history, operate the LumiraDx Instrument at a temperature between 15°C and 30°C (59°F and 86°F), and at a relative humidity between 10 % and 90 % (non-condensing). -
Page 16: Warnings
Dispose of all Test Strips used for patient testing safely in accordance with local regulations and procedures. • Follow the test operating conditions in the LumiraDx Test Strip Product Insert. • Follow the information on correct handling of Test Strips in the LumiraDx Test Strip Product Insert. 14 - Introduction... - Page 17 Follow the test operating conditions in the LumiraDx Test Strip Product Insert. • Follow the information on correct handling of Test Strips in the LumiraDx Test Strip Product Insert. Cleaning and disinfecting Do NOT attempt to put any objects or cleaning materials inside the Test •...
-
Page 18: Precautions
Only operate the LumiraDx Instrument for its intended purpose and in accordance with this Platform User Manual and warnings. If the Instrument is used in a manner not specified in the Platform User Manual, protection provided by the equipment will be impaired. The LumiraDx Instrument (including power supply unit) is designed to operate within the manufacturer specifications. -
Page 19: Help And Support
The documents can also be found at www.lumiradx.com. If error messages appear on the screen, refer to the “Troubleshooting” chapter in this Platform User Manual. For questions not answered in the LumiraDx User Manuals or Product Inserts, please contact Customer Service. Refer to the “Customer Service”... -
Page 20: Getting Started
LumiraDx Instrument LumiraDx Power Supply Unit Platform User Manual Platform Quick Reference Guide (including passwords for Standalone operation) Inspect the Instrument and packaging for damage before use. Report any damage to Customer Service. Refer to the “Customer Service” chapter of this Platform User Manual for contact information. -
Page 21: User Id
User settings will automatically be downloaded to the Instrument if connecting to LumiraDx Connect Manager. Refer to the “Instrument operation” chapter of this Platform User Manual for more information on first time setup. Getting Started - 19... -
Page 22: The Lumiradx Instrument
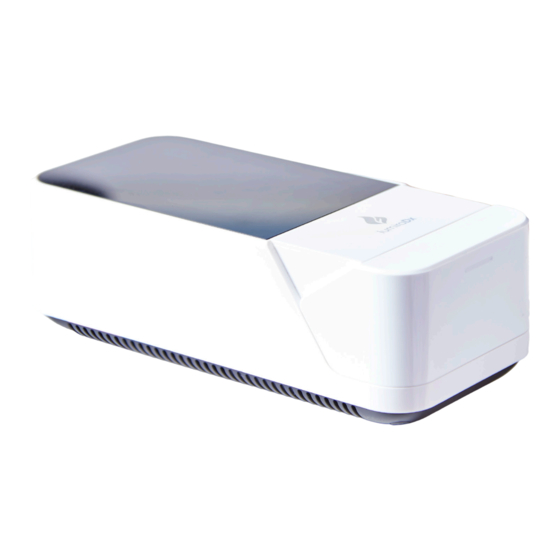
2.6 The LumiraDx Instrument The Instrument is used in conjunction with the LumiraDx family of Test Strips for the in vitro quantification of various analytes in a range of biological samples (whole blood, plasma, serum, urine). Touch-screen RFID reader Door... -
Page 23: Power Supply
When the Instrument powers off, all result records will remain in the Instrument memory and any Instrument settings will be maintained. Refer to the “Instrument Specifications” chapter of this Platform User Manual for additional information on operating conditions and complete Instrument specifications. -
Page 24: Lumiradx Lot Calibration File Installation
2.8 LumiraDx Lot Calibration File installation LumiraDx Lot Calibration Files are required to provide the Instrument with the information needed to perform diagnostic tests. Every manufactured Lot of Test Strips has a unique Lot Calibration File. This contains information about the test method, the Lot number, the calibration data and expiration date. -
Page 25: Extended Functionality And Operating Modes
2.9 Extended functionality and operating modes The LumiraDx Instrument can be used in Standalone mode, or two Connected modes: “Managed” and “EHR Connected” (meaning connected to the organization’s electronic health record). Refer to the LumiraDx Connect User Manual for further information. -
Page 26: Preparation For Testing
Discard the Test Strips if they are past the expiration date. If within the expiry date open the Test Strip Carton, take out one Test Strip, and remove it from the foil pouch. Refer to the LumiraDx Test Strip Product Insert for further information on handling and stability. 3.2 Inserting and removing Test Strips Hold the Test Strip by gripping the blue label end with the label facing upward. - Page 27 Test Strip contacts Alignment rib Line up black line on Test Strip with black line on Instrument. Test type Sample Application Area Apply sample or Quality Control solution AFTER inserting Test Strip. Note: Test Strip may appear differently. Preparation for Testing - 25...
-
Page 28: Sample Collection
Refer to Test Strip Product Insert for information on sample types and collection. Optionally, a validated transfer tube may be used to collect the sample. Details of LumiraDx recommended transfer tubes are available at www.lumiradx.com. Collecting a capillary blood sample from a finger stick Increasing the blood flow in the finger will help to get a good drop of blood. - Page 29 Collecting a capillary blood sample using a transfer tube You may use a transfer tube to transfer the capillary sample from the finger stick to the Sample Application Area of the Test Strip. Follow the steps described in the previous section to increase blood flow to the finger.
-
Page 30: Sample Application Using Direct Finger Stick Sampling
3.4 Sample application using direct finger stick sampling Ensure that you have a large hanging blood drop on the finger. Apply the sample by holding the finger and the hanging blood drop over the circular Sample Application Area on top of the inserted Test Strip. Size of hanging blood drop Sample application using direct finger stick sampling... -
Page 31: Sample Application Using Other Sample Types
Dispose of the transfer tube safely in accordance with local regulations and procedures. 3.5 Sample application using other sample types Refer to LumiraDx Test Strip Product Inserts for information on procedures to transfer other sample types to the Sample Application Area of the Test Strip. Use the recommended transfer procedure to dispense a small sample of one drop onto the circular Sample Application Area on top of the inserted Test Strip. -
Page 32: Instrument Operation
Platform User Manual are intended only as examples. • You can only hear the sounds on the LumiraDx Instrument when they are turned on. This Platform User Manual presumes that the sounds are turned on. 4.1 Home Screen... -
Page 33: Settings Menu
General user settings menu All users can set display and sound preferences in the Settings menu. Refer to the “Instrument Operation” chapter in this Platform User Manual for instructions. Administrator settings menu The administrator can set date and time. Refer to the “Instrument Operation”... -
Page 34: Standalone Instrument First Time Setup
Other sound and display preferences can be set by any user. Administrator and general user passwords for Standalone operation are provided on a tear out sheet in the Platform Quick Reference Guide. 1. Power on Power on the Instrument by pressing the power button at the rear of the Instrument, or tap the touch-screen if the display is dimmed. - Page 35 3. Set language The language is set to English by default. To set a different language go to ‘Settings’ and tap ‘Language’. Choose a language from the list for the text appearing on the display. The currently set language is ticked. Tap ‘Done’...
-
Page 36: Connected Instrument First Time Setup
Standalone first time setup to set the language. To download other Instrument settings, ensure the Instrument is within range of a LumiraDx Connect Hub or a device running the LumiraDx Connect App (within approximately 10 meters). If appears at the top of the screen, the Instrument is connected to Connect Manager and the Instrument settings will download and install automatically. -
Page 37: Display And Sound Preferences
4.5 Display and Sound Preferences All users can set display and sound preferences in the Settings menu. Display In the Display menu the brightness of the display can be set. Go to ‘Settings’ and tap ‘Display’. Use the slider to adjust the brightness. Tap ‘Done’... -
Page 38: Performing A Patient Test
Instrument. If there are differences in the test method for a particular diagnostic test, the Instrument will prompt at each step of the process. Please refer to the LumiraDx Test Strip Product Insert before performing a new test for specific test information. - Page 39 ID field to use the keyboard to enter User ID. Alternatively, scan User ID using the Barcode Scanner. Refer to the “Ancillary devices” chapter in this Platform User Manual for scanning instructions. Tap the password field to display the keyboard.
- Page 40 Tap any field to use the keyboard to enter patient details, or scan the patient ID using the Barcode Scanner. Refer to the “Ancillary devices” chapter in this Platform User Manual for scanning instructions. Use the ‘Enter’ button on the keyboard to move from field to field, or tap a field to enter additional details.
- Page 41 5. Confirm patient details Check patient details are correct and tap ‘Confirm’ to proceed. 6. Open door and insert Test Strip The Instrument display will prompt to open the door and insert a Test Strip. Remove a Test Strip from its packaging and hold with the blue label side facing upward.
- Page 42 Select the intended sample type from the list displayed. Sample type is test type dependent (refer to the LumiraDx Test Strip Product Insert for more information). Note: The Instrument will prompt to install the Lot Calibration File when inserting a new Test Strip Lot.
- Page 43 Sample Application Area on top of the Test Strip. The sample must cover the entire Sample Application Area. Refer to the “Handling Test Strips” chapter in this Platform User Manual for sample application instructions. The Test Strip draws up the sample by capillary action.
- Page 44 10. Immediately close door to continue The Instrument display will prompt to close the door. Note: Pay attention to the countdown for closing the door to avoid test errors. This will be displayed as a countdown bar. If the door is not closed by the end of the countdown the Instrument will sound and display an error message.
- Page 45 Gently pull the blue label end of the Test Strip to remove and dispose. Disinfect the Instrument between patient tests. Refer to the “Cleaning and Disinfecting” chapter in this Platform User Manual for further information. Close the Instrument door. Dispose of all Test Strips used for patient testing safely in accordance with local regulations and procedures.
-
Page 46: Quality Control
4.7 Quality Control The LumiraDx Instrument has a number of built-in QC functions. In addition to these, LumiraDx Quality Controls (Quality Control solutions) can be used to meet compliance requirements as required. To perform QC testing with Quality Control solutions, you will need: •... -
Page 47: Performing A Quality Control Test
This Platform User Manual describes the basic Quality Control solution test method for the LumiraDx platform. If there are differences in the test method for a particular QC test, the Instrument will prompt at each step of the process. Please refer to the LumiraDx Test Strip Product Insert before performing a new QC test for specific information. - Page 48 (Refer to “First time setup” in this chapter for more information). 3. Prepare Quality Control solution Prepare the Quality Control solution according to the LumiraDx Quality Control Pack Insert. 4. Tap Quality Control Tap the ‘Quality Control’ button on the home screen.
- Page 49 6. Open door and insert Test Strip The Instrument display will prompt to open the door and insert a Test Strip. Remove a Test Strip from its packaging and hold with the blue label side facing upward. Line up the black alignment rib on the Test Strip with the black line on the Instrument.
- Page 50 Apply the Quality Control solution directly to the circular Sample Application Area on top of the Test Strip. The solution must cover the entire application area. Refer to LumiraDx Quality Control Pack Inserts for additional information on testing with LumiraDx Quality Controls.
- Page 51 9. Immediately close door to continue The Instrument display will display a prompt to close the door. The test will start and a progress bar will be displayed whilst the test is processing. Note: Pay attention to the countdown for closing the door to avoid test errors.
- Page 52 Gently pull the blue label end of the Test Strip to remove and dispose. Disinfect the Instrument between tests. Refer to the “Cleaning and Disinfecting” chapter in this Platform User Manual for further information. Close the instrument door Dispose of all Test Strips used for Quality Control testing safely in accordance with local regulations and procedures.
- Page 53 13. Complete remaining QC levels Multiple QC levels may be required depending on test type. Refer to the LumiraDx Quality Control Pack Insert for more information on QC levels. Repeat steps in “Performing a Quality Control test” to test any additional QC levels.
-
Page 54: Result History
4.9 Result History The LumiraDx Instrument can save 1000 patient or QC test results, together with respective time, date and comments. If the Instrument memory is full, the oldest result is automatically deleted. 1. Power on and login 2. Tap Result History To view Patient or QC test results, tap ‘Result... - Page 55 Instrument Operation - 53...
-
Page 56: Cleaning And Disinfecting
5 Cleaning and Disinfecting It is important to observe the disinfection guidelines of your organization. Below are procedures for cleaning and disinfecting the Instrument. Failure to follow these procedures may cause Instrument malfunction. The difference between cleaning and disinfecting: Cleaning is the physical removal of dirt or other foreign material from the Instrument surface. - Page 57 The Instrument is now ready to perform another test. For technical assistance or questions, information about the TECcare® wipes can be found at www.lumiradx.com. Only use LumiraDx recommended cleaning and disinfecting materials on the Instrument surfaces. Always wear gloves whilst cleaning and disinfecting the Instrument.
-
Page 58: Software Updates
USB memory sticks and should be installed on each instrument by the administrator. Installing the latest updates will help ensure that the LumiraDx instrument operates with optimum performance and that the latest features are available. This section describes the steps required to complete the software update. -
Page 59: Troubleshooting
7 Troubleshooting The LumiraDx Instrument regularly performs internal checks for unexpected and unwanted conditions. These may arise for technical reasons or due to handling errors. If an issue occurs, a message will be displayed on the Instrument touch-screen. Alert messages include useful information and are highlighted by an orange banner. Error messages also include a symbol. - Page 60 Example alert message: Description and instruction Tap ‘OK’ to proceed. Connect the power supply unit before the battery runs out. Example error message Description and instruction Tap ‘OK’ to proceed and follow the suggested instruction(s) to resolve the issue. In this example, remove and dispose of the Test Strip.
- Page 61 Instrument: minutes and press the power button. Cannot login Do not have or know where to find the 1. Check tear out sheet in the Platform correct password: Quick Reference Guide for the login password, or contact the administrator.
- Page 62 If the date and time is incorrect: Contact the administrator for “Managed” Instruments, or refer to the “First time setup” section of this Platform User Manual for instructions on setting date and time. Patient test result is red If the patient test result is displayed in...
-
Page 63: Maintenance And Disposal
8 Maintenance and Disposal The LumiraDx Instrument does not require user maintenance and has no serviceable parts. No attempt should be made to open the Instrument. In case of Instrument failure or damage, or to arrange collection/disposal contact LumiraDx Customer services on: 00800 5864 7239 or by email: customerservices@lumiradx.com... -
Page 64: Instrument Specifications
9 Instrument Specifications Operating temperature 15 °C to 30 °C (59 °F to 86 °F) Storage temperature -10 °C to 50 °C (14 °F to 122 °F) Relative humidity 10 % to 90 % rh (non-condensing) Maximum altitude 3,000 m (9,840 feet) operating 1000 test results with date, time and comments Data storage... -
Page 65: Ancillary Devices
In order to configure the LumiraDx Barcode Scanner please contact LumiraDx Customer Services on 00800 5864 7239 or by email: customerservices@lumiradx.com. The LumiraDx Barcode Scanner can be used to scan patient ID number when performing a patient test. If using a Connected Instrument, the Barcode Scanner can be used to scan User ID for login. - Page 66 LumiraDx Barcode Scanner Cradle Attaching LumiraDx Barcode Scanner cradle to Instrument Note: Correct orientation of Barcode Scanner cradle 64 - Ancillary Devices...
-
Page 67: Lumiradx Usb Memory Stick
LumiraDx Desktop Stand 10.2 LumiraDx USB Memory Stick LumiraDx USB Memory Stick used for Instrument software updates. Note: Right side USB port nearest the power button at the rear of the Instrument must be used. Ancillary Devices - 65... -
Page 68: Lumiradx Connect Hub
10.3 LumiraDx Connect Hub Refer to LumiraDx Connect User Manual and Connect Hub Pack Insert for information and setup instructions 10.4 LumiraDx Connect App Refer to LumiraDx Connect User Manual for information and setup instructions. 66 - Ancillary Devices... -
Page 69: Customer Service
The limited warranty above shall not apply if the customer has subjected the LumiraDx Instrument or Test Strips to physical abuse, misuse, abnormal use, use inconsistent with the LumiraDx Platform User Manual or Product Insert, fraud, tampering, unusual physical stress, negligence or accidents. -
Page 70: References
12 References World Health Organization (2009) Guidelines on hand hygiene in healthcare. http://www.who.int/gpsc/5may/tools/9789241597906/en/ World Health Organization (2016) Guidelines on core components of infection prevention programmes at the national and acute healthcare facility level. http:// www.who.int/gpsc/ipc-components-guidelines/en/ CDC Guideline for Isolation Precautions: Preventing Transmission of infectious Agents in Healthcare Settings 2007. -
Page 71: Compliance
Please refer to www.lumiradx.com for further information. 13.2 Compliance LumiraDx UK Ltd hereby declares that the product complies with all relevant European Directives and Regulations at the time of placing on the market. The EC Declaration of Conformity may be found at www.lumiradx.com... - Page 76 SPEC-30178 Rev1 ART-00015 Rev4 For product and connectivity support please contact LumiraDx customer services on 00800 5864 7239 or by email: customerservices@lumiradx.com The customer international free phone number will be free from most landlines in countries where the LumiraDx Platform is commercially available, but could be classified as an international call from a mobile and therefore chargeable.
Need help?
Do you have a question about the Instrument and is the answer not in the manual?
Questions and answers