Table of Contents
Advertisement
Advertisement
Table of Contents

Related Manuals for ZUG Card-System 2

Summary of Contents for ZUG Card-System 2
- Page 1 Operating instructions Card-System 1 and 2 Cashier system...
- Page 2 The product family (model number) corresponds to the first alphanumerics on the identification plate. These operating instructions apply to: Model Type Product range Card-System 1 CS 1 Card-System 2 CS 2 Variations depending on the model are noted in the text. © V-ZUG Ltd, CH-6301 Zug, 2017...
-
Page 3: Table Of Contents
Contents 1 Safety precautions 5 Symbols used ...................... 5 General safety precautions ................. 6 2 Instructions for use 7 Before using for the first time ................ 7 Correct use...................... 7 Children in the household ................... 7 Note on use ...................... 8 3 Disposal 9 4 Your appliance... - Page 4 Key to parameters .................... 25 8 Care and maintenance 28 Cleaning the exterior .................. 28 9 Spare parts 29 10 Technical data 30 10.1 Dimensions ...................... 30 10.2 Electrical connections .................. 30 11 Index 31 12 Notes 33 13 Service & Support 35...
-
Page 5: Safety Precautions
Safety precautions Symbols used Denotes important safety precautions. Failure to observe said precautions can result in injury or in damage to the appliance or fittings! Information and precautions that should be observed. Information on disposal Information about the operating instructions ▸... -
Page 6: General Safety Precautions
1 Safety precautions General safety precautions ▪ Read the operating instructions before using the appliance for the first time! ▪ This appliance can be used by children aged 8 and above and by persons with reduced physical, sensory or mental cap- abilities, or lack of experience and/or knowledge, provided they are supervised or have been instructed on the safe use of the appliance and have understood the hazards involved. -
Page 7: Instructions For Use
Instructions for use Before using for the first time ▪ The appliance must be installed and connected to the electricity supply in accordance with the separate installation instructions. Have a qualified fitter/ electrician carry out the necessary work. ▪ Dispose of the packaging material in accordance with local regulations. ▪... -
Page 8: Note On Use
2 Instructions for use Note on use ▪ If the appliance is visibly damaged, do not use it. Contact our Customer Services. ▪ Do not spray the appliance with water. Do not use a steam cleaner. ▪ If the mains cable of the appliance is damaged, it must be replaced by Cus- tomer Services to avoid any danger. -
Page 9: Disposal
Disposal Packaging ▪ All packaging materials (cardboard, plastic film (PE) and polystyrene (EPS)) are marked and should, if possible, be collected for recycling and disposed of in an environmentally friendly way. Disconnection ▪ Disconnect the appliance from the mains. With a fixed appliance, this is to be carried out by a qualified electrician! Safety ▪... -
Page 10: Your Appliance
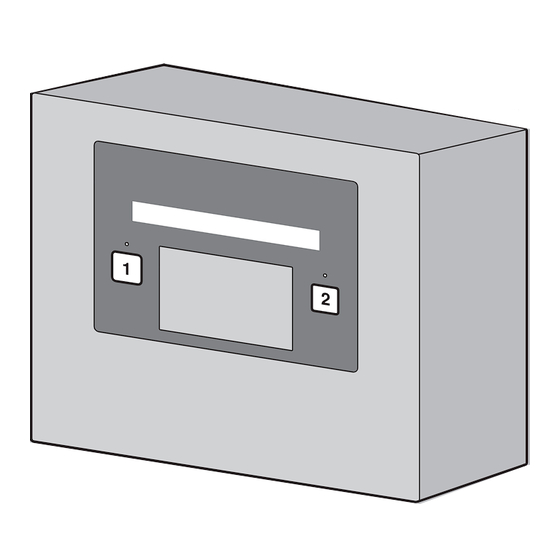
Your appliance Appliance description The cashier system controls the power supply to the appliance connected based on the amount debited from the user card. The length of time that elec- tricity is consumed is then measured and debited. Any remaining balances that are not credited back, are stored in the appli- ance. -
Page 11: Basic Position
4 Your appliance Basic position Single and double machine The backlight turns off when no text is displayed. Standby Single and double machine The backlight is turned off. The machine switches to standby mode 10 seconds after the last action is completed. Power consumption is reduced to a minimum by turning off unused features. -
Page 12: User Cards
4 Your appliance User cards ▪ The user card saves individual credit and can be charged as often as required. It activates CARD-SYSTEM the power supply to the washing machine and tumble dryer. Name Card Nr. Objekt Nome Special cards The cards described below are to be used by those who are responsible for the appliance (property manager, owner, caretaker). -
Page 13: Operation
Operation Using the cards The user and special cards are basically used in the same way. The charge and control cards are for identification purposes only and can be removed after activating the corresponding mode: – parameter settings for language, tariff and amount charged –... -
Page 14: Current Balance
5 Operation Current balance Appliance 1 ▸ Briefly press the button. Balance xxx.xx – ... appears in the display and the LED is illu- minated. – Moving appear after 10 seconds. Appliance 2 ▸ Briefly press the button. Balance xxx.xx –... -
Page 15: Adding A Payment Amount On A Double Machine
5 Operation Adding a payment amount on a double machine ▸ Briefly press the button. ▸ Hold the user card to the card reader. New credit amount xxx.xx – appears in the display. Tarif Gerät 1 xx.xx/xxx Tarif Gerät 2 xx.xx/xxx –... -
Page 16: Returning Credit To The User Card, Single Machine
5 Operation Returning credit to the user card, single machine ▸ Hold down the button. Return credit – After 3 seconds, appears in the display. ▸ Release the button after 3 seconds. Please insert card – appears after 1 second. ▸... -
Page 17: Debiting The User Card For Appliance 1, Double Machine
5 Operation Debiting the user card for appliance 1, double machine ▸ Briefly press the button. Please select appliance – ... appears in the display and the LEDs are il- luminated. ▸ Briefly press the button. Please insert card – ... appears in the display and the LED is illu- minated. -
Page 18: Returning Credit To The User Card For Appliance 1, Double Machine
5 Operation Returning credit to the user card for appliance 1, double machine ▸ Hold down the button. Return credit ▸ After 3 seconds, appears in the display. ▸ Release the button. Please insert card – After a second, appears and the LED is illu- minated. -
Page 19: Using The Charge Card
5 Operation 5.10 Using the charge card Charging the user card ▸ Briefly press the button. Please select appliance – ... appears in the display and the LEDs are il- luminated. ▸ Briefly press the button again. Please insert card –... -
Page 20: Settings With The Charge Card
5 Operation 5.11 Settings with the charge card The procedure described below is explained on the basis of model 82A. ▸ Hold down the button. Please select appliance ▸ ... appears in the display and the LEDs flash. Return credit ▸... -
Page 21: Using The Totaliser Card
5 Operation 5.12 Using the totaliser card The procedure described below is explained on the basis of model 82A. ▸ Briefly press the button. Please select appliance – ... appears in the display and the LEDs flash. – Hold the totaliser card to the card reader. Total charged xxxx.xx –... -
Page 22: Calculation
Calculation Preface to the calculation The costs which are calculated for the appliance are based on the operating costs of the washing machine or tumble dryer connected. The operating costs comprise the costs of the electricity and water consumed as well as of any service subscription. -
Page 23: Individual Calculations
6 Calculation Individual calculations You will need the following details: Electricity consumption* From the operating in- ....kWh structions Water consumption* (1m³ = 1000 From the operating in- ....m³ litres) structions Programme duration* From the operating in- ..h ..structions Electricity tariff per kWh (incl. -
Page 24: Settings
Settings The different parameters are explained below. The factory setting is intended for operating a washing machine in the case of model 81A and a washing ma- chine and a tumble dryer in the case of model 82A. Parameters The parameters are set at the factory as follows: Parameters with Unit Setting range... - Page 25 7 Settings Key to parameters Parameters with Function Description factory settings Laundry room no. Access code for the appliance. Can P–01 1050 vary from laundry room to laundry room. The access code is transferred to the user card the first time it is charged. Time unit for appli- Defines the length of time (e.g.
- Page 26 7 Settings Charge access Access code for the charge card. Each P–09 1xxxx code error cashier system has a separate code. The code is transferred the first time the charge card is used. If required, the same entry code can be set for all cash- ier systems.
- Page 27 7 Settings Acoustic signal To activate the acoustic signal in the P–18 case of an error message 0 = Off/1 = Acoustic signal To activate the acoustic signal as con- P–19 firmation that an action has been com- pleted 0 = Off/1 = On Loading payment To activate simple loading of the pay- P–20...
- Page 28 Care and maintenance Cleaning the exterior ▪ Do not use abrasive, caustic cleaning agents or stainless steel cleaner. ▪ Do not use abrasive scouring pads, wire wool, etc., as such products will damage the surface. ▸ Remove any soiling or excess cleaning solution immediately. ▸...
- Page 29 Spare parts User card CARD-SYSTEM Name Card Nr. Objekt Nome Charge card CARD-SYSTEM Objekt Totaliser card CARD-SYSTEM Objekt...
- Page 30 Technical data 10.1 Dimensions Model 81A Model 82A Width: 25 cm 25 cm Height: 22.5 cm 22.5 cm Depth: 10.5 cm 10.5 cm Weight: 2.6 kg 2.8 kg 10.2 Electrical connections Model 81A Model 82A Voltage: 400 V 3N~ 2 × 400 V 3N~ Fuse: Max. 16 A Max.
- Page 31 Index Appliance description ........10 Packaging ............9 Appliance design .......... 11 Parameters............. 24 Product family..........2 Basic position ..........11 Queries ............35 Calculation ............. 22 Care and maintenance ........ 28 Returning credit to the user card Checking credits on user cards....14 Single machine ........
- Page 32 Validity............... 2 Your appliance ..........10...
- Page 33 Notes...
- Page 35 Your repair order Call the free service number 0800 850 850 to contact your nearest V-ZUG service centre. You can arrange an onsite visit by us by phone if you wish. General queries, accessories and service agreement V-ZUG will be happy to help you with any general administrative or technical queries, to accept your orders for accessories and spare parts and to inform you about our progress- ive service agreements.
- Page 36 CA RD -S YS TE M Nam e Nom e Car d Nr. Obj ekt J81A013-R04 V-ZUG Ltd, Industriestrasse 66, CH-6301 Zug Tel. +41 58 767 67 67, Fax +41 58 767 61 61 info@vzug.com, www.vzug.com Service Centre: Tel. 0800 850 850...
Need help?
Do you have a question about the Card-System 2 and is the answer not in the manual?
Questions and answers