
Related Manuals for Caladair Hexamotion Series


Summarization of Contents
RECEIVING THE EQUIPMENT
1.1. Checks on reception
Verify the state of packaging and equipment upon delivery.
1.2. Unpacking
Check the number of packages and all accessories are present.
1.3. Storing
Store units in a dry place, shaded, between -20°C and 40°C.
1.1. End of life
Contact ECOLOGIC for collection, removal, and treatment of WEEE.
INSTALLATION
II.1. Handling
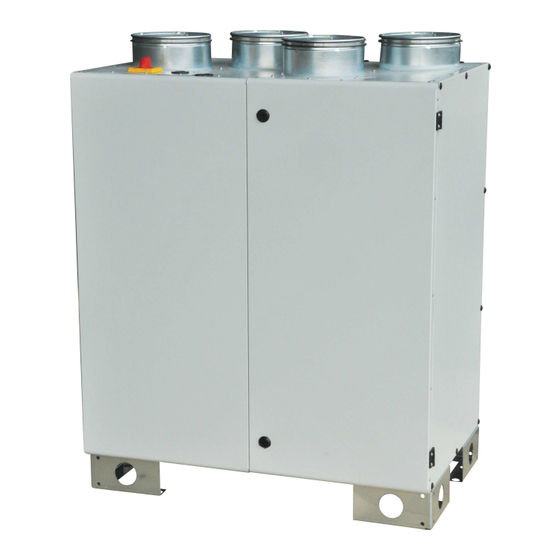
Move units in their installation position using appropriate equipment.
II.2. Space required
Ensure adequate access space around the unit for maintenance.
II.2.a. FREETIME®
Define required space for FREETIME units based on model dimensions.
II.3. Installation
Install unit on a rigid surface and connect HVAC ducts properly.
II.2.b. HEXAMOTION®
Define required space for HEXAMOTION units based on model dimensions.
GENERAL FONCTIONNING
III.1. GENERAL
Overview of double-flow units with high efficiency recovery systems.
III.1.a. FREETIME®
Description of FREETIME unit management capabilities and associated batteries.
III.1.a. HEXAMOTION®
Description of HEXAMOTION unit management capabilities and batteries.
III.2. FUNCTIONNAL ANALYSIS
Details on unit starting and stopping sequences and conditions.
MODE DE REGULATION
III.3.a. SEASON :
SEASON mode uses potentiometers for fan speed control.
III.3.b. ECO :
ECO mode offers 1 or 2 adjustable speeds with factory-set timed operation.
III.3.c. DIVA
DIVA mode uses proportional ventilation with CO2 management.
III.3.d. LOBBY® :
LOBBY mode provides constant pressure ventilation.
III.3.e. MAC2® :
MAC2 mode offers constant airflow with CO2 management.
III.3.f. QUATTRO® :
QUATTRO mode provides proportional ventilation with CO2 management.
COMPOSITION
III.4.a. FREETIME®
Component list and details for FREETIME units.
III.4.b. HEXAMOTION® FIRST-PREMIUM
Component list and details for HEXAMOTION FIRST-PREMIUM units.
III.4.c. HEXAMOTION® SEASON
Component list and details for HEXAMOTION SEASON units.
ELEMENTS IN THE REGULATION
III.5.a. FREETIME®
Regulation elements for FREETIME ECO, DIVA, LOBBY, and SEASON models.
III.5.a.1. REGULATION ECO/DIVA/LOBBY
Details of regulation components for ECO, DIVA, and LOBBY modes.
III.5.a.2. REGULATION SEASON
Details of regulation components for SEASON mode.
III.5.b. HEXAMOTION®
Regulation elements for HEXAMOTION ECO, DIVA, LOBBY, MAC2, QUATTRO, and SEASON models.
III.5.b.1. REGULATION ECO/DIVA®/LOBBY®/MAC2®/QUATTRO®
Regulation components for HEXAMOTION ECO, DIVA, LOBBY, MAC2, QUATTRO.
III.5.b.2. REGULATION SEASON
Regulation components for HEXAMOTION SEASON.
ELECTRIC WIRING
IV.1. POWER SUPPLY
Electrical power supply specifications for FREETIME and HEXAMOTION units.
IV.1.a. FREETIME®
Power supply details for FREETIME models, including voltage and current.
IV.1.b. HEXAMOTION®
Power supply details for HEXAMOTION models, including voltage and current.
IV.2. RACCORDEMENT SEASON
Wiring diagram for SEASON models, showing connections for fans and sensors.
IV.3. TEMPERATURE SENSOR WIRING (Except SEASON)
Wiring instructions for temperature sensors on non-SEASON models.
IV.4. TERMINAL BLOCKS OF FREETIME® (Except SEASON)
Terminal block connections for FREETIME units, excluding SEASON models.
Raccordement électrique et fonctionnement de l'échangeur rotatif
IV.5.a. Version SEASON
Electrical connection and operation of the rotary exchanger in SEASON version.
IV.5.b. Version FIRST PREMIUM
Electrical connection and operation of the rotary exchanger in FIRST PREMIUM version.
ELECTRIC WIRING
IV.6. Filters pressure switches wiring and connection
Wiring and connection for filter pressure switches.
IV.7. Fan pressure switch wiring and connection
Wiring and connection for fan pressure switches.
IV.8. Pressure transmitters wiring and connection LOBBY®/MAC2®/QUATTRO®
Wiring for pressure transmitters in LOBBY, MAC2, and QUATTRO versions.
IV.9. Motors wiring
Wiring diagrams for unit motors.
IV.10. CO2 sensor wiring DIVA® QUATTRO®
Wiring for CO2 sensors in DIVA and QUATTRO models.
IV.11. Night Cooling
Functionality and settings for the Night Cooling mode.
IV.12. Hot water coil integrated (PREMIUM BC) – changeover water coil (PREMIUM CO) or external cold or changeover coil
Connection of hot water and changeover coils, including wiring instructions.
IV.13. DX battery (cold or reversible)
Connection and operation of DX batteries for cooling or reversible needs.
IV.14. Electrical battery
Wiring and specifications for electrical heating batteries.
IV.15. Fire function
Configuration and operation of the unit's fire safety function.
IV.16. Dehumidification function
Functionality and connection of the dehumidification feature.
IV.17. MODBUS / WEB / BACNET wiring
Instructions for connecting MODBUS, WEB, and BACNET communication interfaces.
IV.18. Repeater wiring
Wiring guidelines for using a repeater to extend communication range.
IV.19. LON
Instructions for LON communication setup and connection.
SETTINGS
V.1. Display
Description of the unit's display interface and navigation.
V.2. Exemple of setting
Example of how to navigate and set parameters on the unit.
V.3. Standard settings (opérator menu)
Overview of accessible operator menu settings and their purpose.
V.3.a. Menu Mode de fonctionnement
Detailed explanation of the operating mode menu options.
V.3.b. Temperature menu
Settings related to temperature control and setpoints.
V.3.c. Ventilation menu
Configuration options for ventilation speeds and pressures.
V.3.d. Timer menu
Settings for programming the unit's timer functions.
V.4. Operator parameters modification ( password 3333 required)
Modifying operator parameters requires password 3333.
V.4.a. Dates and hours clocks setting
Setting the unit's internal clock and date.
V.4.b. Speed /pressure modification in LS and HS
Adjusting fan speeds and pressures for different operating modes.
V.4.b.1. STANDARD (ECO) / DIVA
Modifying speed/pressure for STANDARD (ECO) and DIVA modes.
V.4.b.2. LOBBY
Modifying constant pressure for LOBBY mode.
V.4.b.3. MAC2®/QUATTRO®
Modifying airflow for MAC2 and QUATTRO modes.
V.4.c. Temperature setpoint modification
Adjusting temperature setpoints for regulation.
V.4.d. Forced stop of the unit or forced start LS or HS on the remote control
Remote control for unit start and stop functions.
V.4.e. Choice of language
Selecting the user interface language.
V.5. Intermediate settings (service level)
Accessing service-level settings requires password 2222.
V.5.a. Menu configuration en accès service
Navigating the service menu for configuration.
V.6. Modification of the services parameters (password 2222)
Modifying service parameters requires password 2222.
V.6.a. Regulation mode of the unit
Selecting the unit's regulation mode.
V.6.b. Overventilation parameters
Adjusting parameters related to overventilation and night cooling.
V.6.c. CO2 setpoint for DIVA / QUATTRO option
Setting CO2 setpoints for DIVA and QUATTRO options.
V.7. Administrator settings
Accessing administrator settings requires password 1111.
V.7.a. Configuration menu with admin level access
Admin-level configuration menu for communication and functions.
V.8. Modification of the service parameters
Modifying various communication service parameters.
V.8.a. MODBUS
Configuration and parameters for MODBUS communication.
V.8.a.1. Repetitors and EXO communication
Settings for repeaters and EXO communication protocols.
V.8.a.2. WEB Communication
Instructions for WEB communication via TCP/IP.
V.8.a.3. BACNET IP Communication with BASC type
Configuration for BACNET IP communication.
V.8.a.4. Communication LON (si CORRIGO avec option LON)
Setup for LON communication with CORRIGO.
V.8.a.5. Fire function activation
Activating and configuring the fire function.
Alarm setting
Configuring alarm settings and parameters.
V.8.a.6. Activation of the function dehumidification
Activating the dehumidification function.
REPAIR
VI.1. Different types of defaults
Classification and description of common unit faults.
VI.2. List of alarms
Comprehensive list of unit alarms, their causes, and descriptions.
VI.3. Acknowledge the default « timer service »
Procedure to acknowledge and reset the timer service alarm.
MAINTENANCE
VII.1. Obligatory maintenance
Recommended regular maintenance tasks for the unit and its components.
VII.2. Battery replacement
Procedure for replacing the unit's internal battery.
ANNEXES
Command diagram
Wiring diagram illustrating the control system connections.
Motors diagrams FREETIME® 500-800 HEXAMOTION® 05-08
Motor wiring diagrams for FREETIME 500-800 and HEXAMOTION 05-08.
Motors diagrams FREETIME® 1500 HEXAMOTION® 15
Motor wiring diagrams for FREETIME 1500 and HEXAMOTION 15.
Motors diagrams FREETIME® 2000 HEXAMOTION® 20
Motor wiring diagrams for FREETIME 2000 and HEXAMOTION 20.
Motors diagrams FREETIME® 2700-3500 HEXAMOTION® 27-80
Motor wiring diagrams for FREETIME 2700-3500 and HEXAMOTION 27-80.
Curves
Performance curves illustrating unit operation at different speeds.
VII.7.a. FREETIME®
Performance curves for FREETIME models.
VII.7.b. HEXAMOTION®
Performance curves for HEXAMOTION models.
Table MODBUS et BACNET
Reference table for MODBUS and BACNET communication registers.
Need help?
Do you have a question about the Hexamotion Series and is the answer not in the manual?
Questions and answers