Table of Contents
Advertisement
Advertisement
Table of Contents

Related Manuals for OneScreen Touchscreen


Summary of Contents for OneScreen Touchscreen
- Page 1 KK Intelligent Hub/ Interactive Touch Screen H5 OneScreen: User Manual onescreensolutions.com | +1 858.552.0290 | United States| Pakistan Colombia | Mexico | Dubai i ...
-
Page 2: Table Of Contents
Contents 1. What’s included ............................ 1 1.1. OneScreen Touchscreen ......................... 2 1.2. OneScreen Canvas .......................... 2 1.3. OneScreen Hubware ........................ 3 2. About OneScreen ........................... 4 2.1. Introduction to OneScreen : ...................... 4 2.2. About the Hardware Overview Manual: .................... 4 3. Safety First! .............................. 5 3.1. General ............................... 5 3.2. Safety Information ‐ OneScreen ..................... 5 4. Getting Ready! ............................ 7 ... - Page 3 7.1.3. Applications and Menus ...................... 23 8. RS 232 Guide ............................ 27 8.1. Settings for RS 232 Control: ...................... 27 8.2. RS 232 Commands ........................... 27 9. Technical Specifications ........................... 29 9.1. Touchscreen Specifications ...................... 29 9.2. On‐board PC Specifications ...................... 30 10. Troubleshooting ........................... 31 Contact US ............................... 32 USA ................................ 32 UAE ................................ 32 Colombia .............................. 32 Mexico................................ 32 Pakistan ................................ 32 iii ...
-
Page 4: What's Included
1. What’s included * Optional items are sold as part of different models. These are also sold separately and can be purchased afterwards to complement your OneScreen. 1 onescreensolutions.com | +1 858.552.0290 | United States| Pakistan Colombia | Mexico | UAE... -
Page 5: Onescreen Tm Touchscreen
OneScreen Touchscreen 1.1. 1x OneScreen Touchscreen 65” 4K display 1x Logitech K400 Plus wireless keyboard with dongle 1x Extendible Stylus 2x Stylus pens 1x HDMI cable 1x VGA cable 1x Touch USB cable 1x Power cable 1x Keyboard tray 1x Wall mount package (contains 1x horizontal mount and 2x mounting arms) 1x Remote control (batteries not included) Screws OneScreen Canvas 1.2. 1x OneScreen Touchscreen 65” 4K display 1x Logitech K400 Plus wireless keyboard with dongle 1x Extendible Stylus ... -
Page 6: Onescreen Tm Hubware
OneScreen Hubware 1.3. 1x OneScreen Touchscreen 65” 4K display 1x Logitech K400 Plus wireless keyboard with dongle 1x Extendible Stylus 2x Stylus pens 1x HDMI cable 1x VGA cable 1x Touch USB cable 1x Power cable 1x Keyboard tray 1x Camera tray 1x Wall mount package (contains 1x horizontal mount and 2x mounting arms) 1x Remote control (batteries not included) 1x On‐board OneScreen PC (core i7) 1x OneScreen PTZ Camera 1x Speakerphone Screws ... -
Page 7: About Onescreen Tm
: 2.1. Every workday is unique. Collaborate the way you need to with OneScreen solutions. From hardware to software, OneScreen offers interactive video collaboration technology for your remote teams along with your conference room, board room and classroom needs. Our solutions include unlimited free, online ... -
Page 8: Safety First
Safety Information ‐ OneScreen 3.2. Inspect the OneScreen for any physical damage to the casing before use. If damage is apparent, take care to avoid contact with any potentially live parts. Do not under any circumstances try to gain access to internal parts of the OneScreen. If you suspect that the device is damaged or faulty, you should contact Technical Customer Support, or an authorised Promethean service agent for advice. ... - Page 9 50% isopropanol and 50% water in a spray bottle, and spraying this onto a micro‐fibre or 100% cotton cloth Wipe the glass surface gently; do not spray the solution onto the OneScreen. Doing so could saturate the electronics and cause damage to the device. Only a small amount of the solution is needed to clean and sanitize the glass. ...
-
Page 10: Getting Ready
4. Getting Ready! Installing the Wall mount 4.1. For mounting the unit, check the integrity of the wall, whether it can endure the load of the unit. After that, clean the surface on which the unit is to be installed. Make sure your technician has the proper tools to install the wall mount (these include screws, washers, drill machine, screwdriver etc.) Follow the steps given below: At least two persons are required to lift the screen. Hang the Horizontal mount with sufficient number of screws. Check the level of the mount and make sure that it is properly adjusted. Attach and screw the mounting arms on the back side of unit properly, make sure that screws do not damage the screen. Hang the screen with the help of others and make sure that the mounting arms properly align and fix themselves on the mount. Make sure that spacing between wall and screen is 5 cm or more for proper ventilation. Finally, place a little force downward and sidewise to check whether the mount withstands the forces. ... -
Page 11: Installing The Keyboard Tray
Installing the Keyboard tray 4.2. 1) The keyboard tray comes with a set of screws and has to be installed at the bottom of the screen as indicated by the diagram below. 2) There will be two holes present at the back side (towards the bottom) of the screen. 3) These holes should coincide with the two holes present on the keyboard tray. The picture below shows the keyboard tray and the position of holes on it. 4) Insert the screws in these holes from the bottom of the keyboard tray. 5) Once the keyboard tray has been secured properly with the screws, you may place the wireless keyboard on top of it. 8 onescreensolutions.com | +1 858.552.0290 | United States| Pakistan Colombia | Mexico | UAE... -
Page 12: Hardware Details
5. Hardware Details Top View 5.1. 1. AC Out Port (For OneScreen PTZ Camera) 2. PC USB Port (For OneScreen Fixed Camera or OneScreen PTZ Camera) – Only functional with the OPS PC Module 9 onescreensolutions.com | +1 858.552.0290 | United States| Pakistan Colombia | Mexico | UAE... -
Page 13: Bottom View
Bottom View 5.2. 1. RS232 Port 2. VGA Input Port 3. VGA Audio Input Port 4. Line In Port (To connect external audio devices) 5. Headphone (3.5mm) Audio port 6. YPbPr (Three in one YPbPr in interface) 7. AV In (Three in one AV in interface) 8. AV out (Three in one audio and video output interface) 9. Coaxial SPDIF (Optical) port 10. 12V Output Port 10 onescreensolutions.com | +1 858.552.0290 | United States| Pakistan Colombia | Mexico | UAE... -
Page 14: Right Side View
Right Side View 5.3. 1. 2.5 GHz Wi‐fi Antenna Slots 8. RJ 45 Port 2. HDMI Out Port 9. Touch USB Port A (For HDMI) 3. 5.0 GHz Wi‐fi Antenna Slots 10. HDMI 1 Input Port 4. USB 2.0 11. HDMI 2 Input Port 5. USB 2.0 12. HDMI 3 Input Port 6. USB 2.0 13. DP (Display Port) Input Port 7. RJ45 Port 14. Touch USB Port B (For DP and VGA) 11 onescreensolutions.com | +1 858.552.0290 | United States| Pakistan Colombia | Mexico | UAE... -
Page 15: Left Side View
Left Side View 5.4. 1. OPS Slot 2. Power Button 3. Power Cable Input 12 onescreensolutions.com | +1 858.552.0290 | United States| Pakistan Colombia | Mexico | UAE... -
Page 16: Front View
Front View 5.5. 1. Source Select Button 4. USB Port 2. Volume Down Button 5. USB Port 3. Volume Up Button 4. Home Screen Button (Takes you to the Android Home Page) 5. Brightness Button 6. Power Button 13 onescreensolutions.com | +1 858.552.0290 | United States| Pakistan Colombia | Mexico | UAE... -
Page 17: On Board Pc
On board PC 5.6. 1. Clear CMOS Button 2. On / Off Button 3. MIC Input (3.5 mm) 4. Audio Output (3.5 mm) 5. VGA port 6. LAN port 7. HDMI port 8. 2 x USB 3.0 Port 9. 2 x USB 3.0 Port 10. 2 x USB 2.0 Port 11. Wi‐Fi Antenna 1 12. Display Port 13. COM Port 14. Wi‐Fi Antenna 2 ... -
Page 18: Setting Up Your Unit
6. Setting Up Your Unit! TM OneScreen Touchscreen 6.1. The OneScreen Touchscreen comes with a perpetual license of OneScreen Annotate. You will have to install it on your external PC. Please contact us for the digital copy of the software and license. To connect an external PC to the Touchscreen please follow the steps mentioned below. 6.1.1. Connecting an External PC To connect an external PC, please use the HDMI or VGA cable and the USB touch cable (as shown in What’s Included). Connect the USB Dongle to your PC, which will allow you to use the unit wirelessly. The USB dongle is ... -
Page 19: Onescreen Tm Canvas
6.2. The OneScreen Canvas comes with a perpetual license of OneScreen Annotate and the first year subscription of OneScreen Swap. With OneScreen Canvas you also get the On‐board PC preinstalled, which has all the necessary software install and configured. However, if you would like to connect an ... -
Page 20: Onescreen Tm Hubware
6.3. OneScreen Hubware The OneScreen Hubware comes with the first year license of OneScreen Swap, OneScreen Hype & a perpetual license of OneScreen Annotate. If you would like to connect an external PC you will have to install the software on it. OneScreen Hubware comes with the OneScreen camera and speaker pod, please see below how to set it up. Please contact us for the digital copy of the software and license. To connect an external PC to the Touchscreen please follow the steps mentioned below. ... -
Page 21: Connecting An External Pc
6.3.2. Connecting an External PC To connect an external PC, please use the HDMI or VGA cable and the USB touch cable (as shown in What’s Included). Connect the USB Dongle to your PC, which will allow you to use the unit wirelessly. The USB dongle is located in the keyboard battery compartment, please take it out and plug it in your computer/laptop. Connect one end of the HDMI or VGA cable to your laptop and the other end to one of the corresponding ports on the OneScreen Touchscreen. If you are connecting the VGA cable, please also use the AUX cable to transfer audio. Connect the standard USB end of the USB Touch Cable to your laptop and the other end to the port shown below on the OneScreen Touchscreen. ... -
Page 22: Usage Guide
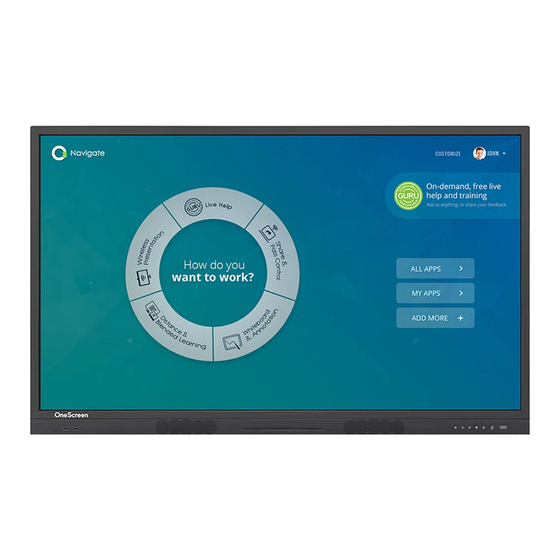
7. Usage Guide 7.1. Home Screen Pressing the OneScreen home button will take you to the Android Home Screen as shown below. Here you will see the time, date, connectivity status and other icons whose purpose is shown in the table. Mini Screen 19 onescreensolutions.com | +1 858.552.0290 | United States| Pakistan Colombia | Mexico | UAE... -
Page 23: Icons On The Home Screen
7.1.1. Icons on the Home Screen Sr. Icon Function 1. Pressing the GURU icon will connect you to the Support Team via Audio/Video. Please ensure that you have a microphone/Camera connected to the OneScreen. 2. Pressing this icon will make the HDMI 1 as the active input source. Once selected, tap on the mini screen to switch to the respective source. 3. Pressing this icon will make the HDMI 2 as the active input source. Once selected, tap on the mini screen to switch to the respective source. 4. Pressing this icon will make the HDMI 3 as the active input source. Once selected, tap on the mini screen to switch to the respective source. 5. Pressing this icon will make the On‐Board PC Source (OPS) as the active input ... -
Page 24: Bottom/Side Toolbar
7.1.2. Bottom/Side toolbar Swiping up from the bottom of the screen bring the toolbar which can also be accessed by pressing the arrows keys on either side of the OneScreen. 21 onescreensolutions.com | +1 858.552.0290 | United States| Pakistan Colombia | Mexico | UAE... - Page 25 The icons in the toolbar are discussed in the table below: Sr. Icon Function 1. This button will take you to the previous window. 2. This button will take you to the home screen. 3. This button will show the running applications. Users can close individual or all application. 4. This button will take the user to the source menu. 5. This button takes the user to the settings side panel. The side panel is shown below. ...
Need help?
Do you have a question about the Touchscreen and is the answer not in the manual?
Questions and answers