Advertisement
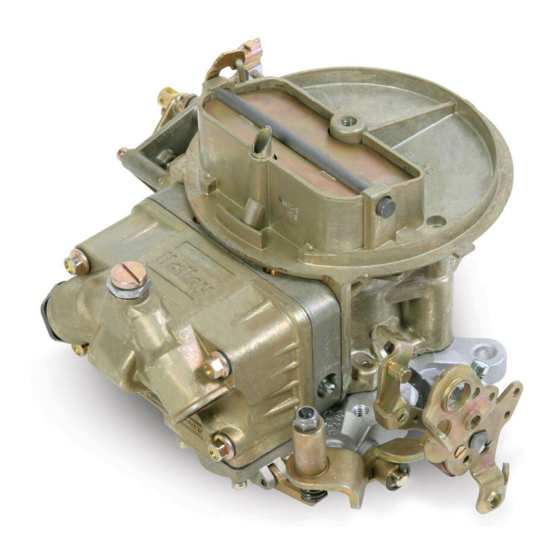
CARBURETOR
P/N 0-7448, 0-4412C, & 0-4412S
INSTALLATION, TUNING, AND
ADJUSTMENT MANUAL
199R7950-7
NOTE: These instructions must be read and fully understood before
beginning installation. If this manual is not fully understood,
installation should not be attempted. Failure to follow these
instructions, including the pictures may result in subsequent
system failure.
Advertisement
Table of Contents

Summarization of Contents
REMOVAL
Remove Air Cleaner
Remove the air cleaner, detaching vacuum lines carefully.
Disconnect and Remove Carburetor
Disconnect fuel, vacuum, wiring, PCV, choke, and linkage, then unbolt carburetor.
INSTALLATION NOTES
Chrysler Applications
Notes for Chrysler automatic overdrive transmission use, requiring throttle lever extension.
Ford Applications
Notes for Ford automatic transmission applications, requiring specific kickdown spring and bracket kit.
INSTALLATION
Install Mounting Components
Install carburetor mounting studs and flange gasket on the intake manifold.
Mount Carburetor
Place carburetor on gasket and tighten hold-down nuts in a crisscross pattern.
Check Throttle Linkage Travel
Operate throttle lever to ensure correct travel, no sticking or binding.
Reconnect Linkage and Springs
Reconnect throttle and kickdown linkage and throttle return spring. Check for free movement.
Reconnect Vacuum Hoses
Reconnect vacuum hoses to carburetor fittings as shown, replacing damaged hoses.
Connect PCV and Power Brake Hoses
Connect PCV hose to its fitting and power brake hose as indicated.
Fuel Line and Filter Installation
Install fuel line, ensuring no particles enter. Use an inline fuel filter. Keep fuel line away from EGR.
Connect Choke Cable
Connect the choke control cable to the actuation lever and mount the outer sleeve.
Start Engine and Check for Leaks
Start engine and check fuel lines and fittings for leaks. Recommended fuel pressure is 5-7 psi.
Set Idle Speed and Readjust Linkage
Set idle speed to manufacturer specs. Readjust throttle operated transmission linkage if necessary.
Ford Auto Trans Kickdown Adjustment
Adjust kickdown screw for Ford automatic transmissions with engine off.
Install Air Cleaner
Place air cleaner gasket and install air cleaner.
Air Cleaner Clearance
Use spacer if needed for clearance. Check clearance between air cleaner, stud, and hood.
Maintenance and General Tips
Periodic inspection, hose replacement, fuel bowl screw torque, engine timing, spark plug gap, ignition components.
Automatic Transmission Kickdown Warning
Install kickdown adjustment screw and clip for automatic transmissions to prevent uncontrolled engine speed.
CHOKE ADJUSTMENT
Fast Idle RPM Adjustment
Adjust fast idle RPM by turning the set screw clockwise to increase or counterclockwise to decrease.
IDLE MIXTURE NEEDLES
Setting Idle Mixture Needles
Adjust idle mixture screws 1/8 turn at a time, alternating to achieve highest manifold vacuum.
Reset Idle Speed
After setting mixture, reset idle speed using the curb idle speed screw.
Vacuum Gauge Alternative
Use a tachometer to obtain highest RPM if a vacuum gauge is unavailable.
Rough Idle and Vacuum Leaks
Check for manifold vacuum leaks from fittings, gaskets, or surfaces if rough idle persists.
FLOAT LEVEL CHECK AND ADJUSTMENT
Check Float Level
Observe fuel level in sight plug hole. Fuel should be even with the bottom of the hole.
Adjust Float Level
Loosen lock screw, turn adjusting nut (clockwise to lower, counterclockwise to raise) in 1/4 increments.
JETTING (MAIN JETS)
Jetting Tips
Out of the box jetting is close. Adjust jet size for altitude. Never drill jets. Use spark plugs for indication.
POWER VALVES
Power Valve Selection
Determine power valve size based on manifold vacuum at idle for proper fuel flow.


Need help?
Do you have a question about the 0-4412S and is the answer not in the manual?
Questions and answers