Table of Contents
Advertisement
Quick Links
Advertisement
Chapters
Table of Contents

Related Manuals for Farm King RT19

Summary of Contents for Farm King RT19
- Page 1 OPERATOR AND PARTS MANUAL Tedder Model RT17, RT19 092018 R0002...
-
Page 3: Table Of Contents
RT17, RT19 Tedder Table Of Contents Manufacturer’s Statement: For technical reasons, Buhler Industries Inc. reserves the right to modify machinery design and specifications provided herein without any preliminary notice. Information provided herein is of descriptive nature. Performance quality may depend on soil fertility, applied agricultural techniques, weather conditions, and other factors. - Page 4 Mounted-Type Guards Mounted-Type Hitch, PTO, Release Rope Mounted-Type Hydraulic Hoses, Stabilizer Bars Hydraulic Cylinder - Angle Adjust Hydraulic Cylinder - Wing Fold PTO Shaft - RT17 PTO Shaft - RT19 Specifications And Shipping Kit Numbers Specifications Shipping Kit And Bundle Numbers...
-
Page 5: Warranty Registration Form
Customer / Owner Signature: Remove this Warranty Registration Form from the Operator And Parts Manual. Make two copies of the form. Send original Warranty Registration Form to Farm King. Give one copy to the customer and the dealer will keep one copy. - Page 6 Warranty Registration Form - RT17, RT19 Tedder...
-
Page 7: Introduction
Farm King equipment. READ AND UNDERSTAND THIS OPERATOR AND PARTS MANUAL BEFORE OPERATING YOUR FARM KING EQUIPMENT. If you have any questions, see your Farm King dealer. This manual may illustrate options and accessories not installed on your Farm King equipment. - Page 8 Introduction - RT17, RT19 Tedder...
-
Page 9: Owner's Information
Owner’s Information Serial Number Location Please enter the model and serial number in the Thank you for your decision to purchase a Farm King space provided for easy reference. Tedder. To ensure maximum performance of your equipment, it is mandatory that you thoroughly... -
Page 10: Equipment Identification
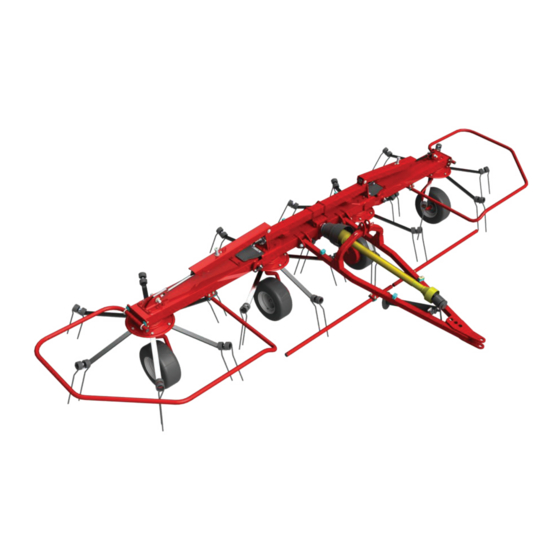
Introduction - RT17, RT19 Tedder Equipment Identification Component Location - Pull Type SIDE PROTECTION GUARD GEAR BOX WING LOCK ROTARY UNIT TINES SUPPORT JACK TOWING CONNECTION WHEELS SIDE PROTECTION GUARD... - Page 11 Introduction - RT17, RT19 Tedder Component Location - Mounted Type REAR PROTECTION GUARD SIDE PROTECTION GUARD GEAR BOX WING LOCK ROTARY UNIT TINES THREE - POINT CONNECTIONS SUPPORT JACK SIDE WHEELS PROTECTION GUARD...
- Page 12 Introduction - RT17, RT19 Tedder...
-
Page 13: Safety
Safety - RT17, RT19 Tedder Safety Safety Instructions Safe Operation is The Operator’s Responsibility Safe Operation Needs A Qualified Operator Use Safety Rules Safety Rules For Power Take-Off (PTO) Driven Equipment Machine Requirements And Capabilities Transport Safety Fire Prevention Maintenance... - Page 14 Safety - RT17, RT19 Tedder...
-
Page 15: Safety Instructions
• The written instructions from Farm King include the result in minor or moderate injury. It may also Warranty Registration, Dealer Inspection Report, be used to alert against unsafe practices. -
Page 16: Use Safety Rules
Safety - RT17, RT19 Tedder Use Safety Rules Safety Rules For Power Take-Off (PTO) Driven Equipment • Read and follow instructions in this manual and the tractor’s Operators Manual before operating. • Keep PTO shields and all guards in place. Replace damaged or missing shields and guards before •... -
Page 17: Machine Requirements And Capabilities
Safety - RT17, RT19 Tedder Machine Requirements And Capabilities Transport Safety • Fasten seat belt securely. If equipped with a foldable • Do not exceed 20 mph (32 kph). Reduce speed on Roll-Over Protective Structure (ROPS), only fasten rough roads and surfaces. -
Page 18: Fire Prevention
Fueling components can cause a fire. Operation • The Farm King machine must be in good operating condition before use. • Check all of the items listed on the service schedule • Stop the engine and let it cool before adding fuel. No under the 8 hour column before operation. -
Page 19: Welding And Grinding
Safety - RT17, RT19 Tedder Welding And Grinding • Always clean the machine and equipment, disconnect the battery, and disconnect the wiring from the machine controls before welding. Cover rubber hoses, battery and all other flammable parts. Keep a fire extinguisher near the machine when welding. -
Page 20: Equipment And Safety Decals
Safety - RT17, RT19 Tedder Equipment and Safety Decals GREASE POINT... -
Page 21: Safety Sign-Off Form
Untrained operators and failure to follow instructions can cause injury or death. Farm King follows the general Safety Standards specified by the American Society of Agricultural and Biological Engineers (ASABE) and the Occupational Safety and Health Administration (OSHA). Anyone who will be operating and / or maintaining the Rotary Rake must read and clearly understand ALL Safety, Operating and Maintenance information presented in this manual. - Page 22 Safety - RT17, RT19 Tedder...
-
Page 23: Operation
Operation - RT17, RT19 Tedder Operation Pre - Operation Checklist Entering The Operator’s Position Leaving The Operator’s Position Tractor Requirements Connecting to Tractor Three-Point Hitch Pull Type Hitch Connecting PTO Driveline PTO Driveline Length Check PTO Driveline Bottoming Out Check... - Page 24 Operation - RT17, RT19 Tedder...
-
Page 25: Pre - Operation Checklist
Wear goggles. Tractor Requirements Use cardboard to check for leaks. The RT17 and RT19 Tedders require a tractor with 20 HP (15 KW). Note: Do not operate with hydraulic leaks. 6. Check that all electrical connections are tight. -
Page 26: Connecting To Tractor
Operation - RT17, RT19 Tedder Connecting to Tractor Install the left and right lower three-point mounts of the tractor to the equipment left and right lower Three-Point Hitch mounting pins. Reinstall the retaining pins. Always inspect the tractor’s three-point hitch and equipment three-point mounts before connecting. -
Page 27: Pull Type Hitch
Operation - RT17, RT19 Tedder Pull Type Hitch Figure 4 Figure 3 16 in. 410 mm) Move the tractor backwards, aligning the drawbar with the equipment hitch (Item 1). Lower or raise the support jack (Item 2) to properly align the Adjust the tractor’s drawbar in / out, until the center... -
Page 28: Connecting Pto Driveline
Operation - RT17, RT19 Tedder Connecting PTO Driveline Figure 6 Stop the engine and leave the operator’s position (See “Leaving The Operator’s Position” Operator’s section). The PTO shafts are shipped with the slip Note: clutch disengaged. Engage the slip clutch. -
Page 29: Pto Driveline Length Check
Operation - RT17, RT19 Tedder PTO Driveline Length Check PTO Driveline Bottoming Out Check Due to variations in distances between tractor PTO Stop the engine and leave the operator’s position shafts and implement input shafts, drivelines may (See “Leaving The Operator’s... -
Page 30: Reducing The Pto Driveline Length
Operation - RT17, RT19 Tedder Reducing The PTO Driveline Length Figure 8 Stop the engine and leave the operator’s position IMPLEMENT (See “Leaving The Operator’s Position” in the PTO SHAFT Operation section). Make sure the PTO driveline and all rotating components have come to a complete stop before leaving the operator’s position. -
Page 31: Pto Driveline Engagement Check
(from Step 3), the PTO driveline does not have adequate engagement and should be replaced • Keep bystanders away. with a longer driveline. See your Farm King dealer for available PTO drivelines. • Keep hands, feet, clothing and long hair away. -
Page 32: Connecting Hydraulic Hoses
Operation - RT17, RT19 Tedder Connecting Hydraulic Hoses WARNING Tedders are equipped with a hydraulic wing lift system. AVOID BURNS Figure 11 Hydraulic fluid, tubes, fittings and quick couplers can get hot when running equipment. Be careful when connecting and disconnecting quick couplers. -
Page 33: Work Configuration
Operation - RT17, RT19 Tedder Work Configuration Figure 13 Transport the Tedder to the area of work (See WORK MODE “Transport Mode” in Operation section). Always comply with federal, state, local and provincial laws regarding the transport of farm equipment on pubic roadways. -
Page 34: Field Operation
Operation - RT17, RT19 Tedder Field Operation Figure 14 Make sure the tractor is properly connected to the equipment. Enter the operator’s position. See “Entering the Operator’s Position” in the Operation section. When starting work, operate the equipment for a short distance and check the result. - Page 35 Operation - RT17, RT19 Tedder Figure 16 DANGER DANGER DANGER DANGER Rotary group rotation is as shown [Figure 16]. WARNING AVOID INJURY OR DEATH During operation make sure no bystanders, especially small children, are in the work area. Keep away from all dangerous areas around the...
-
Page 36: Adjustments
Operation - RT17, RT19 Tedder Adjustments Pull-Type Models Figure 18 WARNING AVOID INJURY OR DEATH Before adjusting or servicing the machine: • Always park on a flat level surface. • Place all controls in NEUTRAL. • Engage the park brake. -
Page 37: Transport Configuration
Operation - RT17, RT19 Tedder Transport Configuration Figure 19 Always comply with federal, state, local and TRANSPORT MODE provincial laws regarding the transport of farm equipment on pubic roadways. Verify that the tractor / tow vehicle is approved for transporting the equipment and that the equipment is securely attached to the tractor / tow vehicle. - Page 38 Operation - RT17, RT19 Tedder Figure 21 10 - 20 IN. MOUNTED-TYPE MODEL Mounted-Type Models: Raise the three point hitch and lift the equipment off the ground. The lowest point of the equipment must be 15 to 20 in. (40 to...
-
Page 39: Maintenance
Maintenance - RT17, RT19 Tedder Maintenance Service Schedule Chart Lubrication Recommendations Locations Tine Replacement Safety Sign (Decal) Installation Storage And Return To Service Storage Return To Service... - Page 40 Maintenance - RT17, RT19 Tedder...
-
Page 41: Service Schedule Chart
Maintenance - RT17, RT19 Tedder Service Schedule Chart WARNING Instructions are necessary before operating or servicing equipment. Read and understand the Operator And Parts Manual and safety signs (decals) on equipment. Follow warnings and instructions in the manuals when making repairs, adjustments or servicing. Check for correct function after adjustments, repairs or service. -
Page 42: Lubrication
Maintenance - RT17, RT19 Tedder Lubrication Locations Recommendations IMPORTANT Always use a good quality multi-purpose / lithium base grease when lubricating the equipment. Fluid such as engine oil, hydraulic fluid, • Always use a hand-held grease gun. coolants, grease, etc. must be disposed of •... - Page 43 Maintenance - RT17, RT19 Tedder Figure 23 Figure 25 8-10 Lubrication point locations (Item 1) are identified with a sticker (Item 2) [Figure 25]. Lubrication points include: Apply two pumps of grease to the guard bushings • Wheels (Item 1) [Figure 23].
-
Page 44: Tine Replacement
Maintenance - RT17, RT19 Tedder Tine Replacement Safety Sign (Decal) Installation Periodically check all tines for wear or damage. IMPORTANT Figure 27 When replacing safety signs (decals), the temperature must be above 10° C (50° F). • Remove all portions of the damaged safety sign (decal). -
Page 45: Storage And Return To Service
Maintenance - RT17, RT19 Tedder Storage And Return To Service Return To Service After the equipment has been in storage, it is Storage necessary to follow a list of items to return the Sometimes it may be necessary to store the equipment to service. - Page 46 Maintenance - RT17, RT19 Tedder...
-
Page 47: Parts Identification
Parts Identification - RT17, RT19 Tedder Parts Identification Always give your dealer the Model, Color and Serial Number of your machine to assist them in ordering and obtaining the correct parts. Use the exploded view and tabular listing of the area of interest to exactly identify the required part. - Page 48 Parts Identification - RT17, RT19 Tedder...
-
Page 49: Center Frame
Parts Identification - RT17, RT19 Tedder Center Frame ITEM PART NUMBER DESCRIPTION R18033776 HAY TEDDER GEARBOX R18033479 R LATERAL ARM - RT17 R18033728 R LATERAL ARM - RT19 R18033727 L LATERAL ARM - RT17 R18033729 L LATERAL ARM - RT19... - Page 50 Parts Identification - RT17, RT19 Tedder ITEM PART NUMBER DESCRIPTION R3120102 CIR CLIP D.35 R3010294 HH SCREW M8X20 R3030802 WASHER M12 S.E. R12061035 SPACER 54X45X8 R3120101 CIR CLIP Ø30 R3110003 TAB 8X7X40 R3010228 HH SCREW M12X30 R3030800 WASHER M12 S.E.
- Page 51 Parts Identification - RT17, RT19 Tedder ITEM PART NUMBER DESCRIPTION R18030616 TINE R18030627 SPRING CLAMP R3020202 SELF LOCKING NUT M12 R3011215 SCREW TE 12X40 R3020202 SELF LOCKING NUT M12 R18033631 R COMPLETE ARM - RT17 R18033736 R COMPLETE ARM - RT19...
-
Page 52: Wing Frame
Parts Identification - RT17, RT19 Tedder Wing Frame ITEM PART NUMBER DESCRIPTION R18033535 CROSS ATTACK L.1365 MM - RT17 R18033730 CROSS ATTACK L.1590 MM - RT19 R18033216 COLLAR C3 R3010231 SCREW TE M12X70 R3030800 WASHER M12 S.E. R4010702 BAND... - Page 53 Parts Identification - RT17, RT19 Tedder ITEM PART NUMBER DESCRIPTION R9070101 COVER R8020702 JOINT DOUBLE DG2 R18033703 SPACER D.42 L.8 R3080141 ELASTIC PIN 10X55 R3080142 ELASTIC PIN 6X55 R12010103 SHAFT L.916 MM - RT17 R12010104 SHAFT L.1041 MM - RT19...
-
Page 54: Wing Lift, Locking Device, Guards
Parts Identification - RT17, RT19 Tedder Wing Lift, Locking Device, Guards ITEM PART NUMBER DESCRIPTION R18033536 CYLINDER - RT17 R18033732 CYLINDER - RT19 R12881406 END POINT D.50 R3030156 WASHER M16 ZN R3020209 SELF LOCKING NUT M8... - Page 55 Parts Identification - RT17, RT19 Tedder ITEM PART NUMBER DESCRIPTION R3030176 WASHER M22 ZN R11010906 SPRING D.27 L.78 R18033542 STOP FRAME R18033700 PIN HYDRAULIC CYLINDER D20 L100 R3030168 WASHER M20 R3120157 SEEGER E20 R18033538 R3030115 WASHER 53X26X5 R3120127 RING SEEGER D.25...
-
Page 56: Pull-Type Hydraulic Hoses
Parts Identification - RT17, RT19 Tedder Pull-Type Hydraulic Hoses ITEM PART NUMBER DESCRIPTION R12760724 HYDRAULIC HOSE L.1350 R12760722 HYDRAULIC HOSE L.3300... -
Page 57: Pull-Type Hitch, Pto
R18033636 R3030168 WASHER M20 ZN R3020216 SELF LOCKING NUT M20 R18033342 COLLAR CF2 R18033216 COLLAR C3 R3070118 U BOLT M10 R8020438 PTO SHAFT 90 KG/M L.1480 - RT17 R8020426 PTO SHAFT 120 KG/M L.1520 - RT19 R12881497 BASE COLLAR 30X20... -
Page 58: Pull-Type Mechanical Angle Adjust, Release Rope
Parts Identification - RT17, RT19 Tedder Pull-Type Mechanical Angle Adjust, Release Rope... - Page 59 Parts Identification - RT17, RT19 Tedder ITEM PART NUMBER DESCRIPTION R18033715 ROPE R9060108 HANDLE R18033712 SCREW REGULATION R18033714 SNAIL M24 L.55 R3080102 ELASTIC PIN 6X36 R12280003 WASHER AS2035 R18030697 HANDLE R18033711 FRONT SNAIL R3120146 SEEGER D.35 R18034347 ATTACK REGULATION R18035418...
-
Page 60: Pull-Type Hydraulic Angle Adjust
Parts Identification - RT17, RT19 Tedder Pull-Type Hydraulic Angle Adjust... - Page 61 Parts Identification - RT17, RT19 Tedder ITEM PART NUMBER DESCRIPTION R18035531 ATTACK CYLINDER R18035418 PLATE ATTACK R3010408 SCREW TE M16X110 ZN R3030322 GROWER WASHER M16 R18033957 CYLINDER R3120157 SEEGER E20 R18033713 PIN HYDRAULIC CYLINDER D20 L100 R18033321 PIN Ø25 L.160...
-
Page 62: Mounted-Type Guards
Parts Identification - RT17, RT19 Tedder Mounted-Type Guards... - Page 63 Parts Identification - RT17, RT19 Tedder ITEM PART NUMBER DESCRIPTION R18033553 FRONT PROTECTION DX R18033554 FRONT PROTECTION SX R9190018 RUBBER CUP Ø32 R3070118 U BOLTO M10 R18033552 UNION PROTECTION R3170120 U BOLTO M10X40 R18033708 PROTECTION BACK DX R18033555 PROTECTION BACK SX...
-
Page 64: Mounted-Type Hitch, Pto, Release Rope
Parts Identification - RT17, RT19 Tedder Mounted-Type Hitch, PTO, Release Rope... - Page 65 Parts Identification - RT17, RT19 Tedder ITEM PART NUMBER DESCRIPTION R18033546 FRAME R3010405 SCREW TE M16X120 ZN R3020204 SELF LOCKING NUT M16 R18033973 SUPPORT ROPE 3P R3011268 SCREW TE M12L20 ZN R3030162 WASHER M12 ZN R3080105 ELASTIC PIN 8X50 R18032266...
-
Page 66: Mounted-Type Hydraulic Hoses, Stabilizer Bars
Parts Identification - RT17, RT19 Tedder Mounted-Type Hydraulic Hoses, Stabilizer Bars... - Page 67 Parts Identification - RT17, RT19 Tedder ITEM PART NUMBER DESCRIPTION R18033543 R18033572 WASHER Ø40 R18033548 CYLINDER R3030168 WASHER M20 ZN R3020216 SELF LOCKING NUT M20 R3011312 SCREW TE M8X90 ZN R18033165 SUPPORT SPRING R11010708 SPRING R18033569 BRAKE R3030157 WASHER M8 EXL ZN...
-
Page 68: Hydraulic Cylinder - Angle Adjust
Parts Identification - RT17, RT19 Tedder Hydraulic Cylinder - Angle Adjust ITEM PART NUMBER DESCRIPTION R18053185 SUPPORT R18053179 HANDLE R18053180 BUSH R3080103 ELASTIC PIN 6X40 R18053181 R18053182 HEAD R18033666 SEAL KIT COMP . R3020232 SELF LOCKING NUT M20 R18053184 CYLINDER WITH VALVE R18033957 CYLINDER COMPLETE Ø50 C.100... -
Page 69: Hydraulic Cylinder - Wing Fold
Parts Identification - RT17, RT19 Tedder Hydraulic Cylinder - Wing Fold ITEM PART NUMBER DESCRIPTION R18053172 ROD - RT17 R18053174 ROD - RT19 R18053175 HEAD R18033665 SEAL KIT - RT17 R18033667 SEAL KIT - RT19 R18053177 CYLINDER - RT17 R18053178... -
Page 70: Pto Shaft - Rt17
Parts Identification - RT17, RT19 Tedder PTO Shaft - RT17 ITEM PART NUMBER DESCRIPTION R12881456 FORK R12881457 CROSS R12881458 FORK SPLINED R12881459 TUBE EXT. L.1085 R12881460 TUBE INT. L.1085 R12881461 FORK INT. R12881462 LIMITING R12881463 ELASTIC PIN 8X55 DIN 1481 R12881464 EXTERNAL PROTECTION L.1210... -
Page 71: Pto Shaft - Rt19
Parts Identification - RT17, RT19 Tedder PTO Shaft - RT19 ITEM PART NUMBER DESCRIPTION R12881466 FORK R12881467 CROSS R12881468 FORK SPLINED R12881469 TUBE EXT. L.1060 R12881470 TUBE INT. L.1060 R12881471 FORK INT. R12881472 LIMITING R12881473 ELASTIC PIN 8X65 DIN 1481 R12881474 EXTERNAL PROTECTION L.1210... - Page 72 Parts Identification - RT17, RT19 Tedder...
-
Page 73: Specifications And Shipping Kit Numbers
Specifications And Shipping Kit Numbers - RT17, RT19 Tedder Specifications And Shipping Kit Numbers Specifications Shipping Kit And Bundle Numbers Hardware Torque Values Metric Chart Imperial Chart... - Page 74 Specifications And Shipping Kit Numbers - RT17, RT19 Tedder...
-
Page 75: Specifications
Specifications And Shipping Kit Numbers - RT17, RT19 Tedder Specifications Shipping Kit And Bundle Numbers The following is a list of Kit Numbers for this MODEL RT17 RT19 product and the Bundle Numbers, Descriptions, and Quantities for each Kit. Working Width 17’... -
Page 76: Hardware Torque Values
Specifications And Shipping Kit Numbers - RT17, RT19 Tedder Hardware Torque Values Metric Chart NOTE: Do not use the values listed in the charts if a different torque value or tightening procedure is specified in this manual for a specific application. Torque values listed are for general use only. -
Page 77: Imperial Chart
Specifications And Shipping Kit Numbers - RT17, RT19 Tedder Hardware Torque Values (Cont’d) Imperial Chart NOTE: Do not use the values listed in the charts if a different torque value or tightening procedure is specified in this manual for a specific application. Torque values listed are for general use only. - Page 78 Specifications And Shipping Kit Numbers - RT17, RT19 Tedder...
-
Page 79: Warranty
Warranty - RT17, RT19 Tedder Warranty Farm King Base Limited Warranty Repair Parts Limited Warranty What Is Not Covered Authorized Dealer And Labor Costs Warranty Requirements EXCLUSIVE EFFECT OF WARRANTY AND LIMITATION OF LIABILITY... - Page 80 Warranty - RT17, RT19 Tedder...
-
Page 81: Farm King Base Limited Warranty
If Farm King determines that it will pay labor costs for warranty work, it will do so by issuing a credit to the dealer’s or distributor’s account. - Page 82 Corrections of defects and improper workmanship in the manner, and for the applicable time periods, provided for herein shall constitute fulfillment of all responsibilities of Farm King to the purchaser, and Farm King shall not be liable in negligence, contract, or on any other basis with respect to the subject equipment.
- Page 84 www.farm-king.com 1260 Clarence Avenue Winnipeg MB, R3T 1T2 Ph.: 204.661.8711 | Fax: 204.654.2503 Toll Free: 888.524.1004 E-mail: info@buhler.com www.farm-king.com Equipment shown is subject to change without notice. ©2018 Buhler Trading Inc. Printed in Canada TSX:BUI a division of Buhler Industries Inc.
Need help?
Do you have a question about the RT19 and is the answer not in the manual?
Questions and answers