
Related Manuals for AMX FG4051-00


Summary of Contents for AMX FG4051-00
- Page 1 ADM I NI STRATO RS G U IDE A C R - 5 1 0 0 ACE N DO ™ C O RE ™ ME ETING COLLABORATION SYSTEM...
- Page 2 AMX. The three-year warranty period will be extended to the life of the product (Limited Lifetime Warranty) if the war- ranty card is filled out by the dealer and/or end user and returned to AMX so that AMX receives it within thirty (30) days of the installation of equipment but no later than six (6) months from original AMX sales invoice date.
-
Page 3: Table Of Contents
Table of Contents Table of Contents Overview ......................1 Features..........................1 Enclosure ..............................1 Front Panel Features ..........................2 Rear Panel Features..........................2 Power ..............................2 USB ................................. 2 Dual Network Connections ........................3 Dual HDMI Outputs ..........................3 Stereo Audio Line Output........................3 Microphone Audio Input......................... - Page 4 Table of Contents Room Booking............................21 Skype for Business ..........................29 Email ..............................31 User Profiles ............................32 System Settings....................... 33 Device - Options ............................ 33 Screen Sharing ............................. 40 Share Internet Connection ........................41 NetLinx ..............................42 Content Sharing............................ 43 System - Acendo Core Updates ......................
- Page 5 Table of Contents Room Booking Issues...................... 63 Wireless Presentation Issues ....................... 63 ACR-5100 Acendo Core Administrators Guide...
-
Page 6: Overview
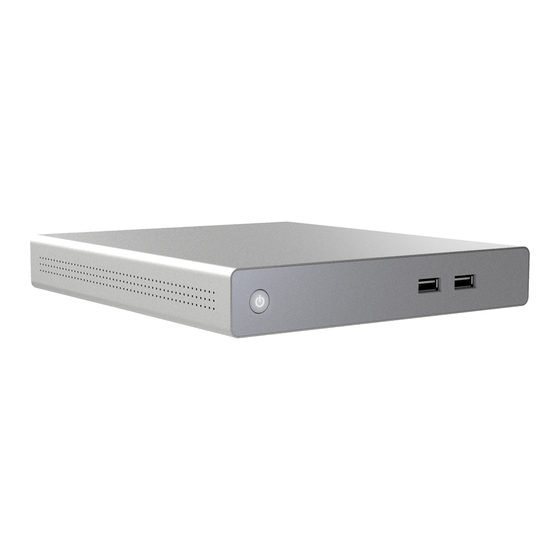
Overview Overview Delivering a flawless start to any meeting, Acendo Core Meeting Collaboration System (FG4051-00) includes wide support for Web Conferencing Platforms including one-click Skype for Business meeting launch, document sharing, web browsing, room scheduling, and more, directly from the meeting space touch display or keyboard and mouse. This chapter provides a brief overview of the functional capabilities, details about connections and wiring, and product specifications of the Acendo Core System. -
Page 7: Front Panel Features
AMX Acendo Vibe One of the USB ports can be connected to an AMX Acendo Vibe Conferencing Sound Bar to provide video conferencing capabilities. The USB connection from Acendo Vibe passes microphone audio and camera video. The HDMI connection from Acendo Core provides audio signal to Acendo Vibe while the video is passed through by Acendo Vibe to the display.. -
Page 8: Dual Network Connections
Overview The rear panel features two 10/100/1000 Base-T RJ-45 (8P8C) LAN ports for network connection via Cat5 cable. Port2 is disabled by default. FIG. 4 provides the pin outs and signals for the LAN connector and cable. RJ-45 Wiring Diagram FIG. -
Page 9: Microphone Audio Input
The rear panel features one 3.5mm mini-phono connector for audio Input jack with the right channel on the ring and the left channel on the tip. This can be used to connect to AMX’s Alero 8-channel microphone mixer for conference room meetings. - Page 10 Overview ACR-5100 Specif ications Control NetLinx: • Master Code: URL, Auto, Listen • ICSP Security: Yes RS-232: • Supported through USB using USB-DB9 adapter cable Operation Button: • Quick press: Sleep • Press-and-hold: System Settings Port Usage • 8888 TCP Group Manager •...
- Page 11 Overview ACR-5100 Specif ications USB: USB connectors support connecting peripheral devices such as a USB keyboard or mouse, a mass storage device such as a USB hard drive or flash drive, touch screens, or USB Cameras (UVC1.4). Connection: • Two USB 2.0 Type A, 500mA, 480 Mbps •...
-
Page 12: Acendo Core Welcome Screen
Overview Acendo Core Welcome Screen The Acendo Core Welcome screen provides users with room booking abilities, a 48 hour scheduler view, Admin sign on feature. The Admin username and password must be entered to view or change any of the system settings. User Login Users can access the user Home screen by clicking on the blue Use Room Now button at the center of the welcome screen (FIG. -
Page 13: Acendo Core Home Screen
Overview Acendo Core Home Screen The Acendo Core Home screen provides users with access to default applications and up to four additional Admin assigned App Favorites in the Applications tool bar (FIG. 9). Some features in the System Tool Bar are not available to non Admin users such as System Settings and the Windows control panel defined later in this chapter. - Page 14 Overview System Clock Clicking on the System time will bring up the Day of the Week, Date and Time view as shown in FIG. 11. Furthermore, click on the Change Date and Time link to bring up the Windows System clock to make changes. Click on Change Date and Time to bring up the Windows clock.
-
Page 15: Window Service Plan Information
Overview When users and guests logoff the system the following user folders are deleted for ALL users: CD Burning Cookies Desktop Documents Downloads Music Pictures Public Desktop Public Documents Public Downloads ... -
Page 16: Installation
Installation Installation Overview The Acendo Core (ACR-5100) is passive cooled without the need for fans and constructed of silver powder-coated sheet metal. Its dimensions are and requires 1RU slot when mounted in a 19" rack. 1.37” x 7.06” x 7.937” (34.8mm x179 mm x 201.6 mm) H x W x D The device is equipped with feet for tabletop usage. -
Page 17: Connections
Physical Installation Align with slotted holes and push the unit through and slide down/back. Insert Stand-off Screws into Core FIG. 15 ATTACH STAND-OFF SCREWS, INSERT THROUGH BACKPLATE Connections FIG. 16 displays the ports provided on Acendo Core. Dual HDMI Output (to 1-2 video monitors) +12VDC Input Rear... -
Page 18: Acendo Core Power Up
Acendo Core Power Up This section describes the required steps to successfully power up the Acendo Core ACR-5100. FIG. 17 provides references to the Acendo Core rear access ports that will have connections made to peripheral devices, monitors, and power. -
Page 19: Connecting A Keyboard And Mouse
Physical Installation Connecting a Keyboard and Mouse Acendo Core front and rear panels each feature Type-A USB ports for mouse and keyboard functionality, two on the front and four on the rear. The ports may also be used for reading from a mass storage device, such as a USB hard drive or flash drive. (USB external hard drives may require their own power sources. -
Page 20: Acendo Core System Settings
Acendo Core System Settings Acendo Core System Settings Login The Acendo Core System Settings are only available to system Administrators. The Admin username and password must be entered to view or change any of the system settings. Press the Key/Door icon in the bottom left of the screen next to the Power Icon to bring up the login screen. Press on the Key/Door icon to make changes to the system (Administrators Only). -
Page 21: Experience
Acendo Core System Settings After an Admin user Login, the system displays the following screen with an app toolbar down the left side and additional settings lower right. System Settings Administrator Session Screen FIG. 24 Experience Clicking on the Acendo Core Settings button brings the user to the About Acendo Core screen. Acendo Core Settings - About FIG. -
Page 22: About
Copyright - AMX copyright protecting interests of the company. Support Contact Name and Contact Number - Add an AMX or Dealer contact information for easy access to this information should issues arise. Export Diagnostics - Selects a folder to save diagnostics to on your local system. - Page 23 Acendo Core System Settings Acendo Core Settings - Applications FIG. 27 ACR-5100 Acendo Core Administrators Guide...
- Page 24 Acendo Core System Settings Applications Listed Applications Listed shows all of the applications that have been added to this device. Default apps are: Skype for Business Web Browser Media Player Remote Desktop Calculator Follow these instructions to add additional applications to this device. Hovering over the Add Application button will highlight it, Select it to add an application.
- Page 25 Acendo Core System Settings Application Favorites Up to four favorite apps may be added here that will display their icons on the Home screen left banner (FIG. 32). NOTE: When changing the Applications Favorites, the tool bar may not reflect the current changes until the Admin user ends session and comes back in.
-
Page 26: Background
Acendo Core System Settings Background The Background tab enables administrators to assign a different image to the Welcome/Home screen. Either drag-and drop and image to the center of the dotted lines, or browse to select an image that has been saved locally. Acendo Core Settings - Background FIG. - Page 27 Acendo Core System Settings With the Room Booking turned Off, the Home screen appears as shown (FIG. 35). Note the lack of a calendar icon. Home Screen with Room Booking Turned OFF FIG. 35 Click on the Room Booking switch to toggle it to On. This will take several seconds to complete and new options will appear. Acendo Core Settings - Room Booking On Options FIG.
- Page 28 Acendo Core System Settings NOTE: The Calendar Email ID f ield is the only f ield that is unique to each room: "Provider", "Server URL", "Username", and "Password" are the same across all rooms in the system. Connection Status - Current status of the Acendo Core connection to the calendar server. ...
- Page 29 Acendo Core System Settings Settings The Settings section allows Administrators to customize the defaults for the room booking on the main screen. Default Meeting Length Clicking on the Default Meeting Length will bring up the following options: 15 minutes 30 minutes ...
- Page 30 Acendo Core System Settings Require Meeting Pin Code If a conference room needs to be set aside for certain users, a Pin Code can be set that requires users to enter it before they can book a meeting. To require a Pin Code for this room, click on the switch to toggle it to ON. The system provides a 10-key for entering the Pin Code (FIG.
- Page 31 Acendo Core System Settings Now when users enter a room they will no longer see the Book Room options. They may however still Use Room Now as shown in (FIG. 43). Users may use room now. No Booking Available Book Room in Read Only Mode FIG.
- Page 32 Acendo Core System Settings Privacy Mode Privacy Mode eliminates the users ability to enter a meeting subject or comments, leaving a Privacy Meeting Subject that the Administrator assigns. To make the meetings Private only, click on the switch to toggle it ON (FIG. 46). Privacy Mode FIG.
- Page 33 Acendo Core System Settings Show Day Calendar The Day Calendar provides up to a 48hr view of today and tomorrow. It is on a slider on the right side of the main screen (FIG. 49). It can be disabled using Show Day Calendar. Slider Day calendar on the right side of the main screen.
-
Page 34: Skype For Business
Acendo Core System Settings Skype for Business Use the Skype for Business settings to configure how the meeting room handles Skype calls. Acendo Core supports One-Click Meeting Start for the following web conferencing systems: Skype for Business (on-premise where the server is maintained locally by the company using it) ... - Page 35 Windows profile prior to any other requests. This means domain users who sign into Acendo Core, will be logged into the Skype for Business client under their own account. AMX recommends enforcing Skype ACR-5100 Acendo Core Administrators Guide...
-
Page 36: Email
Acendo Core System Settings for Business's GPO (Group Policy) setting "Require Logon Credentials" to allow Acendo Core to handle login for all users on the unit. This will unify the experience and have the unit always sign in as the configured credentials provided in the Acendo Core Settings. -
Page 37: User Profiles
Acendo Core System Settings Email Server Page Options Settings • Default Subject - If desired, enter a subject for the title of messages sent from this device. • Default Message - If desired, enter a text string that will show up in each message sent from this device. •... -
Page 38: System Settings
Acendo Core System Settings Enter Special Mode to Edit the Base Prof ile This action will sign the admin user out and automatically sign in to a special base profile session. This session will either start with the default base profile or with the base profile snapshot created from a previous 'Setup Base Profile' session. From within this session, the admin user can launch applications and configure their settings as desired. - Page 39 "(Recommended)" in their selection (FIG. 61). Windows Scaling is actually called: "Change the size of text, apps and other items". Then make further adjustments using the following steps. NOTE: AMX recommends using ONLY 720p or 1080p displays to connect to Core. Windows Recommended Settings FIG.
- Page 40 Acendo Core System Settings Date and Time Settings Date and Time Settings functions the same as Windows PCs. This link provides a short cut to the Windows configuration. Click Open to launch the Windows date and time window (FIG. 63). Device Options - Date and Time Settings FIG.
- Page 41 Acendo Core System Settings The Windows system Date and Time option appears (FIG. 66). Select the Change date and time button. Select Change date and time option. Change System Date and Time FIG. 66 The Date and Time Settings window appears (FIG. 67). Select the Change calendar settings button. Select Change calendar settings option.
- Page 42 Acendo Core System Settings The Customize Format window appears. Select the Time tab and change both the Short & Long time formats to the desired formats (12 or 24 Hours). NOTE: Uppercase H for the hour is used for 24 hour format. Refer to the def initions provided on screen. Select the Time tab.
- Page 43 Acendo Core System Settings On the next window, make sure to check "Welcome screen and system accounts" as well as "New user accounts" to get the settings visible on login panel & new domain users. Select check boxes Change System Date and Time FIG.
- Page 44 Acendo Core System Settings Network Settings Network Settings enables Administrators to view and organize device network connections using standard Windows based tools. Click on the Open button to launch the Network Connections window (FIG. 72). Device Options - Wireless Settings FIG.
-
Page 45: Screen Sharing
Acendo Core System Settings Screen Sharing The Screen Sharing options turns the Acendo Core into a wireless presentation platform from user devices such as laptops, tablets and cellphones. Device Options - Screen Sharing FIG. 76 Click on the Screen Sharing switch to toggle it to On to make Acendo Core a wireless presentation platform (FIG. 76). Administrators may change the SSID to a custom name that defines the location or room name. -
Page 46: Share Internet Connection
Acendo Core System Settings Passcode Click on the Passcode switch to toggle it on. This will require users to enter an on-screen 4-digit Passcode into their device when connection to Acendo Core during Screen Mirroring sessions. This feature is supported by both AirServer and Mirrorcast. -
Page 47: Netlinx
Acendo Core System Settings The Ethernet screen appears displaying the available ports and their status (FIG. 82). The Active Ethernet Port will show "Connected". Select the Change Adapter Options from the right side menu. Select Status shows "Connected" indicating the Active port. Ethernet - Change Adapter Settings FIG. -
Page 48: Content Sharing
Content Sharing Content Sharing is an AMX app that enables sharing content from AMX Modero X G5 touch panels to display on Acendo Core meeting room presentation systems. With Content Sharing enabled, G5 touch panel users can enter the Acendo Core IP address and connect to Acendo Core and share content from USB or other downloads. - Page 49 Acendo Core System Settings Content Sharing FIG. 87 Display Options Content Sharing This option enables Content Sharing so users can connect and share content from Modero X G5 panels. Username Specify a Username for the Acendo Core that users will also need to enter into the Modero X G5 touch panel as a receiver to connect and share content.
-
Page 50: System - Acendo Core Updates
Acendo Core System Settings System - Acendo Core Updates Use the Acendo Core Updates screen (FIG. 88) to update the software version of this device, read the current version or release notes, and set the device up for automatic updates. Updates FIG. -
Page 51: Import/Export
NOTE: Harman (AMX) software updates take place at the scheduled time if no session is currently active. If a session is active, the upgrade will be deferred to after the session logout/expiry. Software updates will be applied silently in the background and a reboot will take place after the software update installation is complete. - Page 52 Acendo Core System Settings Export Settings to File Click Export to save the system settings to your local drive as a data file (.dat). The system requires a user defined password (FIG. 94). Enter a password and click OK. c0r3@dmiN Export Password Confirmation FIG.
-
Page 53: System Recovery And Backup
Acendo Core System Settings The system prompts for a File Name and Location (FIG. 98). Enter those and click Open. Export File Location and Name FIG. 98 Once the file is imported the system responds with a confirmation. Click OK to confirm. System Recovery and Backup There are several options for recovery solutions. -
Page 54: Exchange/Office 365 Set Up
Exchange/Office 365 Set Up Exchange/Off ice 365 Set Up Introduction The following document provides a recommended path for resources to communicate with Exchange 2013/2016 or Office 365 servers. Although other configurations are supported, we recommend Impersonation for all accounts associated with Acendo Core communication. -
Page 55: Requirements
Why Impersonation is Recommended for Exchange/Off ice 365 For Acendo Core, AMX recommends using a single user account, also known as credentials, with permissions to impersonate all resources (rooms) that will be accessed by Core units. Acendo Core uses Microsoft's "streaming notifications" to subscribe to a resource's calendar, and stay up to date with the calendar's status. -
Page 56: Creating Room Mailboxes
Creating Room Mailboxes Creating Room Mailboxes Overview Exchange 2013, 2016 and Office 365 use Room Mailboxes to manage meeting room schedules. Each location (meeting room) that will synchronize with the Microsoft scheduling application (Exchange / Office 365) must be represented by a Room Mailbox. NOTE: Appropriate administrator access is required to perform these tasks. -
Page 57: Domain Group Policy Definition Requirements
Domain Group Policy Definition Requirements Domain Group Policy Def inition Requirements When an Acendo Core unit is enrolled on a domain, it’s local policy definitions that are configured via the image we deploy on the unit are replaced with domain policy definitions and some of our policy rules are wiped out. These policies are used to lock down the system, such as hiding the C drive. - Page 58 Domain Group Policy Definition Requirements Local Computer\Non-Administrators Policy->User Configuration->Administrative Templates Control Panel->Personalization Enable Screen Saver - Disabled Windows Components->File Explorer Do not allow Folder Options to be opened from the Options button on the View tab of the ribbon ...
-
Page 59: Screen Sharing
Screen Sharing Screen Sharing To enable Wireless Presentation, some manual configuration must be performed. Use the following processes to configure the units as an Access Point for wireless screen casting. From main login screen, click the Key/Door icon in the bottom left (FIG. 100). Press on the Key/Door icon to make changes to the system. - Page 60 Screen Sharing Open Acendo Core Settings by clicking the Settings icon (FIG. 102). Continue with Screen Sharing configuration in the Admin Settings section and return to this procedure. Refer to Screen Sharing on page 40. System Settings Administrator Session Screen - Settings Icon FIG.
-
Page 61: Wireless Presentation (Airserver)
Screen Sharing You will see the Screen Sharing icon on the bottom tool bar (FIG. 105). Click on it to bring up the connection information. User Session - Screen Sharing Enabled FIG. 105 Wireless Presentation (AirServer) Verify the on-board AirServer app is running and you can present by connecting an Android or iOS device to Acendo Core. Click on Use Room Now to verify the Access Point starts and has Internet connection (FIG. -
Page 62: Disabling Usb Drives And Wpd Devices
Disabling USB Drives and WPD Devices Disabling USB Drives and WPD Devices Disabling USB Removable Drives and WPD Devices using Group Policies It is likely that some sites where Rome devices will be deployed will enforce security policies with regard to the use of USB removable drives and similar devices and will require these devices to be effectively disabled on the Rome device. -
Page 63: Implementing The Group Policy To Disable Removable Storage Devices
Disabling USB Drives and WPD Devices Implementing the Group Policy to Disable Removable Storage Devices For the Acendo Core device itself, this can be accomplished by a user with administrator rights using the Local Group Policy editor (gpedit.msc). A similar process can be used to create a domain policy for users, groups, or workstations on the domain using the GPO Management Console (gpmc.msc). -
Page 64: Netlinx Programming
NetLinx Programming NetLinx Programming Overview This chapter defines all programming commands and system responses available for the ACR-5100 Acendo Core Meeting Collaboration System. Device Ports: The following table details the device ports on an Acendo Core system: Port Name Description Acendo Core API exposed on this device port controls the core Acendo Core platform, settings, and Acendo Core operating environment. - Page 65 NetLinx Programming NetLinx Commands Description FFWD Moves playback forward 30 seconds on the currently open media player instance. Syntax: SEND_COMMAND <DEV>, "’FFWD’" MEETING.ADD If room scheduling is enabled, attempts to schedule a meeting with the given parameters. Syntax: MEETING.ADD-startTime,endTime,subject,body Variables: startTime - the meeting start date/time (see allowable date/time formats below) (required) endTime - the meeting end date/time (see allowable date/time formats below) (required) subject - the short meeting subject (required)
- Page 66 NetLinx Programming NetLinx Commands Description REWIND Moves playback backward 30 seconds on the currently open media player instance. Syntax: SEND_COMMAND <DEV>, "’REWIND’" ?SESSION Query for the current session state; responds with: SESSION-username Variables: username - 'NONE' if not in session 'ADMIN' if in the admin session 'GUEST' if in the guest session, or the username signed in if in a domain user session...
-
Page 67: Acendo Core System Responses
NetLinx Programming NetLinx Commands Description VOLUME Sets the system volume to the given level Variables: level - the volume level specified as a whole number between 0 and 255 (required) Syntax: SEND_COMMAND <dev>,'VOLUME-<level>' Example: SEND_COMMAND 1001:1:0,'VOLUME-128' VOLUME.MUTE Mutes or unmutes the system volume. Variables: state - true/on/1 = muted... -
Page 68: Troubleshooting
Troubleshooting Troubleshooting This section provides a list of error dialog pop-ups that may appear during an Admin or User session and possible remedies for each of them. Room Booking Issues Error Remedy An invalid URL has been entered. • Malformed URL was entered as the server's address. •... - Page 69 © 2018 Harman. All rights reserved. Acendo, Core, NetLinx, AMX, AV FOR AN IT WORLD, HARMAN, and their Last Revised: respective logos are registered trademarks of HARMAN. Oracle, Java and any other company or brand name 3/19/2018 referenced may be trademarks/registered trademarks of their respective companies.
Need help?
Do you have a question about the FG4051-00 and is the answer not in the manual?
Questions and answers