Table of Contents
Advertisement
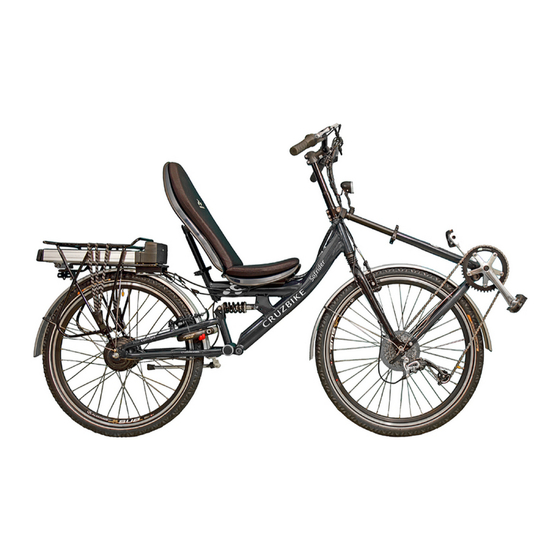
Cruzbike Owner's Instruction & Safety Manual
You have made a smart choice in selecting a Cruzbike front-wheel drive recumbent. Your new
recumbent has been engineered to provide years of top quality performance, comfort and enjoyment.
Caution: The Cruzbike riding position, rider's weight distribution and the weight of the steering
function are each quite different to any other bicycle, including average "up right" bicycles and
including other recumbent bicycles of any kind.
Warning: Be ready to explore the unique handling characteristics of the Cruzbike with
appropriate due care and in a safe, car and hazard free riding environment.
Caution: The Cruzbike has a drive system that is unlike and other bicycle on the market. Like
a child's tricycle, the pedaling and steering system are unified and create a unique set of handling
characteristics. Starting up from a standstill, turning at low and high speeds, and cornering and
braking in wet weather, even riding in a straight line are handled differently to all other bicycles.
Warning: Make sure you are practiced in the handling skills required for this bicycle
before you ride among automobile traffic or other cyclists.
Warning: Do not ride this bicycle among automobile traffic or other cyclists before you
are thoroughly familiar with its handling characteristics. Failure to do so could result in
accident and serious injury or death.
Read and make sure that you understand each point in the safety related sections (Sections 5, 6 and
7) and refer to the cited sections on any issue that you don't completely understand.
Congratulations!
Critical Safety Information
1
Advertisement
Table of Contents

Related Manuals for CRUZBIKE Freerider

Summary of Contents for CRUZBIKE Freerider
-
Page 1: Cruzbike Owner's Instruction & Safety Manual
Caution: The Cruzbike has a drive system that is unlike and other bicycle on the market. Like a child’s tricycle, the pedaling and steering system are unified and create a unique set of handling characteristics. -
Page 2: General Warning
1. General Warning: Like any sport, bicycling involves risk of injury and damage. By choosing to ride a bicycle, you assume the responsibility for that risk, so you need to know — and to practice — the rules of safe and responsible riding and of proper use and maintenance. -
Page 3: Table Of Contents
Cruzbike Owner’s Instruction & Safety Manual................. 1 Critical Safety Information ..........................1 General Warning:........................2 Contents ............................ 3 Cruzbike Sofrider and Freerider Overview ................5 Sizing Adjustments ........................6 Pre-riding Safety Checks ......................9 Safety first..............................9 Mechanical Safety Check ..........................9 Your First “Hazard-Free”... - Page 4 Important This manual contains important safety, performance and service information. Read it before you take the first ride on your new bicycle, and keep it for reference. CHECK THAT YOUR BRAKES WORK! Before getting on the bike, make a habit of pulling the front and rear brake levers to ensure the brakes engage properly.
-
Page 5: Cruzbike Sofrider And Freerider Overview
3. Cruzbike Sofrider and Freerider Overview The Cruzbike is distinguished by a drive triangle mounted forward of the front forks and which turns in unison with the front fork. This added structure increases the turning inertia of the steering function and so calls for the rider to become familiar with its feel and its responsiveness. -
Page 6: Sizing Adjustments
Step over height Step over height is the basic element of whether you are suitable to ride a particular Cruzbike. It is the distance from the ground to the top of the seat pan cushion. You need to be comfortable that you can swing your leg over the seatback, or lift your leg over the seat pan. - Page 7 Fitment Checklist 1. Rider height: The Cruzbike Sofrider and Freerider are designed to fit most riders with a height between 5’1” (155 cm) and 6’4” (193 cm). If your bike is not the right size for you, you may lose control and fall.
- Page 8 6. Do you fully understand how to operate your new bicycle? If after reading this entire manual you still have questions, call Cruzbike, Inc. at 888-225-2789 for an explanation of any functions or features which you do not understand. Information and assistance is also available online at www.cruzbike.com...
-
Page 9: Pre-Riding Safety Checks
5. Pre-riding Safety Checks Safety first 1. Always wear an approved helmet when riding your bike, and follow the helmet manufacturer’s instructions for fit, use and care. 2. Do you have all the other required and recommended safety equipment? See Section 7. It’s your responsibility to familiarize yourself with the laws of the areas where you ride, and to comply with all applicable laws. - Page 10 Handlebar and seat alignment: Make sure the seat and handlebar stem are parallel to the bike’s centerline and clamped tight enough so that you can’t twist them out of alignment. See Section 4. Handlebar ends: Make sure the handlebar grips are secure and in good condition. If not, have your dealer or local bike shop replace them.
-
Page 11: Your First "Hazard-Free" Cruzbike Ride
41 inches (104 cm) above the ground. The most popular way to mount a Cruzbike is to step over the seat while holding the handlebar with one hand and the top of the backrest with the other hand. This requires your foot to clear the seat cushion, which sits approximately 26 inches (66 cm) above the ground. - Page 12 Parking the bike To park a Cruzbike with the kickstand, dismount, turn the front wheel all the way to the right (about 120°), and lean the bike onto the stand. The kickstand is intended for use on level surfaces only.
-
Page 13: Riding Safety
7. Riding Safety The Basics WARNING: Many states require specific safety devices. It is your responsibility to familiarize yourself with the laws of the state where you ride and to comply with all applicable laws, including properly equipping yourself and your bike as the law requires. Observe all local bicycle laws and regulations. -
Page 14: Off Road Safety
• Children or pets playing near the road. • Pot holes, sewer grating, railroad tracks, expansion joints, road or sidewalk construction, debris and other obstructions that could cause you to swerve into traffic, catch your wheel or cause you to have an accident. -
Page 15: Wet Weather Riding
7. Before you attempt to jump, do stunt riding or race with your bike, read and understand Section 8 8. We recommend that children not ride on rough terrain unless an adult accompanies them. Off Road respect Obey the local laws regulating where and how you can ride offroad, and respect private property. You may be sharing the trail with others —... -
Page 16: Extreme, Stunt Or Competition Riding
The Cruzbike is not designed for this type of riding, being intended for road and groomed trail touring, commuting, and recreational/fitness riding. -
Page 17: Changing Components Or Adding Accessories
For example, rear mountain bike style touring racks that attach to the seat post may be used with Cruzbike recumbents. Many standard mudguard designs will fit the Cruzbike. Follow the manufacturers installation and usage directions in all cases. -
Page 18: Technical Information
8. Technical Information It’s important to your safety, performance and enjoyment to understand how things work on your bicycle. We urge you to ask your dealer or local bike shop how to do the things described in this section before you attempt them yourself, and that you have your dealer or local bike shop check your work before you ride the bike. - Page 19 As its name implies, it serves as a back up for a critical adjustment. If the quick release is not adjusted correctly, the secondary retention device can reduce the risk of the wheel disengaging from the fork. Removing or disabling the secondary retention device may also void the warranty.
- Page 20 c. Removing a Quick Release Front Wheel (1) Shift the rear derailleur to high gear (the smallest, outermost rear sprocket). (2) If your bike has rim brakes, disengage the brake’s quick-release mechanism to open the clearance between the wheel rim and the brake pads (see Section 4.C, figs. 11 through 15). (3) Pull the derailleur body back with your right hand.
-
Page 21: Seatpost Quick Release
19 (3) If your rear fork has a clip-on type secondary retention device, disengage it and go to he next step. If your rear fork has an integral secondary retention device, loosen the axle nuts enough to allow wheel removal; then go to the next step. (4) Raise the rear wheel a few inches off the ground and tap the top of the wheel with the palm of your hand to knock the wheel out of the fork ends. -
Page 22: Brakes
WARNING: Riding with an improperly tightened seat assembly can allow the seat to turn or move and cause you to lose control and fall. Therefore: 1. Ask your dealer or local bike shop to help you make sure you know how to correctly clamp your seat assembly. -
Page 23: Shifting Gears
the brake quick release works on your bike and check each time to make sure both brakes work correctly before you get on the bike. 2. How brakes work The braking action of a bicycle is a function of the friction between the brake surfaces — usually the brake pads and the wheel rim. - Page 24 Shifting the Front Deraileur The Sofrider and Freerider come with a wide gear ratio, however there is only a single chain ring and therefore no front deraileur . For customers who have their local bike shop add a front deraileur , they should not that the front deraileur , which is controlled by the left shifter, shifts the chain between the larger and smaller chain rings.
-
Page 25: Pedals
difficulties with shifting, the problem could be mechanical adjustment. See your dealer or local bike shop for help. WARNING: Never shift a deraileur onto the largest or the smallest sprocket if the deraileur is not shifting smoothly. The deraileur may be out of adjustment and the chain could jam, causing you to lose control and fall. -
Page 26: Bicycle Suspension
F. Bicycle Suspension Many bicycles are equipped with suspension systems. There are many different types of suspension systems — too many to deal with individually in this Manual. If your bicycle has a suspension system of any kind, be sure to read and follow the suspension manufacturer’s setup and service instructions. If you do not have the manufacturer’s instructions, see your dealer or local bike shop or contact the manufacturer. - Page 27 Tire pressure is given either as maximum pressure or as a pressure range. How a tire performs under different terrain or weather conditions depends largely on tire pressure. Inflating the tire to near its maximum recommended pressure gives the lowest rolling resistance; but also produces the harshest ride.
-
Page 28: Service
9. Service WARNING: Technological advances have made bicycles and bicycle components more complex, and the pace of innovation is increasing. It is impossible for this manual to provide all the information required to properly repair and/or maintain your bicycle. In order to help minimize the chances of an accident and possible injury, it is critical that you have any repair or maintenance that is not specifically described in this manual performed by your dealer or local bike shop. -
Page 29: If Your Bicycle Sustains An Impact
• Lift the front wheel off the ground and swing it from side to side. Feel smooth? If you feel any binding or roughness in the steering, you may have a tight headset. Have your dealer or local bike shop check it. •... -
Page 30: Assembly Instructions
Please note the information at the end of this section concerning the Safety Bolt feature of the Telescoping Front Tube (TFT). Sofrider / Freerider The assembly procedure for the Sofrider is as follows, notes that apply to the Freerider are presented in brackets, [like so]: Freerider, using a 6mm Allen fit the stem Carefully remove the seat, parts box and into the stem mount.]... - Page 31 with a nut underneath. Change the position as required according to the following: Your height is under 5’7” move SM forward two holes Your height is 5’7” to 5’9” move SM forward one hole Your height is 5’9” to 5’11” leave as Your height is 5’11”...
- Page 32 16. Put the chain back on the chain ring, arrange the chain as pictured and release the front brake cable: 17. Take the front wheel (the one with the cluster of gears) and place it as pictured before pushing it home so that the axle is seated firmly in the fork dropouts.
- Page 33 23. That completes the Cruzbike-specific 19. Take the yellow wheel reflectors from the assembly instructions. parts box and fit one to each wheel, opposite the valve.
-
Page 34: Safety Bolt
Safety Bolt Your Cruzbike Sofrider or Freerider is fitted with a unique safety feature to prevent the Telescoping Front Tube (TFT) from disengaging. If this were to occur, the pedals could swing down and touch the road dangerously. Warning: Pay attention to the following instructions on checking and setting the Safety Bolt. -
Page 35: Cruzbike Conversion Kit Instructions
11. Cruzbike Conversion Kit Instructions These instructions are for people who purchased the Cruzbike Conversion Kit and who are going to convert a regular mountain bike into a Cruzbike. If you purchased a complete bike, please disregard this chapter. Read the entire fitting instructions before starting. - Page 36 3. Bolt, washer nut x 4. Rubber Strip; 5. Ring Clamps 6. Seat pan cushion (not shown) Parts Group E (seat pan) Items E1 to E5 1. bushings to fit the sofrider fork (not Parts Group F (misc bushings) required for Items F1 conversions)
-
Page 37: Now Get Started
We suggest you use slicks unless you will be travelling on dirt roads. The clearance for the front wheel of the cruzbike can be tight and it may not take nobby tyres. 37. Check list when you visit the bike shop:... - Page 38 Fit the chainstay arms to the FWD bracket Fit the crank axle and bearings into the using the Chainstay arm bolts, placing a cruzbike chainstay, replace and or re-grease nylon washer either side of the Triangle as necessary. Bracket and on the outside, one steel washer on each side.
- Page 39 Refit the chain. the the seat support bracket so the clamp can go around the horozontal bar of the Fit the cruzbike seat bike. Make sure the screw heads of the Remove the saddle from the bike, then hose clamp are facing down.
-
Page 40: Your First Ride
Sore behind the knees – adjust pedals Adjustment and fitting cables closer. Fit the cushions to the seat, matching up 100. Sore on top of knees – adjust pedals the velcro strips. further away. Sit on the bike and loosen the Quick 101. - Page 41 113. Contact sales@cruzbike.com for technical reached that limit. support. 111. Upgrade the drive train componentry. 112. Visit http://www.cruzbike.com/forums/ and see the ‘Conversion Kit’ board for contact...
-
Page 42: Warranty
Cruzbike Bicycle Limited Warranty Cruzbike will repair or replace any original equipment parts it determines to be defective for a period of 180 days from date of purchase at no charge; the frame and fork have a lifetime warranty. The...
Need help?
Do you have a question about the Freerider and is the answer not in the manual?
Questions and answers