
Related Manuals for HIRAYAMA HVA-110


Summary of Contents for HIRAYAMA HVA-110
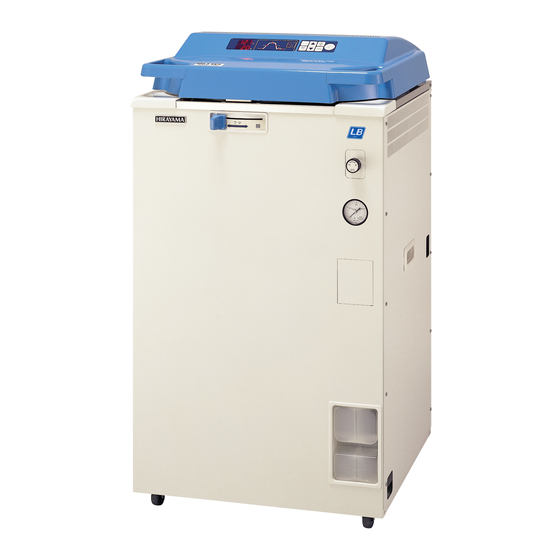
- Page 1 No. S04G-001-C HIRAYAMA AUTOCLAVE HICLAVE HVA-85 HVA-110 OPERATION MANUAL WARNING: Be sure to read this operation manual carefully and handle it properly. Issued on October 20, 2005. Revised on June 1, 2009...
-
Page 2: Introduction
Refer to Page 6 for Contents ● This manual covers the operation and basic maintenance procedure for the Autoclave HVA-85/110. Proper handling will allow the autoclave to demonstrate its full performance and ensure a long lifetime for the instrument. ● Please confirm that this product conforms to your order, and confirm that it was not damaged during transport. -
Page 3: Read Carefully Before Using
Read Carefully Before Using Determine the handling person responsible of this product. ● In this manual the following headings are applied to items to which great attention should be given: ● WARNING : Precaution indicating an imminent dangerous situation which if not avoided may lead to death or serious injury. - Page 4 CAUTION: Foreign matter (metals, liquid) may enter through the vent hole. Operating the equipment with such foreign matter inside may cause trouble with the equipment, fire or electric shock. Do not forcibly bend, twist, tie or extend the power cord. Do not place heavy objects on the cord.
-
Page 5: How To Read This Manual
This operation manual consists of the following sections covering the information required for ● proper operation of the Autoclave HVA-85/110: Chapter 1. What is the Autoclave HVA-85/110? This section describes the uses and features of the product, and the names and functions of its parts. -
Page 6: Table Of Contents
Read Carefully Before Using …………………………………………………………………... 2 How to Read this Manual ………………………………………………………………………. 4 Contents ………………………………………………………………………………………….. 5 Chapter 1. What is the Autoclave HVA-85/110 ······························································· 6 1. Product Uses········································································································ 6 2. Product Features·································································································· 6 3. Names and Functions of Parts ············································································· 6 Chapter 2. -
Page 7: Chapter 1. What Is The Autoclave Hva-85/110
Chapter 1. What is the Autoclave HVA-85/110? 1. Product Uses The product is used to sterilize substances that can withstand high temperature and/or high ● pressure steam: there include tools of glass, ceramic, metal or rubber, water, media, reagents, and liquid medicines. - Page 8 Display and Operation Switches ① ④ ⑤ ⑧ ⑩ STER. MODE MODE ℃ START HEATG COOL SOLID STOP POWER NEXT WARM ON/OFF ST - BY COMP. MIN. ② ③ ⑥ ⑦ ⑨ ① Digital Display (Temperature, Error) The digital display indicates the set temperature when the equipment is in standby and the temperature in the working chamber during operation.
-
Page 9: Chapter 2. Installation
Chapter 2. Installation IMPORTANT : If the equipment is installed in a place which is 800m or higher than sea level (i.e. under low pressure in mountainous areas), the settings must be changed. In this case, be sure to contact our authorized distributor in your region. -
Page 10: Installation Procedure
① Put the body on the caster stoppers to prevent it from accidentally moving. Anchor the body as described in the following. (1) Set the stopper the specified distance from walls. Specified distance L = HVA-85/110..67 cm or Right side view more... - Page 11 ③ Pour water into the exhaust bottle. ・ Add water to the exhaust bottle as described below. (1) Unload the exhaust bottle from the body. ・ Pull the bottle outwards until the top handle can be grabbed securely. Lift the bottle out of the autoclave using this handle.
- Page 12 Turn the breaker ON. ④ Lift the circuit breaker lever on the right side of the main body. Circuit breaker Lift ⑤ Referring to “Chapter 3, Operation Method”, open the lid and take out the accessories. ⑥ Place the bottom plate in the chamber. ⑦...
-
Page 13: Chapter 3. Operation Method
Chapter 3. Operation Method Basic Operation Method Turn the power on See "1. Power On" on page 14. ▼ Open the lid ▼ See "2. Pouring Water" on page 14. Pour water ▼ Load substance ▼ See "3. Loading Substance" on page 15. Close lid ▼... -
Page 14: Power On
③ Pour water through the opening of the ② Heater cover ③ chamber until you can see water through Water level gauge hole the hole at the center of the Heater cover. ・The HVA-85 requires 4 liters and HVA-110 requires 5 liters of water. ① UNLOCK... -
Page 15: Loading Substance
3. Loading Substance CAUTION: Be careful not to pinch hands when closing the lid. Close the lid after confirming that no foreign matter is adhering to the section contacting the lid gasket. Foreign matter in this section may cause vapor leaks. ... -
Page 16: Selecting Mode (Process)
NOTE: When sterilizing an empty deep container, lay the container on its side in the chamber so that it will be permeated with steam. An upright position may cause insufficient sterilization. If a waste disposal bag is used in sterilization, open the bag far enough that the bag is not in contact with the inside surface of the chamber. - Page 17 Initial Value Mode Step Display Display Sterilization Sterilization Warming Cooling Temperature Time Temperature pattern HEATG→STER.→COOL→WARM 121℃ 20 minutes 50℃ P - 0 Mode STER. MODE ℃ ℃ HEATG COOL SOLID Alternate WARM COMP . ー MIN. MIN. display Initial Value Mode Step Display Display...
-
Page 18: Changing Set Values (Registering Of Values By Customer)
・ Each time the switches are pressed, the displayed value increases or decreases as follows: Sterilization temperature: (In increments of 1℃ within a range of:) HVA-85/110 : 105~135℃ Sterilization time : 1 minute increments within a range of 1 - 250 minutes... - Page 19 Set sterilization time (50 minutes) = Delay time (30 minutes) + desired sterilization time (20 minutes) Set sterilization time Delay time Sterilization time (Temperature) HVA-85 Reference Values of Delay Time (per flask) Liquid Volume Delay Time Temperature of water 3 liters...
-
Page 20: Starting Operation
6. Starting Operation ① Ascertain that the water level in the exhaust bottle is between the HIGH and LOW levels. If above the HIGH level: See "1. Draining Exhaust Bottle" on page 26. If below the LOW level: See "2. Installation Procedure (3)" on page 10. ②... -
Page 21: Unloading
7. Unloading WARNING: Confirm that the gauge for pressure in the chamber reads "0MPa". 0 Pressure gauge CAUTION: Keep the face and hands away from the chamber when lifting the lid after operation is complete; steam will gush out of the opening of the chamber. ... -
Page 22: After Completion Of Operation
8. After Completion of Operation ① Turn off the power switch after the completion of daily operations. ② If the fine exhaust knob is open, turn it until closed. IMPORTANT : To prevent clogging of the piping, refer to "Draining Chamber" and change the water within the chamber once per day. -
Page 23: Operation Of Cycles
11. Operation of Cycles Air Evacuation Cycle --- Common to all modes The ST-BY display stops flashing and lights up and the HEATG display starts blinking. The temperature in the chamber is displayed in the digital temperature display section. ... - Page 24 Cooling Cycle --- Modes 1 and 2 The COOL display will start to flash. When the cooling pattern is set to P-1, the cooling fan independently and pulse cooling is executed. When the exhaust pattern is set to P-2, Forced Cooling is executed. When P-0, the cooling fan does not works the chamber cools naturally.
- Page 25 Completion Cycle --- Common to all modes When all cycles of a mode are complete, the electronic alarm indicates the completion by beeping 3 times. The COMP display then starts blinking. Completion state Blinking COMP. NOTE: If the operation switches and the lock / unlock lever are left un-operated for 30 minutes, the ●...
-
Page 26: Chapter 4. Maintenance And Service
Chapter 4. Maintenance and Service WARNING: Be sure to start maintenance or service work after the main body has been sufficiently cooled. 1. Draining Exhaust Bottle Water collects in the exhaust bottle as operations are repeated. If the water is above the HIGH level (allowable highest water level), drain the bottle in accordance with the following procedures. -
Page 27: Draining Chamber
2. Draining Chamber When planning to put the equipment out of service for a long time, be sure to drain the ● chamber to prevent pipe clogging. After checking that the chamber has been sufficiently cooled, drain the chamber in accordance with the following procedure. CAUTION : ... -
Page 28: Cleaning Body
4. Cleaning Body IMPORTANT : Do not use benzine or thinner to clean the body. Also make sure that the volatile substances such as insecticides do not come into contact with the body as these substances may deteriorate the body or strip its paint. ①... -
Page 29: Chapter 5. Specifications
Chapter 5. Specifications Model HVA-85 HVA-110 External dimensions W × 1011H × 652 D mm W × 1191H × 652 D mm (D size is not including Open/Close & Fine Exhaust Knobs) Internal dimensions 420Ø × 615D mm (Effective: 85 liter) 420Ø... -
Page 30: Chapter 6. Troubleshooting
Chapter 6. Troubleshooting 1. Error Detection (Alarms) Should any malfunction occur in the autoclave, the error detection circuit will be triggered to assure safety. Once the circuit is activated, an error number appears on the digital display and the electronic alarm sounds, indicating the problem. To stop the alarm sound, press the START/STOP switch. - Page 31 Contact our authorized distributor at the set temperature was 0.18MPa in your region. (Excessive pressure or above for HVA-85, 0.24MPa or alarm) above for HVA-110 continued in the chamber for 15 seconds. Piping is clogged by a bag such as ...
-
Page 32: Early Troubleshooting
2. Early Troubleshooting Symptom Cause Remedy Display remains off Check the plug and outlet first. (1) Properly insert plug after power is retighten any loose parts. (1) The plug is not properly inserted or turned on. is insufficiently tightened. (2) (3) Contact the authorized sales distributor from which the unit was (2) Disconnection in the power cord. -
Page 33: Appendix
2. Fast wearing parts Parts name Applicable Model Lid gasket HVA-85 / 110 3. Glossary Autoclave (High Pressure Steam Sterilizer) Equipment to sterilize, with saturated steam and under a pressure higher than atmospheric pressure, the tools and gauze for medical treatment and surgical operations and media used in laboratories.
Need help?
Do you have a question about the HVA-110 and is the answer not in the manual?
Questions and answers