
Related Manuals for Valmet TCU

Summarization of Contents
Warnings & Safety Information
Input Voltage and Frequency Check
Check input voltage and frequency before making connections to prevent equipment damage.
Welding Safety Precautions
Ensure operating voltage is disconnected before performing welding near the device.
Hot Sample Handling Warning
Exercise caution with hot samples or water in the sample line during installation, maintenance, or service.
ATEX Zone 2 Sensor Suitability
Sensor unit suitable for ATEX ZONE 2 or non-hazardous locations only.
TCU Non-Hazardous Location Use
The Valmet TCU operating unit is only suitable for use in non-hazardous locations.
ATEX Component Substitution Hazard
Substitution of components may impair ATEX ZONE 2 suitability; ensure housing is pressure tested.
Disconnection Safety Warning
Do not disconnect equipment unless power is off or the area is known to be non-hazardous.
1. Introduction
1.1. Measurement Principle
Explains the microwave propagation time measurement principle of the Valmet TS for total solids content.
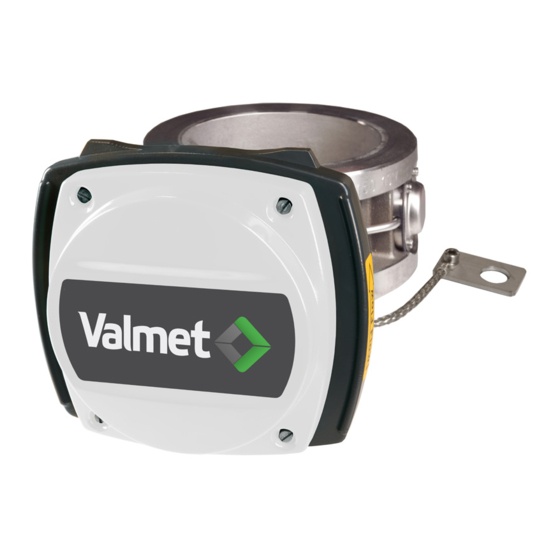
1.2. Parts of the Device
Identifies the main components of the Valmet TS, including the sensor unit and TCU operating unit.
2. Construction
2.1. Valmet TS-FT
Describes the Valmet TS-FT model, its sizes, pressure ratings, and compliance with ATEX standards.
2.2. Sensor Electronics
Details the sensor electronics board, its components like transmitter, receiver, and connectors for measurement and communication.
2.3. Transmitter Central Unit (TCU)
Describes the TCU as the operating terminal and calculation unit, operated via keypad and display.
3. Installing
3.1. General Principles
Guidance on selecting sensor models based on pipeline size and pressure rating, and installation considerations.
3.2. Choosing the Installation Site
Recommendations for selecting the optimal installation point, considering pipe section, space, and environmental factors.
3.3. Installation Dimensions
Illustrates installation dimensions for Valmet TS sensors, showing how the sensor replaces a pipeline section.
3.4. TCU and its Shield
Instructions for mounting the TCU's protective shield, considering accessibility and sensor cable length.
3.5. Electric Connections
Provides essential safety notes and steps for connecting power supply, current outputs, and sensor cables.
4. Setting Up
4.1. Checking the Hardware
Ensures delivery consistency and checks for any transport damage to the device before installation.
4.2. Installing
Directs users to install the sensor and TCU as instructed in Chapter 3 of the manual.
4.3. Checking the Cable Connections
Verifies correct connection of the power supply cable, current outputs, and sensor cable.
4.4. Checking Electric Operation
Guides on connecting power, verifying TCU display, and allowing the device to warm up.
4.5. Configuration and Calibration
Outlines steps for choosing language, units, setting date/time, scaling outputs, and calibrating the total solids content.
5. User Interface and Operating
5.1. Operating Unit, TCU
Explains the function of TCU keys for navigation, data entry, and sample taking for calibration and monitoring.
5.2. Operating Diagram
Presents the operating diagram divided into four main sections: Calibration, Configuration, Diagnostics, and Special functions.
6. Configuration
6.1. Configuration Menu
Lists the functions available in the configuration menu, including output signals, user settings, device info, clock, address, and digital inputs.
6.2. Choosing and Scaling the Output Signal
Details how to configure total solids content output, including setting low/high limits and handling errors.
6.3. User Settings
Covers settings like trend interval, position, language, temperature unit, TS unit, password, and active signal level.
6.4. Device Info
Allows viewing information about the sensor electronics and the TCU, including type, serial number, and software versions.
6.5. Setting Date & Time
Procedure for setting the device's date and time, which is used for trend tables and sample timestamps.
6.6. Address
Explains HART address settings, their impact on analog output, and warnings about using specific address values.
6.7. Digital Inputs
Describes the use of binary inputs (BIN0, BIN1) for recipe selection and process stop functions.
7. Calibration
7.1. About Calibration
Explains factory calibration and the recommendation for re-calibration upon device start-up for optimal settings.
7.2. Sample Taking
Guides on how to take a calibration sample, adjust the measurement signal, and interpret the sampling results.
7.3. Entering Laboratory Results
Instructs on entering laboratory results for total solids content and conductivity to calibrate the device.
7.4. Offset Correction
Details how to perform offset correction if laboratory monitoring shows consistent high or low measurement results.
7.5. Calibration and Sample History
Describes how to view the calibration history and sample history tables for monitoring and analysis.
8. Diagnostics
8.1. Diagnostics Menu
Lists the functions within the diagnostics menu: Error Log, Diag. Values, and Diag. Limits.
8.2. Error Table
Explains how to read the error table for self-diagnostics messages, including timestamps and error types.
8.3. Diagnostics Values
Shows how to view diagnostic measurements like temperature, signal levels, and drift values.
8.4. Diagnostics Limits
Details error limits for diagnostic measurements and their effect on the current signal, with options to edit ON/OFF settings.
9. Special Functions
9.1. Special Functions Menu
Outlines the available special functions: Chemical compensation, Temperature compensation, Sensitivity correction, and Recipes.
9.2. Chemical Compensation
Explains how to compensate for errors caused by variations in chemical content using microwave attenuation measurement.
Temperature Compensation Correction
Describes how to enter a correction curve to compensate for temperature effects on measurement results.
9.3. Sensitivity Correction
Details how to change the sensitivity for measuring different materials by adjusting a coefficient based on lab results.
9.4. Recipes
Explains the recipe function for applications with varying conditions, allowing separate calibration and configuration for each recipe.
10. Troubleshooting
10.1. Troubleshooting Procedures
Provides instructions for fault situations, covering self-diagnostics and potential issues not detected by the system.
10.2. Effect of Process Conditions on Measurement
Discusses how process conditions like air, chemicals, and temperature can affect measurement accuracy.
10.3. Self-Diagnostics Error Messages
Explains how the self-diagnostics system monitors channels and detects faults, detailing specific error messages and their causes.
11. Replacing Components
11.1. Pressure Test of Sensor Housing
Details the procedure for pressure testing the sensor housing after opening, especially for ATEX Zone 2 installations.
11.2. Sensor Electronics
Provides instructions for removing and installing the sensor electronics, including disconnecting cables and securing the unit.
11.3. Antenna Cables, FT-sensor
Guides on removing and installing antenna cables for FT-sensor models, including handling connectors and bushings.
11.4. Antennas, FT-sensor
Instructions for removing and installing the microwave antennas on FT-sensor models, covering screws, seals, and O-rings.
11.5. TCU
Details the procedure for removing and installing the TCU unit, including power disconnection and calibration selection.
12. HART User Interface
12.1. About the Interface
Introduces HART communication and the Valmet MCA device description used with the Valmet TS.
12.2. Measurement
Describes the 'Measurement' menu, which displays results from the Valmet TS, including sensor type, CS, temperature, and conductivity.
12.3. Configure
Explains how to configure the Valmet TS current output and other parameters using the 'Configure' menu.
12.4. Calibrate
Details single-point calibration, including commands for sampling, laboratory value entry, and history viewing.
12.5. Diagnostics
Provides access to diagnostic functions like history, values, alarms, digital inputs, loop tests, and master reset.
Technical Specification
Sensor Specifications
Details on measurement range, repeatability, sensitivity, filtering, process conditions, pressure, vibration, environmental conditions, and materials.
Operating Unit TCU Specifications
Details on connections, voltage, environmental conditions, dimensions, weight, and PC connections for the TCU.
Conductivity Limits and Sensor Weights
Table listing conductivity limits and sensor weights for different models based on temperature.
Need help?
Do you have a question about the TCU and is the answer not in the manual?
Questions and answers