Advertisement
24 Remco IndustRIes | www.remcoindustries.com | www.remcotowing.com
Aquajet
User's Manual and Installation Guide
Please read the following instructions before attempting an installation.
When properly installed, Aquajet series pumps can be used in virtually
any existing RV.
If you prefer to have the pump professionally installed, contact Remco
(763-253-4743) to locate your nearest authorized service center.
WARNING
the 5-chamber Aquajet series pumps are more powerful than most
existing RV water pumps and, as a result, may draw more current
(Amps) than the pump(s) they replace. It is imperative that any power
supply, fuses/circuit breakers, wiring, switches, connectors, or
controllers that are used to supply 12 Vdc to the pump are adequately
sized. Inadequately sized components may overheat, causing an
electrical fire.
When installing an Aquajet series pump, positive voltage (+12VDC)
must be connected to the Aquajet's red fused leadwire. Reversing
polarity will instantly blow the fuse and may permanently damage
the controller.
www.remcotowing.com | www.remcoindustries.com | Remco IndustRIes 1
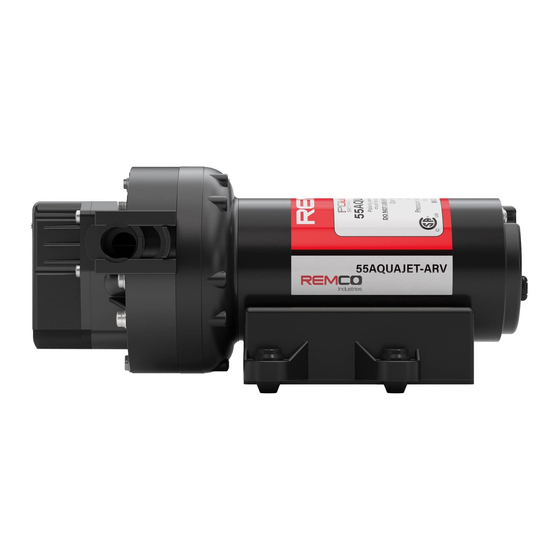
RV Water
System Pumps
55AQuAJet-Aes – 3.4 GPm/12Vdc, WItH Fuse
55AQuAJet-oes – 3.4 GPm/12Vdc, no Fuse
55AQuAJet-ARV – 5.0 GPm/12Vdc, WItH Fuse
55AQuAJet-oRV – 5.0 GPm/12Vdc, no Fuse
Advertisement
Table of Contents

Related Manuals for AquaJet 55AQUAJET-ARV

Summary of Contents for AquaJet 55AQUAJET-ARV
- Page 1 55AQuAJet-oRV – 5.0 GPm/12Vdc, no Fuse User’s Manual and Installation Guide Please read the following instructions before attempting an installation. When properly installed, Aquajet series pumps can be used in virtually any existing RV. If you prefer to have the pump professionally installed, contact Remco (763-253-4743) to locate your nearest authorized service center.
- Page 2 If you are uncertain with respect to any of this information, Remco highly recommends that a qualified technician perform your installation and determine the existing polarity of your current wiring. Safety Tips 1. never operate the pump in an atmosphere where flammable gases may be present, since arcing at the motor brushes or switch contacts may cause an explosion.
- Page 3 10. Both the 55Aquajet ARV and Aes series include a fuse-holder. It is important to use only a 15 amp AGc automotive type fuse for the Aquajet RV series and a 10 amp AGc fuse for the Aquajet es series. once again, use only these types of fuses with these specific pumps.
-
Page 4: Warranty
A typical Aquajet installation takes between 1 - 2 hours and requires the following: Basic Tools Flashlight, Voltmeter, Wire stripper/crimper, standard screwdriver, WARRANTY Phillips screwdriver, Hose cutter, 8˝ crescent Wrench, bucket, towels. Aquajet RV Series | Aquajet ES Series Remco Industries (“Remco”) warrants its model Aquajet RV Pumps (Part numbers depending on the RV’s layout, electrical and plumbing configuration,... - Page 5 1 Volt you will need to pull a new heavier (10-12AWG) ‘hot’ wire to the pump And use a 30 amp relay (referenced in section 1b above) to connect your Aquajet pump (see Figures 1 and 2, page 13).
- Page 6 200 F) after extended running. Locate the Aquajet pump at least one inch away from any wall surface. In most cases, you’ll be able to mount the Aquajet pump very close to where the old pump was located. 8. PUMP IS EXCESSIVELY NOISY 4.
- Page 7 5. PUMP LEAKS 5. At the end of your survey you should have determined how to wire the Aquajet pump. Your alternatives are illustrated in Figure 1, Solution Cause page 13 (“no change”, also applicable for single switch systems), Please contact factory, Figure 2 page 13, Figures 3, 4 or 8, page 15.
- Page 8 If necessary, disassemble and clean valves. Before installation, however, you should insure that your particular RV does not require any electrical modifications to run the Aquajet oes/Aes, as follows: 1. determine whether or not your existing wiring can supply 6.5 Amps to the Aquajet es without generating an excessive voltage drop or 4.
-
Page 9: Troubleshooting Guide
In most cases, you’ll thaw pump and system and Pump and/or motor is frozen be able to mount the Aquajet pump very close to where the old check for damage. the pump/ pump was located. -
Page 10: Installation
6. steps 1 and 2 of the earlier ‘Installation Planning’ section should TO BATTERY +12V OR FUSE PANEL have determined the applicable wiring method. As appropriate, wire the Aquajet pump as per Figures 1, 2, 3, 4 or 8, pages 13-15. INTELLITEC 7AMP... - Page 11 10 AMP place by pushing down retainer. +12 5W LOAD +12V GROUND 8a. [If the Aquajet pump is to be directly plumbed to the existing inlet filter/fitting, as in Figures 5 and 6, page 15]. OLD HOT AQUAJET WIRE TO...
- Page 12 20. Water should be flowing into bucket (see Figures 6 and 7, PUMP page 15) or into the sinks (see Figure 5, page 15). 21. Allow Aquajet RV to run for 10-15 seconds to get rid of all air TYPICAL RV TWO SWITCH WIRING FIGURE 1 inside the pump, then power down the pump.
-
Page 13: Specifications
AQUAJET RV Pump Model: 5503-4V15-B636 DENTIFYING UMBER 5503-4V15-B636 BASEPLATE AS SHOWN 8 = 2.25 X 3.18 FOOTPRINT 12VDC MOTOR DOUBLE BALL BEARING MOTOR 4.84 FOR RV AND MARINE APPLICATIONS TASTE FREE MATERIALS (SEE BELOW) 65 PSI SHUT-OFF SAFETY SWITCH 12VDC SPEED CONTROLLER 4.58... -
Page 14: Discharge Pressure
TEMPERATURE TIME (MINUTES) The Aquajet RV Pump operates in the shaded area, and is therefor capable of sustaining continual running, at any of the above listed pressures, without shutting down to allow the motor to cool. The Speed Controller gen- erates heat much faster, as evidenced by the heat sink temperature rise and must be protected from accidental human contact.
Need help?
Do you have a question about the 55AQUAJET-ARV and is the answer not in the manual?
Questions and answers