
Related Manuals for StoneL Quartz QN Series

Summary of Contents for StoneL Quartz QN Series
- Page 1 Quartz® by StoneL Valve monitor series QX/QN/QG Installation, Maintenance and Operating instructions StoneL publication 105406revA...
-
Page 2: Table Of Contents
These instructions provide information about safe handling and operation of the limit switch. If you require additional assistance, please contact the manufacturer or manufacturer’s representative. Addresses and phone numbers are printed on the back cover. Save these instructions. Subject to change without notice. All trademarks are property of their respective owners. StoneL publication 105406revA... - Page 3 Quartz | 3 7 QZ 70 en Table of contents continued 5 Model/Type code QGabcdef QNabcdef QXabcdef 6 Regulatory, specific conditions of use, and product marking 7 Appendix Controlled installation drawings StoneL publication 105406revA...
-
Page 4: General
Quartz. If you are uncertain about the use of this device, or its suitability for your intended use, please contact StoneL for assistance. -
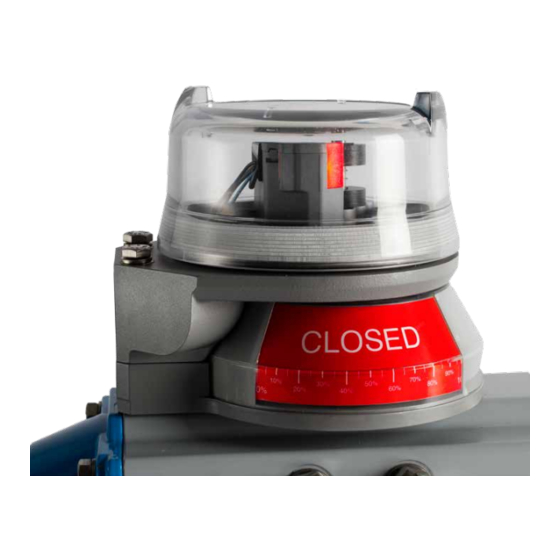
Page 5: Assembly Drawing
184 mm [7.24 in] Tall cover Unit height 186 mm [7.10 in] Cover removal clearance 241 mm [9.48 in] Ratings and approvals* See page 47 or StoneL.com/approvals * Only models listed on StoneL’s official website are approved per specific rating. StoneL publication 105406revA... -
Page 6: Dimensions
Dual module and 2-switch models use short covers. Short cover = 102 mm [4.0 in] Medium cover = 123.4 mm [4.86 in] Tall cover = 155.4 mm [6.12 in] Quartz certified dimensional drawing can be found under the download tab at www.stoneL.com/en/products/Quartz StoneL publication 105406revA... -
Page 7: Assembly And Mounting
Instructions for mounting with extended visual indicator Special notes: • Mounting of the Quartz requires a StoneL mounting kit specific to the actuator the Quartz is to be mounted to. • It is recommended that thread lubricant or anti-seize be used on the mounting kit fasteners (Items B, I and J) prior to assembly. -
Page 8: Typical Quartz With Short Visual Indicator Assembly Figure
Instructions for mounting with short visual indicator Special notes: • Mounting of the Quartz requires a StoneL mounting kit specific to the actuator the Quartz is to be mounted to. • It is recommended that thread lubricant or anti-seize be used on the mounting kit fasteners (Items B, I and J) prior to assembly. -
Page 9: Maintenance, Repair And Installation
Maintenance and repair Maintenance or repair of StoneL Quartz equipment must only be done by StoneL or by qualified personnel that are knowledgeable about the installation of electromechanical equipment in hazardous areas. All parts needed for repairs or maintenance must be purchased through a StoneL authorized distributor to maintain warranty and to ensure the safety and compliance of the equipment. -
Page 10: Function Specific Details
Bench test procedure Fig. 1 cam set for normally Fig. 2 cam set for normally Use StoneL Light Read Tester. Or use a 24 VDC or 120 VAC power open sensor function closed sensor function supply with series load resistor (2kΩ - 6kΩ). - Page 11 Failure to use a series load resistor when bench testing sensors with a power supply will result in permanent damage to the unit. Bench test procedure Use StoneL Light Read Tester. Or use a 24 VDC or 120 VAC power supply with series load resistor (2kΩ - 6kΩ). StoneL publication 105406revA...
-
Page 12: Sst Solid State Proximity Senors (X)
(2) SST solid state sensors Bench test procedure Operation NO/NC (cam selectable) Use StoneL Light Read Tester. Or use a 24 VDC or 120 VAC power Maximum current Inrush 1.0 amp @ 125 VAC/VDC supply with series load resistor (2kΩ - 6kΩ). - Page 13 Fig. 1 cam set for normally Fig. 2 cam set for normally open sensor function closed sensor function Caution: To prevent ignition of hazardous atmospheres, replace cover before energizing the electrical circuits. Keep cover tightly closed within operation. StoneL publication 105406revA...
-
Page 14: P+F 3-Wire Solid State Proximity Sensors (E, F)
(4) 3-wire sensors (QN4E_, QN4F_, QX4E_, QX4F_) 1st SW - LOAD 1st SW + 4th SW + first switch fourth switch LOAD 4th SW - 2nd SW - LOAD 2nd SW + 3rd SW + second switch third switch LOAD 3rd SW - StoneL publication 105406revA... - Page 15 Fig. 1 cam set for Fig. 2 cam set for normally open sensor normally closed function sensor function Caution: To prevent ignition of hazardous atmospheres, replace cover before energizing the electrical circuits. Keep cover tightly closed within operation. StoneL publication 105406revA...
-
Page 16: Intrinsically Safe Inductive Proximity Switches
LEDs will be lit and neither sensor will be active. SOL PWR - SOL - Bench test procedure Use StoneL Light Read Tester or use a 24 VDC power supply. No series load resistor required. Caution: To prevent ignition of hazardous atmospheres, replace cover before energizing the electrical circuits. - Page 17 SOL + SOL PWR - SOL - Bench test procedure Use StoneL Light Read Tester or use a 24 VDC power supply. No series load resistor required. Caution: To prevent ignition of hazardous atmospheres, replace cover before energizing the electrical circuits. Keep Fig.
-
Page 18: P+F Namur Sensors Nj2-12Gk-Sn (A)
BTM SW - top switch bottom switch Bench test procedure Use StoneL Light Read Tester or use a 24 VDC power supply and an ammeter. No series load resistor required. Fig. 2 cam set for Caution: To prevent ignition of hazardous atmospheres, clockwise rotation replace cover before energizing the electrical circuits. -
Page 19: P+F Namur Sensors Nj2-V3-N (N)
2nd SW + second switch 2nd SW - TOP SW + top switch TOP SW - Bench test procedure Use StoneL Light Read Tester or use a 24 VDC power supply and an ammeter. No series load resistor required. StoneL publication 105406revA... -
Page 20: Reed Type Proximity Switches
1000 ohms - 1/2 watt. Ohm meter will not work. (Light Read tester Maximum voltage drop No LED (P) 0.1 volts @ 10 mA available from StoneL or StoneL distributor.) 0.5 volts @ 100 mA Minimum of 3.5 volts required for proper switch operation. With LED (L) 3.5 volts @ 10 mA... -
Page 21: Spdt Maxx-Guard Proximity Sensors (G, H, S)
1000 ohms - 1/2 watt. Ohm meter will not work. (Light Read tester “G” sensors 0.20 amp @ 120 VAC, 0.30 amp @ 24 VDC available from StoneL or StoneL distributor.) “S” sensors 0.10 amp @ 120 VAC, 0.10 amp @ 24 VDC Minimum of 3.5 volts required for proper switch operation. -
Page 22: Intrinsically Safe Models With Spst Maxx-Guard Proximity Sensors (J)
Test LED units with 9 volt battery and load between 150 and Warranty Two years 1000 ohms - 1/2 watt. Ohm meter will not work. DO NOT test without load. (Maxx-Guard Light Read tester available from StoneL or StoneL Wiring diagrams distributor.) 2 SPST switches (QN2J_) Minimum of 3.5 volts required for proper switch operation. -
Page 23: Intrinsically Safe Models With Spdt Maxx-Guard Proximity Sensors (M)
Test LED units with 9 volt battery and load between 150 and Warranty Two years 1000 ohms - 1/2 watt. Ohm meter will not work. DO NOT test without load. (Maxx-Guard Light Read tester available from StoneL or StoneL Wiring diagrams distributor.) 2 SPDT switches (QN2M_) Minimum of 3.5 volts required for proper switch operation. -
Page 24: Mechanical Micro Switches
Two years ** Recommended for use in 24 VDC computer input applications Wiring diagrams 2 SPDT switches (QG2V_, QG2W_, QX2V_, QX2W_) TOP NC TOP NO top switch TOP C BTM C BTM NO bottom switch BTM NC StoneL publication 105406revA... - Page 25 5th NO second switch fifth switch 2nd NC 5th NC 3rd C 6th C 3rd NO 6th NO third switch sixth switch 3rd NC 6th NC Note: 6 SPDT models have (2) 12 pole terminal block (4 spares) StoneL publication 105406revA...
-
Page 26: Dpdt Switches
TOP NO2 TOP NC2 BTM NC1 BTM NO1 BTM C1 bottom switch (individual elements actuate BTM C2 with common plunger) BTM NO2 BTM NC2 Additional 3-pole terminal block provided in unit for solenoid termination StoneL publication 105406revA... - Page 27 Quartz | 27 7 QZ 70 en StoneL publication 105406revA...
-
Page 28: Valve Communication Terminals (Vct)
No series load resistor is required when attaching a 24 VDC power supply for switch setting. Caution: To prevent ignition of hazardous atmospheres, replace cover before energizing the electrical circuits. Keep cover tightly closed within operation. StoneL publication 105406revA... - Page 29 2. When input byte 0, bits 0 and 1 are both set to 1, this would indicate that the valve is both open and closed at the same time. This would be an abnormal or Fault condition. StoneL publication 105406revA...
-
Page 30: Vct With Foundation Fieldbus Communication
2 = Discrete Input 2 is true replace cover before energizing the electrical circuits. Keep 3 = Both Discrete Inputs 1&2 are true cover tightly closed within operation. Warranty All mechanical parts Two years Sensor module Five years StoneL publication 105406revA... - Page 31 9 - 32 VDC across FB + and FB -. Use the LEDs to determine when switches are made. You cannot do this procedure with an ohmmeter. No series load resistor is required when attaching a 24 VDC power supply for switch setting. StoneL publication 105406revA...
-
Page 32: Vct With As- Interface Communication
To prevent ignition of hazardous atmospheres, procedure with an ohmmeter. No series load resistor replace cover before energizing the electrical circuits. Keep is required when attaching a 24 VDC power supply for cover tightly closed within operation. switch setting. StoneL publication 105406revA... -
Page 33: Dual Module Sst Sensors
To prevent ignition of hazardous atmospheres, procedure with an ohmmeter. No series load resistor replace cover before energizing the electrical circuits. Keep is required when attaching a 24 VDC power supply for cover tightly closed within operation. switch setting. StoneL publication 105406revA... -
Page 34: Position Transmitters And Potentiometers
Transmitter with solid state switches TRANS + TRANS + transmitter transmitter TRANS - TRANS - TOP NO TOP NO/NC top switch top switch TOP C TOP C BTM C BTM NO/NC bottom switch bottom switch BTM NO BTM C StoneL publication 105406revA... -
Page 35: Dual Module Sst Sensors
TOP SW + TOP SW C BTM SW LED TOP SW - BTM SW LED (red) (green) BTM SW NO BTM SW + BTM SW C BTM SW - transmitter transmitter Position transmitter termination Position transmitter termination StoneL publication 105406revA... - Page 36 QN5L, QX5L, QN5P, QX5P, QN7L, QX7L QN7P, QX7P, see page 20 QN5G, QX5G, QN5H, QX5H, QN5S, QX5S, QN7G, QX7G, QN7H, QX7H, QN7S, QX7S see page 21 QN5J, QX5J, QN7J, QX7J see page 22 QN5M, QX5M, QN7M, QX7M see page 23 QX5V, QX5W, QX7V, QX7W see page 24 StoneL publication 105406revA...
-
Page 37: Potentiometer With And Without Switches (Type B_, C_)
BTM NC Potentiometer with SPST switches Potentiometer with solid state switches potentiometer potentiometer TOP NO TOP + top switch top switch TOP C TOP - BTM NO BTM + bottom switch bottom switch BTM C BTM - StoneL publication 105406revA... - Page 38 TOP SW NO TOP SW + TOP SW C BTM SW LED TOP SW - BTM SW LED (red) (green) BTM SW NO BTM SW + BTM SW C BTM SW - potentiometer potentiometer Potentiometer termination Potentiometer termination StoneL publication 105406revA...
- Page 39 QNBL, QXBL, QNBP, QXBP, QNCL, QXCL QNCP, QXCP, see page 20 QNBG, QXBG, QNBH, QXBH, QNBS, QXBS, QNCG, QXCG, QNCH, QXCH, QNCS, QXCS see page 21 QNBJ, QXBJ, QNCJ, QXCJ see page 22 QNBM, QXBM, QNCM, QXCM see page 23 QXBV, QXBW, QXCV, QXCW see page 24 StoneL publication 105406revA...
-
Page 40: Expeditors
• Actuator/valve decelerates at preset intermediate position 3. Full close • Controller de-energizes primary solenoid and controller energizes secondary solenoid • Actuator/valve closes • Intermediate switch activates • Secondary solenoid energizes • Actuator/valve decelerates at preset intermediate position StoneL publication 105406revA... -
Page 41: With Mechanical Switches (8V, 8W)
2. At full closed position lift bottom cam and rotate until switch is activated. Release cam and be sure it slides fully onto spline. Caution: To prevent ignition of hazardous atmospheres, replace cover before energizing the electrical circuits. Keep cover tightly closed within operation. StoneL publication 105406revA... -
Page 42: With Maxx-Guard Proximity Sensors (8Y)
(White highlights will overlap and red LED will light if power is applied.) Release cam and be sure it slides fully onto spline. Caution: To prevent ignition of hazardous atmospheres, replace cover before energizing the electrical circuits. Keep cover tightly closed within operation. StoneL publication 105406revA... -
Page 43: With Devicenet™ Communication
2. At full closed position lift bottom cam and rotate until sensor is activated. (White highlights will overlap and red LED will light if power is applied.) Release cam and be sure it slides fully onto spline. StoneL publication 105406revA... -
Page 44: Dual Module Namur Sensors
2. At full closed position lift bottom cam and rotate until sensor is activated. (White highlights will overlap and red LED will light if power is applied.) Release cam and be sure it slides fully onto spline. StoneL publication 105406revA... -
Page 45: Dual Module Namur Sensors
2. At full closed position lift bottom cam and rotate until sensor is activated. (White highlights will overlap and red LED will light if power is applied.) Release cam and be sure it slides fully onto spline. StoneL publication 105406revA... -
Page 46: Model/Type Code
= B, E, F, G, J, M, N, R, S, T, W c = 02, 03, 05, 06 d = S, N, H e = A, C, D, G, N, R, S, T, U, V, W, X, 1, 2, 3, 4, 5, 0 f = A or M StoneL publication 105406revA... -
Page 47: Regulatory, Specific Conditions Of Use, And Product Marking
Fergus Falls, Minnesota 56537 USA Products: Quartz QN Series – Valve Position Monitors and Valve Communication Terminals Quartz QX Series – Valve Position Monitors and Valve Communication Terminals Quartz QG Series – Valve Position Monitors and Valve Communication Terminals Model - Type... - Page 48 2. The apparatus enclosure may contain aluminum which is considered to constitute a potential risk of ignition by impact or friction. Care must be taken into account during installation and use to prevent impact or friction. NOTE: See also Control Drawing 105193 for “IS” installation. 105414revA StoneL publication 105406revA...
-
Page 49: Appendix
Quartz | 49 7 QZ 70 en Appendix Controlled installation drawings StoneL publication 105406revA... - Page 50 50 | Quartz 7 QZ 70 en Controlled installation drawings continued StoneL publication 105406revA...
- Page 51 Quartz | 51 7 QZ 70 en Controlled installation drawings continued StoneL publication 105406revA...
- Page 52 52 | Quartz 7 QZ 70 en Controlled installation drawings continued StoneL publication 105406revA...
- Page 53 Quartz | 53 7 QZ 70 en Controlled installation drawings continued StoneL publication 105406revA...
- Page 54 54 | Quartz 7 QZ 70 en Controlled installation drawings continued StoneL publication 105406revA...
- Page 55 Quartz | 55 7 QZ 70 en Controlled installation drawings continued StoneL publication 105406revA...
- Page 56 StoneL Production Center North America, 26271 US Hwy 59, Fergus Falls, MN 56537, USA. Tel. +1 218 739 5774. Fax +1 218 739 5776 www.StoneL.com Metso Flow Control Inc. South Korea, 235 Cheomdansaneop 1-ro, Daesowon-myeon, Chungju-si, Chungbuk-do, 380-871, Korea Tel. +82 43 852 7708, Fax +82 43 841 9890 Europe,Vanha Porvoontie 229, P.O.
Need help?
Do you have a question about the Quartz QN Series and is the answer not in the manual?
Questions and answers