Table of Contents
Advertisement
SERVICE MANUAL
• Refer to the SERVICE MANUAL of VHS MECHANICAL
ADJUSTMENTS VI for MECHANICAL ADJUSTMENTS.
(9-921-647-11)
* The abbreviations of CA30, GA35, GA55, GA65, GF85, SA33, SP70 and SP100 contained in this service
manual are indicated when these models are common to all their corresponding models as given below.
Abbreviated
CA30
model name
CA30TW
GA35ME
All model
GA35PL
names
GA35PS
SLV-
GA35SG
GA35TH
GA35TW
System
EXCEPT CA30/GA35: PL, TW/GA55PL/
GF85: PL, TW/SA33:
Color system
PAL, MESECAM, NTSC 3.58, NTSC 4.43
RF output signal
UHF channel 30 to 90
(B/G, D/K)
Aerial out
75-ohm asymmetrical aerial socket
CA30/GA35: PL, TW/GA55PL/GF85: PL, TW/
SA33:
Format
VHS NTSC standard
Video recording system
Rotary head helical scanning FM system
Video heads
Double azimuth two heads
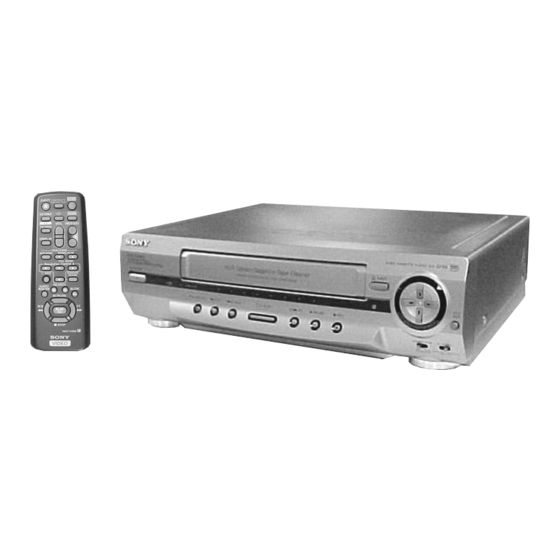
MICROFILM
Photo: SLV-GF85
GA35
GA55
GA65
GA55ME
GA65MJ
GA55PL
GA55PS
GA55SG
GA55TH
SPECIFICATIONS
Video signal
NTSC color, EIA standards
Maximum recording/playback time
9 hrs. in EP mode (with T-180 tape)
Fast-forward and rewind time
Approx. 4 min. 30 sec. (with T-120 tape)
Tape speed (GA55/GA65/GF85: PL, TW/SP70)
SP: 33.35 mm/s
EP: 11.11 mm/s
LP: 16.67 mm/s, playback only
Tuner section: CA30/GA35: PL, TW/GA55PL/
RF output channel
VHF channel 3 or 4
Antenna
75-ohm antenna terminal for VHF/UHF
SLV-CA30 / GA35 / GA55 / GA65 /
GF85 / SA33 / SP70 / SP100
RMT-V286 / V286A / V286B / V286C
SLV-GA35ME/GA35SG/GA55ME/GA55SG
SLV-CA30TW/GA35TW/GF85TW/SA33TW
GF85
SA33
SP70
SA33TW
GF85PL
SP70R
GF85PS
GF85TH
GF85TW
Inputs and outputs
LINE 1 IN (EXCEPT CA30/GA35/SA33)
GF85: PL, TW/SA33
VIDEO CASSETTE RECORDER
E Model
SLV-GA35PS/GA55PS/GF85PS
ME Model
Middle East Model
SLV-GA65MJ
Philippine Model
SLV-GA35PL/GA55PL/GF85PL
Russian Model
SLV-SP70R/SP100R
Taiwan Model
Thailand Model
SLV-GA35TH/GA55TH/GF85TH
S MECHANISM
SP100
SP100R
VIDEO IN, phono jack (1)
Input signal: 1 Vp-p, 75 ohms,
unbalanced, sync negative
AUDIO IN (MONO), phono jack (1)
(GA55/GA65/SP70)
AUDIO IN, phono jack (2) (GF85/SP100)
Input level: 327 m Vrms
Input impedance: more than 47 kilohms
– Continued on next page –
Advertisement
Table of Contents

Related Manuals for Sony SLV-SP100


Summarization of Contents
SECTION 1 GENERAL
Getting Started
Initial setup steps including unpacking, remote configuration, and VCR connection.
Basic Operations
Playing a tape
Instructions for inserting, playing, pausing, and controlling tape playback.
Additional Operations
Selecting the sound during playback
Options for choosing audio output (stereo, mono, bilingual) during tape playback.
Playing/searching at various speeds
Guide on how to play tapes at different speeds and perform search functions.
Editing with another VCR
How to connect to record on this VCR
Steps for connecting the VCR to another VCR for copying tapes.
Synchronised recording
How to connect to use this function
Guide on connecting external equipment for synchronized recording.
SECTION 2 DISASSEMBLY
UPPER CASE REMOVAL
Instructions for removing the top cover of the VCR unit.
FRONT PANEL SECTION REMOVAL
Procedure for detaching the front panel section of the VCR.
REAR PANEL REMOVAL
Steps to safely remove the rear panel from the VCR.
MECHANISM DECK REMOVAL
Guide for detaching the VCR's main mechanism deck.
MA-366 Board Removal
Instructions on how to remove the MA-366 circuit board.
INTERNAL VIEWS
Diagrams illustrating the internal layout and components of the VCR.
CIRCUIT BOARDS LOCATION
Identifies the physical locations of key circuit boards within the VCR.
SECTION 3 BLOCK DIAGRAMS
OVERALL BLOCK DIAGRAM
A high-level overview of the VCR's system architecture and signal flow.
VIDEO BLOCK DIAGRAM
Detailed block diagram of the VCR's video processing circuits.
SERVO/SYSTEM CONTROL BLOCK DIAGRAM
Block diagram illustrating the servo and system control functions.
AUDIO BLOCK DIAGRAM
Block diagram showing the audio signal path and processing.
MODE CONTROL BLOCK DIAGRAM
Block diagram detailing the VCR's mode control logic.
POWER BLOCK DIAGRAM
Block diagram illustrating the power supply system of the VCR.
SECTION 4 PRINTED WIRING BOARDS AND SCHEMATIC DIAGRAMS
FRAME SCHEMATIC DIAGRAM
A simplified schematic showing the main connections between major blocks.
PRINTED WIRING BOARDS AND SCHEMATIC DIAGRAMS
Detailed diagrams of printed wiring boards and their associated schematics.
SECTION 5 INTERFACE, IC PIN FUNCTION DESCRIPTION
SYSTEM CONTROL – VIDEO BLOCK INTERFACE (MA-366 BOARD IC101)
Details the interface between system control and the video block IC.
SYSTEM CONTROL – SERVO PERIPHERAL CIRCUIT INTERFACE (MA-366 BOARD IC101)
Describes the interface for servo peripheral circuits with the system control IC.
SYSTEM CONTROL – MECHANISM BLOCK INTERFACE (MA-366 BOARD IC101)
Pin function descriptions for the mechanism interface with the system control IC.
SYSTEM CONTROL – AUDIO BLOCK INTERFACE (MA-366 BOARD IC101)
Pin details for the audio interface with the system control IC.
SERVO/SYSTEM CONTROL MICROPROCESSOR PIN FUNCTION (MA-366 BOARD IC101)
Pin function mapping for the servo/system control microprocessor.
SECTION 6 ADJUSTMENTS
MECHANICAL ADJUSTMENTS
Reference to the manual for mechanical adjustment procedures.
ELECTRICAL ADJUSTMENTS
Procedures for electrical adjustments and calibration of the VCR.
SECTION 7 REPAIR PARTS LIST
EXPLODED VIEWS
Visual breakdown of the VCR's components for identification and ordering.
CHASSIS ASSEMBLY
Exploded view and part numbers for the VCR chassis assembly.
MECHANISM CHASSIS ASSEMBLY (1)
Detailed exploded view of the mechanism chassis assembly parts.
MECHANISM CHASSIS ASSEMBLY (2)
Further exploded view of the mechanism chassis assembly components.
MECHANISM CHASSIS ASSEMBLY (3)
Final part of the mechanism chassis assembly exploded view.
ELECTRICAL PARTS LIST
List of electrical components and their respective part numbers.
Need help?
Do you have a question about the SLV-SP100 and is the answer not in the manual?
Questions and answers