Table of Contents
Advertisement
Advertisement
Table of Contents

Related Manuals for Pentax 206627 - PocketJet 3 Plus


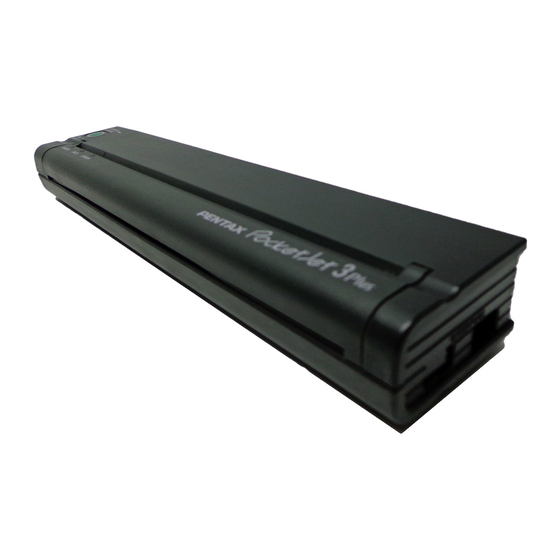
Summary of Contents for Pentax 206627 - PocketJet 3 Plus
- Page 1 Printer User’s Guide The Future of Portable Printing . . . Today!
- Page 2 Symbian OS is a trademark of Symbian Ltd. PALM and PALM OS are trademarks of Palm, Inc. PENTAX and PocketJet are registered trademarks of Pentax Corporation. PSION is a trademark of Psion PLC. RBRC is a trademark of the Rechargeable Battery Recycling Corporation.
-
Page 3: Table Of Contents
Contents Safety Information ................... v Printer Features ..................viii Warranty Information ................ix Chapter 1 – Setting Up the Printer..............1 Unpacking the Printer ................1 Connecting to an AC Outlet..............2 Connecting to a DC Supply ..............3 Using the Operation Panel ............... 4 Main Switch Functions................ - Page 4 Tips on Using the Battery ..............42 Chapter 3 – Tips on Using Paper..............43 Inserting Paper ..................43 Use Pentax Quality Paper ..............44 Usage and Handling Instructions ............44 Clearing a Paper Jam ................45 Method 1 ................... 45 Method 2 ...................
-
Page 5: Safety Information
Check the power plug configurations and voltages that are used in your country. If you need a different plug or power cord, you can either purchase a plug adapter locally, or contact your local reseller or Pentax for assistance in procuring a proper cord set. - Page 6 NiMH battery packs into the trash or municipal waste stream, which is illegal in some areas. Pentax payments to RBRC make it easy for you to drop the spent battery pack at local retailers of replacement NiMH batteries or at authorized Pentax product service centers.
- Page 7 EU Product Disposal 1) In the European Union: If your product is marked with the symbol above, it means that used electronic products should not be mixed with general household waste. There exists a separate collection system for these products. Used electronic equipment must be treated separately and in accordance with legislation that requires proper treatment, recovery, and recycling of these products.
-
Page 8: Printer Features
• Integrated Bluetooth® and integrated serial connections are available as printer options at the time of purchase. Note: Pentax does not offer an upgrade option of Bluetooth or serial compatibility on the original PocketJet 3 or PocketJet 3 Plus printers. -
Page 9: Warranty Information
Pentax provides, free of charge, a one-year limited warranty for your new PocketJet printer. For one year from the date of original purchase, Pentax will repair or replace a failed unit with a new or rebuilt unit when it is returned postpaid to an authorized Pentax service center. A return material authorization number (RMA) and proof of purchase are required—in the United States and Canada call Pentax Customer... - Page 10 Notes: Page x...
-
Page 11: Chapter 1 - Setting Up The Printer
Chapter 1 - Setting Up the Printer Unpacking the Printer Read and follow any instructions on any Read Me First sheet that may be included in your kit. A typical printer kit may contain the items shown in Figure 1. FIGURE 1. -
Page 12: Connecting To An Ac Outlet
AC power outlets in the U.S.A., Canada, and some Central and South American countries. A plug adapter or different cord may be necessary for AC power in other countries or you can contact your local reseller or Pentax for further assistance. Page 2... -
Page 13: Connecting To A Dc Supply
Connecting to a DC Supply The PocketJet can be powered from its internal NiMH battery or from a vehicle DC supply. To install the battery, see page 38. To connect your PocketJet to a “12-volt” vehicle DC supply to print or maintain the battery charge, follow the steps below. -
Page 14: Using The Operation Panel
Using the Operation Panel The operation panel consists of the main switch and three indicator lights. See Figure 4. FIGURE 4. Operation panel Main Switch Functions Power ON: Push once while the printer is OFF. Power OFF: Push twice quickly. Manual Form Feed: With power ON and paper inserted, press and hold the main switch to feed (or eject) paper. -
Page 15: Indicator Lights
NOTE: Additional functions such as Auto On, Auto Off, and Pre- Feed are available for your printer through the Configuration Utility. See pages 18-37 for details. Indicator Lights The three indicator lights—POWER, DATA, and ERROR— show both normal operation and error conditions. Each light may appear as green, red, or orange, and may either stay lit continuously or blink. - Page 16 Notes: Page 6...
-
Page 17: Chapter 2 Using The Printer
* These operating systems do not support printing without the addition of a printing applet. Trial versions of the printing applet are supplied on the CD and on the Pentax website. Contact the applet provider to purchase the one you want after the trial period. PocketPC 2000 and higher systems may use the WinCE driver if using application software that is enabled to use it. -
Page 18: Driver Installation
A CD with drivers and installation information is provided with your PocketJet kit. The newest information and drivers are available from the Pentax web site, www.pentaxtech.com, by choosing “PocketJet Printers and Accessories.” The supplied CD and the website both list the latest driver version numbers. -
Page 19: Manual Install
Browse the CD to locate the “Setup” or “Install” program for your operating system, then double click on the “.exe” program icon and follow the on-screen instructions. If the installation does not proceed as explained above, contact Pentax Customer Service. Accessing Advanced Software Features These features can be accessed using the software dialog boxes and methods discussed below. -
Page 20: Density Modes
Density Modes You can set the print density to your preference from zero to 10. 0 is the lightest, 7 is the default (medium), and 10 is the darkest. 2-Ply Mode For special applications where 2-ply paper is needed, this setting makes prints that are darker (and print slower) than the density mode set to 10 as listed above. - Page 21 Defined Paper Size. Set the width and length as desired. D. Multipage Documents with “tear off” for EACH page Note: This feature is only available with Win 9x/Me and has recently been added to the Win2k/XP driver (check the Pentax website for the latest driver). Page 11...
-
Page 22: Perforated Roll Paper
Pentax Configuration Utility Auto-On Auto-Off Pre-feed These features can be accessed through Windows by using the Pentax Configuration Utility. Please see the Utility Installation instructions on page 18 and specific definitions of Auto-On, Auto-Off, and Pre-feed on pages 27 and 28. -
Page 23: Windows-Specific Operating System Features
Windows-Specific Operating System Features Windows 2000/XP Notes: 1) Paper Type Control – Select Cut Sheet, Roll, or Perforated Roll. This modifies the printable area of all paper sizes (Letter, Legal, A4, and Custom). 2) Using Custom Forms Select Start:Settings:Printers: select Server Properties. b. -
Page 24: Connecting To Your Computer
Connecting to Your Computer There are two ways to connect your PocketJet to your computer, via USB cable and via Infrared (IrDA). Optionally, you can connect via a wireless Bluetooth or a wired Serial connection if your printer is factory-configured for these methods. Via USB Cable CAUTION: Install the driver software before connecting the printer to the computer via the USB cable. -
Page 25: Via Infrared (Irda)
The Windows Add Hardware Wizard window will open (if it does not open, the software has already been installed). Choose “Specify a location” and browse the Pentax CD into the <CD Drive>:\<Printer>\Win9xME folder. Follow the on-screen instructions to complete the wizard installation. -
Page 26: Printing
POWER indicator lights up. See Figure 8. FIGURE 8. Turning the printer ON 3. Insert a sheet of Pentax Quality Paper into the paper input slot. Place the print side of the paper away from you, so that it faces the rear of the printer. -
Page 27: Turning The Printer Off
4. Print one or more pages from any software application. The green DATA indicator light blinks to indicate that the printer is receiving data from your computer. NOTE: If you have inserted paper into the input slot and the green DATA light stays on (without blinking), the printer has received insufficient data to print an entire page. -
Page 28: Configuration Utility
Changes to the default configuration options are in most cases relevant only where the host computer will be sending simple text data and it does not have a Pentax-supplied driver. This utility provides access to printer features through a Windows- based program. -
Page 29: Using The Configuration Program
Infrared ports. • From the Start Menu, select Programs, select Pentax PocketJet 3, and then select “PocketJet 3 (or 3plus) Configuration” The application will load and the active window will appear as follows: FIGURE 5. -
Page 30: Menu Bar
Menu Bar File Menu: • Import – Load a configuration file that was saved previously using the Export feature. Note: You must then Save Config to set the printer to this configuration. • Export – Save a configuration to a file. •... - Page 31 code cannot be programmed using the Bluetooth port. Please use the USB or IRDA port to program the PIN code. The PIN code for your printer will be printed on the printer’s built-in test pattern should you forget your code, and you may create a new code at any time by using the Configuration Utility.
- Page 32 Serial Menu: If your printer is enabled with a serial port connection, you may use this menu entry to set the parameters for your printer’s serial port. The printer is configured for 8 data bits and one stop bit. Baud rate, parity and flow control may be configured here.
- Page 33 Parity may be set to odd, even, or none. Flow control may be set to hardware (sometimes known as RTS/CTS), software (sometimes known as XON.XOFF), or both. It will be a rare instance in which both are set together. When you have completed your selections, click on the “Save Config”...
-
Page 34: Configuration Options
Note: These configuration options are in most cases relevant only where the host computer will be sending simple text data to the printer and does not have a Pentax-supplied driver available. The options which are common to all operating systems include Auto- On, Auto-Off, and Pre-feed. - Page 35 For standard paper sizes, this setting determines default margins and expected length for each printed page. For ‘Custom’ sizes, margins and length may be set using the commands ‘Form Length’, ‘Bottom Margin’, ‘Left Margin’ and ‘Right Margin’. ‘Letter’ size assumes an 8-1/2 x 11” page, and sets a total printable height of 10.67”, which in turn provides for a top margin of about 0.27”, and a bottom margin of about 0.06”.
- Page 36 emulation in native serif and sans serif fonts in 10, 12, 15, and proportional sizes. Print Density: This sets the default print density (darkness) of the printing. Darker print will use more battery power, but may be easier to read if the font or other printed information is made up of very narrow lines.
- Page 37 ‘No Feed’ mode ignores all Form Feed commands, and does not advance the paper after printing. This can be of particular help to roll paper users who are printing only partial pages and do not wish to waste additional paper at the end of each document.
- Page 38 you may select either a 10-minute or 30-minute time-out period. If no data is received within the period selected, the printer will turn itself off. Pre-Feed: When the printer is powered on and paper is found in the infeed area, the printer will normally advance the paper a short distance.
- Page 39 Form Length: This command can be used to set the form length of a ‘Custom’ size page. You may specify the vertical print area in text lines as defined by the ‘Text Line Spacing’ setting, or in inches. If using the ‘Lines’ method for setting “custom” form length, the physical height of the page is determined by the vertical space per line as determined by the ‘Text Line Spacing’...
-
Page 40: Bottom Margin
Bottom Margin: This setting will modify the bottom margin when ‘Page Size’ is set to ‘Custom’. ‘Lines’ allow you to set a bottom margin equal to the height of a specific number of text lines. The actual space that is left depends upon the current setting of the ‘Text Line Spacing’... -
Page 41: Left Margin
Left Margin: This setting can modify the left margin when the ‘Custom’ ‘Page Size’ is selected. You may choose to avoid any changes by selecting ‘Use Paper Size’ which will assume you wish to use the full 8” available print width. You may also choose to set a number of columns of unprinted left margin. -
Page 42: Right Margin
Right Margin: This setting can modify the right margin when the ‘Custom’ ‘Page Size’ is selected. You may choose to avoid any changes by selecting ‘Use Paper Size’ which will assume you wish to use the full 8” available print width. You may also choose to set a number of columns of unprinted right margin. - Page 43 Default Font: This command determines which of the two internal typefaces is the default when printing ASCII text. From the factory, a Serif font (similar to Courier) and a Sans Serif font (similar to Letter Gothic) are supplied. Default Pitch: This command determines default horizontal size of characters when printing ASCII text.
- Page 44 Character Set Map: This menu allows you to select the use of special characters appropriate for one of the languages selected. See Appendix I for a chart of the special characters available. Page 34...
-
Page 45: Printer Commands (Function Buttons)
Printer Commands (Function Buttons) See the buttons across the bottom of the window. Test Page: You can print a test page using the Configuration Utility or you can print test pages using the Main Switch (see “Self Test Feature,” page 56). Clicking on ‘Test Page’... - Page 46 Pentax PocketJet3 Firmware Version 01.11 Current Settings AUTO POWER ON :Disabled PAGE LENGTH 1" PERF SKIP :Disabled BOTTOM MARGIN LINES :None PAGE SIZE :Letter LINE FEED PITCH :1/6 FONT :Courier PITCH SELECT :12cpi CONDENSED MODE PRINT :Disabled FONT ATTRIBUTE :Disabled CHARACTER TABLE ;Extended Graphics...
- Page 47 Custom fonts may be developed for this printer to meet unique customer applications. For further information, if you are in N. America, contact Pentax at 1-800-543-8144 or 1-303-460- 1600. If you are in other areas, contact your local dealer. Factory Reset: Clicking on this button will return the printer to its original factory settings for fonts and configuration.
-
Page 48: Installing The Battery
Installing the Battery 1. Open the printer’s battery cover by pressing the cover latch. Push the cover away from the AC adapter receptacle. See Figure 10. FIGURE 10. Opening the Battery Cover 2. Swing the cover open and remove it. 3. - Page 49 4. Grasp the battery removal ribbon, which is attached to the inside of the battery compartment. See Figure 12. CAUTION: If you forget to hold on to the ribbon, you may accidentally insert the battery on top of it. Then you won’t be able to remove the battery by pulling the ribbon.
-
Page 50: Removing The Battery
Removing the Battery 1. Open the printer’s battery cover by pressing the cover latch. Swing the cover open and remove it. 2. Pull out on the battery removal ribbon as shown in Figure 13 until the battery starts to tilt out of its compartment. NOTE: If the battery removal ribbon is caught behind the battery, insert a thin metal object such as a flat-blade screwdriver between the battery and the case at the end away from the... -
Page 51: Charging The Battery
Charging the Battery Note: Batteries are shipped from the factory uncharged. Pentax recommends that a complete charging cycle (following steps 1 through 3 below) be completed before using the battery for the first time. 1. Make sure the printer is connected to an AC power outlet with the AC adapter and power cord or a DC power cord. -
Page 52: Tips On Using The Battery
Tips on Using the Battery Darker prints discharge the battery faster than lighter prints do. Use the density adjustment from the driver dialog on your computer or use the Set-Up Utility to adjust lightness and darkness. See “Accessing Advanced Software Features” on p. 9. Page 42... -
Page 53: Chapter 3 - Tips On Using Paper
Chapter 3 - Tips on Using Paper Inserting Paper 1. Use both hands to hold the paper straight while you insert it into the printer’s paper input slot. Make sure the bottom edge of the paper is parallel to the feed roller. 2. -
Page 54: Use Pentax Quality Paper
Use Pentax Quality Paper Pentax guarantees optimum compatibility with your PocketJet printer when you use Pentax Quality Paper. This paper is a thermal paper, which eliminates the use of toner, ribbons or ink. It has been specifically designed and tested for optimal support for the PocketJet printer family. -
Page 55: Clearing A Paper Jam
Clearing a Paper Jam Method 1 Press and hold the green Main Power switch. The drive motor will start and move slowly for a few seconds, then move faster as long as you hold the switch down. This can be repeated as many times as necessary. - Page 56 2. Gently pull the paper out of the printer. Pulling in either direction is acceptable. See Figure 16. FIGURE 16. Pulling jammed paper out of the printer 3. Close the release cover. 4. Reinsert a new sheet of paper in the printer and restart the job. Page 46...
-
Page 57: Chapter 4 - Maintaining The Printer
Chapter 4 - Maintaining the Printer Cleaning the Print Head To maintain high print quality, clean the print head after 500 prints or whenever you detect broken or light characters on the page. NOTE: Defective or wrinkled paper can also cause broken or light characters. - Page 58 Cleaning side FIGURE 17. Inserting the cleaning cloth CAUTION: Do not attempt to clean the print head with any material other than the cleaning cloth. The cleaning cloth is for head and roller cleaning only. Do not use it to clean any other part of the printer.
-
Page 59: Cleaning The Platen Roller
Cleaning the Platen Roller Dirt and debris on the platen roller can make the roller feed paper into the printer at an angle, degrade the quality of the printed image, or both. 1. Make sure the printer is powered on without paper loaded. - Page 60 FIGURE 18. Cleaning the platen roller. CAUTION: Do not attempt to clean the platen roller with any material other than the cleaning cloth. The cleaning cloth is for head cleaning and platen roller cleaning only. Do not use it to clean any other part of the printer.
-
Page 61: Cleaning The Printer's Exterior
Cleaning the Printer’s Exterior Should the outside of the printer become dirty, clean it using a soft cloth moistened with water. If necessary, add a very small amount of a mild soap such as a liquid dishwashing detergent. CAUTION: Avoid saturating the cloth. Do not allow water to get inside the printer. - Page 62 Notes: Page 52...
-
Page 63: Chapter 5 - Reference
Chapter 5 - Reference Indicator Lights The indicator lights tell you about the current status of the printer. Indicator Light Table Solid Blinking = Alternating Blinking POWER DATA ERROR = Doesn’t matter External power in use Battery in use, > 14.0 Volts Battery in use, >... -
Page 64: Indicator Light Warnings
POWER DATA ERROR Flash data storage is complete Bad checksum of flash data No battery found when charging Time-Out when charging Low Thermal Head temperature High Thermal Head temperature Data Receive Error Indicator Light Warnings The POWER indicator light does not light The printer is receiving no power. -
Page 65: Data Receive Error
Time-Out When Charging The printer believes that too much time was required to bring the battery up to a normal charge voltage. A maximum of 150 minutes is allowed for the charging cycle. This is an indication that the battery should be replaced. Low Thermal Head Temperature The temperature of the thermal head is too low for reliable printing (less than -10°C). -
Page 66: Self-Test Feature
“Service Mode”. The red DATA light will illuminate. 3. Insert a piece of Pentax Quality paper in the printer. The test page will print automatically. After the print is complete, the printer will return to an idle state. -
Page 67: Chapter 6 - Troubleshooting
Look through the troubleshooting tips in this chapter for help correcting the problem. If none of these suggestions works: • If you are in the U.S., call Pentax Technical Support at 1-800-543- 6144 (extension 1820) from 8 AM to 5 PM Mountain Time, Monday through Friday. -
Page 68: Paper Problems
Paper moves through the printer, but nothing appears on the paper Make sure you are using Pentax Quality paper and that you are loading it properly with the print side away from you. See page 43, “Inserting Paper.” Also, check the Print Density setting using the “Advanced Software Features,”... - Page 69 The printer requires smooth paper to work properly. Make sure the paper does not have any dents or wrinkles. It should lie flat and it should not have a defective or uneven surface coating. Use Pentax Quality paper and make sure it does not have any obvious deformities.
-
Page 70: The Top Margin Is Incorrect
The top margin is incorrect Make sure the correct margins have been set in the configuration utility and your software application. If not, set the margins for the top and bottom of the page as needed. Make sure you are not inserting the paper into the paper input slot with excessive force. -
Page 71: Pages Don't Print
possible, replace the interface cable with another and permanently replace it if it is defective. Pages Don’t Print The green DATA indicator remains lit but does not blink The print buffer contains unprinted data from the software application. If you have already inserted paper in the printer, take the paper out and re-insert it to make sure the printer knows paper is ready. -
Page 72: Windows Ce-Related Problems
This is normal. Each WinCE HPC has a different wait time after a print job completes before it sends an eject signal to the printer. Bluetooth-related Problems Please see the Pentax website for FAQ and tips on connecting to various operating systems and devices at www.pentaxtech.com. -
Page 73: Chapter 7 - Technical Information
Chapter 7 - Technical Information Specifications Physical Height: 1.18 in. (30 mm) Width: 10.04 in. (255 mm) Depth: 2.17 in. (55 mm) Weight: 1.12 lb. (513 g) including battery Printing Method Direct thermal printing Resolution PocketJet 3 - 203 (H) by 200 (V) dpi PocketJet 3 Plus –... -
Page 74: Interfaces
Custom 4.13” (105mm) x 1.00” (25.4mm) minimum 8.6” (218.5mm) x 27 feet (8.23 m) (at 200 dpi) max. 8.6” (218.5mm) x 18 feet (5.49 m) (at 300 dpi) max. (14” (355.6 mm) maximum length recommended) Paper Type Thermal—Cut Sheet, Roll Paper, Perforated Roll, or Fanfold Paper Paper Loading Manual—Single Sheet or Roll... -
Page 75: Electrical
Humidity Operating: 30-80% RH, non-condensing Storage: 30-85% RH, non-condensing Electrical Pentax AC Power Supply Input: 100~240 VAC, 50~60 Hz 1 A Maximum Output: 15 VDC Alternate Power Sources DC: 10.0~14.4V from NiMH battery DC: 10~17 VDC from an external source... - Page 76 For PocketJet 3 units sold in the U.S.A., the following declaration of conformity applies. Page 66...
- Page 77 For PocketJet 3 units sold in the Europe, the following declaration of conformity applies. Page 67...
- Page 78 For PocketJet 3 Plus units sold in the U.S.A., the following declaration of conformity applies. Page 68...
- Page 79 For PocketJet 3 Plus units sold in the Europe, the following declaration of conformity applies. Page 69...
- Page 80 For PocketJet 3 Bluetooth units sold in the U.S.A., the following declaration of conformity applies. Page 70...
- Page 81 For PocketJet 3 Plus Bluetooth units sold in the U.S.A., the following declaration of conformity applies. Page 71...
- Page 82 For PocketJet 3 Bluetooth units sold in Europe, the following declaration of conformity applies. Page 72...
- Page 83 For PocketJet 3 Plus Bluetooth units sold in the Europe, the following declaration of conformity applies. Page 73...
-
Page 84: Radio & Television Interference
The use of a shielded cable is required to comply with Class B limits of FCC rules. Any changes or modifications not expressly approved by Pentax could void the user’s authority to operate this equipment. You may purchase a booklet prepared by the FCC entitled “Interference Handbook,”... -
Page 85: Canadian Regulations
Bescheinigung des Herstellers/Importeurs Hiermit wird bescheinigt, dab der/die/das ..PENTAX Thermodrucker PT-A4211 (‘PocketJet 3’) ... PENTAX Thermodrucker PT-A4312 (‘PocketJet 3Plus’) .. - Page 86 Notes: Page 76...
-
Page 87: Chapter 8 - Ordering Information
For the name of the closest dealer, call the following numbers: • If you are in the U.S., call Pentax at 1-800-543-6144 from 8 a.m. to 5 p.m. Mountain Time, Monday through Friday, and ask for Mobility Products Sales. -
Page 88: Uploadable Fonts
• If you are outside the U.S., contact the dealer where you purchased your printer for information about ordering supplies, accessories and replacement parts. Uploadable Fonts Custom fonts may be developed for this printer to meet unique customer applications. For further information in N. America, call 1- 800-543-3860 or 303-460-1600. -
Page 89: Appendix I - Character Set Tables
Appendix I - Character Set Tables Extended Graphics Character Table MSB> Ç É á ░ └ ╨ α ≡ LSB 0 ü æ í ▒ ┴ ╤ ß ± “ é Æ ó ▓ ┬ ╥ Γ ≥ â ô ú... - Page 90 Notes: Page 80...
-
Page 91: Index
Index 2-Ply Mode, 10 2-ply paper, 10 AC adapter, v, viii, 2, 38, 39, 40, 41, 54 AC power, v, 2, 16, 41, 54 AC power outlet, 2 accessories, 77, 78 Accessories/Replacement Parts, 77 Advanced Software Features, 9, 17, 42, 58 Auto-Off, 27 Auto-Off Timer, 17 Auto-On, 27... - Page 92 Clearing a Paper Jam, 45, 58 Configuration Options, 24 Configuration Program, 15, 18, 19 Configuration Utility, 17, 18, 19, 21, 35, 56, 63 Connecting to Your Computer, 14 Consumables, 77 Controllable Printer Features, 18 Custom Fonts, 37 Customer Support, ix cut sheet paper, 10, 12 Darker prints, 42 DATA indicator, 17, 61, 62...
- Page 93 High Thermal Head temperature, 54 HPC, 62 Indicator Lights, 5, 53 Infinite Length Forms, 11 Infinite Paper Size, 11 Infrared, 14, 15, 19 interface cable, 14, 60, 61 interface connector, 14 IrDA, viii, 14, 15, 55, 64 Linux, 7 Low Thermal Head temperature, 54 Mac OSX, viii, 7, 15 Main Switch, 5, 27, 35 Main Switch Functions, 4...
- Page 94 Custom Forms, 13 Custom Size, 13 Fanfold, viii Inserting, 16, 43, 59 Jam, 45, 46, 58 Pentax Quality, ix, 16, 44, 58, 77 Pre-defined Sizes, 11 Printable Area, 13 Problems, 58 Roll Paper, viii, 10, 26, 28, 77 Size, 10...
- Page 95 Radio & Television Interference Canadian Regulations, 75 European Regulations, 75 US FCC Regulations, 74 Raster Graphics, 7 RBRC, ii red indicator light, 4, 5, 56 release cover, 43, 45, 46, 58, 59 replacement parts, 77 resolution, viii Resolution, 63 Safety Information, v Selecting Media, 10 self test, 4 Serial, 13, 15, 22, 64...
- Page 96 USB Connector, 64 USB port, 14 Use Recommendations, v Variable Length Forms, 11 variable page length, 10 vehicle DC supply, 3, 17 Vehicle Mount, 77 vehicle power, viii Warranty Extended, ix Standard, ix Warranty Information, ix Warranty Registration, ix Windows 2000, 7, 9, 10, 11, 12, 13 Windows 3.1, 11, 60 Windows Advanced Features, 12 Windows CE, 7, 9, 13, 62...
- Page 97 Notes: Page 87...
- Page 98 PENTAX Imaging Company 600 12 Street, Suite 300 Golden, CO 80401 USA 303-460-1600 Fax: 303-460-1628 E-mail: info@pentaxtech.com Internet: www.pentaxtech.com Pentax Technologies Europe, nv Weiveldlaan 3-5 1930 Zaventem (Belgium) Tel: +32.2.306.1190 Fax: +32.2.306.1199 E-mail: info.europe@pentaxtech.be Technical Support In US: 1-800-543-6144, ext. 1820 8 a.m.
Need help?
Do you have a question about the 206627 - PocketJet 3 Plus and is the answer not in the manual?
Questions and answers
Website to make copies if you don’t have CD