Table of Contents
Advertisement
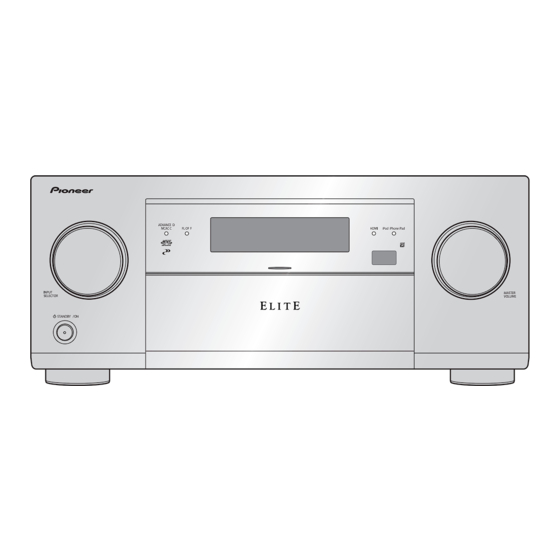
AV RECEIVER
SC-71
SC-1228-K
SC-1223-K
THIS MANUAL IS APPLICABLE TO THE FOLLOWING MODEL(S) AND TYPE(S).
Model
SC-71
CUXJ
SC-1228-K
CUXJ
SC-1223-K
UXJCB
THIS SERVICE MANUAL SHOULD BE USED TOGETHER WITH THE FOLLOWING MANUAL(S).
Model No.
SC-71, SC-1228-K, SC-1223-K
PIONEER CORPORATION
PIONEER ELECTRONICS (USA) INC. P.O. Box 1760, Long Beach, CA 90801-1760, U.S.A.
PIONEER EUROPE NV Haven 1087, Keetberglaan 1, 9120 Melsele, Belgium
PIONEER ELECTRONICS ASIACENTRE PTE. LTD. 253 Alexandra Road, #04-01, Singapore 159936
PIONEER CORPORATION
Type
Power Requirement
AC 120V
AC 120V
AC 120V
Order No.
RRV4462
SCHEMATIC DIAGRAM, PCB CONNECTION DIAGRAM, PCB PARTS LIST
1-1, Shin-ogura, Saiwai-ku, Kawasaki-shi, Kanagawa 212-0031, Japan
2013
SC-71
Remarks
K-FZV MAY
ORDER NO.
RRV4450
Remarks
2013 Printed in Japan
Advertisement
Table of Contents

Related Manuals for Pioneer SC-1228-K


Summarization of Contents
Safety Information
1. Safety Precautions
General safety precautions for service technicians and customers.
2. Product Safety Notice
Information on special safety characteristics of electrical and mechanical parts.
1. Service Precautions
1.1 Notes on Soldering
Guidelines for using lead-free solder and appropriate soldering irons.
1.2 Notes on Replacing
Parts difficult to replace as discrete components, requiring whole Assy replacement.
1.3 Caution
Important warnings before diagnosis, including discharging and ground points.
2. Specifications
Amplifier Section
Details on continuous and simultaneous power output specifications.
Audio Section
Specifications for input sensitivity, impedance, and signal-to-noise ratio.
Tuner Section
Frequency ranges and antenna input specifications for FM and AM.
Video Section
Signal levels and resolution for composite and component video.
Specifications
Digital In/Out Section
Specifications for HDMI, USB, iPod, and LAN terminals.
Integrated Control Section
Specifications for IR signal, 12V Trigger, and RS-232C.
Network Section
Specifications for the LAN terminal.
Miscellaneous
Power requirements, consumption, dimensions, weight, and furnished parts.
3. Basic Items for Service
3.1 Check Points After Servicing
Procedures and check points to ensure product quality after service.
3.3 Jigs List
[1] Jigs List
Details of extension jig cables for board-to-board connections.
[2] Lubricants and Glues List
List of lubricants and glues used, with reference to specific sections.
4. Block Diagram
4.1 Overall Wiring Diagram
A comprehensive block diagram showing the overall wiring and connections.
5. Diagnosis
5.1 Diagnosis Flowchart
Flowchart for diagnosing 'No Power' issues and troubleshooting steps.
No FL Display
Troubleshooting flowchart for units with no display on the front panel.
Digital Amp Block Flowchart
1) No Sound
Troubleshooting steps for no sound issues within the Digital Amp block.
2) Diagnosis Flow Chart from Error Symptom
Flowchart for diagnosing amplifier section errors like BERR, OL, DC Detection, and TEMPERR.
5.2 Circuit Description
[1] Protection Circuit Process List
Details on how protection circuits detect and respond to various abnormalities.
6. Service Mode
6.1 Test Mode
Description and operation of the TEST MODE for checking protection history.
7. Disassembly
Ground Points
Identification of ground points that must be grounded during disassembly.
[1] Front Section
Procedure for removing the front section, including bonnet and internal components.
[2] Rear Section
Procedure for disassembling the rear section of the unit.
[2-2] Diagnosis
Diagnosis steps involving connecting jig cables for rear section assembly testing.
[2-3] Remove the D-AMP_SS ASSY
Procedure for removing the D-AMP_SS ASSY and its associated components.
[3] DIGITAL MAIN_L ASSY, 232C_SS ASSY, VIDEO_SS ASSY
Procedure for removing major digital and video processing assemblies.
[3-2] Diagnosis
Diagnosis steps for digital assemblies using board-to-board extension jig cables.
[3-3] 232C_SS ASSY, VIDEO_SS ASSY
Procedure for removing the 232C_SS and VIDEO_SS assemblies.
[3-4] Diagnosis
Diagnosis steps involving jig cables and insulator placement for rear panel components.
8. Each Setting and Adjustment
8.1 Adjustment Required When the Unit is Repaired or Replaced
Required adjustments and settings after replacing specific assemblies or parts.
8.2 How to Save and Load the Setting Using Backup Function With USB Memory
Procedure for saving and loading unit settings using USB memory.
8.3 Region Writing
Procedure for writing region information using USB memory, typically after replacing the Display Assy.
8.4 How to Update Firmware
Workflow for updating firmware for the main, DSP, and BridgeCo ICs via USB memory.
9. Exploded Views and Parts List
9.1 Packing Section
Exploded view and parts list for the product's packaging components.
Need help?
Do you have a question about the SC-1228-K and is the answer not in the manual?
Questions and answers