Table of Contents
Advertisement
Advertisement
Table of Contents

Related Manuals for MAQ SONAR 90KHz

Summary of Contents for MAQ SONAR 90KHz
- Page 1 MAQ SONAR COMPANY div of Helo Enterprises Inc. Technical and Installation Manual...
- Page 2 No part of this document may be reproduced without express written permission from MAQ Sonar. MAQ Sonar is not legally responsible for any errors or omissions in this document or for any damage or injury as a result of the operation of the system.
- Page 3 Notes: ______________________________________________ ______________________________________________ ______________________________________________ ______________________________________________ ______________________________________________ ______________________________________________ ______________________________________________ ______________________________________________ ______________________________________________ ______________________________________________ ______________________________________________ ______________________________________________ ______________________________________________ ______________________________________________ ______________________________________________ ______________________________________________ ______________________________________________ ______________________________________________ ______________________________________________ ______________________________________________ ______________________________________________...
- Page 4 Notes: ______________________________________________ ______________________________________________ ______________________________________________ ______________________________________________ ______________________________________________ ______________________________________________ ______________________________________________ ______________________________________________ ______________________________________________ ______________________________________________ ______________________________________________ ______________________________________________ ______________________________________________ ______________________________________________ ______________________________________________ ______________________________________________ ______________________________________________ ______________________________________________ ______________________________________________ ______________________________________________ ______________________________________________...
- Page 5 PREFACE Note: MAQ Sonar makes every effort to ensure the information contained within this document is correct. However, our equipment is continuously updated, so we cannot assume liability for errors, which may occur. Warning: MAQ Sonar disclaims any responsibility for damage or injury caused by improper installation, use or maintenance of the equipment.
- Page 6 Intentionally left blank for future use...
- Page 7 Table of contents Chapter 1 Installation requirements Pages 1-2 Sea-Chest Installation References Pages 3-5 Hoist and Transducer Illustrations Pages 6-10 Chapter 2 Mechanical drawings Pages 11-30 Installation Wiring Diagrams Pages 31-36 Chapter 3 Inclinometer Setup Procedure Pages 37-38 Chapter 5 System Power UP Pages 39-40 Screen Layout...
- Page 8 Intentionally left blank for future use...
- Page 9 MAQ SONAR COMPANY DIVISION OF HELO ENTERPRISES INC. Chapter 1 Requirements Basic Installation Requirements Sea Chest Installation Requirements Hoist and Transducer Illustrations P.O BOX 199, 9 CHURCH STREET, FINCH, ONTARIO, CANADA K0C 1K0 Phone: (613) 984-9000 Fax: (613) 984-0909 E-Mail: info@maqsonar.com...
-
Page 11: Installation Requirements
Installation Requirements 1) Approvals: Sea-Chest installations must be approved on a case-by-case basis with regard to the vessel’s national registry and corresponding maritime authority. The ship owner and shipyard performing the installation are responsible for obtaining installation approval. 2) Power supply: For the Processor Units AC Power we recommend the use of an Uninterruptible Power Supply (UPS). - Page 12 The MAQ Sonar system consists of the following components: 1) Computer interface unit (Processor) with Joystick unit. (An optional Keypad Control is Available) 2) Hoist with Hoist Control unit (60 KHz and 90 KHz unit the same hoist system) 3) Transceiver Unit...
- Page 13 Dealers. Sea-Chest: MAQ Sonar is one of the simplest and fastest Omni Sonar to install. This Sonar was designed to fit on vessels with existing Sea-Chests and can be installed in as little as one day.
- Page 14 These drawing show typical lengths and dimensions for short stroke and standard stroke hoist installations of the 90KHz, 60KHz and 22KHz Sonar. Before installing the Sea-Chest or Sonar it is IMPORTANT to measure the angle of a vessel during typical search and catch situations as well as pitch and Roll measurements.
- Page 15 Grounding and Zinc Anodes: MAQ Sonar’s Transducer Pipe, Transceiver and Processor Units must be electrically connected to the ships main ground. Zinc Anodes must be installed on Transducer pipes and inspected and replaced yearly. Poor grounding will cause excessive zinc erosion.
- Page 21 MAQ SONAR COMPANY DIVISION OF HELO ENTERPRISES INC. Chapter 2 Drawings and Diagrams Mechanical Drawings Installation Wiring Diagrams P.O BOX 199, 9 CHURCH STREET, FINCH, ONTARIO, CANADA K0C 1K0 Phone: (613) 984-9000 Fax: (613) 984-0909 E-Mail: info@maqsonar.com...
- Page 23 60/90KHz Sea-Chest 22KHz Sea-Chest...
- Page 24 GM4501 - 60/90kHz Transducer Pipe with Flange KA22005 - 22kHz Transducer Pipe with Flange...
- Page 25 60/90KHz Sea-Chest Guides...
- Page 28 22KHz Sea-Chest Guides...
- Page 31 60/90KHz Hoist...
- Page 32 22KHz Hoist...
- Page 36 22KHz SHIELD INSTALLATION...
- Page 40 PROCESSOR UNIT CASE DIMENSIONS TRANSCEIVER UNIT CASE DIMENSIONS...
- Page 41 TRANSMITTER UNIT CASE DIMENSIONS JOYSTICK DIMENSIONS...
- Page 42 UPPER HOIST CONTROL DIMENSIONS KEYPAD DIMENSIONS...
- Page 43 OMNI INSTALLATION WIRING DIAGRAM...
- Page 44 KA1802 TRANSCEIVER ASSEMBLY Note: KA1891 BOARDS MUST BE INSTALLED IN THESE SLOTS AS SHOWN 2 – KA1891 RECEIVER BOARDS (BLUE) MUST BE INSTALLED AS SHOWN IN THIS TRANSCEIVER TYPE.
- Page 48 G.P.S. and NMEA Hookup. The G.P.S Input requires a MNEA0183 data sentence from a G.P.S. which contains a minimum RMC sentence output. The sentences will require the following data information: LAT\LONG, SPEED and HEADING. If more accurate sentences are available they can be selected on the NAV panel. The RS-232 OUT will send NMEA0183 data to plotters when MM (Manual Mark) is selected on the OPR (Operate Panel) NMEA Data Sentences...
- Page 49 MAQ SONAR COMPANY DIVISION OF HELO ENTERPRISES INC. Chapter 3 Inclinometer P.O BOX 199, 9 CHURCH STREET, FINCH, ONTARIO, CANADA K0C 1K0 Phone: (613) 984-9000 Fax: (613) 984-0909 E-Mail: info@maqsonar.com...
- Page 51 Inclinometer Setup Procedure for type “G” Inclinometer Requirements: Digital level Possibly two people. This procedure must be performed after the transducer is installed, and the processor is in its final position and permanently mounted. This setup procedure must be repeated if: ...
- Page 52 4) To align the transducer with the Inclinometer, the vertical alignment of the transducer in the sea chest must be measured. Precise stabilization only occurs when the transducer alignment matches the Inclinometer. Extreme care must be exercised when conducting this procedure. Transducer with Positive Bow Tilt Transducer with Positive Roll Tilt Transducer with Negative Bow Tilt...
- Page 53 MAQ SONAR COMPANY DIVISION OF HELO ENTERPRISES INC. Chapter 4 System Power Up System Power Up Initialization Sequence Screen Layouts Menu Panels Display P.O BOX 199, 9 CHURCH STREET, FINCH, ONTARIO, CANADA K0C 1K0 Phone: (613) 984-9000 Fax: (613) 984-0909 E-Mail: info@maqsonar.com...
- Page 55 System Power Up Main Power Control Power On Sequence Start the sonar by pressing the menu select and On/Off buttons simultaneously on the Menu Select Button joystick. Power Off Sequence Power On Indicator Shut down the sonar by pressing the menu On/Off select and On/Off...
- Page 56 Initialization Sequence The first screen presented displays the current software version (V XX.XX.XX in this example), date of release (Month Date, Year) and initialization status: Initializing Signal Processing … Complete The sonar is setting up the interface system and loading the previous menu settings. Initializing Transceiver …...
- Page 57 Screen Layout Main Screen Main Screen The Main Screen is divided into two basic sections: Menu Panel The Menu Panel provides user access to the operation and system control features. To change the current menu selection (highlighted in yellow at right), press down on the menu select button on the top of the joystick.
- Page 58 The Panel Select area provides user access to the array of menu panels for operation and configuration of the MAQ Sonar System. At system start, the Operate Panel (OPR) is presented. The Trawl Panel is only present in Trawl Mode.
- Page 59 Operate Panel Setup Panel Display Panel Picture Panel Raw Data Panel Time Panel...
- Page 60 Navigation Panel Auto Fault Locator Panel System Panel Tonnage Panel Trawl Panel Net Panel (Present only in Trawl Mode)
- Page 61 Menu Item Description The Menu Item Description displays a short phrase to give details about the current menu focus. This area is also used to display certain system messages: • Should the communications link between the Computer Interface Unit and the Transceiver Unit fail, a NO DATA RECEIVED message will flash in alternating colors.
- Page 62 What will be seen on the display... Below is a typical sonar screen which has a brief explanation of the various items which might be seen on a sonar screen. On the right hand side is the Main Menu and in this particular screen shot the Operator OPR panel is on the display.
- Page 63 MAQ SONAR COMPANY DIVISION OF HELO ENTERPRISES INC. Chapter 5 System Set Up P.O BOX 199, 9 CHURCH STREET, FINCH, ONTARIO, CANADA K0C 1K0 Phone: (613) 984-9000 Fax: (613) 984-0909 E-Mail: info@maqsonar.com...
-
Page 65: System Setup
System Setup Transducer Alignment The transducer alignment may require alteration as the transducer serviced or when a replacement transducer is installed. Tsh Transducer Shield Stainless Steel transducer shield removed or 60/90 kHz ABS shield installed. Stainless Steel shield installed. Note that if the transducer shield is removed or replaced the Frequency Adjust (below) calibration must be confirmed. - Page 66 DA Display Alignment NOTE: Bow Up Display must be selected on the Navigation Panel when making this adjustment. Adjust to compensate for any misalignment of the transducer during installation to ensure the bow appears at the top of the Sonar display (12 o’clock position). In port, the dock or wharf may be used to align the dock or wharf with the boat.
- Page 67 Inclinometer The inclinometer is used in stabilized modes to sense the attitude of the vessel. Please refer to separate section on Inclinometer Type G which is included with each new system. Below are instructions to be used in older systems. INC Inclinometer Type Adjust to indicate which type of inclinometer is connected to the system.
- Page 68 BW Bow (Pitch) Adjust Compensates for pitch related to inclinometer installation offset. Selections: 0.1 degree increments from -4.0° to 4.0° In order to make this adjustment, the system must be in stabilized mode: • On the Operate Panel select either Tracking mode (TR), Search mode (SR) or Vertical Tracking mode (VTR).
- Page 69 PT Port (Roll) Adjust Compensates for roll related to inclinometer installation offset. Selections: 0.1 degree increments from -4.0° to 4.0° In order to make this adjustment, the system must be in stabilized mode: • On the Operate Panel select either Tracking mode (TR), Search mode (SR) or Vercal Tracking mode (VTR).
- Page 70 Preferences Operating Language The operating language is selected on the Setup Panel. Sets the language displayed in the menu item description. There are 11 languages presently available (standard). English French Spanish Swedish Portuguese Turkish Tür Italian Russian Norwegian Danish Chinese Range Units Feet/Meters/Fathoms/Yards The setting for the Range Units is located on the Setup Panel.
- Page 71 Adjusting The Display The brightness levels for the menu text and the Sonar display can be independently preset on the Display (DIS) Panel. Brightness Levels Adjust the brightness level of the Sonar display. Menu Panel Adjust the brightness level of the text.
- Page 72 Setting The Time The system time is seen on the bottom/left corner of the Sonar display. One use is to time stamp tonnage pictures stored for easier identification on retrieval. Settings are found on the Time (TIM) Panel. Sets the current year for the system. Sets the current month for the system.
- Page 73 Navigation Setup Equipment Connections The MAQ Sonar system is able to interface with many types of NMEA based systems. In order to connect more than one NMEA device to the Sonar system a NMEA multiplexer or combiner will be required. NOTE: A Satellite Compass is strongly recommended for accurate Wake Trail Display.
- Page 74 Intentionally left blank for future use...
- Page 75 MAQ SONAR COMPANY DIVISION OF HELO ENTERPRISES INC. Chapter 6 Basic Operation P.O BOX 199, 9 CHURCH STREET, FINCH, ONTARIO, CANADA K0C 1K0 Phone: (613) 984-9000 Fax: (613) 984-0909 E-Mail: info@maqsonar.com...
- Page 77 Basic Operation This assumes the sonar has been installed, the vessel is in the water and there is clearance under the vessel to deploy the transducer safely below the vessel. Also the High voltage has been turned on in the Transceiver. Note: If the auto Hoist has been connected a Beeping sound will be heard from the Hoist control unit to warn the operator that the Hoist is lowering or raising during Startup or Turn OFF.
- Page 78 Move down to the Gain (GN) control and adjust to obtain a clearly defined image of the target. Setting this control too high will cause the display to become cluttered. If the target object does not appear in correct orientation to the vessel see the System Setup - Transducer Alignment section.
- Page 79 MAQ SONAR COMPANY DIVISION OF HELO ENTERPRISES INC. Chapter 7 Menu Panels RAW Rawdata Panel TIM Time Panel AFL Automatic Fault Locator Panel Nav Navigation Panel SYS Systems Panel P.O BOX 199, 9 CHURCH STREET, FINCH, ONTARIO, CANADA K0C 1K0...
- Page 81 RAW Rawdata Panel Rawdata is used mainly by the development team at MAQ Sonar for analysis and troubleshooting. The transducer data is stored directly after gathering from the Transceiver Unit. Provision is made for saving this data to a memory device for transfer back to the MAQ Research facility.
- Page 82 TIM Time Panel This panel allows the operator to set the current time and date. The time and date is used for the current time displayed on the sonar display and to time stamp tonnage pictures stored for easier identification on retrieval. YR Year Adjust Sets the current year for the system.
- Page 83 AFL Automatic Fault Locator Panel Software Revision Levels Displays the Software Version of the operating system installed along with the software version of the EPROM in the Transceiver Unit. Operating System Version CNTRL Transceiver EPROM Version XCVR I/O Display NMEA Input/Output Displays all NMEA data received or transmitted by the sonar system.
- Page 84 PM Process Message Setting Process Message to 1 will cause the Interface software version, date of release and the Transceiver Unit software versions to be overlaid on the sonar display. Setting Process Message to 2 will cause the mark history for both Event Marks and Vessel Marks to be overlaid on the sonar display in latitude/longitude coordinates.
- Page 85 NAV Navigation Panel This panel allows the operator to set the various aspects of the navigation system. The upper section of the panel displays the navigation status of the external device interfaced to the GPS terminals of the sonar allowing the operator to easily determine which NMEA sentences contain valid information.
- Page 86 Cur Cursor Bearing Sets the cursor bearing readout on the sonar display to be either Absolute (with respect to North) or Relative to the vessel. NM Navigation Mode Selects the display mode for navigation. Two modes are available: BUp Bow Up Display Vessel The display is rotated to position the bow of the Heading...
- Page 87 Sim Simulator Simulator Mode is intended as a demonstration tool only and should not be employed during normal operation as true target data from the Transceiver Unit is replaced by system generated data. This feature simulates target information. A number of simulated targets of varying size and depth may be seen at ranges of about 200 meters and 1500 meters at tilt angles from -10°...
- Page 88 HD Heading Selection Selects the NMEA type to determine heading for the system. Spd Speed Selection Selects the NMEA type to determine vessel speed for the system. L/L Latitude/Longitude Selection Selects the NMEA type to determine latitude/longitude for the system. NH Net Height Adjust Presets the height of the trawl net in use by the vessel.
- Page 89 WT Wake Trail Display This feature allows the operator to decide a number of parameters: • Wake Trail presence. • Wake Trail/Range Ring color. • Minimum speed from the navigation equipment for use by the system. Selections: White range rings - wake trail disabled. Woff Gray range rings - wake trail disabled.
- Page 90 SYS System Panel DA Display Alignment Bow Up Display must be selected on the Navigation Panel when making this adjustment. Adjust to compensate for any misalignment of the transducer during installation to ensure the bow appears at the top of the sonar display (12 o’clock position). When at sea, noise from the vessel’s propeller may be used to position the noise immediately to stern (6 o’clock) on the sonar display.
- Page 91 BW Bow (Pitch) Adjust Compensates for pitch related to inclinometer installation offset. Selections: 0.1 degree increments from -4.0° to 4.0° In order to make this adjustment, the system must be in stabilized mode: On the Operate Panel select either Tracking mode (TR), Search mode (SR) or Vertical Tracking mode (VTR).
- Page 92 PT Port (Roll) Adjust Compensates for roll related to inclinometer installation offset. Selections: 0.1 degree increments from -4.0° to 4.0° In order to make this adjustment, the system must be in stabilized mode: On the Operate Panel select either Tracking mode (TR), Search mode (SR) or Vertical Tracking mode (VTR).
- Page 93 FQ Frequency Adjust This setting is essential for best sonar performance. Adjust to fine tune the transducer frequency to ensure maximum target strength. The transducer frequency is displayed above FQ (e.g. 20.500 kHz). The optimum frequency will vary slightly for each unit. The frequency changes in discrete steps (e.g.
- Page 94 TA Temperature Adjust Compensates for any offset in the water temperature readout on the sonar display. Adjustment: ±5.0° (Centigrade) in 0.5° steps. Tsh Transducer Shield Compensates for signal attenuation due to the transducer shield (if installed). Attenuation increases with greater tilt angles for shielded transducers. Adjustment: Stainless Steel transducer shield removed or 60/90 kHz ABS shield installed.
- Page 95 MAQ SONAR COMPANY DIVISION OF HELO ENTERPRISES INC. Chapter 8 Electronics Electronics Descriptions Electronics Troubleshooting P.O BOX 199, 9 CHURCH STREET, FINCH, ONTARIO, CANADA K0C 1K0 Phone: (613) 984-9000 Fax: (613) 984-0909 E-Mail: info@maqsonar.com...
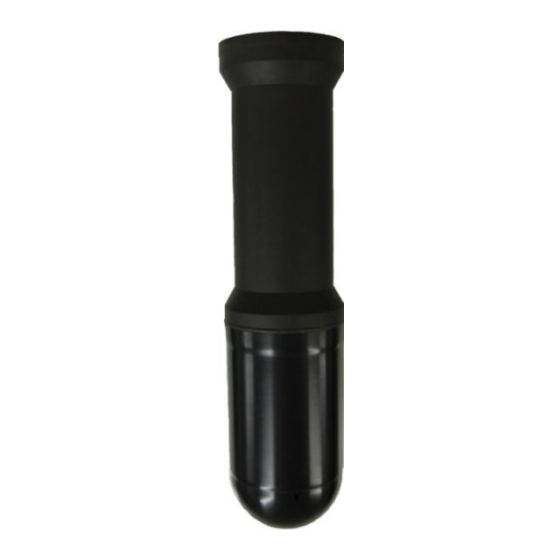
- Page 97 - Typically in Sonar room or engine Room. Room temperature but not mounted near engine or heat source. Several meters from the Hoist unit. KA9004-90KHz Transducer – 8” Sea-Chest KA6004-60KHz Transducer– 8” Sea-Chest KA2204-22KHz Transducer– 18” Sea-Chest KA1805-Joystick Assembly - Mounted near operator.
- Page 98 KA1872-Processor Unit Interface Board -Supplies Digital power for the processor Unit and all System Fans. Interfaces all external inputs from Joystick, Navigation and Synchronization to Idustrial computer as well as Digital Data I/O from Transceiver KA1969-Industrial Computer Assembly (Contains an additional Board PCI-7300 – High Speed Digital I/O Board) -Receives all Data I/O thru the KA1872 -Performs all Digital Signal Processing as well as Display and user interface.
- Page 99 KA1814-Transceiver Mux Board (Orange) -1 per system 4 Channels per board -Multiplexes all Receiver board channels to the Control Board for the A/D converters. KA1891-Receiver Board (Blue) -2 or 4 per system 16 channels per board -Receiver all Analog Receive Data filters and amplifies the Data for the A/D converters KA1890-Transmitter Board (Red) - 2 per system 8 channels per board (8 per RDT system)
- Page 100 KA1872 board (Processor Unit Interface Board). Replace KA1872. Power ON Sonar by simultaneously pressing both the red buttons of the Joystick. You must hear the start-up beep of the computer on power-up. MAQ Sonar Operator’s panel must appear on the monitor.
- Page 101 LED2 Flashing Indicates KA1849 is receiving message from Processor Unit KA1849 PCB. (this will vary with range scales and should match the rate of the Trans LED on the KA1872 board) - If not flashing in synchronization with KA1872 LED1 check cable connection KA1837 Interface cable.
- Page 102 LEDS5 KA1872 Lights all flashing indicates Message received from transceiver to processor and “NO DATA RECEIVED” on the display indicates message is not correct. - Reformat and reload software. (Ensure Correct Revision Levels) - If LEDS are not all flashing in synchronization replace KA1872. - Replace KA1849 - Check cable connection KA1837 Interface cable.
- Page 103 MAQ SONAR COMPANY DIVISION OF HELO ENTERPRISES INC. Chapter 9 Maintenance Checks P.O BOX 199, 9 CHURCH STREET, FINCH, ONTARIO, CANADA K0C 1K0 Phone: (613) 984-9000 Fax: (613) 984-0909 E-Mail: info@maqsonar.com...
- Page 105 MAQ Standard Maintenance Checks. Transducers 1. Zinc Anodes mounted on transducer pipes must be inspected when possible and replaced yearly. (excessive erosion of Zinc Anodes indicates improper grounding) 2. Transducer must be inspected yearly. Signs of aquatic life accumulation on the shield or inside the shield must be corrected for best sonar performance (see transducer maintenance procedure).
- Page 106 Intentionally left blank for future use...
Need help?
Do you have a question about the 90KHz and is the answer not in the manual?
Questions and answers