Table of Contents
Advertisement
PLEASE READ CAREFULLY AND KEEP
THIS MANUAL FOR FUTURE REFERENCE
Instruction Manual
Product # 10-000
POLARIS — VEGA — CENTAURI
Certified and tested according to
CAN/ULC S627-00
UL 1482-2011
2020 U.S. Environmental
Protection Agency's crib wood
emission standard
490, rue de l'Argon
Québec, CANADA G2N 2C9
Tél.: 418-849-8095
Fax : 418-849-0077
www.jaroby.com
June 16, 2016
Printed in Canada
Advertisement
Table of Contents

Related Manuals for Roby VEGA

Summary of Contents for Roby VEGA
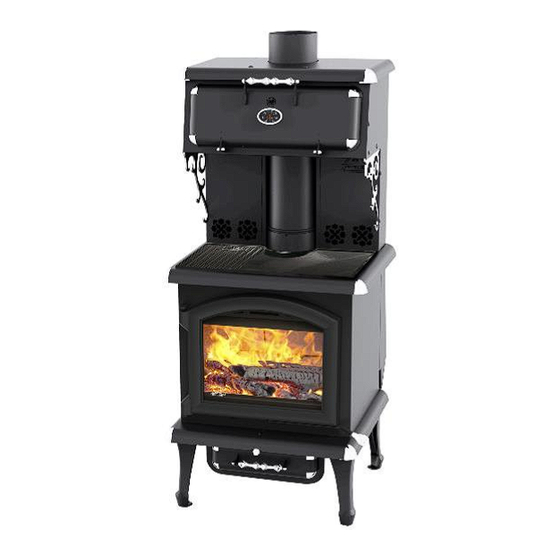
- Page 1 PLEASE READ CAREFULLY AND KEEP THIS MANUAL FOR FUTURE REFERENCE Instruction Manual Product # 10-000 POLARIS — VEGA — CENTAURI Certified and tested according to CAN/ULC S627-00 UL 1482-2011 2020 U.S. Environmental Protection Agency's crib wood emission standard 490, rue de l'Argon Québec, CANADA G2N 2C9...
-
Page 2: Table Of Contents
Vertical Installation............19 Dimension and quantity of bricks ........33 EXTERNAL COMBUSTION AIR SOURCE ......20 J. A. ROBY LIMITED LIFE WARRANTY ........ 34 Exterior Air Intake pipe ............20 Installation of Air Intake Pipe ......... 20 Air Inlet Obstruction ............20... -
Page 3: Introduction
Vent size 6" Read all instructions carefully before installing your new J.A. Roby stove. A good installation is very important for a safe and Firebox size 1.83 cubic feet effective use of this appliance. If you have doubts about the ... -
Page 4: Rating Plate
RATING PLATE June 16, 2016... -
Page 5: Appliance Dimension
APPLIANCE DIMENSION CLEARANCES TO SPECIFICATIONS COMBUSTIBLE MATERIAL Option Polaris, Sirius Vega, Antares Rigel, Centauri All models Combustible Wood Wood Wood Back 10 in (25.4 cm) Recommended 1800 ft² 1800 ft² 1800 ft² surface area Beside 20 in (50.8 cm) Capacity... -
Page 6: Installation
INSTALLATION Fire Prevention Floor protection plate minimum dimensions To provide reasonable fire prevention, the following should be The following dimensions are the minimums values and it can given serious consideration: be higher. 1. At least one smoke detector on each floor of your home Canada: should be installed to ensure your safety. -
Page 7: Minimums Clearances To Combustible Material
Minimums clearances to combustible material For a 45° corner or other corner installation, the With these reduced clearances, this appliance take a minimum minimum clearance between the stove and space to be installed. Whether in the living room or the dining combustible material must be 8 inches. -
Page 8: Assembly Before Installation
Assembly before installation Fan and Snap disc box installation Depending on the option you chose, the stove legs might not have been assembled in the shop in order to save space for storage and shipping. You must therefore assemble them before installing the stove. -
Page 9: Warmer Stove Assembly (Optional)
Warmer stove Assembly (Centauri Cuisiniere) Fix the right side. Now, you need to know which type of smoke pipe: smoke simple pipe or smoke double pipe. For the smoke simple pipe, it’s not necessary to remove the pre- cut metal part. For the smoke double pipe, you must remove the pre-cut metal part on the top, inside and in front of the warmer. - Page 10 Fix the top with the back and with the front as well. Put and fix the warmer with the 6 holes of each side to the cook stove. Fix the left decorative panel side and install the left chrome decoration. Fix the right decorative panel side and finish installing the right chrome decoration.
-
Page 11: Firebricks Installation
Firebricks installation Floor firebricks installation Side firebrick installation Put 2 Bricks «F» near the wall and 2 bricks «D» in the center. Put 4 bricks "A" as shown. Angle firebricks installation Back firebrick installation Put «C» and «E» brick on the top of the back bricks and tangent Put 3 bricks «A»... -
Page 12: Firebrick Installation On The Pipes
Firebrick installation on the pipes The firebricks must be put on the 3 pipes from the front of Put the rockwool over the bricks and check from the hole combustion chamber. Bricks keep the maximum heat inside the in the flue collar that the passage of smoke is not combustion chamber and help the air from the tube burn the most obstructed. -
Page 13: General Stove Installation Steps
GENERAL STOVE Note: This appliance have to be connected to 6 inches INSTALLATION STEPS (15.24 cm) factory build chimney HT UL 103 or CAN/ULC S629 compliant or a 6 inches (15.24 cm) masonry chimney Location considerations with a homologated sleeve inside. We recommend installation of this appliance by a certified Install the chimney following the manufacturer installer. -
Page 14: Chimney Connector Installation
Chimney connector installation The chimney connector is a set of single wall or double wall flue For direct vertical installation, you will need: pipes and elbow installed between the stove collar and the chimney collar. The single wall chimney connector is sold into 1 vertical section of 24 inches or more;... -
Page 15: Mobile Home Installation
Always keep the door closed. Open it only when add Mobile home installation wood or start fire. DANGER: DO NOT INSTALL IN BEDROOM. To close the exterior air inlet when the stove is not in WARNING: THE STRUCTURAL INTEGRITY OF THE MOBILE use, a damper must be installed in the air intake pipe. -
Page 16: Chimney Installation, General Steps
Frame the hole into the roof. Chimney installation, General steps Install the chimney support at the ceiling where stove Use only approved chimneys, the same size as the output is installed. collar, 6 inches in this case. The chimneys used must be tested Stack and lock the factory built chimney section on according to CAN/ULC S629 M87 in Canada and to UL 103 the support and above the roof. -
Page 17: Inside Masonry Chimney, Vertical Installation
Inside Masonry Chimney, Vertical Outside Vertical Installation Installation The wood appliance must be installed in accordance with the applicable local laws or the CAN/CSA-B365, NFPA211 (USA) The wood appliance must be installed in accordance with the norms. Follow the chimney manufacturer’s instructions to install applicable local laws or the CAN/CSA-B365, NFPA211 (USA) the chimney. -
Page 18: Offset Installation
Cathedral Vertical Installation Offset Installation The wood appliance must be installed in accordance with the The wood appliance must be installed in accordance with the applicable local laws or the CAN/CSA-B365, NFPA211 (USA) applicable local laws or the CAN/CSA-B365, NFPA211 (USA) norms. -
Page 19: Vertical Installation
Vertical Installation The wood appliance must be installed in accordance with the applicable local laws or the CAN/CSA-B365, NFPA211 (USA) norms. Follow the chimney manufacturer’s instructions to install the chimney. Always pass chimney between joists. If a joist need to be cut, referring to the National Building code to know how to do it safely to avoid structural integrity fail. -
Page 20: External Combustion Air Source
EXTERNAL COMBUSTION AIR Install a small rigid section inside the house and put a SOURCE damper to close the air Inlet. This damper is to reduce the cold air circulation into the stove when it is not in In conventional designed house, natural ventilation is enough service. -
Page 21: Stainless Steel Tubes Replacement
STAINLESS STEEL TUBES How to install tubes REPLACEMENT Insert the tube into the round hole in the hot air corridor. Although the tubes are in stainless steel, with extreme Insert the other side in the corresponding hole of the temperature and conditions, the tubes are eventually corroded hot air corridor. -
Page 22: Operating Instructions
OPERATING INSTRUCTIONS OPERATE ONLY WHEN DOOR IS CLOSED: Keeping Lightning fire the door open might over fire and cause permanent After installing correctly the stove following the instruction of damage to the stove or a chimney fire. the manufacturer, you are ready to light it. ... -
Page 23: First Fire
First fire Fan Control During the first hours of operation, you must heat it gradually. The optional switch on the snap disc box is only to turn on and In order to allow an appropriate baking of the paint and off the fan. -
Page 24: Things Not To Burn
Things not to burn MAINTENANCE Garbage; Ash Removal Lawn clippings or yard waste; The wood burning doesn’t transform the wood into combustion Materials containing rubber, including tires; gas completely. It makes some residue called ash and it must Materials containing plastic; be removed from the combustion chamber to help oxygen Waste containing petroleum products, paints or paint circulation. -
Page 25: Chimney Inspection
Sweeping chimney also requires to climb on the roof to remove the chimney cap and sometime even a very high chimney To clean the glasses, J.A. Roby Inc. recommends using section too. products sold for this purpose or an oven cleaner avoiding touching paint part. -
Page 26: Replacing Broken Glass
Fiberglass rope installation Replacing broken glass Put a high temperature latex inside the clean groove WARNING: NEVER OPERATE STOVE WHEN THE GLASS to glue the fiberglass rope. IS BROKEN OR CRACKED. Starting at the lower corner near the hinge put DO NOT SLAP THE DOOR. -
Page 27: Exploded Diagram Of Door
APPENDIX 1 Exploded diagram of door Square door Arc door June 16, 2016... -
Page 28: Fans Electric Wiring Diagram
APPENDIX 2 Fans electric wiring diagram June 16, 2016... -
Page 29: Parts That Can Be Replaced
APPENDIX 3 Parts that can be replaced Bricks Door glass Spring Handle Stove Door with handle Fans Flat fiber glass rope (around glass) Round fiberglass rope Ash Plug Slotted Brick Washer Call your stove seller representative to order parts. -
Page 30: Annexe 4
ANNEXE 4 Pedestal installation The pedestal consists of 5 components. 1) Left Side 2) Right Side 3) Reinforcing plate 4) Base 5) screws 1. Detach stove from the skids. 2. Put the stove on its back. June 16, 2016... - Page 31 3. Detach skid anchor. We recommend 4. Insert the left side part on the base. you to ask for help to avoid accident. Note : To distinguish the left side part from Be careful not to insure yourself. the right side part, find the holes for the reinforcing plate on the non-rounded side of the base part, at the back of the pedestal.
- Page 32 7. Remove the screws for the 8. Install the ashtray holder by screwing ashtray holder. with the holes for this purpose. 10. Install the reinforcing part at the back 9. Open the pedestal slightly and of pedestal. Let the stove stand on the tack the washers on both sides.
-
Page 33: Dimension And Quantity Of Bricks
APPENDIX 5 Dimension and quantity of bricks June 16, 2016... -
Page 34: J. A. Roby Limited Life Warranty
J. A. ROBY. Failure of any components which is attributed to poor maintenance, is not warrantable and will not be covered by this policy. J.A. ROBY neither assumes, nor authorizes any third party to assume, on its behalf, any other liabilities with respect to the sale of this product.
Need help?
Do you have a question about the VEGA and is the answer not in the manual?
Questions and answers