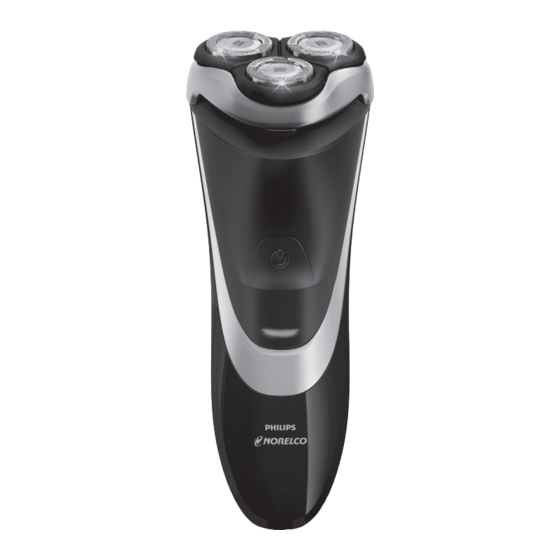
Summarization of Contents
IMPORTANT SAFETY INSTRUCTIONS
DANGER
Reduces the risk of electric shock.
WARNING
Reduces risks of burns, fire, electric shock, or injury.
SAVE THESE INSTRUCTIONS
Important note about the power plug transformer.
Product Features
Razor Head Assembly Details
Describes the razor head components.
Individually Floating Heads
Explains the flexible heads for contour following.
Hair Chamber Function
Details the hair collection mechanism.
LED Charge Indicators
Explains the meaning of the LED charge indicators.
Pop-up Trimmer (PT730)
Details the pop-up trimmer feature.
Worldwide Voltage Compatibility
Covers voltage compatibility (100-240V AC).
Rechargeable Battery Information
Describes the rechargeable battery and its runtime.
Corded and Cord-Free Usage
Highlights versatile usage options.
Two-Year Product Warranty
Outlines the product's warranty period.
LED Multi-Purpose Display Guide
Charging Indicator Status
Light blinks green when charging.
Full Charge Indicator Status
Light stays on continuously when fully charged.
Low Battery Indicator Status
Light blinks orange when battery is low.
Quick Charge Indicator Status
Light blinks orange/green for quick charge.
Before First Use
Essential Charging Instruction
Use only the provided power cord for charging.
Charging Procedures
Temperature Impact on Battery
Avoid extreme temperatures for battery life.
Full Charge Duration
Requires eight full hours for a complete charge.
Cordless Shaving Runtime
Fully charged provides up to 40 minutes cordless use.
Charging Pouch Restriction
Do not charge the razor inside a pouch.
Wet Use and Charging Warning
Do not charge or use razor until fully dried.
Recharging the Razor
Recharge Trigger Indicator
Recharge when the charging light blinks orange.
Quick Charge Functionality
Quick Charge Benefit
Provides enough energy for a 5-minute shave.
Shaving Tips and Trial
21-Day Skin Adjustment
Skin and beard need time to adapt to the system.
Money-Back Guarantee Claim Process
Refund available if unsatisfied after 21 days.
How to Shave
Shaving Preparation Steps
Shave with a clean, dry face for best results.
Shaving Technique Guide
Shave against beard growth using circular movements.
Gentle Pressure for Comfort
Stretch skin gently; avoid pressing too hard.
Post-Shave Routine
Turn off, clean, and apply protective cap.
Razor Head Lifespan
Replace heads annually for optimal results.
Trimmer Operation (PT730)
Using the Pop-up Trimmer
Steps for using the pop-up trimmer.
General Cleaning
Rinsing Symbol Explanation
Symbol indicates razor can be rinsed under tap water.
Routine Cleaning Instructions
Always clean after each use, turn off, unplug.
Cleaning Care Precautions
Avoid pressing combs or using hard objects.
Shaving Unit Cleaning
Cleaning Razor Heads with Water
Clean heads with hot water after each use.
Water Temperature Safety Warning
Test water temperature to avoid burns.
Water Dripping during Cleaning
Water may drip from razor base during rinsing.
Detailed Water Cleaning Steps
Steps for cleaning with water.
Hair Chamber Dry Cleaning
Use supplied brush for hair chamber cleaning.
Advanced Cleaning Method
Cleaning Cutters and Combs Separately
Clean cutters and combs separately.
Warning on Mixed Sets
Do not mix cutters/combs from different sets.
Lubrication for Performance
Use cleaning spray, alcohol, or mineral oil.
Detailed Cleaning Procedures
Disassembly and Part Cleaning
Detailed steps for disassembling and cleaning parts.
Reassembly of Razor Parts
Instructions for putting the razor back together.
Reassembly Smoothness Check
Ensure smooth closing after reassembly.
Razor Head Replacement
Recommended Replacement Interval
Replace heads once a year for optimal performance.
Specifying Replacement Heads
Use only model HQ8 Philips Norelco heads.
Trimmer Maintenance
Trimmer Cleaning and Lubrication
Clean trimmer after each use, lubricate every 6 months.
Razor Head Replacement Steps
Pre-Replacement Procedures
Turn off, unplug, remove charging plug before replacing.
Step-by-Step Head Replacement
Detailed steps for removing old and installing new heads.
Non-Replaceable Parts
No other user-serviceable parts are present.
Storing Your Razor
Optimal Storage Conditions
Store in a safe, dry location, protected from damage.
Protective Cap for Storage
Use cap to protect heads during storage.
Product Support and Assistance
Contacting Support
Visit website or call toll-free number for help.
Battery Removal and Disposal
Battery Type and Disposal Policy
Contains Lithium-Ion battery, dispose of properly.
When to Remove Battery
Remove battery only when discarding the razor.
Battery Disposal Guidance
Follow local regulations and contact for info.
Battery Removal Procedure
Detailed steps for safely removing the battery.
Do Not Replace Battery
Do not attempt to replace the battery.
Available Accessories
Recommended Replacement Parts
Replacement heads (HQ8) and cleaning spray (HQ110).
Accessory Purchase Information
Accessories available in stores or online.
Two-Year Limited Warranty
Warranty Coverage Scope
Covers defects in materials/workmanship for two years.
Warranty Limitations and Exclusions
Excludes damage from misuse, accident, or unauthorized parts.
Obtaining Warranty Service
Contact website or phone number for warranty service.


Need help?
Do you have a question about the PT720 and is the answer not in the manual?
Questions and answers