Table of Contents
Advertisement
Advertisement
Table of Contents

Related Manuals for Securepoint RC 400


Summary of Contents for Securepoint RC 400
- Page 1 Securepoint 10 Securepoint...
-
Page 2: Product Overview
These limitations affect the functions of the applications proxies, virus scanner, spam filter and content filter. If you purchase the Terra VPN-Gateway, you can easily upgrade to the Securepoint UTM product with a registration key. At this yearly update costs are incurred. For further informa- tion contact our sales department: vertrieb@securepoint.de... -
Page 3: Table Of Contents
UTM Products ........................ 2 Introduction ........................11 Part 1 The Administration Interface ................. 12 The Appliances ......................13 Positioning the Appliance ...................14 Piranja and RC 100 ....................14 RC 200 .......................15 RC 300 .......................15 RC 400 .......................16 Administration Interface .....................17 Connecting the Appliance ...................17 System Requirements for Client Computer ............18... - Page 4 Securepoint 10 5.13.1 Traffic Settings .....................26 5.13.2 Traffic Details und Traffic Zoom ..............27 5.14 Show Help ......................28 5.15 Administrator IP ....................28 5.16 Refresh .......................28 Menu Configuration ....................29 Configuration Management .................30 6.1.1 Save Configuration ..................31 6.1.2 Import configuration ..................32 Reboot System ....................32 Halt System ......................32...
- Page 5 Securepoint 10 7.2.2.3 Add Route ....................52 7.2.3 DSL Provider ....................53 7.2.3.1 Edit or Delete DSL Provider ..............53 7.2.3.2 DSL Provider create .................54 7.2.4 DynDNS ......................55 7.2.4.1 Create or Edit a DynDNS Entry ..............56 7.2.4.2 Delete a DynDNS Entry ................56 7.2.5 DHCP ......................57...
- Page 6 Securepoint 10 8.6.1 Network Object Information .................84 8.6.2 Add Host/Net ....................85 8.6.3 Add VPN Host/Net ..................86 8.6.4 Add User .....................86 8.6.5 Add Interface ....................87 Network Groups ....................88 8.7.1 Network Object Information .................89 8.7.2 Network Group Information ................89 Menu Applications .....................90 HTTP Proxy ......................91...
- Page 7 Securepoint 10 9.3.6.2 Recipient flooding .................. 116 9.3.6.3 Limit max number of recipients .............. 116 9.3.6.4 Limit connections ................... 116 9.3.6.5 Rate Control ................... 116 Spam Filter Properties ..................117 9.4.1 General ...................... 117 9.4.2 Attachment Filter ..................119 9.4.3 Virusscan ....................
- Page 8 Securepoint 10 10.3.1.1 Phase 1....................144 10.3.1.2 Phase 2....................146 10.4 L2TP ......................... 147 10.5 PPTP ........................ 149 10.6 SSL VPN ......................151 Menu Authentication ..................... 152 11.1 Users ........................ 153 11.1.1 Add User Tab General ................154 11.1.2 Add User Tab VPN ..................155 11.1.3...
- Page 9 Securepoint 10 12.4 Registration ...................... 175 12.5 Manage Cockpit ....................176 12.6 Advanced Settings .................... 177 12.6.1 Buttons ...................... 177 12.6.2 IPSec ......................178 12.6.3 Portfilter ..................... 179 12.6.4 Dialup ......................180 12.6.5 Templates ....................181 12.6.6 Variables ....................182 12.6.7...
-
Page 10: Securepoint
14.4.7.2 Tab General ..................204 14.4.7.3 Tab Virus ..................... 204 14.4.7.4 Tab Top Level Domain ................. 205 14.5 SPUVA Login ....................206 14.6 Wake on LAN ....................207 14.7 Download Section ..................... 208 Zone Concept of the Securepoint Firewall ............209 Securepoint Security Solutions... -
Page 11: Introduction
The appliance is administrated with a clearly structured web-interface. The Securepoint UTM solution is available as a pure software version or as sundry ap- pliances which are especially adapted to the requests. The solutions vary from home office and small office networks to great company networks with several hundred com- puters. -
Page 12: Part 1 The Administration Interface
Securepoint 10 Part 1 The Administration Interface Securepoint Security Solutions... -
Page 13: The Appliances
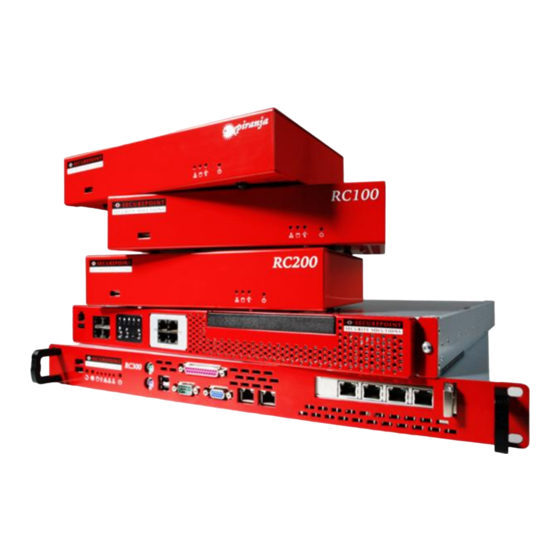
2 The Appliances The firewall software is installed on hardware, which is especially designed for the purpose of network protection. The portfolio of Securepoint contains 7 appliances. The appliances are adapted to different network quantities and consequently the processing speed, the memory capacity, the disk space, the throughput rate and the numbers of interfaces of the machines vary. -
Page 14: Positioning The Appliance
1 position of the appliance in the network 3.1 Piranja and RC 100 The Piranja and the RC 100 appliances have 3 Ethernet ports (LAN 1 to LAN 3), one serial interface (D-Sub) and two USB ports. The three network ports are destined for different nets. The interface eth0 is reached through LAN 1and is designated for the external network (internet). - Page 15 The port LAN 4 is bounded to the interface eth3 und is for free disposal. You could connect another internal net, another DMZ or a second internet connec- tion to this port. fig. 3 rear view of the Piranja respectively of the RC 100 port interface...
- Page 16 3 Positioning the Appliance Securepoint 10 3.4 RC 400 This Appliance has 8 LAN ports. The sockets are arragned in two blocks of 4 connectors. The ports are numbered top down and from left to right. LAN 1 and LAN 3 are destined for the predefined networks.
-
Page 17: Administration Interface
4 Administration Interface Securepoint 10 4 Administration Interface 4.1 Connecting the Appliance You access the appliance with your browser on the IP address of the internal interface on the port 11115 using the https (SSL) protocol. The factory setting for the internal IP address is 192.168.175.1. The port 11115 cannot be changed. -
Page 18: System Requirements For Client Computer
5 Securepoint Cockpit Securepoint 10 4.2 System Requirements for Client Computer Operating system: MS Windows XP and higher or Linux Processor: Pentium 4 with 1.8 GHz and higher or according Memory: 512 MB or more Browser: preferably MS Internet Explorer 7 and Mozilla Firefox 3... -
Page 19: Navigation Bar
5 Securepoint Cockpit Securepoint 10 5.1 Navigation Bar The navigation bar guides you to the different configuration categories. These catego- ries are: configuration, network, firewall, applications, VPN, authentication, tras, live log Moving the mouse over the entry opens the respective dropdown menu. -
Page 20: System
5 Securepoint Cockpit Securepoint 10 5.3 System In this area the current system utilization and the number of active TCP / UDP connections are shown. name description Utilization of the processor Type Type of processor Utilization of the memory graphical and in percentage... -
Page 21: Service Status
5 Securepoint Cockpit Securepoint 10 5.4 Service Status The table shows a list of all available services and their status. Next to the HTTP proxy, POP3 proxy and Mail Relay services is shown the state of the virus scanning. An active service is illustrated by a green circle. A grey circle shows that the service is inactive. - Page 22 5 Securepoint Cockpit Securepoint 10 SPUVA Server Wortmann Security User Verification Agent Server Central user authentication Web Server Dynamic Host Configuration Protocol Server Allocates network configurations to the computer in the network (for example the IP-address). DHCP Server Internet Protocol Security Server Offers VPN connections to the firewall by using the IPSec pro- tocol.
-
Page 23: Appliance
5 Securepoint Cockpit Securepoint 10 5.5 Appliance Displays the view of the appliance. The connected LAN ports are marked green. fig. 13 view of the appliance (for example a Piranja) 5.6 Interfaces In this area the interface in listed with the assigned IP-addresses and zones. Depending on the used appliance more interfaces (ethx) are shown. -
Page 24: Ipsec
16 available downloads in the user interface 5.9 Spuva User This table lists the users and their IP address, which have signed in via SPUVA (Securepoint User VerificationAgent). The SPUVA gives users individual rights on computers in the DHCP environment. The user authenticates against SPUVA and gets an individual Security Policy for any workstation in the network. -
Page 25: Ssh User
5 Securepoint Cockpit Securepoint 10 5.10 SSH User This section shows, which user has connected the appliance via SSH (Secure Shell for ex- ample by the program PuTTY). Login name and IP address of the user are shown. Also the time of the login is listed. -
Page 26: Interface Traffic
5 Securepoint Cockpit Securepoint 10 5.13 Interface Traffic The display Internet Traffic shows the data traffic of the interfaces graphically. The incom- ming traffic is shown as a green and the outgoing traffic as a blue graph. The represented time period is the last 24 hours. The measurement is taken every 5 minutes. -
Page 27: Traffic Details Und Traffic Zoom
5 Securepoint Cockpit Securepoint 10 5.13.2 Traffic Details und Traffic Zoom A click onto a diagram opens a new window, which shows the graph in higher resolution. It also shows details of the traffic. fig. 23 details of the data traffic of the interface eth1 You can enlarge a section of the graph by raising a selection rectangle in the lower diagram. -
Page 28: Show Help
5 Securepoint Cockpit Securepoint 10 5.14 Show Help In the title bar of the dialogs you can find a questionark symbol right beneath the close but- ton. Press this symbol to open the help. The shown text comments the settings, which have to be set in the dialog. -
Page 29: Menu Configuration
6 Menu Configuration Securepoint 10 6 Menu Configuration All settings of the appliance are stored in a configuration file. Commands which are related to the configuration and basic system commands are depo- sited in the menu item configuration. fig. 29 dropdown menu of the menu item configuration... -
Page 30: Configuration Management
6 Menu Configuration Securepoint 10 6.1 Configuration Management All settings of the firewall are stored in a configuration file. The menu item Configuration management of the menu configuration shows a list of all saved configurations. Choose the menu configuration in the navigation bar and select the point Configu- ration management from the dropdown menu. -
Page 31: Save Configuration
6 Menu Configuration Securepoint 10 6.1.1 Save Configuration The settings made will be stored automatically in the current running configuration. You can also save the new settings in an existing configuration or in a new one. Click on the button Save as … . -
Page 32: Import Configuration
6 Menu Configuration Securepoint 10 6.1.2 Import configuration You can import an existing configuration. The function requires that the external file must be saved in DAT format. Click on the button Import … . The dialog Import configuration … appears. -
Page 33: Menu Network
7 Menu Network Securepoint 10 7 Menu Network Network settings like IP-addresses of the interfaces, DSL access data etc. are set here. Fur- ther on you can download updates and apply the license file in this section. fig. 33 dropdown menu of the menu item network... -
Page 34: Server Properties
7 Menu Network Securepoint 10 7.1 Server Properties In this section basic settings for the appliance will be set. The dialog contains the tabs Serv- Settings, Administration, Syslog Cluster Settings. 7.1.1 Server Settings On this tab you can set the appliance name, the Domain Name Service server and the Net- work Time Protocol server. -
Page 35: Administration
7 Menu Network Securepoint 10 7.1.2 Administration The administration access to the appliance is only allowed from the internal net by default. In this tab you can define which IP-addresses and subnets the appliance can be admini- strated from. To add an IP-address or a net, click the button Add Host/Net. -
Page 36: Syslog
7 Menu Network Securepoint 10 7.1.3 Syslog In the portfilter of the appliance the administrator can define whether the use of a rule is logged and in which grade of accuracy. The logging data in Syslog format can be stored on a server. -
Page 37: Snmp
7 Menu Network Securepoint 10 7.1.4 SNMP The Simple Network Management Protocol (SNMP) is a network protocol to control network devices centraly. With this protocol you can read the values of interface traffic, processor- and memory utilization. The versions 1 and 2c are supported. -
Page 38: Monitor Agent (Amdosoft V4 Agent)
Securepoint 10 7.1.5 Monitor Agent (AmdoSoft v4 Agent) The Securepoint firewall can be monitored and maintained by the controller software of the company AmdoSoft Systems. The firewall connects to the registered AmdoSoft controller in the internal or external network. The controller software for the automatic monitoring has to be purchased from the company AmdoSoft Systems. -
Page 39: Cluster Settings
Securepoint 10 7.1.6 Cluster Settings The Securepoint appliance offers the option to set up a high availability environment. For the environment you need at least two appliances. One firewall will be used as active machine (mMaster) and the other one (or more) as backup machine (slave) in standby. If a requisite service or the complete master crashes, the slave machine assumes the control. -
Page 40: Network Configuration
7 Menu Network Securepoint 10 7.2 Network Configuration In this area the settings for the network have to be defined. This contains the IP-addresses of the several interfaces, entries in the routing table, access data of the internet service provid- er, maybe data of a dynamic address service and settings ot the DHCP server. - Page 41 7 Menu Network Securepoint 10 The name of the interface is depending on it´s usage. Interfaces with the same name are numbered serially from 1 to n. usage labeling ethernet eth0, eth1, eth2, eth3, eth4 ... ethn eth0.0; eth0.1 … eth0.n .ethn.0;...
-
Page 42: Add Eth Interface
7 Menu Network Securepoint 10 7.2.1.1 Add eth Interface Click Add Interface. The Interface Wizard appears. Select the desired interface type (in this case eth). Click Next. The configuration window of eth Interface appears. In the section General you have to set the properties of the interface. -
Page 43: Add Vlan Interface
7 Menu Network Securepoint 10 7.2.1.2 Add VLAN Interface VLAN means Virtual Local Area Network and is used to divide a physical network into ser- veral logical nets. Several networks kann be used to structure the whole intranet. You can split the network by organization into units, groups or by spatial properties like floor or build- ings. - Page 44 7 Menu Network Securepoint 10 Click Add Interface. The Interface Wizard appears. Select the desired interface type (in this case VLAN). Click Next. The configuration window of VLAN Interface appears. Select in the field Interface to which physical Interface the VLAN interface should be bound to.
-
Page 45: Add Pptp Interface
7 Menu Network Securepoint 10 7.2.1.3 Add PPTP interface A PPTP interface is used for connecting the internet by Point to Point Tunneling Protocol. This protocol is primarily used in Austria. Click Add Interface. The Interface Wizard appears. Select the desired interface type (in this case PPTP). -
Page 46: Add Pppoe Interface
7 Menu Network Securepoint 10 7.2.1.4 Add PPPoE Interface A PPPoE interface is used for connecting the internet by Point to Point Protocol over Ether- net. This protocol is commony used in Germany. Click Add Interface. The Interface Wizard appears. -
Page 47: Vdsl Interface Hinzufügen
7 Menu Network Securepoint 10 7.2.1.5 VDSL Interface hinzufügen VDSL stands for Very High Speed Digital Subscriber Line and is an internet connection with great transfer rates. Click Add Interface. The Interface Wizard appears. Select the desired interface type (in this case VDSL). -
Page 48: Add Cluster Interface
7 Menu Network Securepoint 10 7.2.1.6 Add Cluster Interface The cluster interface is needed to set up a high availability environment. Two (or more) appliances are required to adjust this setup. One appliance acts in active state as master and the other appliances are waiting in stand-by mode as spare. If important ser- vices cannot be provided by the active machine or the whole machine breaks down, the oth- er appliance wakes op from stand-by and assumes the service as master. - Page 49 7 Menu Network Securepoint 10 Click Add Interface. The Interface Wizard appears. Select the desired interface type (in this case Cluster). Click Next. The configuration window of Cluster Interface appears. Select in the field Interface to which physical Interface the cluster interface should be bound to.
-
Page 50: Edit Or Delete An Interface
7 Menu Network Securepoint 10 7.2.1.7 Edit or Delete an Interface In the lists of all interfaces on the tab Interfaces a wrench symbol and a trashcan symbol are positioned beneath the entries. With these buttons the entries can be edited or deleted. -
Page 51: Edit Or Delete Routes
7 Menu Network Securepoint 10 7.2.2.1 Edit or Delete Routes In the lists of all routing entries on the tab Routing a wrench symbol and a trashcan symbol are positioned beneath the entries. With these buttons the entries can be edited or deleted. -
Page 52: Add Route
7 Menu Network Securepoint 10 7.2.2.3 Add Route Routes offer the possibility to find networks which are not directly connected to the appliance. To send a package to a network which is connected via a gateway (for example a router) to the appliance, the system must be informed about this. -
Page 53: Dsl Provider
7 Menu Network Securepoint 10 7.2.3 DSL Provider When connecting the internet using a DSL dialup mode, you have to enter the provider and your account data, so the appliance can connect to the internet by itself. fig. 54 list of DSL provider 7.2.3.1 Edit or Delete DSL Provider... -
Page 54: Dsl Provider Create
7 Menu Network Securepoint 10 7.2.3.2 DSL Provider create Click the button Add DSL Provider. The dialog Add DSL Provider appears. Enter a name for the provider into the field Name. Type your login data into the field Login. -
Page 55: Dyndns
7 Menu Network Securepoint 10 7.2.4 DynDNS If you don’t have a static IP address, but a dynamic one which is changing at every dial into the internet, you can use a DynDNS service for always being reachable with the same host- name. -
Page 56: Create Or Edit A Dyndns Entry
Enter the address of the DynDNS server into the field Server. In the field MX enter the domain for the e-mail reception (for example securepoint.de). Select the interface which should be used for this connection from the field Interface (mostly a ppp interface). -
Page 57: Dhcp
7 Menu Network Securepoint 10 7.2.5 DHCP The Dynamic Host Configuration Protocol can assign IP-addresses and other network set- tings to the clients. If you start a client of the internal network, the operating system of the client sends a query to the DHCP services of the server. The server transmits an available IP-address, the IP-addresses of the DNS server and of the default gateway to the client. -
Page 58: Dhcp Relay
7 Menu Network Securepoint 10 7.2.6 DHCP Relay The appliance can also be used as DHCP relay. In this case a central DHCP server distri- butes the DHCP information in the network. The appliance receives the broadcast querys and forwards them to the central DHCP server. The answers of the server will be returned to the clients by the DHCP relay. -
Page 59: Zones
7 Menu Network Securepoint 10 7.3 Zones This dialog lists all arranged zones of the appliance and the allocated interfaces. The zones conduce to confine or connect interfaces and associated nets. The important zones are already set in factory. Every zone is available only once and can be allocated to just one interface. If you want to use interfaces in the same zone, you have to add a new zone. -
Page 60: Network Tools
7 Menu Network Securepoint 10 7.4 Network Tools The point Network Tools opens a dialog which offers three needful functions. These func- tions are often used in network engineering. Therefore they are implemented in the ap- pliance. button meaning description lookup Detects IP addresses of a host. -
Page 61: Ping
7 Menu Network Securepoint 10 7.4.2 Ping A Ping checks if a defined computer is reachable in the IP network. The appliance is sending an ICMP echo-request to the computer, so-called Ping. The appliance expects an ICMP echo-reply as an answer (often called Pong). If the remote computer sends this answer, the computer is reachable. -
Page 62: Routing Table
7 Menu Network Securepoint 10 7.4.3 Routing Table The command Routing Table shows the routing table of the appliance. You don´t have to enter data. Click the button Routing Table. All entered routes will be listed. fig. 63 output of the routing table... -
Page 63: Menu Firewall
8 Menu Firewall Securepoint 10 8 Menu Firewall This menu item includes all functions for creating firewall rules. The entry Portfilter shows the system of rules. This section manages rights of all computers, computer groups, networks, users, user groups and devices. -
Page 64: Portfilter
8 Menu Firewall Securepoint 10 8.1 Portfilter The port filter is the main item of the firewall. Rules are defined in this section, which control the whole data traffic. The rules are editable in the properties networks, user, services, and time. - Page 65 8 Menu Firewall Securepoint 10 A rule always has the following structure: Who (where from/which source) uses which service to access a defined destination. Then you have to decide if the activity is allowed (Accept), denied (Drop) or refused (Re- ject).
- Page 66 8 Menu Firewall Securepoint 10 You can modify the view of the portfilter by using the filter function. This way you can find a desired rule fast. Click on Set Filter in the portfilter overview to open the dialog Set Filter.
-
Page 67: Create Rule
8 Menu Firewall Securepoint 10 8.1.1 Create Rule Click Appent Rule to append a new rule. The dialog Add Rule appears. The rule will be created on the tab General. Select in the field Source a source from the list. -
Page 68: Infobox Function
8 Menu Firewall Securepoint 10 8.1.1.1 Infobox Function When the mouse cursor rolls over an entry in the list, an infobox appears which shows de- tails of the entry. It shows which objects or services are elements of the related group. -
Page 69: Tab Time
8 Menu Firewall Securepoint 10 8.1.1.2 Tab Time On the tab Time you can limit the validity period of a rule. If you do not set any limit, the rule is valid all the time. Click on the tab Time. -
Page 70: Create Rule Group
8 Menu Firewall Securepoint 10 8.1.2 Create Rule Group You can subsume several rules to one group. If you unite several rules of one scope to one group you can arrange the portfilter clearly. Click on the button Append Group in the dialog Portfilter. -
Page 71: Organize Rules And Groups
8 Menu Firewall Securepoint 10 8.1.3 Organize Rules and Groups The order of rules in the portfilter can have a big effect on the performance of the appliance because the rules are executed sequentially. If a packet passes through all rules of the portfilter and is dropped by the last rule, it could be more sensible to position the blocking rule at the top of the portfilter. -
Page 72: Hide Nat
8 Menu Firewall Securepoint 10 8.2 Hide NAT Private IP-addresses are not routed in the internet. Therefore outgoing packets must get the external IP of the firewall. The function Hide Nat realites this. Source is the network or the computer, which IP will be replaced by the Hide NAT. - Page 73 8 Menu Firewall Securepoint 10 Click on Add, to define a new Hide NAT rule. The dialog Add HideNat appears. Under Type you can choose between Include and Exclude. Under Source define which objects should be 'nated'.
-
Page 74: Port Forwarding
8 Menu Firewall Securepoint 10 8.3 Port Forwarding The menu item Port Forwarding includes the functions Port Forwarding and Port Translation. Both functions define the destination of packages which reach the firewall at a defined port. Port Forwarding direct packages arriving at the defined port to a determined computer. -
Page 75: Port Forwarding
8 Menu Firewall Securepoint 10 8.3.1 Port Forwarding Via Port Forwarding you can conduct inquiries, which are directed to a specified port, to a defined computer. For Example: You can conduct HTTP queries at port 80 directly to the web server. For this forwarding a network object must exist for the web server. -
Page 76: Port Translation
8 Menu Firewall Securepoint 10 8.3.2 Port Translation With port translation you can change default ports to self defined ports. Example: You want to run two web servers in the DMZ. But the default HTTP port 80 cannot be set twice. So you redirect the port to another one. For example 2080. -
Page 77: Services
8 Menu Firewall Securepoint 10 8.4 Services Services are used to specify the rules in the portfilter. Every service uses a certain protocol and port or a port range. This is listed in the section Services. The list contains a lot of services. You can add new services, edit and delete services. -
Page 78: Services Information
8 Menu Firewall Securepoint 10 8.4.2 Services Information The function Infobox shows information about services if the mouse cursor rolls over it. You can enable this function by unchecking the checkbox Disable Infobox. The infobox shows not only the name and the service group affiliation of the service but also if the service is used in a firewall rule. -
Page 79: Add Service
8 Menu Firewall Securepoint 10 8.4.3 Add service Click Add new Service. The dialog New Service appears. In the field Designation enter a name for the new service. In the field Protocol select a protocol from the list which is used by the service. -
Page 80: Service Groups
8 Menu Firewall Securepoint 10 8.5 Service Groups In the section service groups you can subsume several services into a group, delete services from existing groups or add services to existing groups. These groups can be used in the portfilter for rule creation. -
Page 81: Edit Existing Service Groups
8 Menu Firewall Securepoint 10 8.5.1 Edit Existing Service Groups Select a group from the dropdown box in the section Service Groups. The services which are elements of the selected group are shown in the right table. You can add services by highlighting services in the left table. It could be helpful to disable the infobox. -
Page 82: Create New Service Group
8 Menu Firewall Securepoint 10 8.5.2 Create New Service Group You can also subsume services in new service groups Click on the plus symbol in the section Service Groups. The dialog Add service group appears. Enter a name for the new service group and click Add. -
Page 83: Network Objects
8 Menu Firewall Securepoint 10 8.6 Network Objects Network objects describe certain computers, network groups, users, interfaces, VPN- computers and –networks. With these network objects the rules in the portfilter can be de- fined exactly. Click the on the menu item Firewall in the navigation bar Click in the dropdown menu on the entry Network Objects. -
Page 84: Network Object Information
8 Menu Firewall Securepoint 10 8.6.1 Network Object Information The function Infobox shows information of a network object if the mouse cursor rolls over it. You can enable this function by unchecking the checkbox Disable Infobox. The infobox shows not only the name and the object group affiliation but also if the object is used in a firewall rule. -
Page 85: Add Host/Net
8 Menu Firewall Securepoint 10 8.6.2 Add Host/Net To create a network object for a network or a computer use the following approach. Click Add Host/Net. The dialog Add Host/Net appears. Enter a name for the new object in the field Name. -
Page 86: Add Vpn Host/Net
The only condition for this is that the users are SPUVA (Securepoint Security User Verifica- tion Agent) user and employ the agent to log onto the system. The user must be listed in the user administration under the menu item Authentication in the entry Users. -
Page 87: Add Interface
8 Menu Firewall Securepoint 10 8.6.5 Add Interface You can also add network objects for interfaces. You distinguish between interfaces with static and dynamic IP-addresses. Click Add Interface. The dialog Add Interface appears. Enter a name for the new object in the field Name. -
Page 88: Network Groups
8 Menu Firewall Securepoint 10 8.7 Network Groups In this section you can subsume several network objects into groups. You can add new groups, edit and delete existing groups. Select an existing group from the dropdown field in the section Network Groups. -
Page 89: Network Object Information
8 Menu Firewall Securepoint 10 8.7.1 Network Object Information The function Infobox shows information of the network object if the mouse cursor rolls over You can enable this function by unchecking the checkbox Disable Infobox. The infobox shows the name, IP address, subnet mask, zone and NAT IP. -
Page 90: Menu Applications
9 Menu Applications Securepoint 10 9 Menu Applications In this menu item you will find the settings of the proxies for HTTP, POP3 and VoIP and also the settings of the remote control service VNC Repeater, the Mail Relay and the Spam Filter. -
Page 91: Http Proxy
9 Menu Applications Securepoint 10 9.1 HTTP Proxy The HTTP proxy is set between the internal net and the internet. It analyzes content of inter- net sites, blocks suspicious websites and checks data for viruses. The client sends his query to the proxy. The proxy gets the data from the internet, analyses it and sends it to the client. - Page 92 9 Menu Applications Securepoint 10 fig. 99 HTTP proxy settings - tab general When you define exception for HTTP proxy the relevant computers will access the internet directly, if an accordant rule exists. The exceptions must be defined by source and destination IP addresses.
-
Page 93: Virus Scanning
9 Menu Applications Securepoint 10 9.1.2 Virus scanning In this tab you can set which files and websites should be ignored by the virus scanner. You can deactivate the virus scanning by unchecking the checkbox Virus scanner. The left list shows file extentions, which are excluded by the virusscanning. -
Page 94: Url Filter
9 Menu Applications Securepoint 10 9.1.3 URL Filter With the URL filter you can block the access to websites by defining the URL. The filter is adjustable by two lists. The blacklist contains URLs of blocked websites. The whitelist con- tains addresses of allowed websites. - Page 95 9 Menu Applications Securepoint 10 fig. 102 HTTP proxy dialog - tab URL filter Securepoint Security Solutions...
-
Page 96: Block Extensions
9 Menu Applications Securepoint 10 9.1.4 Block Extensions On this tab you can define file extensions which will be blocked. Not only suffixes with three characters are supported. You can also block suffixes like jpeg or mpeg. Suffixes must be given with alleading dot. -
Page 97: Block Applications
9 Menu Applications Securepoint 10 9.1.5 Block Applications On this tab you can define remote support programs and messaging programs which will be blocked. Note: These settings only work for the HTTP proxy. The programs could be executed via the rule set without using the HTTP proxy. -
Page 98: Content Filter
9 Menu Applications Securepoint 10 9.1.6 Content Filter 9.1.6.1 Blacklist Categories The Content Filter blocks websites with defined content. You can select from several prede- fined content categories. The categories contain tags and keywords which are characteristic for respective content. The keywords are weighted by their directness. If the sum of key- words exceeds a defined limit (Naughtylesslimit) the website will be blocked. -
Page 99: Whitelist
9 Menu Applications Securepoint 10 9.1.6.2 Whitelist You can exclude users, IP-addresses and websites from the content filtering by the whitelist. 9.1.6.2.1 User Users who are listed in this table can call up websites without being limited by the content filter. -
Page 100: Ip Addresses
9 Menu Applications Securepoint 10 9.1.6.2.2 IP Addresses IP-addresses can be excluded from the content filtering as well. This only makes sense if the IP addresses are assigned statically. Switch to the tab IP Addresses. Enter the IP address which should be excluded from the content filtering. -
Page 101: Websites
9 Menu Applications Securepoint 10 9.1.6.2.3 Websites In this section you can enter websites which will not be checked by the content filter. Just insert absolutely trustable websites. Some entries are factory-provided. Switch to the tab Websites. Enter addresses of websites which should be excluded by the content filtering. -
Page 102: Bandwidth
9 Menu Applications Securepoint 10 9.1.7 Bandwidth You can limit the bandwidth globally or per host. Enable the bandwidth limitation by activating the checkbox Enable Bandwidth Con- trol. Select a global limitation or a limitation per host. Activate the related radio button. -
Page 103: Pop3 Proxy
9 Menu Applications Securepoint 10 9.2 POP3 Proxy The POP3 proxy acts as a POP3 server to the mail client and retrieves the e-mails from a mailserver in the internet. The e-mails are checked for viruses and spam and are send to the mail client. -
Page 104: Mail Relay
9 Menu Applications Securepoint 10 9.3 Mail Relay In this section you set properties for the e-mail service. fig. 111 tabs of the mail relay Bezeichnung Erklärung General General settings for spam filter, virus scanner, e-mail administrator and maximum e-mail size. -
Page 105: General
9 Menu Applications Securepoint 10 9.3.1 General Set general setting of the mail relay and a Smarthost. A Smarthost must only be set, if e-mails should not be send directly by the appliance. Set the dropdown field Virusscanner to ON to scan e-mails for viruses. -
Page 106: Relaying
9 Menu Applications Securepoint 10 9.3.2 Relaying On the tab relaying you deside how to deal with e-mails of recorded hosts and domains. E-mails which are directed to your domain should be relayed to your internal mail server. If the internal mail server also uses the firewall for sending e-mails you have to enter it´s IP address. - Page 107 9 Menu Applications Securepoint 10 To add a domain, click Add Domain. The dialog Add Realy Domain appears. Enter a domain in the field Domain. Select None, To, From, Connect in the dropdown field Option. In the field Action choose between Relay (forward), Reject (block) and OK (ac- cept).
-
Page 108: Mail Routing
9 Menu Applications Securepoint 10 9.3.3 Mail Routing The mail routing defines which mail server is responsilble for e-mail adresses in which do- main. You can activate an e-mail validation against different databases or against a local file. E- mail to addresses which don´t exist will be directly rejected by the mail relay. - Page 109 9 Menu Applications Securepoint 10 To assign e-mails of a domain to a defined mail server, click the button Add SMTP Routing. The dialog Add SMTP Routing appears. Enter a domain into the field Domain. Enter a host name or an IP address of the mail server into the field Mailserver.
-
Page 110: Greylisting
9 Menu Applications Securepoint 10 9.3.4 Greylisting The greylisting controverts spam by rejecting e-mails with unknown combinations of sending mail server, address of the sender and address of the recipient. A spam mail server will not retry to deliver the mail. A normal mail server will do. When the mail comes the second time, the relay will accept it. -
Page 111: Whitelist Ip Address / Net
9 Menu Applications Securepoint 10 9.3.4.1 Whitelist IP address / Net In the whitelist you can define e-mails which should be excluded from the greylisting. They will be forwarded at the first delivery attempt. In the section IP Address / Net you can exclude e-mails from the greylisting which come from defined IP addresses and networks. -
Page 112: Whiteliste Domains
9 Menu Applications Securepoint 10 9.3.4.2 Whiteliste Domains You also can exclude e-mails from the greylisting which comes from defined domains. The specifcatons are only made in second- and top-level domains. Enter a domain in the field at the bottom of the window. -
Page 113: Whitelist E-Mail Recipients
9 Menu Applications Securepoint 10 9.3.4.3 Whitelist E-mail Recipients Exclude e-mails to defined recipients from the greylisting. Enter the e-mail address of a recipient into the field at the bottom of the window. Click Add E-mail Recipient. E-mails which are delivered to this recipient will be excluded from the greylisting. -
Page 114: Domain Mapping
9 Menu Applications Securepoint 10 9.3.5 Domain Mapping This function replaces the domains of e-mail addresses. So the internal mail server must only be configured for one domain. For example: bob@myhost.com becomes to bob@myhost.de fig. 123 domain mapping settings To add a domain mapping rule, click the button Add Domain Mapping. -
Page 115: Advanced
9 Menu Applications Securepoint 10 9.3.6 Advanced This section offers settings that protect the mail relay with a basic mechanism. fig. 125 protecting mechanism on the tab advanced Securepoint Security Solutions... -
Page 116: Greeting Pause
9 Menu Applications Securepoint 10 9.3.6.1 Greeting Pause Mail servers send a Greeting Message to the sending mail server. An uncorrupted mail serv- er will deliver more SMTP commands after it gets this message. Spam mail servers don’t wait for this message and deliver the mail immediately. The mail relay drops e-mails if the Greeting Message rule has been ignored. -
Page 117: Spam Filter Properties
The Securepoint spam filter analyzes every e-mail on the basis of different criteria and classi- fies it as spam depending of the weighting. Assessment criteria are for example: obviously invalid sender address, known spam text passages, HTML content, future dated sender data and so on. - Page 118 9 Menu Applications Securepoint 10 If you want to use the Commtouch module activate the checkbox Automatically Spam filtering. Activate the checkbox Bayes Filter to use this filter mechanism. Set values for the following settings. o Threshold value for spam mail: The calculated value lies in the range between 1 and 99.
-
Page 119: Attachment Filter
9 Menu Applications Securepoint 10 9.4.2 Attachment Filter You can block attachments from incoming and outgoing e-mails. The filter can check all at- tachments or you limit the checking of a special attachment. You can define attachments by extension or MIME (Multipurpose Internet Mail Extensions) type which is given in the e-mail header. - Page 120 9 Menu Applications Securepoint 10 You can write MIME types on your own (for example: audio/mp3) or you use prede- fined types. Switch to the tab MIME Types at the Whitelist or Blacklist section. Click the button Predefined.
-
Page 121: Virusscan
9 Menu Applications Securepoint 10 9.4.3 Virusscan You can check incoming and outgoing e-mails for viruses. If a virus was found it will be de- leted. The deleting of a virus from an e-mail will be indicated by a message in the e-mail. -
Page 122: Smtp Settings
9 Menu Applications Securepoint 10 9.4.4 SMTP Settings In this section you can define, how to deal with e-mails that are identified as spam, include a virus or an undesired attachment. If you don’t want to block spam but mark it, activate the checkbox Don’t block spam just mark. -
Page 123: Smtp Advanced
9 Menu Applications Securepoint 10 9.4.5 SMTP Advanced In the advanced SMTP setting you can define a global Whitelist and a global Blacklist. The entries in the list could be an IP address, a domain or a host IP address / host name. -
Page 124: Pop3 Settings
9 Menu Applications Securepoint 10 9.4.6 POP3 Settings Here you can define settings for the POP3 e-mail retrieve service. You can check all mail- boxes for viruses and undesired attachments or just specified mailboxes. The subject of spam e-mails will be tagged. Edit the tag in the field Edit message in subject when spam. -
Page 125: Vnc Repeater
9 Menu Applications Securepoint 10 9.5 VNC Repeater Virtual Networking Computing (VNC) software can display the screen content of a remote computer on a local computer. The keyboard and mouse actions of the local computer are send to the remote computer. So you can work on the remote computer as though you work directly on it. -
Page 126: Vnc Server Id
9 Menu Applications Securepoint 10 9.5.2 VNC Server ID If the server connects the VNC proxy, an ID is assigned to the server. The client connects the server via the repeater and uses the ID to identify the Server. To add a Server ID type it into the field ID at the bottom of the dialog. -
Page 127: Voip Proxy
9 Menu Applications Securepoint 10 9.6 VoIP Proxy The VoIP (Voice over IP) proxy offers packet based telephony over the internet. It supports SIP (Session Initiation Protocol) for initiation of a communication session and RTP (Real-Time Transport Protocol) for broadcasting the speech data. -
Page 128: Provider
9 Menu Applications Securepoint 10 9.6.2 Provider Enter the data of the provider in this section. Enter the name of the provider in the field Domain. Enter the SIP proxy of the provider in the field Proxy. Select the SIP proxy port of the provider in the field Proxy Port (default 5060). -
Page 129: Ids
9 Menu Applications Securepoint 10 9.7 IDS The Intrusion Detection System (IDS) is a system to detect attacks in the network. The IDS analyzes all packets which pass the appliance. Suspicious activities will be logged by the IDS. The system checks the signature of every packet against known attack signatures which are stored in so called rules. -
Page 130: Nameserver
9 Menu Applications Securepoint 10 9.8 Nameserver You have the possibility to forward requests to the local nameserver to external nameserv- ers. The replies of the external nameservers will be transmitted to the requesting application or the requesting service. Select the menu item applications from the navigationbar and click on nameserver in the dropdown menu. -
Page 131: Service Status
9 Menu Applications Securepoint 10 9.9 Service Status In this section all services of the firewall are listed. The current state of every service is shown. You can start, stop or restart the system. If you use a high availability environment you can define which services are critical. This means, if the service crashes, the system will change to the spare machine. -
Page 132: Menu Vpn
10 Menu VPN Securepoint 10 10 Menu VPN The Virtual Private Network (VPN) connects several computers or networks with the local network. This is realized by a tunneling connection through the internet. For the user the tunneling connection seems to be a normal network connection to the destination host. The VPN provides the user a virtual IP connection. -
Page 133: Ipsec Wizard
10 Menu VPN Securepoint 10 10.1 IPSec Wizard The assistant for creating IPSec VPN connections guides you step by step through the sev- eral configuration points. You can choose between site-to-site or roadwarrior connection. A site-to-site connection interlinks two networks. For example: The local network of a central office with the local network of a branch. - Page 134 10 Menu VPN Securepoint 10 Enter a name for the VPN Connection in the field Connection name. Enter the IP address or hostname of the remote network in the field Gateway. If you want to use a DynDNS service, activate the checkbox Hostname resolved by DynDNS.
- Page 135 10 Menu VPN Securepoint 10 Certificate Method Mark the radio button x.509 Certificate and select a server certificate from the drop- down box. Decide which IKE (Internet Key Exchange) version you want to use and select the related radio button.
-
Page 136: Site-To-End (Roadwarrior)
10 Menu VPN Securepoint 10 10.1.2 Site-to-End (Roadwarrior) Click in the VPN dropdown menu on the entry IPSec Wizard. à The dialog IPSec Wizard Create an IPSec connection appears. Select the VPN type Roadwarrior à One or several computers can connect to the local network. -
Page 137: Native Ipsec
10 Menu VPN Securepoint 10 You can set up the IPSec (Internet Protocol Security) connection with or without L2TP (Layer2 Tunneling Protocol). You need a separate client for native IPSec (without L2TP). The operating system Microsoft Windows 7 already includes a native IPSec client. -
Page 138: Ikev1
10 Menu VPN Securepoint 10 10.1.2.1.1 IKEv1 If you selected IKEv1 you have to specify the local network and an IP address for the road- warrior. Enter the network the roadwarrior connects to into the field Local Network. Select the related subnet mask from the dropdown box Local Mask. -
Page 139: Ikev2
10 Menu VPN Securepoint 10 10.1.2.1.2 IKEv2 If you selected IKEv2 you have to enter an individual IP address for the roadwarrior or a ad- dress pool. Enter the network the roadwarrior connects to into the field Local Network. -
Page 140: L2Tp
10 Menu VPN Securepoint 10 10.1.2.2 L2TP L2TP combines the PPT protocol and the L2F protocol. Because L2TP has no authentica- tion, integrity and encryption mechanism it is combined with IPSec. Activate the radio button IPSec Connection with L2TP. - Page 141 10 Menu VPN Securepoint 10 Enter the address pool for the roadwarrior and the IP address of the DNS server. Enter the local IP address into the field Local L2TP IP address. Enter the IP address range into the fields L2TP address pool.
-
Page 142: Ipsec Globals
10 Menu VPN Securepoint 10 10.2 IPSec Globals Adjust general settings for all IPSec VPN connections. 10.2.1 General Settings On this tab you can activate the option Traversal. This function prevents the manipula- tion of IPSec packets by address translation. This could occur if the mobile user uses NAT devices himself. -
Page 143: Ike V2
10 Menu VPN Securepoint 10 10.2.2 IKE V2 The Internet Key Exchange (IKE) protocol is used for managing and exchange of IPSec keys. It arranges the connection establishment and the authentication of the communication partner. Furthermore it is responsible for the negotiation of the encryption parameters and the generation of the keys. -
Page 144: Ipsec
10 Menu VPN Securepoint 10 10.3 IPSec This point displays an overview of all native IPSec and L2TP connections. Here you can adjust the settings of the connections, delete, load, initiate and stop the con- nections. Furthermore the status of the connection is shown. - Page 145 10 Menu VPN Securepoint 10 tab IKE Encryption Encryption method Authentication Authentication method Strict If this box is activated, the remote station must use the same set- tings for key and hash mode (regards phase 1 and phase 2). DH Group Key length of the Diffie Hellmann key.
-
Page 146: Phase 2
10 Menu VPN Securepoint 10 10.3.1.2 Phase 2 name description tab General Encryption Encryption method Authentication Authentication method Perfect Forward Secrecy The new key material must be created irrespective of the previous keys. So no one can gather the new key from the previous key. -
Page 147: L2Tp
10 Menu VPN Securepoint 10 10.4 L2TP In this section you can set the general setting for L2TP VPN connections. Click in the VPN dropdown menu L2TP. The dialog VPN L2TP appears. In the tab General you have to adjust basic settings. - Page 148 10 Menu VPN Securepoint 10 In the tab NS/WINS enter the IP addresses of the name server and of the WINS-server (Windows Internet Name Service), if you use one. This will be forwarded to the L2TP net- work. Switch to the tab NS/WINS.
-
Page 149: Pptp
10 Menu VPN Securepoint 10 10.5 PPTP The basic settings of VPN via PPTP are nearly identical to the settings of L2TP. The basic settings of the PPTP interface and address pool are set on the tab General. On the other tab enter the IP addresses of the name server and the WINS servers. - Page 150 10 Menu VPN Securepoint 10 In the tab NS/WINS enter the IP addresses of the name server and of the WINS-server (Windows Internet Name Service), if you use one. This will be forwarded to the PPTP net- work. Switch to the tab NS/WINS.
-
Page 151: Ssl Vpn
10 Menu VPN Securepoint 10 10.6 SSL VPN In this section you can set the general setting for SSL encrypted VPN connections. Enter the desired IP which should be used by the virtual interface in the field SSL VPN IP. -
Page 152: Menu Authentication
11 Menu Authentication Securepoint 10 11 Menu Authentication The user- and certificate administration is located in the section Authentication. Further- more you can adjust the settings of external authentication methods here. fig. 164 dropdown menu authentication name description Users User administration for creating new users and editing existing users. -
Page 153: Users
11 Menu Authentication Securepoint 10 11.1 Users The dropdown menu item Users displays a list with all existing users and their permissions in binary format. The users are listed in order of their creation. Existing users can be edited by clicking the... -
Page 154: Add User Tab General
VPN L2TP 000000100 L2TP VPN connection user Spam Filter User 000001000 Administrator of the spam filter SPUVA User 000010000 User authenticates via Securepoint User Verification Agent HTTP Proxy 000100000 HTTP proxy user User Interface 001000000 User of the firewall user interface... -
Page 155: Add User Tab Vpn
11 Menu Authentication Securepoint 10 11.1.2 Add User Tab VPN If the new user is L2TP or PPTP VPN user, you can assign an IP address to the user for the VPN connection. The IP address must be contined in the address pool. -
Page 156: Add User Tab Vpn Client
11 Menu Authentication Securepoint 10 11.1.3 Add User Tab VPN Client This tab will be activated if the user is member of the group SSL VPN. In this tab you make settings to build a preconfigured SSL VPN client package for the user. The package includes a configuration file, a certificate and the portable OpenVPN client. -
Page 157: Add User Tab Spam Filter
11 Menu Authentication Securepoint 10 11.1.4 Add User Tab Spam Filter Is the user member of the group Spam Filter User, you can restrict the permissions to sev- eral e-mails-addresses or domains. You can add three entries. If you don’t enter any restric- tion, the user can access all e-mails Restriction to several e-mail-addresses must be set for the whole e-mail-address. -
Page 158: Add User Tab Extras
11 Menu Authentication Securepoint 10 11.1.5 Add User Tab Extras On this tab you can adjust the settings for the password. You decide if the user may change the password himself, if the password must contain num- bers, special characters, lower- and uppercase letters and the minimal password length. -
Page 159: Add User Tab Wol
11 Menu Authentication Securepoint 10 11.1.6 Add User Tab WoL The abbreviation WoL stands for Wake on LAN. You can start start turned off computers over LAN. The mainboard and the network adapter must support ACPI to use this function. -
Page 160: External Authentication
11 Menu Authentication Securepoint 10 11.2 External Authentication For user authentication you can not only use the local database but also external authentica- tion databases. The appliance offers checking against a Radius- or LDAP server. For the HTTP proxy you can also select authentication with the Kerberos service. -
Page 161: Ldap Server
11 Menu Authentication Securepoint 10 11.2.2 LDAP Server For using a LDAP server follow the approach below. Open the dialog External Authentication. On the tab LDAP insert the data of the LDAP servers. Insert the host name or the IP address of the server in the field IP address or host name. -
Page 162: Kerberos
11 Menu Authentication Securepoint 10 11.2.3 Kerberos The Kerberos authentication service authorizes the access of the HTTP proxy. It not only authenticates the client to the server but also the server to the client. Switch to the tab Kerberos. -
Page 163: Certificates
11 Menu Authentication Securepoint 10 11.3 Certificates The appliance uses certificates to authenticate users which connect via VPN. The certificate proves the users identity and contains a digital signature and statements about the owner. Certificates are signed by a Certification Authority (CA) to guarantee the genuineness of the certificate. -
Page 164: Create Ca
11 Menu Authentication Securepoint 10 11.3.1 Create CA At first you have to create a CA to sign created certificates. Click in the tab CA onto Add. The dialog Add Certificate appears. The fields Valid from and Valid until define the duration of validity of the CA. You can enter the date directly into the first field. -
Page 165: Create Certificates
11 Menu Authentication Securepoint 10 11.3.2 Create Certificates Click in the tab Cert onto Add. The dialog Add Certificate appears. The fields Valid from and Valid until define the duration of validity of the certificate. You can enter the date directly into the first field. Or click into the field and a calendar appears where you can select the date. -
Page 166: Import Ca And Certificate
11 Menu Authentication Securepoint 10 11.3.3 Import CA and Certificate You can import CA and certificates, if they are available in PEM file format. Switch to the corresponding tab (CA or Certs). Click Import and in the appearing dialog click Browse. -
Page 167: Download Ssl-Vpn Client
11 Menu Authentication Securepoint 10 11.3.5 Download SSL-VPN Client You can also download the preconfigured SSL VPN client from the tab Certs. An Icon in the row of every certificate offers the download of the zip archive. The archive includes the port- able OpenVPN client, a preconfigured configuration, the CA and the relating cert. -
Page 168: Delete Ca And Certificate
11 Menu Authentication Securepoint 10 11.3.6 Delete CA and Certificate You cannot delete the CA or certificates directly. You can only revoke them so they aren’t valid anymore. Revoked certificates are store as invalid, so nobody can use them for authen- tication anymore. -
Page 169: Tab Crls
11 Menu Authentication Securepoint 10 11.3.7 Tab CRLs On the tab CRLs the Certificate Revocation Lists are listed. These lists have the same name as the relating CA. If a certificate is revoked, it is stored in the CRL of the CA it is signed with. -
Page 170: Menu Extras
12 Menu Extras Securepoint 10 12 Menu Extras In this section you will find options to customize the administration interface and functions for advanced users. fig. 184 dropdown menu extras name description Command Line Interface Logging of the command line in- and output. -
Page 171: Cli
12 Menu Extras Securepoint 10 12.1 CLI The command line interface (CLI) sends commands to the firewall software. Most functions of the administration interface are based on such commands. This section offers to log the in- and output of the CLI. Furthermore you can send commands directly to the firewall. -
Page 172: Cli Send Command
In this tab you can send commands directly to the firewall. For this you have to use special CLI commands. For further information on these commands check the CLI reference which is available on the Securepoint website. Type the desired CLI command into the field CLI. -
Page 173: Updates
12.2 Updates You can update the firewall software and the virus pattern database at this menu item. The firewall will connect to the Securepoint Server and looks for new versions. Updates are only available with a valid license. fig. 187 dialog for updating firewall software and virus pattern database 12.2.1 Update the Firewall... -
Page 174: Update Virus Pattern Database
12 Menu Extras Securepoint 10 12.2.2 Update Virus Pattern Database The virus scanner can be adapted immediately. If no newer version is available, the update will not be executed. If a new database is installed, the scanner will be restarted. -
Page 175: Registration
12.4 Registration Here you can upload your license file. If you don’t have a license yet, you can follow the hyperlink in the dialog to access the Securepoint website and register your appliance. Upload the license file like this: Click Browse and select the license file from your file system. -
Page 176: Manage Cockpit
12 Menu Extras Securepoint 10 12.5 Manage Cockpit This menu item offers the possibility to customize the cockpit. You can hide lists which are uninteresting for you. Furthermore you can position the lists to your needs. The dialog Manage Cockpit for user: x is divided into three sections. -
Page 177: Advanced Settings
12 Menu Extras Securepoint 10 12.6 Advanced Settings This menu item opens a new browser window which offers settings for experienced users. You can for example edit the templates of all services and applications and read out the used variables. -
Page 178: Ipsec
12 Menu Extras Securepoint 10 12.6.2 IPSec You can disable the support of IKEv1 and IKEv2 for IPSec connections. If you disable both servers, IPSec connections cannot be established. To disable a server click the related button Off. To enable a server click the related button On. -
Page 179: Portfilter
12 Menu Extras Securepoint 10 12.6.3 Portfilter Make a setting for the allowance of IPSec connections. Activate the first checkbox to Accept all incoming IPSec. Activate the checkbox Allow related connections to allow iptables to accept all packets of existing connections per connection tracking. -
Page 180: Dialup
12 Menu Extras Securepoint 10 12.6.4 Dialup LCP (Link Control Protocol) echo requests are used to control the existence of a connection. Several internet service providers don’t support this checking. For this you should disable the checking. To disable the checking deactivate the checkbox Support LCP Echo for PPPoE. -
Page 181: Templates
12 Menu Extras Securepoint 10 12.6.5 Templates On this tab you can edit all templates on the firewall. Select the application you want to edit from the dropdown list Applications. The firewall displays the depending templates in the dropdown field Templates. -
Page 182: Variables
12 Menu Extras Securepoint 10 12.6.6 Variables On this tab you can show the template variables and their values. You can also add new va- riables. The added values just stay until a reboot of the appliance. Select the application from which you want to see the variables in the dropdown box Applications. -
Page 183: Webserver
12 Menu Extras Securepoint 10 12.6.7 Webserver On this tab you can change the port of the webserver for the user interface. By default the port of the webserver for SSL encrypted connections is 443. Enter the desired port into the field or use the arrow buttons to select the desired port. -
Page 184: Refresh All
12 Menu Extras Securepoint 10 12.7 Refresh All This function reloads all data of the appliance and rebuilds the cockpit. So you can update data in the cockpit which are changed per CLI and not in the administra- tion interface. -
Page 185: Menu Live Log
13 Menu Live Log Securepoint 10 13 Menu Live Log The Live Log shows the current log entries. For a clear view the entries are highlighted in different colors. Furthermore the logs can be filtered. name description Shows the day of occurrence. In the Live Logging the current date. -
Page 186: Start Live Log
13 Menu Live Log Securepoint 10 13.1 Start Live Log When you enter the Live Log window the logging is out of action. You can also not enter any search pattern. To start the logging complete the following approach. Click on the icon Live Log in the navigation bar. -
Page 187: Tab Settings
13 Menu Live Log Securepoint 10 o Service: If you filter by service you don’t have to know the service concretely. You can also use parts of words. For example: webserver ; server o Content: The content of protocol messages is very different. If you don’t know a concrete error message, you can search for an IP addresses. -
Page 188: Details Of A Log Message
13 Menu Live Log Securepoint 10 13.4 Details of a Log Message If the automatic scrolling is disabled you can navigate through the log by the arrow keys on the keyboard. If you press the “enter“ key on a marked entry, a window with details of the log message is shown. -
Page 189: Raw Data
13 Menu Live Log Securepoint 10 13.5 Raw Data Entries in the live log are conditioned Syslog messages. You can also display the Syslog messages. Click on the button Show raw data. The raw data of the current logging are shown. The logging is still running in the background. -
Page 190: Colored Labeling Of The Service In The Live Log
13 Menu Live Log Securepoint 10 13.6 Colored Labeling of the Service in the Live Log description Communication between Securepoint client and server Communication between dhcp-client and -server Communication dns; Domain Name Service; client <--> nameserver Communication dyndns-client <--> dyndns-provider Communication https-client <-->... -
Page 191: Part 2 User Interface
Securepoint 10 Part 2 User Interface Securepoint Security Solutions... -
Page 192: Login User Interface
14 Login User Interface Securepoint 10 14 Login User Interface The user interface is useable for all users with the group membership User Interface combination with Spam Filter Admin, SSL-VPN, SPUVA User or the possibility to change password. The users can reach the user interface with their webbbroser over the IP address of the in- ternal interface by using the HTTPS protocol. -
Page 193: The User Interface Sections
14 The User Interface Sections Securepoint 10 14.1 The User Interface Sections The user interface has more sections. The user can access the sections depending on his group membership. fig. 205 login screen section description visible for groups Change Dialog to change the password. -
Page 194: Change Password
14 Change Password Securepoint 10 14.2 Change Password This section is only visible for users which are authorized to change their password. Login in to the user interface. Click the button Change Password. The dialog Change Password appears. -
Page 195: Download Ssl-Vpn Client
14 Download SSL-VPN Client Securepoint 10 14.3 Download SSL-VPN Client If the user is member of the groups User Interface SSL-VPN and if the administrator has made settings for the VPN client for this user, he is able to download the SSL-VPN client in this section. -
Page 196: Spamfilter
14 Spamfilter Securepoint 10 14.4 Spamfilter If the user is a member of the groups User Interface Spam Filter User he can access the Spam filter interface The user can check which e-mails were classified as spam or ham by the system. If he finds e-mails which are misclassified as spam, he can mark them as ham. - Page 197 14 Spamfilter Securepoint 10 Section Description 1 Tabs The display is divided in different sections. shows identified desired e-mails. Spam shows identified undesired e-mails. Trash shows deleted e-Mails (deleted by the Spam Filter User). Statistics shows a diagram of ham and spam e-mails in depen- dence on the country of origin Click on the tabs to change the view.
-
Page 198: Columns Of The Table
14 Spamfilter Securepoint 10 14.4.2 Columns of the Table name description first column Activate the checkbox to mark the e-mail. Already marked e-mails will be unchecked if you click the checkbox again. Date Date and time of the e-mail. Status... -
Page 199: Details Of An E-Mail
14 Spamfilter Securepoint 10 14.4.3 Details of an E-mail The Spam Filter User can take a look at the content of an e-mail. The content and the at- tachments are only displayed if these options are activated in the spam filter settings. Other- wise only the e-mail header is shown. -
Page 200: Action On The Tab Ham
14 Spamfilter Securepoint 10 14.4.4 Action on the Tab Ham You can execute the following actions on the e-mails: Mark selected e-mails as spam Marks the selected e-mails as spam and moves them to the tab Spam. Delete selected e-mails Moves the marked e-mails to the tab Trash. -
Page 201: Action On The Tab Spam
14 Spamfilter Securepoint 10 14.4.5 Action on the Tab Spam You can execute the following actions on the e-mails: Mark selected e-mails as ham Marks the selected e-mails as ham and moves them to the tab Ham. Delete selected e-mails Moves the marked e-mails to the tab Trash. -
Page 202: Actions On The Tab Trash
14 Spamfilter Securepoint 10 14.4.6 Actions on the Tab Trash You can execute the following actions on the e-mails: Mark selected e-mails as ham Marks the selected e-mails as ham and moves them to the tab Ham. Mark selected e-mails as spam Marks the selected e-mails as spam and moves them to the tab Spam. -
Page 203: Tab Statistic
14 Spamfilter Securepoint 10 14.4.7 Tab Statistic On this tab the ratio of spam and deleted e-mails to ham e-mails is shown graphically. Fur- ther diagrams show the numbers of mails depending on their origin. 14.4.7.1 Filter With the filter function above the diagram all statistics can be displayed for different time in- tervals. -
Page 204: Tab General
14 Spamfilter Securepoint 10 14.4.7.2 Tab General On this tab a diagram shows the total number of ham e-mails, spam e-mails and deleted e- mails. The blue lines clarify the total amount of every bar on the y-axis. The legend on the right side shows the numbers of every section and the percentage. -
Page 205: Tab Top Level Domain
14 Spamfilter Securepoint 10 14.4.7.4 Tab Top Level Domain On this tab a diagram shows from which state the e-mails are received. The statistic is split into ham e-mails, spam e-mails and deleted e-mails. fig. 218 tab top level domain... -
Page 206: Spuva Login
Securepoint 10 14.5 SPUVA Login The Securepoint User Verification Agent (SPUVA) gives users individual rights on computers in the DHCP environment. The user authenticates against SPUVA and gets an individual security policy for any workstation in the network. If the user changes his workplace, he will get the same security policy at the new workplace automatically. -
Page 207: Wake On Lan
14 Wake on LAN Securepoint 10 14.6 Wake on LAN This section is only visible for users which are authorized to use the Wake on LAN function. The user can start registered computers remotely. The user can access the remote computer if according rules are defined. -
Page 208: Download Section
14 Download Section Securepoint 10 14.7 Download Section Every user who is member of the group User Interface can access the download section. The download section offers files and documents which are stored on the appliance. The hyperlink is positioned in the first column of the list. The second column contains the version of the file and the third column contains a short description of the file. -
Page 209: Zone Concept Of The Securepoint Firewall
Internet Zone: external FW zones: firewall-external; vpn_ipsec/ vpn-ppp FW zone: Zone: FW zone: Zone: firewall-DMZ 2 - n DMZ1 firewall-DMZ 1 DMZ2 to DMZn FW zone: firewall-internal Zone: internal fig. 222 zone concept of the Securepoint firewall Securepoint Security Solutions... - Page 210 15 Download Section Securepoint 10 The zone concept is designed in two parts: The firewall zones and the group zones. The firewall zones contain the zones: firewall-internal, firewall-external and firewall-dmz. These zones are provided for the interfaces of the appliance.
Need help?
Do you have a question about the RC 400 and is the answer not in the manual?
Questions and answers