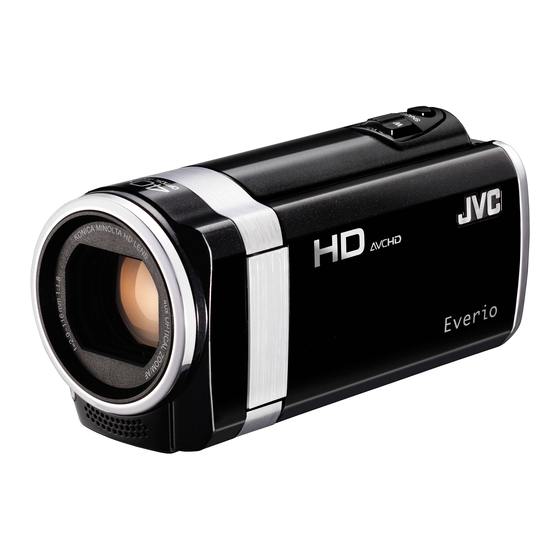
Summarization of Contents
Beginner's Guide
Charging
Instructions for charging the battery pack.
Recording
Instructions for recording videos.
Playback
Instructions for playing back recorded content.
Shooting Tips
Techniques for better shooting.
Getting Started
Key Features
Highlights the main capabilities of the camcorder.
Charging the Battery Pack
Step-by-step guide for charging the battery.
Inserting an SD Card (GZ-HM650/GZ-HM670)
Guide for inserting an SD card into specific models.
Inserting an SD Card (GZ-HM445/GZ-HM448)
Guide for inserting an SD card into specific models.
Using the Touch Screen
Explains how to operate the touch screen interface.
Clock Setting
Guide to setting the date and time on the unit.
Tripod Mounting
Instructions for mounting the camcorder on a tripod.
Using this Unit Overseas
Considerations for using the camcorder abroad.
Optional Accessories
Lists and describes optional accessories for the camcorder.
Recording
Taking Videos in Intelligent Auto Mode
Recording using automatic settings for ease of use.
Taking Still Images in Intelligent Auto Mode
Capturing still photos with automatic settings.
Manual Recording
Adjusting settings manually for video and still images.
Adjusting Focus Manually
Manually adjusting the focus for clear images.
Adjusting Brightness
Adjusting the overall brightness of the recorded image.
Setting White Balance
Adjusting color tone based on the light source.
Registering Human Face Personal Authentication Information
Registering faces for automatic focus and brightness adjustment.
Capturing Subjects Clearly (TOUCH PRIORITY AE/AF)
Adjusting focus and brightness based on tapped position.
Reducing Camera Shake
Using image stabilizer to reduce camera shake.
Recording at Intervals (TIME-LAPSE RECORDING)
Capturing scenes over long periods at intervals.
Remaining Recording Time/Battery Power
Checking available recording time and battery status.
Playback
Playing Back Videos
Selecting and playing recorded videos from an index screen.
Playing Back Still Images
Selecting and playing recorded still images from an index screen.
Searching for a Specific Video/Still Image
Finding specific files using search functions.
Connecting to and Viewing on TV
Connecting the camcorder to a TV for playback.
Connecting via the HDMI Mini Connector
Connecting to HDTVs for HD quality playback.
Connecting via the Component Connector
Connecting to TVs for analog high-definition playback.
Connecting via the AV Connector
Connecting to TVs using the AV cable for playback.
Editing
Deleting Unwanted Files
Removing files to free up recording media space.
Protecting Files
Preventing important files from accidental deletion.
Capturing a Still Image in the Video during Playback
Saving scenes from videos as still images.
Capturing a Required Part in the Video (TRIMMING)
Selecting and saving a portion of a video as a new file.
Capturing Videos for Uploading to YouTube
Preparing video clips for YouTube upload.
Copying
Creating Discs with a DVD Writer
Copying files to discs using an optional DVD writer.
Copying All Files
Copying all videos and still images from the unit.
Copying Files by Date
Sorting and copying files based on recording date.
Copying Selected Files
Individually selecting and copying videos or still images.
Creating Discs with an External Blu-ray Drive
Copying files to discs using an external Blu-ray drive.
Dubbing Files by Connecting to a DVD Recorder or VCR
Dubbing videos to DVD/VCR in standard quality.
Using a USB External Hard Disk Drive
Copying and playing files via USB external HDD.
Copying Files to an SD Card
Copying videos and images to an SD card.
Moving Files to an SD Card
Moving videos and images from built-in memory to SD card.
Copying to Windows PC
Transferring files to a PC using provided software.
Backing Up All Files
Creating a backup of all files to a computer's HDD.
Recording Videos to Discs
Burning recorded videos onto DVDs.
Backing Up Files Without Using Provided Software
Copying files to a PC manually without software.
Menu Settings
Operating the Menu
General guide to navigating the camcorder's menu system.
Main Menu for Video Recording
Adjusting video recording settings like brightness and white balance.
Main Menu for Still Image Recording
Adjusting settings for still image capture.
Main Menu for Video Playback
Options for deleting or searching specific videos.
Common Menu
Common settings applicable across different modes.
Clock Adjust
Resets or sets the local time for the unit.
VIDEO QUALITY
Selects recording quality settings for videos.
FORMAT BUILT-IN MEM. (GZ-HM650/GZ-HM670)
Deletes all files from the built-in memory.
FORMAT SD CARD
Deletes all files on the SD card.
Troubleshooting
Battery Pack
Issues related to battery not powering on, short usage time, or charging.
Recording
Problems like recording failure, slow shooting, or focus issues.
Card
Issues with SD card insertion, copying, or playback.
Playback
Problems with interrupted playback, choppy motion, or missing files.
Editing/Copying
Issues related to dubbing, deleting, copying, or moving files.
Computer
Problems copying files to PC/Mac or uploading to YouTube.
Screen/Image
Issues with LCD visibility, bright spots, dark/bright subjects, or color differences.
Other Problems
Problems like grainy images, unit heating, slow operation, or improper function.
Error Message?
Troubleshooting specific error messages displayed on the unit.
Maintenance
Camcorder
Instructions for cleaning the camcorder body.
Lens/LCD Monitor
Cleaning the lens and LCD monitor.
Specifications
Camera
Technical specifications of the camcorder including power, dimensions, and image pickup.
Connectors
Details of the unit's various output and input connectors.
AC Adapter (AC-V10M)
Specifications for the AC adapter.
Battery Pack (BN-VG114E/BN-VG114AC)
Specifications for the battery pack.


Need help?
Do you have a question about the Everio GZ-HM445 and is the answer not in the manual?
Questions and answers