Table of Contents
Advertisement
AIR CONDITIONER
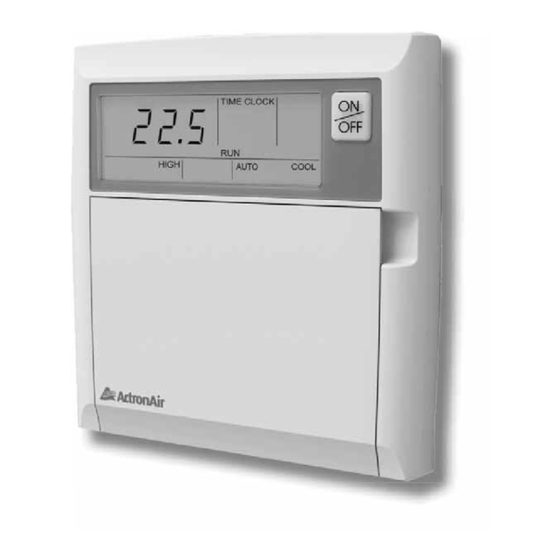
WALL CONTROLLER
Operating Instructions
Controller
Model Numbers
LM7
LM7-D
LM24
Please Read This Manual
Congratulations on your purchase of an
ActronAir air conditioning system. This unit
has been designed and manufactured with
the highest quality standard in mind.
Please read this manual carefully and keep it
for future reference.
Copyright © 2011
All rights reserve. No part or contents of this book maybe reproduced or transmitted in any
form or by any means without the written permission of Actron Engineering Pty. Ltd.
®
Advertisement
Table of Contents

Related Manuals for ActronAir LM24

Summary of Contents for ActronAir LM24
-
Page 1: Operating Instructions
LM7-D LM24 Please Read This Manual Congratulations on your purchase of an ActronAir air conditioning system. This unit has been designed and manufactured with the highest quality standard in mind. Please read this manual carefully and keep it for future reference. -
Page 2: General Information
INSIDE THIS MANUAL You will fi nd instructions for two types of wall controllers, the standard 7-Day programmable model LM7 and the optional model LM24. The LM7 series controllers have all the features of LM24 series plus the addition of a fully programmable 7-Day Timeclock. -
Page 3: Table Of Contents
Trouble Shooting.........Page 29 Setting the time and day......Page 17 Resetting wall control......Page 30 Basic Operation and Additional Features show LM7 Wall Controller for illustration purposes only. Buttons, functions and controller operation are the same for both controllers. SYSTEM INFORMATION Air Conditioner Model No. -
Page 4: Advance Features
ADVANCE FEATURES Auto-Restart After Power Failure Should a power failure occur whilst the air conditioner is running, the wall controller will restart the air conditioner in the same mode when the power is restored. Dual Wall Control Operation ( Optional ) Two wall controls can be installed on one system. -
Page 5: Wall Controller Functions
Temperature-Down Setting Button Select / Clock-Down Setting and Lowers room temperature setting. Room Temp Display Button Exit Button (Not used on LM24) Repeat / Backlight Button (LM7 only) Quick exit from time clock • Repeats the previous day settings to programming menu. - Page 6 WALL CONTROLLER FUNCTIONS LM7 Display 26 27 MON TUE WED THU FRI SAT SUN TIME CLOCK TIMER EVENT INSIDE FILTER HIGH AUTO HEAT COOL CONT AUTO HEAT / COOL 40 41 PROGRAM TIMER SET TEMP SELECT REPEAT / EXIT LM24 Display...
- Page 7 Shows during backlight adjustments and timer times and event times when Turning On/Off backlight. Timer and Room/Setpoint 1 & 2 Indicator (LM7 function only) Temperature Indicator (LM24 only) Illuminates together with Event to show Displays the setpoint & current room the programming event.
-
Page 8: Lcd Backlight
1 second indicating the backlight level is set. Turn On/Off LCD Backlight 1A Turn On LCD Backlight. Press and hold REPEAT (LM7) or DISPLAY (LM24) Button for 4 seconds. LOCK symbol will appear, then release button and backlight will remain On. 2A Turn Off LCD Backlight. -
Page 9: On/Off Button Light
NOTE: The Wall Controller must be turned on before operating this procedure. Turn On the On/Off Button Light 1A Press and hold REPEAT (LM7) or DISPLAY (LM24) Button, press and release ON/OFF Button and then release REPEAT (LM7) or DISPLAY (LM24) Button. -
Page 10: Cooling Operation
COOLING OPERATION COOL AUTO AUTO HEAT / COOL HEAT / COOL PROGRAM TIMER SET TEMP SET TEMP SELECT EXIT REPEAT / REPEAT / Press ON/OFF Button. AUTO Press the Button until “COOL” appears on display. HEAT/COOL Set the desired temperature by pressing either the SET TEMP UP or DOWN arrow key. -
Page 11: Heating Operation
HEATING OPERATION HEAT AUTO AUTO HEAT / COOL HEAT / COOL PROGRAM TIMER SET TEMP SET TEMP SELECT EXIT REPEAT / REPEAT / Press ON/OFF Button. AUTO Press the Button until “HEAT” appears on display. HEAT/COOL Set the desired temperature by pressing either the SET TEMP UP or DOWN arrow key. -
Page 12: Auto Operation
AUTO OPERATION Automatically changes between heating and cooling mode AUTO COOL AUTO AUTO HEAT / COOL HEAT / COOL PROGRAM TIMER SET TEMP SET TEMP SELECT EXIT REPEAT / REPEAT / Press ON/OFF Button. AUTO Press the Button until “AUTO” appears on display. HEAT/COOL Set the desired temperature by pressing either the SET TEMP UP... - Page 13 FAN ONLY OPERATION AUTO AUTO HEAT / COOL HEAT / COOL PROGRAM TIMER SET TEMP SET TEMP SELECT EXIT REPEAT / REPEAT / Make sure the system is off. Press the FAN Button. Adjust the fan speed by pressing the FAN Button.
-
Page 14: Circulation Operation
ESP FAN FEATURE Available for ESP Plus and ESP Ultima Models HIGH CIRCULATION OPERATION FAN CYCLE FAN SPEED CYCLE: HIGH = High air circulation. MED = Normal air circulation. LOW = Low air circulation. ESP = Variable air circulation, varying fan speed will be determined by the controller automatically. -
Page 15: Countdown Timer (Off)
TIMER OPERATION OFF Timer Function TIMER AUTO AUTO HEAT / COOL HEAT / COOL PROGRAM TIMER SET TEMP SET TEMP SELECT REPEAT / REPEAT / EXIT Press the ON/OFF Button. Make sure the system is running and the operating conditions are those desired. -
Page 16: Countdown Timer (On)
TIMER OPERATION ON Timer Function TIMER AUTO AUTO HEAT / COOL HEAT / COOL PROGRAM TIMER SET TEMP SET TEMP SELECT EXIT REPEAT / REPEAT / Make sure the system is OFF. Press the TIMER Button. TIMER Set the desired hours for the system to turn ON by pressing either the SELECT UP / DOWN Arrow key. -
Page 17: 7-Day Programmable Model
7-DAY PROGRAMMABLE MODEL Timeclock Operation TIME CLOCK EVENT AUTO AUTO HEAT / COOL HEAT / COOL PROGRAM TIMER SET TEMP SET TEMP SELECT EXIT REPEAT / REPEAT / • The 7-Day timeclock feature on the controller allows you to set the air conditioner to turn ON and OFF at different times for each day of the week. -
Page 18: Setting The Time And Day
7-DAY PROGRAMMABLE MODEL Setting the Time and Day TIME AUTO AUTO HEAT / COOL HEAT / COOL PROGRAM TIMER SET TEMP SET TEMP SELECT EXIT REPEAT / REPEAT / Press the “PROGRAM” button 3 times and “SET” will be illuminated with “TIME” fl ashing. Adjust the “Hours”... -
Page 19: Activating And De-Activating The 7-Day Timeclock
7-DAY PROGRAMMABLE MODEL Activating and De-activating the TIME CLOCK 7-Day Timeclock AUTO AUTO HEAT / COOL HEAT / COOL PROGRAM TIMER SET TEMP SET TEMP SELECT REPEAT / REPEAT / EXIT Activating Press the PROGRAM button twice. Press ON/OFF until “ON” is fl ashing. Press the EXIT button. -
Page 20: Programming The Events
7-DAY PROGRAMMABLE MODEL Programming the Events TIME CLOCK EVENT AUTO AUTO HEAT / COOL HEAT / COOL PROGRAM TIMER SET TEMP SET TEMP SELECT EXIT REPEAT / REPEAT / Press the PROGRAM button repeatedly until event 1 and “MON” is showing. You are now setting MONDAY, event 1, ON time. -
Page 21: Cancelling An Individual Event
7-DAY PROGRAMMABLE MODEL Cancelling an Individual Event TIME CLOCK EVENT AUTO AUTO HEAT / COOL HEAT / COOL PROGRAM TIMER SET TEMP SET TEMP SELECT EXIT REPEAT / REPEAT / Press the PROGRAM button repeatedly until the “ON” time for the event you wish to cancel is displayed. Press the ON/OFF button. -
Page 22: Repeating A Days Event And Times
7-DAY PROGRAMMABLE MODEL Repeating a Days Events & Times TIME CLOCK EVENT AUTO AUTO HEAT / COOL HEAT / COOL PROGRAM TIMER SET TEMP SET TEMP SELECT EXIT REPEAT / REPEAT / This feature allows you to automatically repeat the previous days, events and times, therefore eliminating the need to re-enter the events and times. -
Page 23: Zone Controller Functions
ZONE CONTROLLER FUNCTIONS INSIDE HIGH COOL CONT AUTO AUTO HEAT / COOL HEAT / COOL PROGRAM TIMER SET TEMP SET TEMP SELECT EXIT REPEAT / REPEAT / Turning Zones ON & OFF Press the Zone Button to turn zones on & off. Lights are illuminated when zone is turned on. -
Page 24: Dual Wall Controller Operation
DUAL WALL CONTROLLER OPERATION MIMIC CONTROL • The air conditioner can be operated from either wall controller. • Information displayed on the two wall controllers is identical. • Last wall controller used has priority. Eg. 1 Using wall controller one, the cooling operation is started, both wall controllers will now show the system is in cooling mode. -
Page 25: Setting The Upper And Lower Temperature Limits
SETTING THE UPPER & LOWER TEMPERATURE LIMITS This feature allows you to set the upper and lower temperature limits on your wall control. This can be used in a variety of ways. 1. You may want the maximum set-temp limited AUTO AUTO to 25... - Page 26 OPERATING TIPS FOR SUMMER Always test run your air conditioner a few weeks before the start of summer and make sure it’s cooling suffi ciently. If the air conditioner needs servicing, it’s advised you have this done before the summer season arrives. A HOT day is forecast for tomorrow, what should you Always start the air conditioner early in the morning and keep the house/offi...
- Page 27 OPERATING TIPS FOR WINTER Always test run your air conditioner a few weeks before the start of summer and make sure it’s cooling suffi ciently. If the air conditioner needs servicing, it’s advised you have this done before the summer season arrives. A COLD day is forecast for tomorrow, what should you You can leave air conditioner running overnight, but lower the set point C from your normal setting to help save electricity.
-
Page 28: (Summer)
ENERGY CONSERVATION TIPS For the most effi cient operation, keep the windows and doors closed including unused areas where possible. They not only help to insulate against heat and cold, they also reduce dust, pollen and noise. Occasionally allow fresh air into rooms and offi ces that are closed off. Should you wish to leave your air conditioner on over night during the winter. -
Page 29: Maintenance
MAINTENANCE Wall Controller Outlets and Return Air MON TUE WED THU FRI SAT SUN TIME CLOCK TIMER EVENT INSIDE FILTER HIGH AUTO HEAT COOL CONT AUTO AUTO HEAT / COOL HEAT / COOL PROGRAM TIMER SET TEMP SET TEMP SELECT EXIT REPEAT / REPEAT /... -
Page 30: Trouble Shooting
TROUBLE SHOOTING CONDITION CAUSES OR CHECK POINTS The system does not • Check that 5 minutes has passed from turn on time, as start. the system has inbuilt safety timers. • Check thermostat settings are correct. • Check the thermostat “set-point” is set low enough for cooling or high enough for heating. -
Page 31: Resetting Wall Control
Re-Setting the Wall Control Re-Setting all functions for LM7 & LM24 Note: This does not reset the 7-day timeclock features on the LM7 wall controller. Make sure the air conditioner is in the OFF position. Press and hold down FAN, press and release SET TEMP DOWN, press and release ON/OFF and then release FAN All the display indicators will fl... - Page 32 1800 119 229 actronair.com.au Actron Engineering Pty Ltd Printed in Australia Part No. 0500-121 ABN 34 002 767 240 Version: 02 HEAD OFFICE SYDNEY AUSTRALIA...
Need help?
Do you have a question about the LM24 and is the answer not in the manual?
Questions and answers