
Related Manuals for LG BD460


Summarization of Contents
Safety Instructions
Indoor Installation
Safety precautions for projector placement and operation indoors, including warnings about heat sources and flammables.
POWER
Electrical safety precautions related to power connection, grounding, and usage to prevent fire or shock.
USING
Safety warnings and precautions during projector use, covering liquid, damage, and foreign objects.
CAUTION
General cautions for safe operation, handling, and environmental considerations like heat and magnetic fields.
Cleaning
Guidelines for cleaning projector parts safely, avoiding water and using appropriate cleaning agents.
Others
Safety advice on battery handling, disposal, and storage to prevent fire or explosion.
FCC NOTICE
Regulatory compliance information for radio frequency emissions and measures to correct interference.
Disposal of your old appliance
Instructions for environmentally responsible disposal of the product according to European directives.
Disposal of waste batteries/accumulators
Guidelines for proper disposal of used batteries, referencing European directives.
Part names and functions
Front
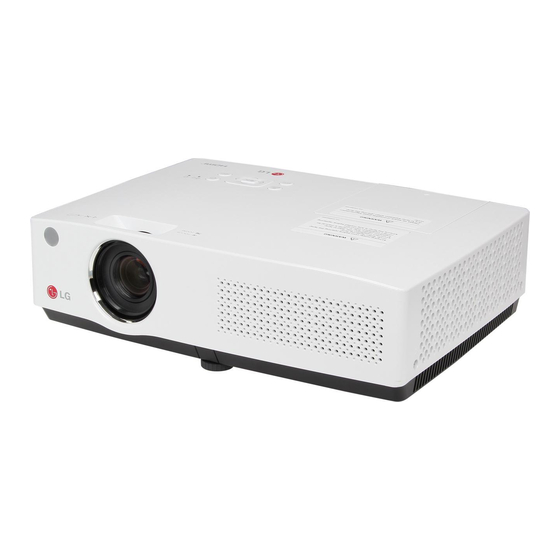
Identification of parts located on the front panel of the projector, including lens and speaker.
Back
Identification of parts located on the back panel of the projector, including connectors and controls.
Bottom
Identification of parts located on the bottom panel, such as adjustable feet.
Rear terminal
Description and connection details for all rear input/output terminals like HDMI, RGB, and audio.
Top control and indicators
Explanation of buttons and status indicators on the projector's top panel for operation.
Remote control
Identification and function of buttons on the projector's remote control for various operations.
Remote control battery installation
Steps for installing batteries in the remote control to ensure proper operation.
Operation range
Information on the effective range and angle for remote control operation.
Adjustable foot
How to adjust the projector's height and tilt angle using the built-in adjustable foot.
Installation
Positioning the projector
Guidelines and diagrams for optimal projector placement relative to the screen for best picture quality.
Connect to computer (Digital and analog RGB)
Instructions for connecting computers via RGB and HDMI cables, including diagrams.
Connect to video equipment (Video, S-Video,Component, HDMI)
Instructions for connecting various video sources via different cables like RCA, S-Video, and HDMI.
Connecting to Audio equipment
Steps for connecting external audio devices to the projector using audio cables.
Connecting to the AC power cord
Guide to safely connecting the projector to a power outlet, including regional plug types.
Basic operation
Turning on the projector
Step-by-step guide for powering on the projector, including peripheral connections and PIN entry.
Turning off the projector
Procedures for safely powering off the projector and cooling down the lamp for longevity.
How to operate the On Screen Menu
Explanation of navigating and using the projector's on-screen display menu for adjustments.
Menu bar
Overview of the main menu categories available for projector configuration and settings.
Zoom and focus adjustment
How to adjust the projected image size and sharpness using the zoom and focus rings.
Auto setup function
Using the AUTO button for automatic input search, PC adjustment, and keystone correction.
Keystone
Correcting geometric distortion (keystone effect) of the projected image using the menu.
Audio adjustment
Adjusting volume and muting audio via direct controls or the on-screen menu.
Remote control operation
Direct operation of key remote control functions like input selection, image modes, and zoom.
Computer input
Select input source (RBG 1/RGB 2)
How to choose between RGB 1 and RGB 2 computer input signals via direct or menu operation.
Computer system select
Automatic and manual selection of the computer's signal format for optimal display.
Auto PC adjustment
Automatic adjustment of image parameters like phase, dots, and position for computer input signals.
Manual adjustment via PC
Detailed manual adjustments for PC image parameters like phase, position, and dots.
Image select
Selecting predefined image modes (Dynamic, Cinema, etc.) for different viewing conditions.
Image adjust
Fine-tuning image quality settings such as contrast, brightness, color temperature, and white balance.
Screen size adjust
Adjusting the projected image aspect ratio, resolution, and digital zoom for computer input.
Video Input
Select input source (HDMI/Component/S-video/Video)
Choosing the video input source from HDMI, Component, S-Video, or Composite Video.
Video system select
Selecting the appropriate video system (PAL/NTSC) or component signal format for video inputs.
Image select
Selecting predefined image modes (Dynamic, Cinema, etc.) for different viewing conditions.
Image adjust
Fine-tuning video image quality settings like contrast, brightness, color, and tint.
Screen size adjust
Adjusting the projected image aspect ratio and digital zoom for video input signals.
Option
Language
Selecting the display language for the on-screen menu interface.
Menu position
Adjusting the on-screen menu's location on the display for user convenience.
Auto setup
Enabling input search, auto keystone, and auto PC adjustment for quick setup.
Keystone
Storing or resetting keystone correction settings to maintain image geometry.
Blue Back
Setting a blue background display when no input signal is detected.
Display
Configuring the startup display animation or using the input screen as the startup.
Logo (Logo and Logo PIN code lock settings)
Customizing startup logos and securing them with a PIN code to prevent unauthorized changes.
Enter a Logo PIN code
Setting a new PIN code for logo customization and security, with important notes on safekeeping.
Logo PIN code change
Procedures for changing the existing logo PIN code for enhanced security.
Ceiling
Enabling ceiling mount mode for inverted image projection.
Rear
Enabling rear projection mode for projecting images from behind a screen.
Terminal
Configuring the terminal settings for RGB output or input, and other signal routing.
Power management
Adjusting power saving settings to reduce consumption and extend lamp life.
Auto Power
Enabling the projector to turn on automatically when connected to AC power.
Standby mode
Selecting between normal and eco standby modes for power saving and feature availability.
Closed Caption
Enabling text display of audio content for accessibility, supported on specific video systems.
Lamp Mode
Adjusting screen brightness to save power and extend lamp life.
Test Pattern
Displaying various test patterns for signal and image quality checks.
Security (Key lock and PIN code lock)
Setting up security features like key lock and PIN code lock to prevent unauthorized operation.
PIN code lock
Preventing unauthorized operation by requiring a PIN code on startup.
PIN code change
Changing the existing PIN code for projector security, with important notes on safekeeping.
Cooling fast
Adjusting fan speed for quicker cooling after projector shutdown.
High Altitude
Adjusting fan speed for optimal performance at high altitudes.
Filter counter
Setting filter cleaning intervals and resetting the counter to manage maintenance alerts.
Automatic Standby
Setting the projector to automatically turn off after a period of inactivity.
Sleep time
Setting a timer for the projector to turn off automatically, even if active.
Initial Setting
Resetting all projector settings to factory defaults, excluding specific user configurations.
Information
Displaying input source
Viewing detailed information about the current input signal and projector status.
Maintenance
POWER/TEMP indicator
Understanding the projector's status and operational conditions through the POWER/TEMP indicator lights.
Cleaning the filter
Step-by-step guide for cleaning the projector's air filter to ensure optimal performance and airflow.
Resetting the filter counter
Procedure to reset the filter cleaning timer after maintenance to clear warning indicators.
Attaching the Lens Cap
How to properly attach the lens cap for protection during transport or storage.
Cleaning the lens
Instructions for safely cleaning the projector's lens without causing damage, using appropriate agents.
Cleaning the projector's cabinet
Guidelines for cleaning the exterior casing of the projector using a soft cloth.
Replacing the lamp
Detailed instructions and safety precautions for replacing the projector lamp.
ORDER REPLACEMENT LAMP
Information on how to order a new projection lamp and important handling precautions.
Appendix
Troubleshooting
Solutions for common projector issues such as no power, no image, or poor picture quality.
Indicator and projector state
A table correlating indicator lights with projector operational states and error conditions.
Compatible Signal
List of supported video resolutions and signal frequencies for optimal projector compatibility.
Configuration of terminals
Pinout diagrams for RGB, RS232C, and HDMI connection terminals.
Technical Specifications
Detailed technical data including dimensions, weight, resolution, and power requirements.
Accessories
List of included accessories provided with the projector, such as cables and remote control.
Content of hazardous substances and elements
Information on the presence of hazardous substances in projector components as per regulations.
Dimensions
Technical drawings showing the projector's physical dimensions and mounting hole details.
PIN code memorandum
Space to record PIN codes for security and quick access to projector functions.
RS232 Control Method
Configuration settings and wiring for controlling the projector via RS232 serial interface.
Commands
A comprehensive list of serial commands for controlling projector functions remotely.
Need help?
Do you have a question about the BD460 and is the answer not in the manual?
Questions and answers