Table of Contents
Advertisement
Advertisement
Table of Contents

Related Manuals for CMS 5000

Summary of Contents for CMS 5000
- Page 1 Grid PV Inverter CMS 4000 CMS 5000 Installation and Operation Manual...
-
Page 2: Table Of Contents
Before you start ......................... 3 Content ..........................4 2. Installation ..........................5 1) Safety instructions ......................5 2) Fixed on the wall ......................6 3) Connecting to the grid (AC utility) .................. 7 4) Connect to PV Panel (DC input)..................8 5) Checking ......................... -
Page 3: Before You Start
Before you start Congratulations on choosing CMS Grid PV Inverter, the products from CMS Grid PV Inverter are a highly reliable products due to their innovative design and perfect quality control. Such inverters are used in high demand, grid-linked PV systems. -
Page 4: Content
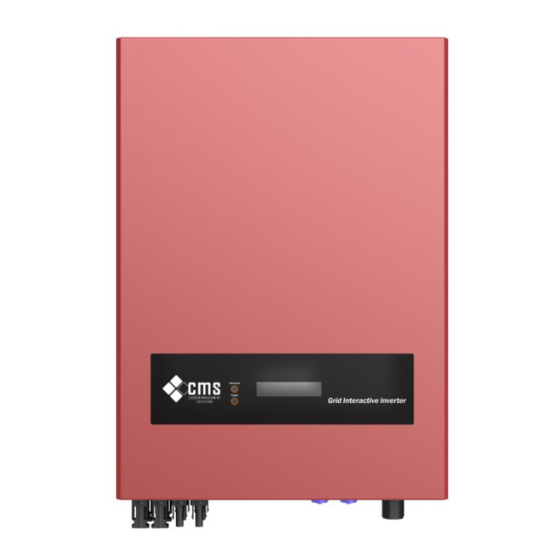
1. Content CMS 4000 and CMS 5000 Design Overview Front View Bottom View LCD Display Showing the inverters status Operation LED Solar panel input Utility (AC) connector RS232 RS485 Opening the package After opening the package, please check the contents of the box. It should contain the... -
Page 5: Installation
Item Name Quantity CMS 4000 or CMS 5000 mounting frame mounting screws safety-lock screws AC socket assembly Instruction manual Monitor Optional software(disk) Before starting installation please consider the following items: This unit is designed for outdoor usage(IP65). Do not expose the PV-Inverter to direct sunlight. -
Page 6: Fixed On The Wall
connected to this equipment, a photovoltaic panel will charge the DC link capacitors. D. Energy stored in this equipment’s DC link capacitors presents a risk of electric shock. Even after the unit is disconnected from the grid and photovoltaic panels, high voltages may still exist inside the PV-Inverter. -
Page 7: Connecting To The Grid (Ac Utility)
A. Measure grid (utility) voltage and frequency. It should be 230VAC (or 220VAC) , 50/60Hz and single phase. B. Open the breaker or fuse between PV Inverter and utility. C. For Inverter (CMS 4000 and CMS 5000 ), connect AC wires as follows: Edition 2.0 2010/06... -
Page 8: Connect To Pv Panel (Dc Input)
Pin G Pin N Pin L Suggested cable width for AC wire Φ(mm) Model AWG no. Area(mm CMS 4000 ≥3.2 ≥3 ≤12 CMS 5000 ≥4.0 ≥3.75 ≤10 4) Connect to PV Panel (DC input) A. Make sure the maximum open circuit voltage (Voc) of each PV string is less than 550VDC UNDER ANY CONDITION. -
Page 9: Checking
The green LED turns lights-up. D. This completes the check. 6) System Diagram Utility Connection system PV panel A. PV Panel: Provide DC power to inverter B. CMS: Converts DC (Direct Current) power from PV panel(s) to AC (Alternating Edition 2.0 2010/06... -
Page 10: Modes Of Operation
Current) power. Because Inverter is grid-connected it controls the current amplitude according to the PV Panel power supply. Inverter always tries to convert the maximum power from your PV panel(s). C. Connection system: This “interface” between Utility and PV-Inverter may consist of electrical breaker, fuse and connecting terminals. - Page 11 information: Automatic ON-OFF: Inverter starts up automatically when DC-power from the PV panel is sufficient. Once the PV-Inverter starts it enters one of the following 3 states: Standby: The PV string can only provide just enough voltage to minimum requirements of the controller.
-
Page 12: Inverter Status
PV:xxxV BUS:xxxV The PV and Bus voltage AC:xxxV xx.xHz The Grid voltage and frequency 4. Inverter Status Inverter is designed to be user-friendly; therefore, the status of the Inverter can be easily understood by reading the information shown on the front panel display. All possible messages are shown in the following table. -
Page 13: Communications Software Instructions
1) Communications software instructions Connect PV Inverter and PC by RS232 wire. Open monitoring software “PV Inverter COM.exe”.If you use “PV Inverter COM.exe”, Open the “PV Inverter COM.txt” file in the path :C:\WINDOWS. The file records the user's software and the main parameter settings, click on the main interface and the "Setting"... - Page 14 local dealer. Should any problems arise, the red (Fault) LED on the front panel turns on and the LCD displays the relevant information. Please refer to the following table for a list of potential problems and their solutions. 1. The ground current is too high. 2.
-
Page 15: Specifications
7. Specifications Model CMS 4000 CMS 5000 Specifications Input data Max. DC power 4500W 5200W Max. DC voltage 550V 550V PV voltage range MPPT 110V-530V 110V-530V Max. input current DC voltage ripple <5% <5% Max. number of strings Ground fault monitoring...
Need help?
Do you have a question about the 5000 and is the answer not in the manual?
Questions and answers