Sign In
Upload
Download
Table of Contents
Contents
Add to my manuals
Delete from my manuals
Share
URL of this page:
HTML Link:
Bookmark this page
Add
Manual will be automatically added to "My Manuals"
Print this page
×
Bookmark added
×
Added to my manuals
Manuals
Brands
Toshiba Manuals
Laptop
Satellite A505
Service manual
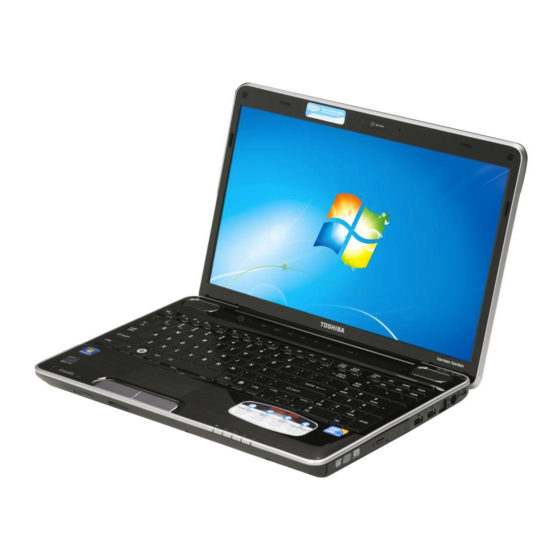
Toshiba Satellite A505 Service Manual
Hide thumbs
Also See for Satellite A505
:
User manual
(248 pages)
,
Specifications
(4 pages)
,
Specifications
(4 pages)
1
2
3
4
5
6
7
8
9
10
11
12
13
14
15
16
17
18
19
20
21
22
23
24
25
26
27
28
29
30
31
32
33
34
35
36
37
38
39
40
41
42
43
44
45
46
47
48
49
50
51
52
53
54
55
56
57
58
59
60
61
62
63
64
65
66
67
68
69
70
71
72
73
74
75
76
77
78
79
80
81
82
83
84
85
86
87
88
89
90
91
92
93
94
95
96
97
98
99
100
101
102
103
104
105
106
107
108
109
110
111
112
113
114
115
116
117
118
119
120
121
122
123
124
125
126
127
128
129
130
131
132
133
134
135
136
137
138
139
140
141
142
143
144
145
146
147
148
149
150
151
152
153
154
155
156
157
158
159
160
161
162
163
164
165
166
167
168
169
170
171
172
173
174
175
176
177
178
179
180
181
182
183
184
185
186
187
188
189
190
191
192
193
194
195
196
197
198
199
200
201
202
203
204
205
206
207
208
209
210
211
212
213
214
215
216
217
218
219
220
221
222
223
224
225
226
227
228
229
230
231
232
233
234
235
236
237
238
239
240
241
242
243
244
245
246
247
248
249
250
251
252
253
254
255
256
257
258
259
260
261
262
263
264
265
266
267
268
269
270
271
272
273
274
275
276
277
278
279
280
281
282
283
284
285
page
of
285
Go
/
285
Contents
Table of Contents
Troubleshooting
Bookmarks
Table of Contents
Table of Contents
Chapter 1 Hardware Overview
Table of Contents
Features
Figure 1-1 ID Parts Description Placement
Figure 1-2 Computer Block Diagram
Figure 1-3 System Board Configurations
Figure 1-4 System Unit Block Diagram
System Unit Components
Figure 1-5 SATA HDD
Inch HDD
Table 1-1 HDD Specifications
Figure 1-6 Solid Status Drive
Solid Status Drive (SSD)
DVD Super Multi (+-R Double Layer)
Figure 1-7 DVD Super Multi Drive
Table 1-2 DVD Super Multi Drive Specifications
Power Supply
Batteries
Battery Charging Control
Main Battery
Table 1-3 Battery Specifications
RTC Battery
Table 1-4 Quick/Normal Charging Time
Chapter 2 Troubleshooting
Outline
Basic Flowchart
Power Supply
Procedure 1 Power Icon Check
Procedure 2 Connection Check
Procedure 3 Replacement Check
System Board
Procedure 2 Connection Check
Procedure 3 Replacement Check
Procedure 1 Message Check
Procedure 2 Test Program Check
Procedure 3 Replacement Check
Hdd
Procedure 1 Message Check
Procedure 2 Partition Check
Procedure 3 Format Check
Procedure 4 Test Program Check
Procedure 3 Format Check
Procedure 4 Test Program Check
Procedure 5 Connector Check and Replacement Check
Ssd
Procedure 1 Test Program Check
Procedure 2 Connector Check and Replacement Check
Procedure 1 Test Program Check
Procedure 2 Connector Check and Replacement Check
Keyboard
Procedure 1 Test Program Check
Procedure 2 Connector Check and Replacement Check
Display
Procedure 1 External Monitor Check
Procedure 2 Test Program Check
Procedure 3 Connector Check and Replacement Check
ODD (Optical Disk Drive)
Procedure 1 ODD Cleaning Check
Procedure 2 Test Program Check
Procedure 3 Connector Check and Replacement Check
Lan
Procedure 1 Test Program Check
Procedure 2 Connector Check and Replacement Check
Finger Print (Optional)
Procedure 1 Test Program Check
Procedure 2 Connector Check
Audio Test
Procedure 1 Test Program Check
Procedure 2 Connector Check and Replacement Check
IEEE 1394 Test
Procedure 1 Test Program Check
Procedure 2 Connector Check
Cooling Module
Procedure 1 Test Program Check
Procedure 2 Connector Check and Replacement Check
Chapter 3 Diagnostic Programs
General
Quick Start
Customization Test
Quick Test
Keyboard Layout Test
Audio Play Test
Hotkey Test
Audio Record Test
DMI Read
DMI Write
Sensor Test
System Information
View Logs
Exit to Free DOS
The Diagnostics Screen Explanation
Options
Overview
Batch Parameters Configuration
Item's Parameters Configuration
Load Batch Parameters
LOG Parameters Setting
Save Batch Parameters
Display LOG File
Specify LOG Viewer
LOG Viewer
LOG File Sample
Subtests
System Test
Memory Test
Storage
Video
Communication (COMM)
Peripheral
Error Codes and Description
Quick Test Item List
Chapter 4 Replacement Procedures
Table of Contents
General
Safety Precautions
Before You Begin
Disassembly Procedures
Assembly Procedures
Tools and Equipment
Screw Tightening Torque
Colors of Screw Shanks
Symbols of Screws on the Computer Body
Symbol Examples
Battery Pack/Pc Card/Bridge Media
Battery Pack
Removing the Battery Pack
Installing the Battery Pack
PC Card
Removing the PC Card
Installing the PC Card
Bridge Media
Removing the Bridge Media
Installing the Bridge Media
Memory Module
Removing the Memory Module
Installing the Memory Module
Hdd
Removing the HDD
Installing the HDD
ODD Bay Module
Removing the ODD Bay Module
Installing the ODD Bay Module
Disassembling the ODD Drive
Assembling the ODD Drive
Keyboard
Removing the Keyboard
Installing the Keyboard
Wireless LAN Card
Removing the Wireless LAN Card
Installing the Wireless LAN Card
Top Cover
Removing the Top Cover
Installing the Top Cover
MDC Module
Removing the MDC Module
Installing the MDC Module
FM Module
Removing the FM Module
Installing the FM Module
Bluetooth Module
Removing the Bluetooth Module
Installing the Bluetooth Module
Speakers
Removing the Speakers
Installing the Speakers
Display Assembly
Removing the Display Assembly
Installing the Display Assembly
AC-IN Cable, RJ11(or FM) Cable and USB Cable
LED Board
Removing the LED Board
Installing the LED Board
System Board
Removing the System Board
Installing the System Board
VGA Board (for VGA Board Model)
Removing the VGA Board (for VGA Board Model)
Installing the VGA Board (for VGA Board Model)
CPU Cooling Module and Fan
Removing the CPU Cooling Module and Fan
Installing the CPU Cooling Module and Fan
Cpu
Removing the CPU
Installing the CPU
Ssd
Removing the SSD
Installing the SSD
Slot ODD Module
Removing the Slot ODD Module
Installing the Slot ODD Module
Disassembling the ODD Drive
Assembling the ODD Drive
Display Mask
Open Display Mask
Removing the Display Mask
Installing the Display Mask
Removing the Display Mask
Flat Display Mask
FL Inverter Board
Removing the FL Inverter Board
Installing the FL Inverter Board
Replacement Procedures
LCD Module
Open LCD Module
Flat LCD Module
CCD Board and MIC
Removing the CCD Board and MIC
Installing the CCD Board and MIC
Power Board, Switch Board and Logo LED Board
Removing the Power Board, Switch Board and Logo LED Board
Installing the Power Board, Switch Board and Logo LED Board
Button Board
Removing the Button Board
Installing the Button Board
Appendices
Appendix
Appendix A Handling the LCD Module
Appendix Contents
Appendix B Board Layout
System Board Front View
System Board Back View
Appendix C Pin Assignments
CN1 Power BD Connector (4-Pin
CN3 Hot Key BD Connector (6-Pin
CN4 Camera Cable Connector (5-Pin
CN6 LCD Cable Connector (40-Pin
CN10 Wireless LAN Module Connector (52-Pin
CN7 Modem Module Connector (12-Pin
CN12 MB to Touchpad BD Connector (14-Pin
CN13 Keyboard Cable Connector (34-Pin
CN17 Express Card Connector (26-Pin
MB to LED BD Connector (16-Pin
Battery Connector (9-Pin
Internal MIC Connector (2-Pin
Internal Speaker Cable Connector (6-Pin
Keyboard LED Cable Connector (4-Pin
FAN Connector (3-Pin
SO-DIMM0 Connector (200-Pin
SO-DIMM1 Connector (200-Pin
HDMI Port Connector (19-Pin
SATA ODD Connector (13-Pin
SATA HDD Connector (22-Pin
SATA SSD Connector (16-Pin
GPS / TV Module Connector (52-Pin
SIM Card Connector (6-Pin
USB#1 Connector (4-Pin
Display Port Connector (20-Pin
Esata Port Connector (11-Pin
FM Tuner Cable Connector (10-Pin
In 1 Card Connector (40-Pin
1394 Port Connector (4-Pin
CRT Port Connector (15-Pin
VGA BD Connector (242-Pin
AC-In Cable Connector (4-Pin
Jack470
RJ45 LAN Port Connector (14-Pin
Jack600
SPDIF / Head Phone Connector (6-Pin
Jack601
External MIC Connector (6-Pin
LOGO LED BD Connector (4-Pin
Touchpad BD to Main BD Connector (14-Pin
Touchpad Board
Touchpad Switch BD Connector (2-Pin
LED BD to Main BD Connector (16-Pin
Touchpad Module Cable Connector (12-Pin
Appendix D Keyboard Scan/Character Codes
Appendix E Key Layout
Advertisement
Quick Links
1
Chapter 1 Hardware Overview
2
Figure 1-1 ID Parts Description Placement
Download this manual
See also:
User Manual
Toshiba Personal Computer
Satellite A500
(PSAPx)
Maintenance Manual
TOSHIBA CORPORATION
S/ No
Satellite/Satellite Pro/A500/A505/A507/dynabook
Maintenance Manual
Table of
Contents
Previous
Page
Next
Page
1
2
3
4
5
Advertisement
Chapters
Table of Contents
6
Table of Contents
17
Chapter 2 Troubleshooting
39
Chapter 3 Diagnostic Programs
71
Table of Contents
145
Appendix
228
Table of Contents
Need help?
Do you have a question about the Satellite A505 and is the answer not in the manual?
Ask a question
Questions and answers
Related Manuals for Toshiba Satellite A505
Laptop Toshiba A500-ST5605 User Manual
A500-st5605 user's guide (248 pages)
Laptop Toshiba Portege A505-S6960 Specifications
Toshiba portege a505-s6960: specifications (4 pages)
Laptop Toshiba Satellite A505-S5993 Specifications
Toshiba satellite a505-s5993: specifications (4 pages)
Laptop Toshiba Satellite A505-S6004 Specifications
Toshiba satellite a505-s6004: specifications (4 pages)
Laptop Toshiba Satellite A505-S6005 Specifications
Toshiba satellite a505-s6005: specifications (4 pages)
Laptop Toshiba Satellite A505-S6009 Specifications
Toshiba satellite a505-s6009: specifications (4 pages)
Laptop Toshiba Satellite A505-S6017 Specifications
Toshiba satellite a505-s6017: specifications (4 pages)
Laptop Toshiba Satellite A505-S6020 Specifications
Toshiba satellite a505-s6020: specifications (4 pages)
Laptop Toshiba Satellite A505-S6025 Specifications
Toshiba satellite a505-s6025: specifications (4 pages)
Laptop Toshiba Satellite A505-S6033 Specifications
Toshiba satellite a505-s6033: specifications (4 pages)
Laptop Toshiba Satellite A505-S6965 Specifications
Toshiba satellite a505-s6965: specifications (4 pages)
Laptop Toshiba Satellite A505-S6969 Specifications
Toshiba satellite a505-s6969: specifications (4 pages)
Laptop Toshiba Satellite A505-S6970 Specifications
Toshiba satellite a505-s6970: specifications (4 pages)
Laptop Toshiba Satellite A505-S6973 Specifications
Toshiba satellite a505-s6973: specifications (4 pages)
Laptop Toshiba Satellite A505-S6979 Specifications
Toshiba satellite a505-s6979: specifications (4 pages)
Laptop Toshiba Satellite A505-S6980 Specifications
Toshiba satellite a505-s6980: specifications (4 pages)
Summarization of Contents
Chapter 1 Hardware Overview
1.1 Features
Overview of the Toshiba Satellite A500/A505/A507/Satellite Pro A500/A505/A507 laptop features.
1.2 System Unit Components
Detailed breakdown of the computer's internal hardware components and their specifications.
1.3 2.5-inch HDD
Specifications and details for the 2.5-inch Hard Disk Drive used in the system.
1.4 Solid Status Drive (SSD)
Information on the SATA Solid State Drive used in the laptop.
1.5 DVD Super Multi (+-R Double Layer)
Specifications for the DVD Super Multi drive, including read/write capabilities.
1.6 Power Supply
Functions and operation of the computer's power supply unit.
1.7 Batteries
Details on the main battery, RTC battery, and charging control mechanisms.
Chapter 2 Troubleshooting
2.1 Outline
Introduction to fault diagnosis procedures for Field Replaceable Units (FRUs).
2.2 Basic Flowchart
A guide to identifying faulty FRUs using a step-by-step diagnostic flowchart.
2.3 Power Supply Troubleshooting
Procedures to check and troubleshoot power supply issues, including LED indicators.
2.4 System Board Troubleshooting
Steps to diagnose and resolve issues related to the system board.
2.5 HDD Troubleshooting
Procedures to diagnose and fix problems with the Hard Disk Drive.
2.6 SSD Troubleshooting
Steps for troubleshooting the Solid State Drive.
2.7 Keyboard Troubleshooting
Procedures to check for keyboard defects or malfunctions.
2.8 Display Troubleshooting
Steps to diagnose and resolve issues with the computer's display.
2.9 ODD (Optical Disk Drive) Troubleshooting
Procedures to check and fix problems with the Optical Disk Drive.
2.10 LAN Troubleshooting
Steps to troubleshoot the Local Area Network connectivity.
2.11 Finger Print (Optional) Troubleshooting
Procedures to diagnose and resolve issues with the fingerprint reader.
2.12 Audio Test Troubleshooting
Steps to check for speaker or audio system malfunctions.
2.13 IEEE 1394 Test Troubleshooting
Procedures to diagnose issues with the IEEE 1394 interface.
2.14 Cooling Module Troubleshooting
Steps to check and resolve problems with the cooling module and fan.
Chapter 3 Diagnostic Programs
3.1 General
Introduction to diagnostic programs, classifying them into OPTION and DIAGNOSTIC TEST types.
3.2 Quick Start and Test Procedures
Guide to running various diagnostic tests and their procedures.
3.3 Options Menu Configuration
How to configure batch parameters, test item parameters, and LOG file settings.
3.4 Subtests
Detailed listing of diagnostic subtests categorized by hardware component.
3.5 System Test
Procedures for testing CPU, Boards, FAN, and other system components.
3.6 Memory Test
Detailed steps for testing BIOS ROM, Parity, Patterns, and extended memory.
3.7 Storage Test
Procedures for testing HDD and ODD components, including SMART tests.
3.8 Video Test
Steps for testing text modes, VGA modes, VESA video memory, and display components.
3.9 Communication (COMM) Test
Procedures for testing LAN card and 1394 port functionality.
3.10 Peripheral Test
Steps to diagnose Keyboard, Mouse, and LED related issues.
3.11 Error Codes and Description
Reference for error codes, their causes, and recommended actions.
3.12 Quick Test Item List
A summary list of quick test items for various devices with estimated test times.
Chapter 4 Replacement Procedures
4.1 General Replacement Information
Overview of replacement procedures, safety precautions, and tools required.
4.2 Battery Pack, PC Card, and Bridge Media
Procedures for removing and installing battery packs, PC cards, and bridge media.
4.3 Memory Module Replacement
Steps for removing and installing memory modules.
4.4 HDD Replacement
Procedures for removing and installing the Hard Disk Drive.
4.5 ODD Bay Module Replacement
Steps for removing and installing the Optical Disk Drive bay module.
4.6 Keyboard Replacement
Procedures for removing and installing the keyboard.
4.7 Wireless LAN Card Replacement
Steps for removing and installing the wireless LAN card.
4.8 Top Cover Replacement
Procedures for removing and installing the top cover assembly.
4.9 MDC Module Replacement
Steps for removing and installing the Modem Daughter Card module.
4.10 FM Module Replacement
Procedures for removing and installing the FM module.
4.11 Bluetooth Module Replacement
Steps for removing and installing the Bluetooth module.
4.12 Speakers Replacement
Procedures for removing and installing the left and right speakers.
4.13 Display Assembly Replacement
Steps for removing and installing the display assembly.
4.14 DC-IN, RJ11, and USB Cable Replacement
Procedures for removing and installing various cables.
4.15 LED Board Replacement
Steps for removing and installing the LED board.
4.16 System Board Replacement
Procedures for removing and installing the system board.
4.17 VGA Board Replacement
Steps for removing and installing the VGA board.
4.18 CPU Cooling Module and Fan Replacement
Procedures for removing and installing the CPU cooling module and fan.
4.19 CPU Replacement
Steps for removing and installing the CPU.
4.20 SSD Replacement
Procedures for removing and installing the Solid State Drive.
4.21 Slot ODD Module Replacement
Steps for removing and installing the slot-loading Optical Disk Drive module.
4.22 Display Mask Replacement
Procedures for removing and installing the open and flat display masks.
4.23 FL Inverter Board Replacement
Steps for removing and installing the Fluorescent Lamp inverter board.
4.24 LCD Module Replacement
Procedures for removing and installing the open and flat LCD modules.
4.25 CCD Board and MIC Replacement
Steps for removing and installing the CCD board and microphone.
4.26 Power Board, Switch Board, and Logo LED Board Replacement
Procedures for removing and installing power, switch, and logo LED boards.
4.27 Button Board Replacement
Steps for removing and installing the button board.
Appendices
Appendix A Handling the LCD Module
Precautions and guidelines for safely handling and installing the LCD module.
Appendix B Board Layout
Diagrams illustrating the front and back views of the system board layout.
Appendix C Pin Assignments
Detailed pin assignments for various connectors on the system board.
Appendix D Keyboard Scan/Character Codes
Tables listing keyboard scan codes for different keytop and shift states.
Appendix E Key Layout
Visual representations of keyboard layouts for various international language versions.
Table of Contents
Print
Rename the bookmark
Delete bookmark?
Delete from my manuals?
Login
Sign In
OR
Sign in with Facebook
Sign in with Google
Upload manual
Upload from disk
Upload from URL
Need help?
Do you have a question about the Satellite A505 and is the answer not in the manual?
Questions and answers