Table of Contents
Advertisement
Quick Links
www.GEAppliances.com
. . . . . . . . .2, 3
. . . . . . .4, 5
. . . . . . . . . . .6
Preparing to Install the
Air Conditioner . . . . . . . . . . . . . .7
Window Installation . . . . . . . .8-12
. . . . .13-15
Normal Operating Sounds . . . . .15
Consumer Support
Consumer Support . . . .Back Cover
Product Registration . . . . . . .17, 18
Warranty . . . . . . . . . . . . . . . . . . .19
Write the model and serial numbers here:
Model # __________________________
Serial # __________________________
Find these numbers on a label on the
side of the air conditioner.
Owner's Manual and
Installation Instructions
AGE14
AGE18
AGE21
3828A20514N
49-7508-1
03-05 JR
Advertisement
Table of Contents

Related Manuals for GE AGE21DH


Summary of Contents for GE AGE21DH
-
Page 1: Table Of Contents
www.GEAppliances.com Safety Instructions ..2, 3 Owner’s Manual and Installation Instructions Operating Instructions ..4, 5 AGE14 Care and Cleaning ...6 AGE18 AGE21 Installation Instructions... -
Page 2: Safety Instructions
IMPORTANT SAFETY INFORMATION. READ ALL INSTRUCTIONS BEFORE USING. WARNING! For your safety, the information in this manual must be followed to minimize the risk of fire, electric shock or personal injury. SAFETY PRECAUTIONS Use this appliance only for its intended Turn the mode control to OFF and unplug purpose as described in this Owner’s your air conditioner before making any... -
Page 3: Save These Instructions
www.GEAppliances.com WARNING! USE OF EXTENSION CORDS– 115-Volt models only Because of potential safety hazards under certain CAUTION: conditions, we strongly recommend against the DO NOT use an extension use of an extension cord. cord with any of the 230/208 volt models. However, if you must use an extension cord, it is absolutely necessary that it be a UL-listed, 14 gauge, 3-wire grounding type appliance... -
Page 4: Operating Instructions
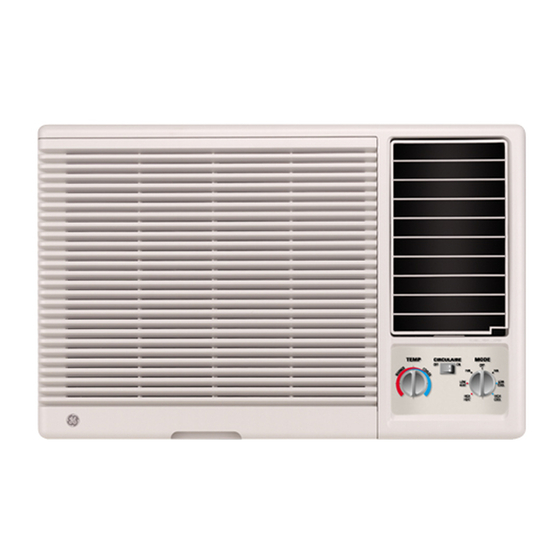
About the controls on the air conditioner. Features and appearance will vary. COOL TEMP CONTROL MODE CONTROL Controls Temp Control Mode Control HIGH COOL and LOW COOL provide cooling The temp control is used to maintain the room temperature. The compressor will with different fan speeds. - Page 5 www.GEAppliances.com Additional controls and important information. Vent Control The vent control is located above the To open the vent, pull the lever toward you. control knobs. To close it, push it in. When set at CLOSE, only the air inside the room will be circulated and conditioned.
-
Page 6: Care And Cleaning
Care and cleaning of the air conditioner. Grille and Case Turn the air conditioner off and remove the To clean, use water and a mild detergent. plug from the wall outlet before cleaning. Do not use bleach or abrasives. Outdoor Coils The coils on the outdoor side of the air conditioner should be checked regularly. -
Page 7: Installation Instructions
Installation Air Conditioner Instructions Questions? Call 800.GE.CARES (800.432.2737) or Visit our Website at: www.GEAppliances.com BEFORE YOU BEGIN CAUTION: Do not, under any circumstances, cut or remove the third (ground) prong from the Read these instructions completely power cord. and carefully. -
Page 8: Window Installation
Installation Instructions PARTS INCLUDED (Appearance may vary) Window sash seal Left mounting accordion Foam top rail panel window gasket Top mounting rail seal strip Frame guide (2) Right accordion panel Sill bracket (2) Support bracket (2) Window locking bracket Type A (14) Type B (7) Type C (5) Type D (2) -
Page 9: Window Requirements
Installation Instructions WINDOW REQUIREMENTS STORM WINDOW REQUIREMENTS • These instructions are for a standard A storm window frame will not allow the double-hung window. You will need to air conditioner to tilt toward the outside, modify them for other types of windows. and will keep it from draining properly. -
Page 10: Remove The Air Conditioner From The Case
Installation Instructions REMOVE THE AIR CONDITIONER PREPARE THE WINDOW AND FROM THE CASE THE CASE (CONT.) Remove the 2 shipping screws from the Carefully insert the plastic frame guides back of the case. into the bottom of the case on each side. Remove the 2 screws on each side of the case. -
Page 11: Install The Case In The Window
Installation Instructions PREPARE THE WINDOW INSTALL THE CASE IN THE WINDOW (CONT.) Loosely attach the sill brackets to the support brackets using the 2 carriage bolts Adjust the carriage bolts and the lock nuts and 2 lock nuts. in each support so that the case is installed with a slight tilt to the outside. - Page 12 Installation Instructions INSTALL A SUPPORT BRACKET INSTALL THE AIR CONDITIONER AND THE FOAM TOP WINDOW IN THE CASE GASKET Slide the air conditioner into the case. Reinstall the 2 screws removed earlier on Attach a support bracket with a Type C screw.
-
Page 13: Troubleshooting Tips
Before you call for service… www.GEAppliances.com Troubleshooting Tips Save time and money! Review the chart below first and you may not need to call for service. Problem Possible Causes What To Do Air conditioner • Make sure the air conditioner plug is pushed completely The air conditioner does not start is unplugged... -
Page 14: Before You Call For Service
Before you call for service… Troubleshooting Tips Problem Possible Causes What To Do Water drips outside • This is normal. Excessively hot and humid weather Water drips indoors • For proper water disposal, make sure the air conditioner The air conditioner is not tilted to the outside slants slightly from the case front to the rear. -
Page 15: Normal Operating Sounds
www.GEAppliances.com Normal Operating Sounds You may hear a pinging noise caused by Water will collect in the base pan during water being picked up and thrown against high humidity or on rainy days. The water the condenser on rainy days or when the may overflow and drip from the outdoor humidity is high. - Page 16 Notes.
-
Page 17: Product Registration
You can rest easy, knowing that all your valuable household products are protected against expensive repairs. 800.626.2224 Place your confidence in GE and call us in the U.S. toll-free at for more information. *All brands covered, up to 20 years old, in the continental U.S. -
Page 18: Serial Number
Month Year * Please provide your e-mail address to receive, via e-mail, discounts, special offers and other important communications from GE Appliances (GEA). Check here if you do not want to receive communications from GEA’s carefully selected partners. GE Appliances FAILURE TO COMPLETE AND RETURN THIS CARD DOES NOT DIMINISH YOUR WARRANTY RIGHTS. - Page 19 To schedule service, Proof of the original purchase on-line, 24 hours a day, visit us at GEAppliances.com, or call date is needed to obtain service 800.GE.CARES (800.432.2737). under the warranty. For The Period Of: We Will Replace: One Year Any part of the air conditioner which fails due to a defect in materials or workmanship.
-
Page 20: Consumer Support
Contact Us www.GEAppliances.com If you are not satisfied with the service you receive from GE, contact us on our Website with all the details including your phone number, or write to: General Manager, Customer Relations GE Appliances, Appliance Park...
Need help?
Do you have a question about the AGE21DH and is the answer not in the manual?
Questions and answers