Table of Contents
Advertisement
Quick Links
Advertisement
Table of Contents

Related Manuals for Zero 88 jester 48


Summary of Contents for Zero 88 jester 48
- Page 1 OPERATING MANUAL including &...
- Page 2 Web: www.zero88.com interference to radio communications. * 24 hour answerphone Zero 88 reserves the right to make Operation of this equipment in a changes to the equipment described in residential area is likely to cause this manual without prior notice.
-
Page 3: Table Of Contents
Contents JesterML Operating Manual Contents List Introduction......... 4 Fixture Control........31 This Manual ........4 DMX Input.......... 37 The JesterML ........5 Setup Mode ........40 Master Controls and Displays ... 6 MIDI Control ........51 Turning on the Desk......7 Numeric Entry ........ -
Page 4: Introduction
JesterML Operating Manual Introduction Introduction This Manual This manual describes the operation and programming of the JesterML, JesterML24 and JesterML48 lighting desks. It begins with a general description of the desks, the master controls, turning on the desk and the default state. The main sections cover the different operating modes of the desk, namely PRESET, PROGRAM and RUN. -
Page 5: The Jesterml
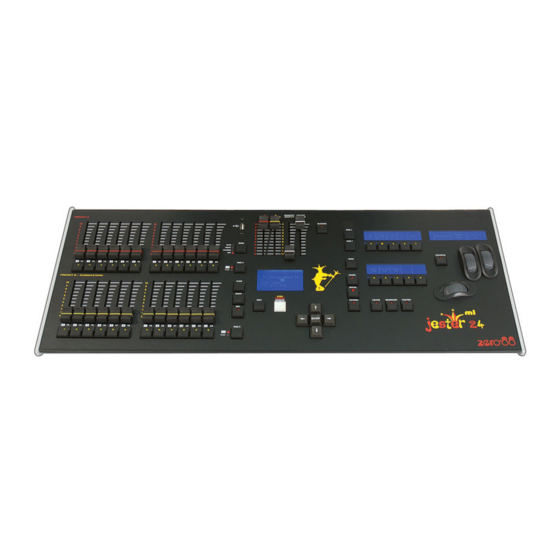
Introduction JesterML Operating Manual The JesterML The JesterML lighting desks are compact user-friendly memory desks which record channel levels and fixture information, and provide both theatre style sequential memory access and sub-master style access, as well as colour, beamshape and position palettes. -
Page 6: Master Controls And Displays
JesterML Operating Manual Introduction Master Controls and Displays These controls set the general operating conditions for the desk. MODE The MODE button is used to select the operational mode of the desk. The red LEDs to the left of the button show the current operating mode (SETUP, PRESET, PROGRAM, RUN). -
Page 7: Turning On The Desk
Introduction JesterML Operating Manual Blackout, Off = Normal). This is also replicated on the monitor, with flashing ‘BLACKOUT’ text on the screen. Both Blackout and the Grand Master do not affect LTP (fixture attribute) channels or channels grabbed from the DMX-input. PROGRAM/GO The PROGRAM/GO button is a multi-coloured, multi-function button which adapts to the mode in which the desk is currently set. -
Page 8: Preset Mode
JesterML Operating Manual Preset Mode Preset Mode PRESET Mode allows direct control of the fixtures, replay of palettes, and control of the 48 preset channels. Whichever desk you are using, you can connect another desk (wing) - e.g. a Jester24/48 – to the DMX Input to control the preset channels. See the section on DMX Input for further details. -
Page 9: Two Preset Operation
Preset Mode JesterML Operating Manual Two Preset Operation In two preset operation the PRESET A and PRESET B faders, the A MASTER and B MASTER and the GRAND MASTER are used to control the output levels from the desk. The fade time set with the middle wheel when SPECIAL is selected, is used to determine the crossfade time between the preset masters. - Page 10 JesterML Operating Manual Preset Mode Timed Crossfades between Scenes 1. Set the A MASTER and B MASTER to zero. 2. Set up a scene using the PRESET A faders. 3. Set up a different scene on the PRESET B faders. 4.
-
Page 11: Wide Mode
Preset Mode JesterML Operating Manual Wide Mode When operating in Wide Mode, you are able to crossfade between or combine two scenes which use all the faders on the desk. A scene is set up using the PRESET A and PRESET B faders. The PRESET A faders control the first half of the channels whilst the PRESET B faders control the second half of the channels. - Page 12 JesterML Operating Manual Preset Mode 8. The operations described in steps 5 - 8 can then be repeated to set up a new scene on the faders, crossfade to the new scene, and save it to a temporary store etc. Manual and Timed Crossfades Crossfading between the scene set up on the PRESETS and the stored scene is achieved by moving the A MASTER and B MASTER faders in tandem.
-
Page 13: Program Mode
Program Mode JesterML Operating Manual Program Mode Introduction Program Mode on the desk is used to select and create new memories or submasters and enter moving light data into Palettes. Once an item has been created it can be modified within Program Mode, and the contents re-stored. Memory Types There are two memory types which can be programmed on the JesterML desk. - Page 14 JesterML Operating Manual Program Mode channels in use, may cause the total number of memories to be less than 500. The desk software monitors the amount of memory used and displays a warning when the memory available is getting low, and when there is none left. NOTES Tagging By default, all fixture intensities and preset channels are recorded into every memory...
- Page 15 Program Mode JesterML Operating Manual press the button again, and the LED will go out. To save changes to a new location, first select that location using: Memory: cursor buttons • Submaster: Flash buttons, or PAGE B then Multi-Function-Keys • Palette: COLOUR, BEAMSHAPE or POSITION then Multi-Function-Keys •...
-
Page 16: Scene Memories
JesterML Operating Manual Program Mode Setting up the Desk for Programming 1. If the desk is in RUN Mode, press the MODE button to switch to PROGRAM Mode. If the desk is in any other mode, press and hold the MODE button for 1 second to enter PROGRAM Mode. - Page 17 Program Mode JesterML Operating Manual After programming a new scene memory or submaster, the JesterML will automatically clear the tag states ready for you to start programming the next item. Split Fade Times Sometimes you may wish a scene to have different up and down fade times. The JesterML allows you to define these times using the wheels.
- Page 18 JesterML Operating Manual Program Mode 5. To save the edits back to the original submaster, press the EDIT button again. The outputs remain unaltered. 6. To save the edits to a different location, select that location using: • Memory: cursor buttons •...
- Page 19 Program Mode JesterML Operating Manual Deleting a Palette 1. Use the Multi-Function-Keys to select the programmed palette you wish to clear. If you don’t want the palette to be played when it is selected, first ensure that no fixtures are selected. 2.
-
Page 20: Chase Memories
JesterML Operating Manual Program Mode Chase Memories Programming a New Chase 1. Set up the desk for programming as described above. 2. Select an unprogrammed item using: • Memory: cursor buttons • Submaster: Flash buttons, or PAGE B then Multi-Function-Keys 3. - Page 21 Program Mode JesterML Operating Manual between groups of letters. You can also use the cursor up or down buttons to alter the letter of the selected character, and the cursor left and right buttons to select different characters. If preferred, the Preset B Flash buttons on the JesterML24 and JesterML48 can also be used for name entry when the Multi-Function-Keys are displaying letters.
- Page 22 JesterML Operating Manual Program Mode Overwriting a Step 1. Use the up or down cursor buttons to select the required chase memory. 2. Press the right cursor button to select the Step field. 3. Use the cursor up or down buttons to select the step to overwrite. 4.
- Page 23 Program Mode JesterML Operating Manual 1. Press the CHANNEL FLASH button under the Submaster you wish to clear. You can also press PAGE B and use the Multi-Function-Keys to select a submaster. 2. Press and hold SHIFT with the CLEAR button for 1 second. The Submaster will be cleared.
-
Page 24: Run Mode
JesterML Operating Manual Run Mode Run Mode Introduction Run Mode on the desk is used to replay the previously recorded memories, submasters, and palettes. The programmed memories are stored in a stack and can be replayed one at a time in ascending numerical order. This allows the complete show to be replayed in order, simply by pressing the PROGRAM/GO button. - Page 25 Run Mode JesterML Operating Manual MONITOR The monitor shows details of the current and next memories, as well as all submasters. SPEED The speed setting (set using the wheels when CHASES is selected) is used to adjust the speed of all currently active chases.
- Page 26 JesterML Operating Manual Run Mode 4. Set the GRAND MASTER to full and ensure that blackout is not active (the LED in the BLACKOUT button is off). NOTES Editing ‘Live’ When changing from RUN Mode to PROGRAM Mode, it is the NEXT memory which will be selected for editing.
- Page 27 Run Mode JesterML Operating Manual Only programmed memories are selectable. Any unprogrammed memories are ignored. Presets in Run Mode When in Run Mode, the preset faders (Preset A) function as highest takes precedence (HTP) channels. Each channel can be increased in brightness by raising its appropriate fader (remember that Preset A will be controlled overall by the A MASTER).
- Page 28 JesterML Operating Manual Run Mode The Wheel LCD will indicate the operation of the PAGE B button: Page 7 : Submasters 1>10 Press PAGE B for 11>20 Repeated presses of the PAGE B button changes which submasters from the current page are available on the Multi-Function-Keys.
- Page 29 Run Mode JesterML Operating Manual 2. Press CHASES, and then move the middle wheel to set the desired speed. If you wish to adjust only the chase speed of the selected memory (as opposed to all active chases), ensure you hold down SHIFT whilst adjusting the speed. Beat Setting Sometimes it is desirable to set a chase to match the beat of music.
- Page 30 JesterML Operating Manual Run Mode The brightness attack (for dimmer channels and fixture intensities) can be set using the Multi-Function-Keys to one of the following, when CHASES is selected: Snap: Snap on-Snap off • Ramp Down: Snap on-Fade off • Ramp Up: Fade on-Snap off •...
- Page 31 Fixture Control JesterML Operating Manual Fixture Control Introduction The JesterML provides 30 buttons (3 pages of 10) which can be assigned to control intelligent fixtures (moving lights). Because each type of fixture has a different DMX channel allocation, the desk needs be told which sort of fixture it is controlling on each button, together with it’s DMX address.
- Page 32 JesterML Operating Manual Fixture Control NOTES Multiple Fixture Selection Multiple fixtures can be quickly selected by holding down the Multi-Function-Key for the first fixture, and pressing the Multi-Function-Key for the last fixture. This works in both directions. Be careful not to hold the Multi-Function-Key for too long or you may tag or untag the fixture –...
- Page 33 Fixture Control JesterML Operating Manual The Home Button The HOME button can be used for quickly sending the moving lights into their default position as defined in the fixture personality data loaded from the library. Typically this will be 50/50 Pan/Tilt, Open Colour, Gobo, Shutter, etc, and full Brightness. By pressing HOME, the selected fixtures will instantly move to these values and all parameters will be tagged for programming.
- Page 34 JesterML Operating Manual Fixture Control In Program Mode, applying a palette sets all the channels of the selected fixtures to their programmed values, and tags them for programming. These are tagged as references to the palette, so if a palette is updated at a later date, the new values will be automatically updated in all memories and submasters programmed using that palette.
- Page 35 Fixture Control JesterML Operating Manual When playing back moving light parameters, they are adjusted on the desk using a Latest Takes Precedence (LTP) philosophy. This means that when you play back a memory, submaster or palette which contains information for a moving light channel (or you take direct control with a wheel or the HOME button), it will change the parameters to their required values.
- Page 36 JesterML Operating Manual Fixture Control fixture button, until the LCD above the Multi-Function-Keys indicates that the tag state for the fixtures has changed. NOTES 16-bit parameters The Most-Significant-Byte (MSB) and Least-Significant-Byte (LSB) of 16-bit parameters are tagged or untagged together. It is not possible to tag or untag the MSB separately from the LSB.
-
Page 37: Dmx Input
DMX Input JesterML Operating Manual DMX Input There are 2 distinct modes that the DMX Input can work in. This is set using the Setup option DMX Input Setup: Wing Width 0 Displayed as <--->, this is the default setting, the 48 preset channels (defined by the patch) from the DMX Input are HTP mixed with the local presets, and do not operate in 2-Preset Mode or control Submasters. -
Page 38: Setup Mode
JesterML Operating Manual Setup Mode For DMX Input, only the first address specified in the DMX Patch is used to extract a brightness level for the channel. Duplicate addresses are ignored for the DMX Input. DMX Input Tutorial The example given below shows how to set up a Jester24/48 with a JesterML. Connect Up Connect up as shown below: Monitor... - Page 39 DMX Input JesterML Operating Manual • Return to the main Setup menu, and scroll down to find the DMX Input Setup menu. In this menu, set the Wing Width to 24. • Return to the main Setup menu, and hold MODE for a few seconds to leave Setup.
-
Page 40: Setup Mode
JesterML Operating Manual Setup Mode Setup Mode Introduction In SETUP Mode the presets and memory functions are disabled. You have the options of assigning fixtures and patching them, saving and loading show data, clearing all the programmed memories/submasters, clearing (resetting) the entire desk, as well as setting up numerous other options. - Page 41 Setup Mode JesterML Operating Manual unaffected by this operation. Plug the memory stick into the USB socket on the front panel of the desk. 2. Use the cursor buttons to select <Load/Save Show> and press ENTER. 3. Move to select <Erase Show> and press ENTER. 4.
- Page 42 JesterML Operating Manual Setup Mode using the up and down cursor buttons. Press ENTER when the DMX address has been set. The next fixture may now be patched by selecting it using the Multi- Function-Keys. The desk will not accept a DMX address which would an overlap with another patched fixture or preset channel.
- Page 43 125 manufacturers. This library is regularly added to and updates are available from the Zero 88 website. If the fixture you want to use cannot be found on the desk, you can create the personality information for it using the Fixture Type Editor utility supplied on the CD with the desk (a Windows®...
- Page 44 JesterML Operating Manual Setup Mode cursor buttons. Note that old files stored internally can be cleared from the <Update Fixture Lib> menu if required. Having selected the manufacturer of the fixture, press the down cursor button to move to the next line, and then use the left & right cursor buttons to select the fixture model.
- Page 45 Setup Mode JesterML Operating Manual beamshape parameter is tagged by the desk. The default setting for beamshape is ‘Channel’. Position: All/Channel When set to ‘All’, if one position parameter is changed by moving a wheel, then all position parameters for the currently selected fixtures are automatically also tagged by the desk.
- Page 46 Setup menu. Changes to the recorded data can now be made as normal. If you forget the lock code for your JesterML, please contact Zero 88 Technical Support for assistance, and have the desk’s serial number to hand. You may be asked some questions to verify your identity and ensure that you have genuine reason to unlock a desk without knowing it’s lock code.
- Page 47 125 manufacturers. This library is regularly added to and updates are available from the Zero 88 website. To see which version of the library is installed on the desk, select <Update Fixture Lib> and press ENTER. The version number of the library will be displayed on the Main LCD.
- Page 48 JesterML Operating Manual Setup Mode 1. Select the <Memory Recovery> menu option using the cursor buttons, then press ENTER. 2. The mode can be toggled by pressing ENTER, then using the up or down cursor buttons to toggle between Memory Recovery On and Off. Once you’ve set the recovery mode as you require, press ENTER, use the cursor buttons to select <OK>...
- Page 49 Setup Mode JesterML Operating Manual For further information on what each parameter does, see the MIDI section of this manual. Select <OK> and press ENTER to return to the Setup menu. DMX Input Setup The Wing Width setting under this menu tells the JesterML where the split is between the top and bottom banks of faders on the desk (wing) connected to the DMX Input.
- Page 50 JesterML Operating Manual Setup Mode Test Mode This option is provided primarily for factory and dealer servicing only. It allows the hardware of the JesterML to be tested in isolation from setup options or programming in the show data, which can be useful in diagnosing some problems. Pressing a button will display it’s name on the Main LCD, optionally toggle nearby •...
-
Page 51: Midi Control
MIDI Control JesterML Operating Manual MIDI Control Simple MIDI Before using MIDI, you must first activate it in Setup. To do this, press and hold SHIFT and MODE, then navigate to the <MIDI Setup> option and press ENTER, then toggle the <Disabled> to read <Enabled>. Once MIDI is activated, plug in a MIDI cable from a keyboard to the MIDI ‘IN’... - Page 52 JesterML Operating Manual MIDI Control Velocity Sensing Some keyboards have this function. It enables the musician to control the loudness of the music by playing notes and chords delicately for soft music or hard for loud music. The MIDI signal that is transmitted by such instruments consists of a Velocity in the range 0 to 127.
-
Page 53: Other Features
To perform a software update on the JesterML, first download the file from the Zero 88 website and unzip it to the root directory on a USB Memory Stick. The USB Memory Stick must contain the .JOS file – the JesterML is not able to unzip a .ZIP file itself, nor navigate subdirectories. -
Page 54: Glossary (A To Z Of The Jesterml)
JesterML Operating Manual Glossary Glossary (A to Z of the JesterML) A Master The master fader which controls the level of the channels on Preset A. Address A DMX channel number from 1 - 512. Addresses (or more strictly Start Addresses) on fixtures are set using buttons or switches on the fixture itself. - Page 55 Glossary JesterML Operating Manual Blackout All Intensity channels at 0%. This is toggled by the use of the BLACKOUT button. Blackout is also known as DBO. Bounce Running a chase in forward then reverse, so that the steps are output 1,2,3,2,1,2… Also known as Auto-Reverse or Ping-Pong.
- Page 56 JesterML Operating Manual Glossary the button will flash. The additional parameters are accessed by repeatedly pressing the Colour button. Contrast The difference between the dark areas and the light areas on the LCDs. This can be customised in Setup. Copy In PROGRAM mode, a chase or a scene can be copied by first loading it using the EDIT button, and then saving it elsewhere using the PROGRAM button.
- Page 57 Glossary JesterML Operating Manual Direction The order in which chase steps are output. This can be forward, backward, bounce or random – set when CHASES is selected. DMX512-A Standard communications protocol for dimmers and moving lights. 512 channels of control are digitally multiplexed and sent down a cable to dimmers, which listen for their specific data, according to their start address.
- Page 58 This is a tool (supplied on the CD shipped with the desk, or available for download from the Zero 88 website), which runs on a Windows® PC, and allows you to create Fixture Personality information. Most commonly this is needed for very new fixtures which are not yet included in the Zero 88 Fixture Library, or where you wish to modify the settings from the library version.
- Page 59 Glossary JesterML Operating Manual Flash Button Pressing the flash button results in a temporary increase in brightness of the output for the duration of the flash button being held. The intensity channels are sent to 100% when the Flash button is pressed. This is a temporary action which is removed when the button is released.
- Page 60 The type of mains input connector on the inline PSU, sometimes shortened to simply IEC, or referred to as a kettle plug. .IFT The file extension used by Zero 88 for fixture personality information. The format of the data is not published, and is only compatible with PC applications supplied by Zero 88.
- Page 61 Glossary JesterML Operating Manual The curve of the dimmer, which is normally set on the dimmer itself. The JesterML does not allow you to control the fade law. Liquid Crystal Display – the JesterML has four of these. The area above the PROGRAM/GO button is the Main LCD and displays basic cue information.
- Page 62 JesterML Operating Manual Glossary Movement Effect The JesterML can generate a number of movement effects for fixtures which have Pan & Tilt parameters. Multi-Function-Key The JesterML has 10 of these, which change function depending on whether CHASES, SPECIAL, FIXTURES, COLOUR, BEAMSHAPE or POSITION is selected. The function of each button is indicated on the LCD above it.
- Page 63 Glossary JesterML Operating Manual Page A/B The PAGE A and PAGE B buttons allow you to switch the function of the preset faders. Page Up/Down The PAGE UP and PAGE DOWN buttons allow you to select the page for the Multi- Function-Keys.
- Page 64 JesterML Operating Manual Glossary Ping-Pong See Bounce. Playback Another name for the sequential memory stack. Also known as a Cue Stack or Memory Stack. Position Button This button turns the Multi-Function-Keys into Position Palette selection buttons, with the Wheels controlling parameters which are grouped into the Position attribute. If more than 3 Position parameters are available for the primary fixture, then the LED in the button will flash.
- Page 65 Glossary JesterML Operating Manual Random A function of chases, whereby the steps are output in a random order. This is useful for creating flicker flame effects. This is shown on the front panel as a “?”. Rate Another name for Speed. How fast a chase is running. Record See Program.
- Page 66 JesterML Operating Manual Glossary Size X/Y The X and Y size of a Movement Effect. The X and Y size of a Movement Effect are controlled by the wheels when the appropriate POSITION wheel group is selected for a fixture with Pan & Tilt. Setting one of these to 0 on an Ellipse effect creates a horizontal or vertical line.
- Page 67 Update/Upgrade The fixture library and the software on the desk may be updated from time-to-time. New versions are published on the Zero 88 website. Be sure to check regularly for updates. Universal Serial Bus. A standard for the transfer and storage of information. The JesterML has a USB port mounted on the front panel to allow storage of show files and fixture personality information.
- Page 68 5-pin (used for most DMX512-A devices). • Yellow The colour of the PROGRAM/GO button when the desk is in PRESET mode. Zero 88 The manufacturer of the JesterML. 68 of 73 73-406-00 Issue 2.0...
-
Page 69: Technical Specification
Technical Specification This section of the manual lists all the various inputs, outputs and connections to the desk. Power Supply Pin 1 Pin 2 Pin 3 +12V Pin 4 Not Used Shell Ground An inline external power supply unit is used to power the JesterML. This is connected to the desk via a 4-pin XLR connector. - Page 70 JesterML Operating Manual Technical Specification USB Port One external USB port on the front panel. Mass Storage Devices and Keyboards are supported. Note that due to internal resource limitations, the USB Keyboard will not operate when MIDI is enabled, or when in the Setup menus which require access to a USB Memory Stick (e.g.
-
Page 71: Index
Index 16-bit parameters, 35 Step, 20 Assign Fixtures, 42 Steps, 21 Attack, 24, 28 LCD, 13, 48 Brightness, 19 Load, 39 Colour,Beamshape,Position, 19 Lock/Unlock, 45 Audio In, 68 Low Memory, 12 Beamshape, 30 LTP, 26, 34 Palettes, 32 Memories Beat, 28 Inserting, 20 Blackout, 5 Naming, 19... - Page 72 Remote Step Input, 24 Inserting, 20 Remote Input, 47, 68 Submaster, 12, 26 Reset Desk, 46 Submasters Naming, 19 Mode, 33 Tag, 30, 34 Run Mode, 23 Untag, 34 Save, 39 Tagging, 13 Scene, 12, 15 Update Memory, 15 Fixture Lib, 46 Submaster, 15 Software, 52 Setup, 30...
- Page 73 Zero 88 For news, views and Tel: +44 (0)1633 838088 Usk House the latest software, Fax: +44 (0)1633 867880 Llantarnam Park visit our website at: email: sales@zero88.com Cwmbran www.zero88.com Web: www.zero88.com Gwent NP44 3HD 73-406-00 Issue 2.0 73 of 73...
Need help?
Do you have a question about the jester 48 and is the answer not in the manual?
Questions and answers