Table of Contents
Advertisement
Advertisement
Table of Contents

Related Manuals for Lexicon JAM MAN


Summary of Contents for Lexicon JAM MAN
- Page 1 User Guide...
- Page 2 DO NOT OPEN constitute a risk of shock. Lexicon Inc. 3 Oak Park Bedford, MA 01730 USA Telephone 781-280-0300 Copyright 1993, Lexicon Inc. Fax 781-280-0490 All Rights Reserved. Printed in the U.S.A. Lexicon Part #070-09276...
- Page 3 User Guide User Guide...
-
Page 4: Table Of Contents
Table of Contents Getting Started ................. 1 Loop Mode ................15 Introduction ................1 Basic Looping ............... 16 Front Panel Overview ............2 Punch In Loop .............. 16 Setting Audio Levels ............3 Make a loop ............. 17 Rear Panel Connections ............4 Add layers of sound to your loop ...... -
Page 5: Getting Started
Getting Started Introduction Each of these offers features which are Congratulations on your purchase of Want more? unavailable anywhere else — and all of them A second, optional footswitch allows JamMan. You now possess a unique new are designed to free you from programming. delay device which we believe will become complete footswitch control of all of the func- JamMan lets your tempo set the pace for... -
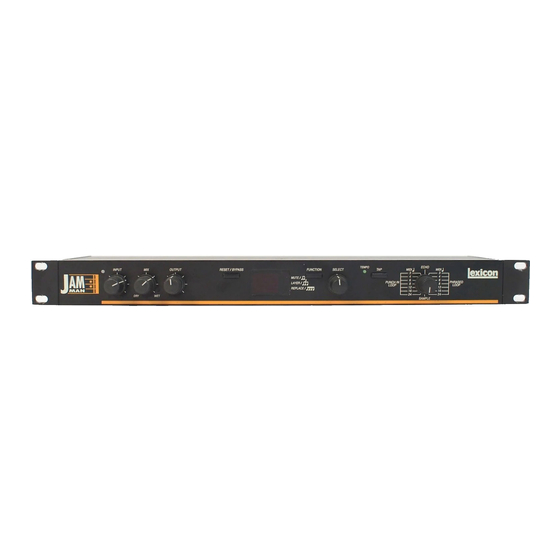
Page 6: Front Panel Overview
SELECT Front Panel Overview Depending on the mode of operation, selects feedback level, audio trigger TEMPO threshold, or selects a loop. Depending on the mode of operation, LED blinks at the current tempo, or lights DISPLAY during sample record and play. Significance of symbols varies with mode of operation. -
Page 7: Setting Audio Levels
Setting Audio Levels 5. If JamMan is using a console’s sends and 1. Turn the Mode knob to ECHO . returns, set the MIX control fully clock- wise (100% wet). If you are using an 2. Turn INPUT and OUTPUT all the way instrument amplifier, start with MIX set down (fully counter-clockwise). -
Page 8: Rear Panel Connections
POWER Two 5-pin DIN MIDI connec- output. If no connection is made at the right output, the left Use Lexicon MSA power pack, tors are provided for MIDI IN output can be used to drive headphones at modest volume. or 9VAC 1 amp equivalent. -
Page 9: Audio Connections
Audio Connections Headphones Footswitches Audio connections to JamMan are unbal- A stereo signal which is adequate to drive Footswitches connected via the rear- anced and should be made with high quality headphones is available at the left output panel footswitch jacks allow control of TAP shielded cables with 1/4"... -
Page 10: Modes Of Operation
Modes of Operation With ECHO , SAMPLE , and LOOP LOOP modes, JamMan is actually three complete ECHO SAMPLE PUNCH-IN PHRASED boxes behind a single, easy-to-use front RESET/BYPASS Reset at next panel. Each operating mode is selected Bypass Reset Reset loop boundary simply by turning the front panel Mode knob Mute at next... -
Page 11: Echo Mode
Echo Mode With JamMan, you no longer have to Once you’ve tapped in the basic rhythm Set Mode knob to ECHO . struggle with calculations of appropriate de- (for example, quarter-notes), pressing lay times to create rhythmic echoes when FUNCTION allows you to split the echo rate ECHO MIDI MIDI... -
Page 12: Basic Echo
Basic Echo FUNCTION Selects between tapped rhythm and three rhythmic variations (your tempo divided by 2, 3 or 4.) LED blinks at the current echo rate. When a new rate is tapped in, the LED lights solid on the first tap,then blinks LEDs show the currently selected at the new echo rate on the second tap. -
Page 13: Change The Echo Rate
When you run any sound through Jam- 3. Press FUNCTION again to hear your To select a new echo rate at any time, just Man, you will hear a very quick echo. (This is original echo rate change to eighth-note TAP twice. -
Page 14: More About Echo Mode
More about ECHO mode Pressing FUNCTION gives you four rhythmic Remember that it takes only two TAPs to variations of any rhythm you TAP ... set an echo rate ... If TAP is only pressed once, JamMan will Tapped-in Rhythm set the longest echo rate possible (8 sec- onds, or 32 seconds, depending on the memory capacity of your unit.) -
Page 15: Sample Mode
Sample Mode Once a sample is recorded, you can set it SAMPLE mode allows you to capture a Set Mode knob to SAMPLE . single sample of as long as 8 seconds (32 to play forward or backward. — You can ECHO even change direction as many times as you seconds with memory upgrade). -
Page 16: Basic Sampling
Basic Sampling FUNCTION Toggles “+” and “-”, selecting whether the recorded sample is to play forward LED lights during sample record, flashes or backward. on start of sample play. If no audio trigger is specified via LEDs are Inactive in this mode. SELECT, first push starts record- ing;... -
Page 17: Manually-Triggered Samples
Now, pressing TAP will trigger Manually-triggered samples Audio triggered playback sample play. Dual-segment 1. If you have already captured a sample, 1. Set SELECT to “1” to allow TAP to trigger chase lights will be displayed run an audio source into JamMan, and sample record start and stop. -
Page 18: Audio-Triggerred Record
Audio triggered record More about SAMPLE mode 1. If you have already captured a sample, If you are using an audio trigger and find press RESET/BYPASS. that the beginning of your sample is being cut off on playback, raise the audio thresh- 2. -
Page 19: Loop Mode
Loop Mode JamMan provides two versions of its JamMan sends out MIDI clock signals in RESET, MUTE and REPLACE can be auto- LOOP mode, PUNCH IN and PHRASED. the tempo established by your loop, allowing mated to start at the loop boundary by selecting These are differentiated primarily by whether sequencers, drum machines, or other Jam- PHRASED LOOP. -
Page 20: Basic Looping
Basic Looping SELECT DISPLAY Selects among a maximum of 8 loops. (Loop ID = Loop displayed is cued to begin at number is displayed.) The actual number of start of next phrase loops which can be made is determined by the = When recording first loop, length of your first loop. -
Page 21: Make A Loop
Punch In Loop Replace a portion of your loop Press FUNCTION to select the RE- 1 2 3 4 2 3 4 2 3 4 PLACE function. The LED will blink, indicat- Make a Loop ing that JamMan is ready to record. Press 1. -
Page 22: Playing With Multiple Loops
Playing with multiple loops Recording of 2nd loop automatically starts here The ability to make multiple loops is one of the features that sets JamMan apart, and Loop 1 2 3 4 2 3 4 Set SELECT to "2" any makes it an instrument you can play . -
Page 23: Things To Keep In Mind
• Once you've created a loop sequence, Things to keep in mind • A second footswitch connected to control loops can be selected (via SELECT, SELECT and FUNCTION allows you to • All loops in a sequence will be the same footswitch, or MIDI Program Change cue the next loop for recording without length. -
Page 24: Using Midi Clock
Using MIDI Clock No matter what tempo you TAP into JamMan recognizes and transmits MIDI For the following examples, we'll assume JamMan, the drum machine will always stay Clock, allowing you to synchronize con- a drum machine is connected to JamMan. in perfect sync. -
Page 25: Let Another Device Determine Jamman's Loop Size
Press TAP to start recording a loop. The Let another device determine TEMPO LED will light solid while the loop is TAP once to record a loop. JamMan's loop size being recorded. Unless a second TAP is Loop size is determined by the With a drum machine, or sequencer con- received before 4 beats have elapsed, RESET/BYPASS... -
Page 26: Adding Memory
These can be purchased through your sembling your unit. ICs can be damaged by Lexicon dealer, direct from Lexicon, or from static electricity, and incorrect insertion can computer electronics suppliers. If you pur- damage both the IC and your unit. Observe... - Page 27 5. Gently pull each IC out of its socket. Do not rock the ICs to loosen them. Put these aside so that you do not confuse them with the upgrade ICs. 6. Carefully align each new IC over a socket, with the beveled corner toward 1.
-
Page 28: Midi Implementation
MIDI Implementation Lexicon JamMan Function Transmitted Recognized Remarks Basic Default Can be disabled on power up Channel Channel Mode Defaullt Messages Altered Note Number True Voice Velocity Note ON Note OFF After Keys Touch Channels Pitch Bender Control 0-95 Change... - Page 29 Function Transmitted Recognized Remarks Program 1-20 mapped to front panel controls Change True # System Exclusive System :Song Pos :Song Sel Common :Tune System :Clock Real Time :Commands :Local ON/OFF Messages :All Notes OFF :Active Sense :Reset Notes: With the exception of MIDI Clock, all MIDI data received is echoed through the OUT port. 1.
-
Page 30: Midi Implementation Notes
MIDI Implementation Notes MIDI Program Change Map Pgm Chg # Loop mode Sample mode Echo mode All front panel controls can be accessed via MIDI Program Change messages as shown. These messages are recognized on reset (punch-in) reset bypass MIDI Channel 1. reset (phrased) reset bypass... -
Page 31: Midi Fade
Any changes made to Channel assign- MIDI Mute/Restart Once JamMan is muted this way, a second ment are temporary. Recognition of these MIDI Program Change 20 allows you to Program Change 20 will restart both the messages on Channel 1 will be re-enabled stop (mute) JamMan. -
Page 32: Specifications
Specifications Audio Inputs (2) Frequency Response Power Requirements Level -30dBu minimum 20Hz-15kHz, +1dB to -3dB 9VAC, 1A wall transformer provided Impedance stereo/50 k unbalanced Dry 20Hz-20kHz, +0.5dB Dimensions mono/25k unbalanced THD+N 19"W x 1.75"H x 4"D (483 x 45 x 102mm) Audio Outputs (2) Wet <0.05%@1kHz Weight...
Need help?
Do you have a question about the JAM MAN and is the answer not in the manual?
Questions and answers