
Related Manuals for Acer Aspire 7530 Series


Summarization of Contents
System Specifications
Features
Summary of the computer's many features, including OS, platform, memory, and I/O.
Platform
Details about the computer's processor, chipset, and graphics.
System Memory
Information on memory type, speed, capacity, and combinations.
Display and graphics
Specifications for the display resolution and graphics processor.
Storage subsystem
Details on hard disk drive and optical drive options.
Audio
Description of audio system features like surround sound and microphone.
Dimensions and Weight
Physical dimensions and weight specifications of the notebook.
Privacy control
Security features such as fingerprint solution and password protection.
Communication
Details on communication features like webcam, WLAN, and modem.
Power subsystem
Information on power management, ACPI, and power adapters.
Special keys and controls
Description of special keys like keyboard and touchpad.
I/O interface
Description of input/output ports like USB, HDMI, and card readers.
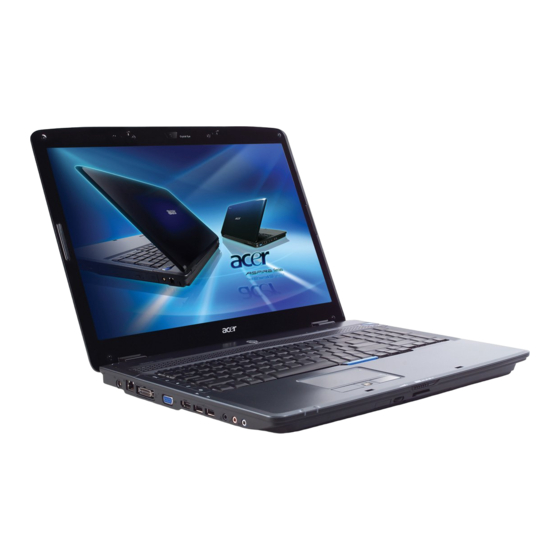
Your Acer Notebook tour
Front View
Identification of components on the notebook's front panel.
Closed Front View
Identification of components on the notebook when closed.
Left View
Identification of ports and connectors on the notebook's left side.
Right View
Identification of ports and features on the notebook's right side.
Rear View
Identification of components and ports on the notebook's rear.
Bottom View
Identification of components on the notebook's bottom side.
Indicators
Explanation of the various status indicator lights on the notebook.
Easy-Launch Buttons
Description of the quick-access function buttons on the keyboard.
Using the Keyboard
Lock Keys and embedded numeric keypad
Details on Caps Lock, Num Lock, and the embedded numeric keypad functionality.
Windows Keys
Explanation of keyboard shortcuts using Windows-specific keys.
Hot Keys
Description of function key combinations for system controls.
Special Key
Information on locating and using the Euro and US dollar symbols.
Using the System Utilities
Acer GridVista (dual-display compatible)
Guide to using the Acer GridVista utility for display management.
Hardware Specifications and Configurations
Processor
Detailed specifications for the CPU, including type, package, and core voltage.
CPU Fan True Value Table
Data table showing CPU fan temperature thresholds and RPM.
System Memory
Memory Combinations
Table showing possible RAM module combinations and total memory.
VGA Subsystem
Discrete Graphic (MXM)
Specifications for the MXM module graphics card.
Power
Power requirements for the VGA subsystem.
System Utilities
BIOS Setup Utility
Guide to configuring system BIOS settings and options.
Machine Disassembly and Replacement
Disassembly Requirements
Tools and precautions needed for disassembling the notebook.
General Information
Important instructions and notes before starting the disassembly process.
Disassembly Process
Outline of the stages involved in disassembling the notebook.
External Module Disassembly Process
External Modules Disassembly Flowchart
Visual guide for the sequence of external component removal.
Removing the Battery Pack
Procedure to safely remove the notebook's battery.
Removing the SD dummy card
Procedure to remove the SD card dummy from its slot.
Removing the ExpressCard dummy card
Procedure to remove the ExpressCard dummy card from its slot.
Removing the Lower Covers
Procedure to remove the bottom access covers of the notebook.
Removing the DIMM Modules
Procedure to remove and replace the system's RAM modules.
Removing the MXM Module
Procedure to remove the MXM graphics module.
Removing the TV Tuner module
Procedure to remove the TV tuner module.
Removing the WLAN Module
Procedure to remove the wireless LAN card.
Removing the Antenna, MIC and Speaker Cables
Procedure to disconnect audio and antenna cables from internal components.
Removing the LCD Module
Procedure to remove the notebook's LCD display assembly.
Removing the Upper Cover
Procedure to remove the notebook's top cover assembly.
Removing the Finger Print Reader
Procedure to remove the fingerprint reader module.
Removing the Touch Pad
Procedure to remove the notebook's touch pad.
Removing the Launch Board
Procedure to remove the launch board component.
Removing the Speaker Module
Procedure to remove the notebook's speaker module.
Removing the eKey Board
Procedure to remove the eKey board component.
Removing the Bluetooth board
Procedure to remove the Bluetooth module.
Removing the Subwoofer Module
Procedure to remove the subwoofer module.
Removing the ExpressCard Module
Procedure to remove the ExpressCard module.
Removing the Mainboard
Procedure to remove the notebook's motherboard.
Removing the CPU Fan Module
Procedure to remove the CPU cooling fan assembly.
Removing the CPU
Procedure to remove the Central Processing Unit (CPU) from the socket.
LCD Module Disassembly Process
LCD Module Disassembly Flowchart
Visual guide for the sequence of LCD module component removal.
Removing the LCD Bezel
Procedure to remove the bezel surrounding the LCD panel.
Removing the Inverter Board
Procedure to remove the LCD backlight inverter board.
Removing the Camera Module
Procedure to remove the integrated camera module.
Removing the LCD Panel
Procedure to remove the actual LCD panel from its assembly.
Removing the LCD Brackets and FPC Cable
Procedure to remove the LCD panel mounting brackets and FPC cable.
LCD Module Reassembly Procedure
Replacing the LCD Panel
Procedure to reinstall the LCD panel with its brackets and cable.
Replacing the LCD Bezel
Procedure to reinstall the LCD bezel onto the display assembly.
Main Module Reassembly Procedure
Replacing the CPU
Procedure to reinstall the Central Processing Unit (CPU) into its socket.
Replacing the CPU Fan Module
Procedure to reinstall the CPU cooling fan assembly.
Replacing the Mainboard
Procedure to reinstall the notebook's motherboard.
Replacing the Bluetooth Board
Procedure to reinstall the Bluetooth module.
Replacing the ExpressCard Module
Procedure to reinstall the ExpressCard module.
Replacing the Subwoofer Module
Procedure to reinstall the subwoofer module.
Replacing the Finger Print Reader
Procedure to reinstall the fingerprint reader module.
Replacing the eKey Board
Procedure to reinstall the eKey board component.
Replacing the Touch Pad
Procedure to reinstall the notebook's touch pad.
Replacing the Launch Board
Procedure to reinstall the launch board component.
Replacing the Upper Cover
Procedure to reinstall the notebook's top cover assembly.
Replacing the LCD Module
Procedure to reinstall the notebook's LCD display assembly.
Replacing the Antenna, MIC and Speaker Cables
Procedure to reconnect audio and antenna cables to internal components.
Replacing the Modem Module
Procedure to reinstall the modem module.
Replacing the Keyboard
Procedure to reinstall the notebook's keyboard.
Replacing the Switch Board
Procedure to reinstall the switch board component.
Replacing the Switch Cover
Procedure to reinstall the notebook's switch cover.
Replacing the ODD Module
Procedure to reinstall the optical disk drive module.
Replacing the Hard Disk Drive Module
Procedure to reinstall the hard disk drive.
Replacing the WLAN Board
Procedure to reinstall the wireless LAN board.
Replacing the TV Tuner Module
Procedure to reinstall the TV tuner module.
Replacing the MXM Module
Procedure to reinstall the MXM graphics module.
Replacing the DIMM Modules
Procedure to reinstall the system's RAM modules.
Replacing the Lower Covers
Procedure to reinstall the bottom access covers of the notebook.
Replacing the ExpressCard Dummy Tray
Procedure to reinstall the ExpressCard dummy tray.
Replacing the SD Dummy Tray
Procedure to reinstall the SD card dummy tray.
Replacing the Battery
Procedure to reinstall the notebook's battery pack.
Troubleshooting
Common Problems
List of common issues and corresponding solutions or page references.
Power On Issue
Steps to resolve problems when the system does not power on.
No Display Issue
Steps to resolve problems when the display does not show any output.
LCD Failure
Troubleshooting steps for malfunctions of the LCD screen.
HDD Not Operating Correctly
Steps to resolve issues related to the hard disk drive's operation.
ODD Failure
Troubleshooting steps for problems with the optical disk drive.
Intermittent Problems
Guidance for diagnosing and resolving issues that occur sporadically.
Undetermined Problems
Procedures for diagnosing system issues with unclear causes.
POST Codes Tables
Chipset POST Codes
Table detailing POST codes, functions, phases, and components for the chipset.
Jumper and Connector Locations
Top View
Identification of jumpers and connectors on the motherboard's top side.
Bottom View
Identification of jumpers and connectors on the motherboard's bottom side.
Clearing Password Check and BIOS Recovery
Clearing Password Check
Method to clear system passwords using a hardware jumper.
Steps for Clearing BIOS Password Check
Step-by-step guide to clearing BIOS supervisor and user passwords.
BIOS Recovery by Crisis Disk
Method for recovering the system BIOS using a crisis disk or USB.
FRU (Field Replaceable Unit) List
Aspire 7230/7530/7530G Exploded Diagram
Visual breakdown of the notebook's components with part numbers.
Aspire 7230/7530/7530G FRU List
Detailed list of Field Replaceable Units (FRUs) and their part numbers.
Model Definition and Configuration
Aspire 7230/7530/7530G Series
Configuration details for various models within the Aspire 7230/7530/7530G series.
Test Compatible Components
Microsoft® Windows® Vista Environment Test
Results of compatibility testing for various components under Windows Vista.
Need help?
Do you have a question about the Aspire 7530 Series and is the answer not in the manual?
Questions and answers