Table of Contents
Advertisement
Advertisement
Table of Contents

Related Manuals for Crest Audio CKI


Summary of Contents for Crest Audio CKI
- Page 1 CKi Amplifier Owner’s Manual...
- Page 2 Intended to alert the user to the presence of uninsulated “dangerous voltage” within the product’s enclosure that may be of sufficient magnitude to constitute a risk of electric shock to persons. Intended to alert the user of the presence of important operating and maintenance (servicing) instructions in the lit- erature accompanying the product.
- Page 3 WARNING: When using electrical products, basic cautions should always be followed, including the following: Read these instructions. Keep these instructions. Heed all warnings. Follow all instructions. Do not use this apparatus near water. Clean only with a dry cloth. Do not block any of the ventilation openings. Install in accordance with manufacturer’ s instructions. Do not install near any heat sources such as radiators, heat registers, stoves or other apparatus (including amplifiers) that produce heat.
-
Page 5: Table Of Contents
How To Use This Manual ....p.2 Introduction Conventions Installation ......p.3 Unpacking Mounting Cooling Requirements... - Page 6 Also, please fill out and return the enclosed product registration card. CKi amplifiers represent a new level of value and flexibility never before offered to the con- tracting market. S Series models are designed to drive low impedance speaker loads while V Series models feature a unique front end circuit to provide directly coupled 70.7 volt out-...
-
Page 8: Installation
Crest to obtain a replacement. Crest Audio CKi amplifiers are configured to a standard set-up at the factory.They are func- tional and ready to use ‘out of the box. ’ All controls and input/output connections are clearly labeled. - Page 9 19” (483mm) 17” (432mm) 17.1” (435mm)
-
Page 10: Powersave
On two an three space CKi amplifiers the fan will remain inactive until operating temperature rises to 45° C. One four space units the fan runs all the time. - Page 11 Controls and connectors Legend of panel symbols Air flow...
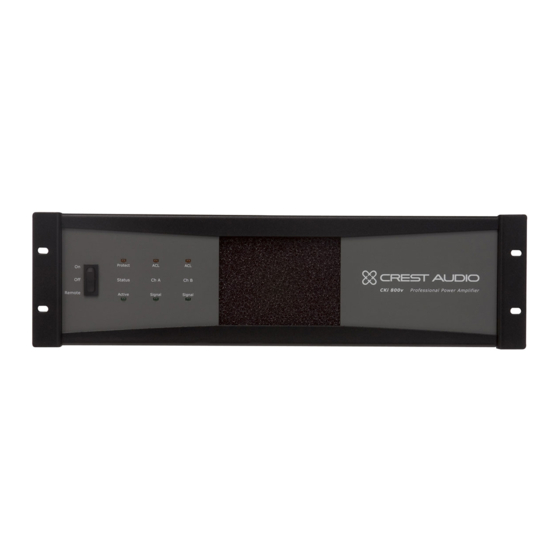
- Page 12 This chapter identifies the switches, indicators, connectors and functional com- ponents of all CKi amplifiers. Keep in mind that this chapter is only as an overview of the amplifier’s layout, and does not contain all the information nec- essary to effectively operate the CKi. For more detailed information on the items listed here, be sure to read this entire manual.
- Page 13 Signal LEDs Each channel has a Signal LED.The intensity of the light varies with sig- nal level – the stronger the input signal, the brighter the LED. Fan Grille & Filter A DC fan draws air into the amplifier though the removable dust fil- ter.
-
Page 14: Rear Panel
Sequential turn on/off Connectors These connectors can be wired to a contact closure for remote turn- on and to other CKi amplifiers for sequential turn-on (STO). Fault I/O Connector This output is a contact closure that can be used to report a fault con- Never connect a hot dition (e.g. -
Page 15: Front Panel
This switch disconnects the audio ground from the chassis ground in the amplifier. Module Bay All CKi amplifiers possess a module bay configured to accept inter- changeable plug-in modules. Your amplifier may have been factory configured with a module. Information on all CKi modules is available... -
Page 17: Bridged
Choosing the appropriate mode Switching between operation modes Special considerations when using bridged mode Connecting to a constant voltage Line... -
Page 18: Stereo
CKi-V and CKi-X Series amplifiers are designed for use with distributed or constant voltage systems. These amplifiers can also be wired for Bridged Mono mode operation, however, bridging these models is usually undesirable, as the output will be approximately 140V (CKi-V) or 200V (CKi-X) There are, how- ever, specific applications for this configuration. -
Page 19: Power
Connecting the amplifier to AC power Proper signal paths Proper wiring schemes for output connectors Sequential turn on/off Additional operation considerations... -
Page 20: Input
Export Nominal 230Vac 50Hz for rated power output (safe operating range 200 - 264Vac ) All CKi series amplifiers use 3-Pin Phoenix connectors for attaching input sig- nals. Each connector is configured (from left to right) positive, negative, ground. Input Phoenix Connectors... -
Page 21: Output
Direct Outputs Direct Outputs Direct Outputs Bridged... -
Page 22: Output
Constant Voltage Output (V & X Models only) CV Line Ch. A CV Line Ch. B Constant Voltage Output (v & x Models only) CV Line Ch. A CV Line Ch. B Ch.A - Knob still attached Ch. B - Knob replaced with plug The attenuator knobs can be removed and replaced with plugs that are shipped with the amplifier.The procedure for attenuator knob removal is as fol- lows:... -
Page 23: Safety
In this position, a 0dBu (0.775 VRMS) input signal will produce maximum power at the amplifier’ s output.The standard factory setting is for x40 (32dB).The specifications for a specific CKi models in Appendix A contain more gain/sensitivity information. -
Page 24: Nexsys Modules
Repeating this wiring scheme with sub- sequent amplifiers allows entire systems of CKi’s to be wired for STO. CKi amplifiers come standard with a blank panel fixed over the module bay. When a NexSys module is installed in this bay, connection to a network is made via a standard RJ-45 connector and CAT -5 Ethernet cable. - Page 25 The owner’s role in amplifier safety Protecting your speakers Description of protection features...
-
Page 26: Specifications
Your CKi Series amplifier is very powerful and can be potentially dangerous to loudspeakers and operators alike. It is your responsibility to read all precau- tions and make sure that the amplifier is installed, wired, and operated properly as instructed in this manual. - Page 27 CKi Series amplifiers incorporate several circuits to protect both themselves and loudspeakers. Crest Audio has attempted to make the amplifiers as fool- proof as possible by making them immune to short and open circuits, mis- matched loads, DC voltage and overheating. If a channel goes into ACL gain reduction mode, the speaker load will remain connected but clipping percent- age or output power will be instantly reduced.
- Page 28 Auto Ramp Signal Control Whenever a CKi Series amplifier powers up or comes out of a protect mode, the Auto Ramp circuit activates. While the speakers are discon- nected, the Auto Ramp circuit fully attenuates the signal. After the out- put relay closes, the signal slowly and gradually raises up to its set level.
-
Page 29: Module Features
General module information Installing a module Individual module features Using a module Setting amplifier IDs Amplifier monitoring via modules... -
Page 30: Installation
4. Slide the module into the bay, and fasten it to the CKi’ s chassis with the screws removed in Step #1. - Page 31 This following pages describe the buttons, indicators, connectors and func- tional components that are relevant to the two NexSys modules. These fea- tures exist on both the NxEthernet and NxCobranet Modules. Features specific to the NxCobranet Module are discussed later in this chapter. 1 2 3 4 5 6 0 ¡...
- Page 32 RJ-45 Network Connector The Neutrik ® EtherCon ® ruggedized RJ-45 connector allows connec- tion of the CKi amplifier to an Ethernet network.The jack accommo- dates a standard male RJ-45 connector or the male EtherCon ® con- nector. ¡ Data & Link LEDs The Data LED will flash when data packets are being sent or received by the module.
- Page 33 For more on software control of the modules’ fea- tures, see the NexSys Manual. The instructions in this chapter assume that a module has been mounted in the CKi amplifier and the user has a working knowledge of the module’s control panel layout. Making Network Connections The Network modules are connected to the network via standard CAT -5 Ethernet cabling using and RJ-45 connector.
- Page 34 Amplifier IDs can remain fixed even if the I.P.Address changes, making the amplifier’s settings and operating conditions easier to track. Additionally, creative use of the High and Low Values in the Amp ID can provide even more information about an amplifier. Since the two val- ues can be adjusted independently, the High Value could be used to des- ignate a group of amplifiers, while the Low Value would identify specific amplifiers in that group.
- Page 37 When to get support Ways to contact Crest Audio...
-
Page 38: Support
Crest To obtain service, contact your nearest Crest Audio Service Center, Audio’s Customer Service Distributor, Dealer, or any of the worldwide Crest Audio offices. For those with Internet access, please visit the Crest Audio web site. Customer Service Phone 201.475.4600... - Page 39 CKi 100S CKi 200S CKi 400S CKi 800S CKi 800-2S CKi 1200S CKi 1600S Stereo Power per channel 800W 1100W 1100W (both channels driven) 2 150W 300W 600W 600W 900W 1100W 100W 200W 400W 400W 600W 800W 1600 2200 2800...
-
Page 40: Constant Voltage
A distributed or constant voltage system, as shown in the figure For example, if the total power demanded by the speakers is 200 below, uses loudspeaker step-down transformers for each speaker.The watts, then: transformers are designed to deliver a specific power level into a spe- V2/P = 25 cific load impedance when a specific voltage (the example here uses 70.7 volts) appears at the primary. - Page 41 HEX TO DECIMAL CONVERSION TABLE 0000 0064 0128 0192 0001 0065 0144 0193 0002 0006 0129 0194 0003 0067 0130 0195 0004 0068 0131 0196 0005 0069 0132 0197 0006 0070 0133 0198 0007 0071 0134 0199 0008 0072 0135 0200 0009 0073...
- Page 42 Stranded Cable Length Wire Gauge Power Loss 8 Ω load 4 Ω load 2 Ω load meters 2.9% 5.6% 10.8% 1.74 0.75 1.16 0.58 1.16 0.35 0.70 1.39 0.22 0.44 0.87 meters 4.3% 8.2% 15.5% 0.75 10.8 1.45 0.87 1.74 0.55 1.09 0.37...
- Page 43 Stranded Cable Length Wire Gauge Power Loss 8 Ω load 4 Ω load 2 Ω load feet 0.81% 1.61% 3.2% 0.51 1.02 0.32 0.64 1.28 0.20 0.40 0.80 0.128 0.25 0.51 feet 1.61% 3.2% 6.2% 1.02 0.64 1.28 0.40 0.80 1.60 0.25 0.51...
- Page 44 Owner’s Manual Version 1.0 3/14/04 http://www.crestaudio.com...
Need help?
Do you have a question about the CKI and is the answer not in the manual?
Questions and answers