Advertisement
Display / Keypad Operation
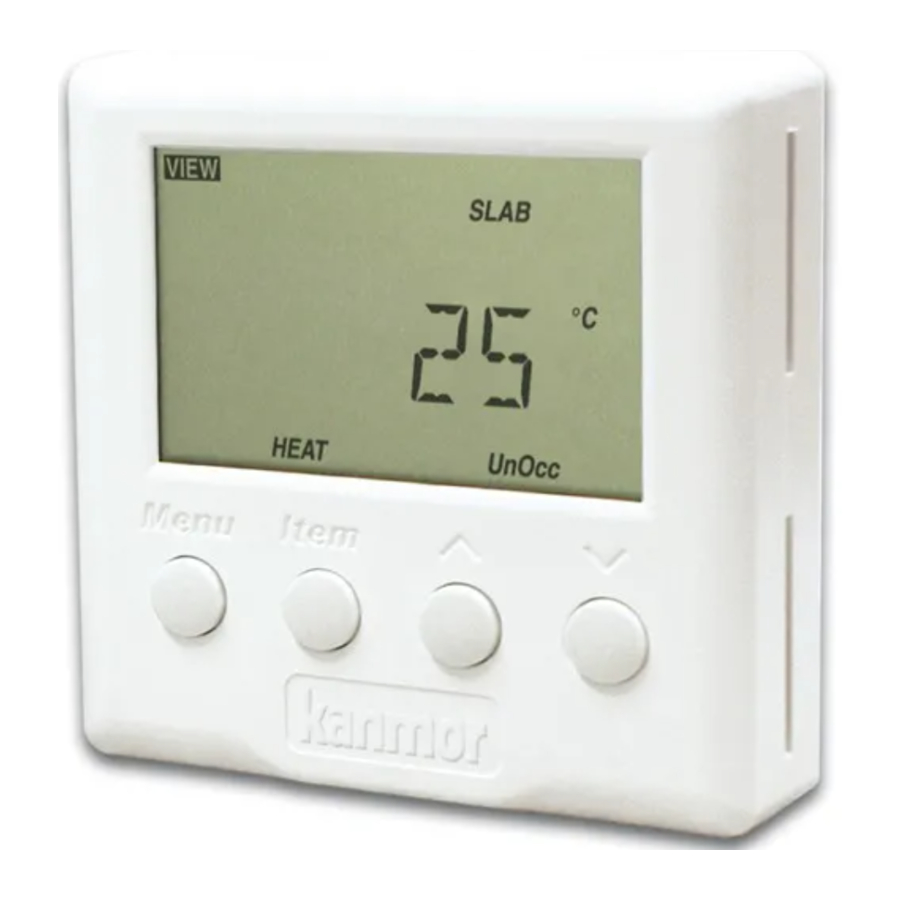
The thermostat's display has four distinct fields. These fields are the Menu field, the Item field, the Number field and the Status field. The four buttons on the face of the thermostat are used to navigate through the menus and items to view and / or adjust the desired settings.

Display Symbols
 | Warning Displays when an error exists. |
 | Access Level Displays when in the user access level. |
 | Early Start Displays when the thermostat is in early start. |
 | Heat One Displays when the heat one contact is on. |
 | Heat Two Displays when the heat two contact is on. |
 | Cool One Displays when the cool one contact is on. |
VIEWING THE CURRENT TEMPERATURE(S)
The View menu allows you to view the current temperature(s) being sensed by the thermostat and its auxiliary sensor(s). To view the various temperatures, begin by selecting the View menu using the Menu button. Next use the button to view the available temperatures.

Room: This is the current air temperature of the room that is being controlled. At least one air sensor must be active for this temperature to be displayed.
Outdoor:This is the current outdoor air temperature. This item is only available if the auxiliary sensor has been set to sense the outdoor air temperature.
Slab: This is the current slab temperature. This item is only available if at least one of the auxiliary sensors has been set to sense the slab temperature.
Remote: This is the current temperature at the remote sensor. This item is only available if the auxiliary sensor has been set to sense a remote temperature.
DEFAULT DISPLAY
The default display for the thermostat can be either the time found in the Time menu or any item in the View menu. To select the default display, use the following procedure.

Step One: Use the  button to select either the Time or the View menu.
Step Two: Use the  button to select the desired item.
SETTING THE TEMPERATURE(S)
A separate heating temperature can be set for each event of the schedule. If a slab sensor is connected to the control, a separate minimum slab temperature can be set for each event of the schedule. If the thermostat is used for cooling, a separate cooling temperature can be set for each event of the schedule. Use the following procedure to set each temperature.

Step One: Press and release the button until the Adjust Menu is reached.
Step Two: Press and release the button until the desired temperature is displayed.
Step Three: Use the  or
or  button to set the desired temperature. Record this temperature in the schedule table found.
Repeat steps two and three for each additional temperature.
SETTING THE TIME

Step One: Press and release the button until the Time Menu is reached.
Step Two: Press the button. While the minutes are flashing, use the or button to set the proper minutes.
Step Three: Press and release the Item button. While the hours are flashing, use the or button to set the proper hour.
Step Four: Press and release the button. While the day is flashing, use the or button to set the proper day.
SETTING THE SCHEDULES
A schedule allows the thermostat to automatically change between several preset temperatures based on the time of day. The schedule divides the day into either two or four events. For each event, a different temperature can be set. This allows the room and / or floor to be warm during the day and cooling during the evening and night. To set the time of day at which each event is to begin, use the following procedure.

Step One: Press and release the button until the Schedule (SCHD) Menu is displayed.
Step Two: Press and release the button. Use the or button to select the desired schedule Mode. None = one temperature per day. 2 = two temperatures per day. 4 = four temperatures per day.
Step Three: Press and release the button. Use the or button to select the schedule Cycle, either 7 day or 24 hour.
Step Four: Press and release the button. Use the or button to set the event's beginning time. If the event does not have a time, select the "- -: - -" time. This time is found between 11:50PM and 12:00AM. Record the event time in the schedule table found for future reference.
Repeat step four until all events have been programmed.
OVERRIDING THE SCHEDULES
Temporary Override
Note: A temporary override lasts for three hours and does not permanently change the existing schedule.

Step One: Press and release the button until the View Menu is displayed.
Step Two: Press and release the button until the Room temperature is displayed.
Step Three: Press the button to increase the temperature to the desired setting or the button to decrease the temperature to the desired setting.
A three-hour temporary override is now in effect.
Temporary Override for the 512e in the Heat / Cool mode
Note: A temporary override lasts for three hours and does not permanently change the existing schedule.
Step One: Press and release the button until the View Menu is displayed.
Step Two: Press and release the button until the Room temperature is displayed.
Step Three: Press and release either the or button once.
Step Four: Use the button to select between the Heating temperature and the Cooling temperature.
Step Five: Press the ![]() button to increase the temperature to the desired setting or the
button to increase the temperature to the desired setting or the ![]() button to decrease the temperature to the desired setting.
button to decrease the temperature to the desired setting.
A three-hour temporary override is now in effect.
Canceling a Temporary Override
To cancel a temporary override, press the button once or twice if back light is not lit.
Permanent Override
Note: A permanent override stays in effect until a new override is selected. A permanent override does not change the existing schedule.
Step One: Press and release the button until the Schedule (SCHD) Menu is displayed.
Step Two: Use the or button to select the desired permanent override.
Canceling a Permanent Override
To cancel a permanent override, use the following procedure.

Step One: Press and release the button until the Schedule (SCHD) is displayed.
Step Two: Use the or button to select the None setting.
Away Override
An Away override is a quick override that does not change your existing schedule. This is to be used during long periods of absence. When the Away override is selected, the heating temperature is set to 62°F (16.5°C) and the cooling temperature is set to 82°F (28.0°C) (Type 512e in Heat / Cool mode only). If a slab sensor is being used with the thermostat, the minimum slab temperature is also ignored. This operation continues as long as the Away override is selected. To select the Away override, use the following procedure.
Step One: Press and release the button until the Schedule (SCHD) Menu is displayed.
Step Two: Use the or button to select the Away override.
Canceling the Away Override
To cancel the Away override, use the following procedure.
Step One: Press and release the Menu button until the Schedule (SCHD) Menu is displayed.
Step Two: Use the or button to select the None setting.
DISPLAY LIGHTING
The display of the thermostat has a back light setting. The back lighting can be turned off, turned on or set to operate temporarily for 60 seconds after any button is pressed. To set the operation of the back lighting of the display, use the following procedure.

Step One: Press and release the button until the Adjust Menu is reached.
Step Two: Press and release the button until the word LITE is displayed.
Step Three: Use the or button to select the desired back light operation.
Note: If the back light setting is temporary, the first press of a button turns on the back light.
UNITS OF DISPLAY
To select between Fahrenheit and Celsius, use the following procedure.

Step One: Press and release the button until the Adjust Menu is reached.
Step Two: Press and release the button until the current temperature unit begins to flash.
Step Three: Use the or button to select between Fahrenheit and Celsius.
SETTING THE MODE OF OPERATION
Depending on the type of the thermostat that has been installed and its setup, there are several modes of operation that are available.

Off: In the off mode, the thermostat does not operate the heating or the cooling for the room.
Heat: In the heat mode, the thermostat operates to maintain the room at the required heating temperature. If you are using the type 512e for heating and cooling, this mode ensures that the cooling does not turn on even if the room requires cooling.
Cool: This mode is only available in the type 512e that is set up for heating and cooling. In the cool mode, the thermostat operates to maintain the room at the required cooling temperature and ensures that the heating does not turn on.
Auto: This mode is only available in the type 512e that has been set up for heating and cooling. This mode allows the thermostat to automatically switch between heating and cooling the room as the air temperature requires. If a slab sensor is installed, the floor maintains the minimum slab temperature even during cooling.
FOUR EVENT DEFAULT PROGRAM

FOUR EVENT USER PROGRAM

TWO EVENT DEFAULT PROGRAM

TWO EVENT USER PROGRAM

Documents / ResourcesDownload manual
Here you can download full pdf version of manual, it may contain additional safety instructions, warranty information, FCC rules, etc.
Advertisement

Need help?
Do you have a question about the 510e and is the answer not in the manual?
Questions and answers