Advertisement
- 1 PRODUCT REGISTRATION
- 2 SET UP & USE
- 3 CLEANING AND CARE
- 4 INSTALLATION INSTRUCTIONS
-
5
TROUBLESHOOTING
- 5.1 The unit doesn't start
- 5.2 The unit doesn't heat
- 5.3 Doesn't dry
- 5.4 The unit is noisy
- 5.5 The remaining time changes abnormally
- 5.6 Clothes are unevenly dried
- 5.7 Shuts off before load is dry
- 5.8 Odors remain in clothing after refresh
- 5.9 Garments still wrinkled after Wrinkle-prevent
- 5.10 Lint on clothes
- 6 SAFETY INFORMATION
- 7 Documents / Resources
PRODUCT REGISTRATION
Thank you for purchasing our BLACK+DECKER product. This easy-to-use manual will guide you in getting the best use of your product.
Remember to record the model and serial numbers. They are on a label on the back of the product.
Staple your receipt to your manual.
You will need it to obtain warranty service.
Model number
Serial number
Date of purchase
SET UP & USE
QUICK START GUIDE
DRYING A LOAD OF LAUNDRY
- Load the dryer with wet clothes. The drum should not be loaded more than ½ full.
- Close the Door.
NOTE: Unit will not start with the door open. - Press POWER to turn the unit ON.
- Turn the selector dial to an appropriate cycle for the load such as NORMAL.
- Continue to touch the DRYNESS key repeatedly to select Damp Dry, Less Dry, Normal Dry or More Dry. The corresponding selection will illuminate on the LED display.
- Press the Start/Pause button to start the cycle.
- The dryer will beep 3 times after the cycle is complete.
NOTE: Clean the filter after every load once the laundry is unloaded and empty the water tank after each use.
CONTROL PANEL

Symbols
 | Delay start |  | Wrinkle Prevent |
 | Control lock |  | My Cycle |
 | Clean filter |  | Buzzer sound open |
 | Water tank full (you should empty water tank) |  | Damp alert open |
Cycle phase status
 | Machine is drying with heat |
 | Machine is working with cool air |
 | Opening the dryer door is available |
 | Wrinkle care cycle is active |
- Power button
Press POWER to turn your dryer ON. If the dryer is powered ON for more than 10 minutes without any buttons being pressed, it automatically goes into standby mode. - Start/Pause button
Press START/PAUSE to start a cycle after all settings are programmed. Press START/PAUSE to pause a cycle. A cycle can be paused to add a garment. - Cycle selector
Select your desired cycle for the type of load. The cycle you select determines the heat control for the cycle.
Normal, Jeans, Perm Press, Quick Dry, My Cycle, Mixed Load, Heavy Duty, Bulky, Towels, Activewear, Delicates, Sanitize are Sensor cycles. Wool, Air Fluff, Time Dry, Refresh are Manual cycles.
| Dry Cycle | Load Description | Type of cycle |
| Normal | Cotton, cotton blends and most linens | Sensor Cycle |
| Jeans | Jeans | Sensor Cycle |
| Perm Press | Easy care synthetic fabric | Sensor Cycle |
| Quick Dry | Small quantities of clothing | Sensor Cycle |
| Wool | Wool suitable for a dryer | Manual Cycle |
| Air Fluff | Use to fluff pillows or down items | Manual Cycle |
| Time Dry | Manually set cycle according to time. Suitable for fabrics that can be dried using high heat. This cycle is useful for damp items where only a small amount of drying time is needed. | Manual Cycle |
| Refresh | Smooths out wrinkles | Manual Cycle |
| Sanitize | High heat sanitizes clothes | Sensor Cycle |
| Delicates | Loosely woven, delicate fabrics suitable for a dryer | Sensor Cycle |
| Activewear | Sportswear, spandex and high performance synthetic fibers | Sensor Cycle |
| Towel | Towels | Sensor Cycle |
| Bulky | Sheets and other bedding that need to be dried on high heat | Sensor Cycle |
| Heavy Duty | Fabrics suitable for high heat | Sensor Cycle |
| Mixed Load | Polyester and Polyester Blends | Sensor Cycle |
- Wrinkle Prevent
Press to activate Wrinkle Prevent. Press again to cancel selection. If Wrinkle Prevent is active, it will provide approximately 90 minutes of intermittent tumbling using unheated air at the end of the cycle to reduce wrinkling. Since the load is already dry, it can be removed at any time during the wrinkle care cycle. - Delay
To delay the start of your dryer up to 24 hours, press the Delay button to activate after the dry cycles have been selected. The number shown on the digital display will indicate when the dry cycle will start. 1 hour will be added to the start time each time you press the Delay button up to 24 hours. Once the delay time has been selected, press Start/Pause to activate. Pressing the delay button to exceed 24 hours until the display indicates 0H will deactivate the delay function and the display will turn off. To cancel the Delay Start function after the program has started, press POWER. - Time Adjust
For manual cycles, the drying time needs to be selected. Press Time Adjust repeatedly to select desired drying time and scroll between 120 minutes, 90 minutes, 60 minutes and 30 minutes. The selected drying time will be illuminated on the LED display. - Dryness
Press the button to select the dryness level, including More, Normal, Less or Damp Dry. The selection will illuminate on the LED display. Different dry levels will result in different drying time. For clothes to be ironed manually, a lower dry level should be selected. My Cycle The DRYNESS button is also used to save a drying cycle as a My Cycle setting. Select the settings you wish to save. Press and hold DRYNESS for 3 seconds. This will illuminate on the control panel. Turn the dial to My Cycle to use the saved setting. To change the saved setting to a different program, select the new settings. Press and hold DRYNESS again to save the new settings. - Signal
Press the button 3 seconds to mute the audible buzzer at the end of the cycle. - Damp Alert
The unit will beep for 10 seconds when the moisture in the clothes is ideal for ironing. At this time, you can take garments out and continue drying remaining items by pressing the "START/PAUSE" button once. - Control Lock
Acts as a Child Safety feature that prevents others from inadvertently changing settings. Press the![]() and "Damp Alert" together to activate the Control Lock function. The Control Lock light
and "Damp Alert" together to activate the Control Lock function. The Control Lock light ![]() will turn on.
will turn on.
When activated, all buttons except the "Power" will not be functional. Press these buttons again for 3 seconds to deactivate the Control Lock and the Control Lock light will turn off.
If the unit is powered Off using the "Power" button while Control Lock is active, the unit will resume the previous cycle when powered On again. Control Lock will be cancelled automatically if power is cut off from the unit, is unplugged during a cycle, a power outage occurs, or the unit is out of service.
 and "Damp Alert" together to activate the Control Lock function. The Control Lock light
  will turn on.
OPERATING INSTRUCTIONS
Opening the door during any cycle will instantly stop operation and will require pressing Start/Pause button to resume operation.
Dry Program Chart
| Cycle | Maximum Load Size (for wet clothes) | Dryness Level | Delay | Time Adjust | Damp Alert | Wrinkle Prevent |
| My Cycle | This is a setting to save a frequently used program. Select the setting you wish to save. Press and hold DRYNESS for 3 seconds. The  will illuminate on the control panel. Turn the dial to My Cycle to use the saved setting. To change the saved setting to a different program select the new setting. Press and hold DRYNESS again to save the new settings. will illuminate on the control panel. Turn the dial to My Cycle to use the saved setting. To change the saved setting to a different program select the new setting. Press and hold DRYNESS again to save the new settings. | |||||
| Normal |  | Damp Less Normal More | O | -- | O | O |
| Jeans | | Damp Less Normal More | O | -- | O | O |
| Perm Press | | Damp Less Normal More | O | -- | O | O |
| Quick Dry |  | Damp Less Normal More | O | -- | O | O |
| Wool | | / | O | -- | -- | O |
| Air Fluff | | / | O | O | -- | O |
| Time Dry | | / | O | O | -- | O |
| Refresh | | / | O | O | -- | O |
| Sanitize | | More | O | -- | -- | O |
| Delicates | | Damp Less Normal More | O | -- | O | O |
| Activewear | | Damp Less Normal More | O | -- | O | O |
| Towels | | Damp Less Normal More | O | -- | O | O |
| Bulky | | Damp Less Normal More | O | -- | O | O |
| Heavy Duty | | Damp Less Normal More | O | -- | O | O |
| Mixed Load | | Damp Less Normal More | O | -- | O | O |
| O= Optional | ||||||
- This dryer utilizes heat pump technology. The air is not as hot as a traditional vented dryer. It is more energy efficient and gentler on clothes but results in a longer drying time.
- For better drying, select higher dryness level and do not load more than ½ full with wet clothes.
Load size recommendations:
 Small Load: Fill the drum with 3-4 items, not more than ¼ full.
 Large Load: Fill the drum to about ½ full.

To reduce the risk of fire or explosion, do not dry items that have been previously cleaned, washed, soaked, or spotted with gasoline, dry cleaning solvents, or other flammable or explosive substances. They emit vapors that could ignite or explode. Any material that has been in contact with cleaning solvents or flammable liquids or solids should not be placed in the dryer until all traces of these flammable liquids or solids and their fumes have been removed. There are many highly flammable items used in homes, such as acetone, denatured alcohol, gasoline, kerosene, some liquid household cleaners, some spot removers, turpentine, waxes, and wax removers. Do not dry items containing foam rubber (may be labeled latex foam) or similarly textured rubber-like materials on a heat setting. Heated foam rubber materials can, under certain circumstances, produce fire by spontaneous combustion.
Sorting and Loading
- Always follow fabric manufacturer's care label.
- If using fabric softener or other products to eliminate static, follow all instructions on the product package. Improper use may cause stains.
- Do not overload. Overloading restricts tumbling action, resulting in uneven drying as well as excessive wrinkling of some fabrics.The drum should not be loaded more than ½ full.
- Mixed loads of heavy and light weight fabrics will dry differently, which may result in lightweight fabrics being dry while heavy fabrics remain damp at the end of a drying cycle. Add one or more similarly sized items to your dryer when only one or two articles of clothing need drying. This improves the tumbling action and drying efficiency.
- Small articles or items that can be tangled, can be dried in a laundry bag.
- Items with buttons should be buttoned up. Items with zippers should be zipped up. These items should be turned inside out to dry.
CLEANING AND MAINTENANCE
Unplug the power cord before cleaning any part of the unit. The dryer should be cleaned regularly. Failure to maintain the unit in a clean condition could lead to deterioration of the surface which could adversely affect the life of the appliance. Do not use harsh chemicals or solvents on any part of the machine or pour water or cleaner directly on it.
Cleaning the Exterior
Clean with a soft, damp cloth or a mild soap and water solution. Do not use abrasive powders or pads. Do not spray cleaners directly onto the control panel.
Cleaning the Drum
Use a damp cloth with a mild non-abrasive cleaner suitable for stainless steel and anodized surfaces. Remove the cleaner residue and dry with a clean cloth.
CLEANING AND CARE
Cleaning the Lint Filter
Do not operate your dryer without the lint filter in place.
Do not use a damaged or broken lint filter. This may reduce performance and/or cause fire.
To prevent a risk of fire, make sure to clean the lint filter after every load.

Pull out the lint filter. Remove the lint. Reinstall the filter.
Empty the Water Tank

- Pull out the water tank using both hands to avoid spilling water.
- Empty the water.
- Reinsert the water tank.
The water tank needs to be emptied after each use.
Do not operate the dryer without the water tank in place.
To avoid overflow, the dryer cycle will pause when the water tank is at capacity.
The  symbol will illuminate.
Once the water tank is emptied press Start/Pause to resume the cycle.
Cleaning the Base Filter and Heat Exchanger
Unplug before Cleaning.
Do not operate the dryer without the base filter and heat exchanger in place.
Clean the Base Filter Every 5th Cycle

- Open the heat exchanger access cover on the bottom left of the dryer by pressing on the tabs.
- Unlock the three levers and grasp the handle to pull out to remove.
- Remove lint and rinse using tap water to make sure all debris is removed.
- Clean all the rubber seals.
- Make sure it is completely dry before re-installing.
- Put the levers back into the lock position.
- Close the cover. There will be a click sound when it is closed completely.
Cleaning the Heat Exchanger Every 2 Months
The heat exchanger is located behind the base filter.
Do not touch the heat exchanger after the dryer has been in use. It may be hot and cause burns.
- Remove the lint from the heat exchanger using a vacuum cleaner with a dusting brush attached.
- Clean the heat exchanger without applying any pressure. Otherwise, the heat exchanger could be damaged. The dryer will not dry if the cooling fins are damaged or bent.
![]()

INSTALLATION INSTRUCTIONS
STORAGE:
Do not store the dryer in any area that it can be exposed to outdoor weather or cold temperatures.
For long term storage, or if dryer will not be used for a long period of time, disconnect the power supply. Clean inside of the unit and keep door open until dried thoroughly. Clean all filters and empty lint traps.
INSTALLATION
INSTALLATION WARNINGS AND PRECAUTIONS
- Plug the power cord into an AC 240 volt 60Hz wall socket rated at 30 amps or higher. Use the socket for this dryer unit only.
- Do not use an extension cord.
- Sharing a wall socket with another appliance, using a power strip, or extending the power cord may result in electric shock or fire.
- Do not use an electric transformer. It may result in electric shock or fire.
- Ensure that the power voltage, frequency, and current match the product's specifications. Failing to do so may result in electric shock or fire.
- Have this appliance installed by a qualified technician or service company.
- Failing to do so may result in electric shock, fire, explosion, problems with the product, or injury.
- Remove all foreign substances such as dust or water from the power plug terminals and contact points using a dry cloth on a regular basis.
- Unplug the power plug and clean it with a dry cloth.
- Failing to do so may result in electric shock or fire.
- Plug the power cord into the wall socket in the correct orientation so the prongs align with the slots in the receptacle.
- If you attempt to plug the power plug into the socket incorrectly, the electric wires within the cable may be damaged and this may result in electric shock or fire.
- Plug the power plug into the wall socket firmly. Do not use a damaged power plug, or loosen wall socket.
- This may result in electric shock or fire.
- Do not pull or excessively bend the power cord.
- Do not twist or tie the power cord.
- Do not hook the power cord over a metal object, place a heavy object on the power cord, insert the power cord between objects, or push the power cord into the space behind the appliance.
- This may result in electric shock or fire.
- Do not pull the power cord when unplugging the power plug.
- Unplug the power plug by holding the plug.
- Failing to do so may result in electric shock or fire.
- If the power plug or power cord are damaged, contact your nearest service center.
- Do not install this appliance near a heater or inflammable material.
- Do not install this appliance in a humid, oily, or dusty location, or in a location exposed to direct sunlight or water (rain drops).
- Do not install this appliance in a location where gas may leak.
- This may result in electric shock or fire.
- If the dryer is moved to a new location, have it checked and re-installed by a qualified service technician.
- Failing to follow this warning may result in electric shock or fire.
- Do not install on carpet. Install dryer on a level and solid floor that can support its weight.
- Failing to do so may result in abnormal vibrations, noise, or problems with the product.
- The dryer is heavy. Two or more people may be needed to install and move the appliance.
- Failing to do so may result in bodily or other injuries.
- Store and install the dryer where it will not be exposed to temperatures below freezing or exposed to outdoor weather conditions. Failing to do so may result in serious leak damage.
- Position the appliance so that the power plug is easily accessible.
- Failing to do so may result in electric shock or fire due to electric leakage.
- To reduce the risk of injury to persons, adhere to all industry recommended safety instructions.
- Failing to follow all safety warnings in this manual may result in property damage, or injury to persons.
PLEASE READ THE FOLLOWING INSTRUCTIONS CAREFULLY BEFORE INSTALLING THE DRYER.
These instructions should be kept for future reference.
The dryer is not suitable for installation in a mobile home.
Remove the door from all discarded appliances to avoid the danger of a child being trapped and suffocating.
When discarding unit, cut off Power Cord after unit is unplugged.
TRANSPORTING THE MACHINE
Handle the machine carefully. The door cannot be used as the handle while moving the unit.
UNPACKING AND REMOVING SHIPPING MATERIAL
Packaging materials can be dangerous to children;
Keep all packaging material (plastic bags, polystyrene, etc.) well out of children's reach.
Remove the packing box and lift the dryer up and away from the foam base.
NOTE: The dryer should be unpacked by 2 or more people due to the weight.
Remove the packing box and lift the dryer up and away from the foam base.
Open the door to remove the accessories.
Lay the unit down on its side to make sure all the small foam triangular pieces are removed from the bottom of the unit.

Do not operate this appliance on the foam base. It should be placed on a level floor.
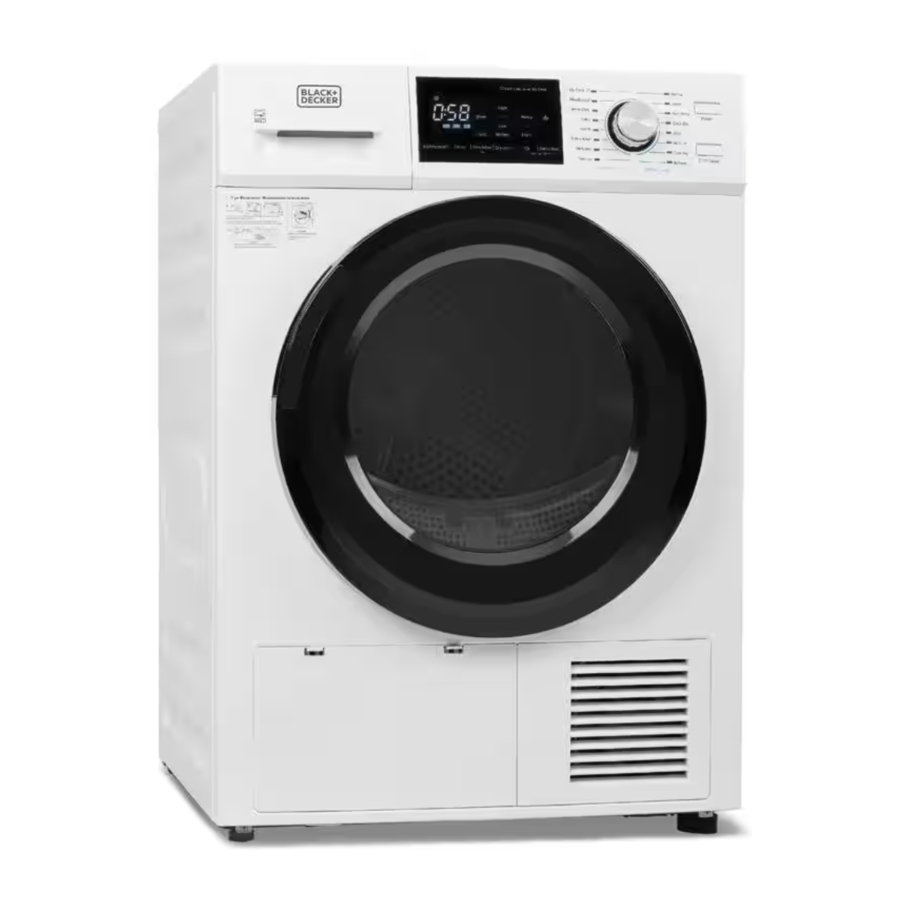
PARTS & FEATURES

CHOOSE THE PROPER LOCATION
Move your dryer to an appropriate location for the installation. Consider installing the dryer and washer side-by-side, to allow access to the electrical connections.
LOCATION REQUIREMENTS
- The dryer should be located where there is enough space at the front for loading the dryer, and enough space behind for the exhaust system.
- Make sure the room in which the dryer is located has enough fresh air. The dryer must be located where there are no air-flow obstructions.
- The dryer must not be installed or stored in an area where it will be exposed to water and/or weather.
![]()
The dryer area must be kept clear of combustible materials, gasoline, and other flammable vapors and liquids. - A dryer produces lint. The area around the dryer should be kept lint-free.
Alcove or closet or wall insert/recessed installations
No other fuel-burning appliance should be installed in the same closet as the dryer.
Minimum clearances between the dryer and adjacent walls or other surfaces:
| Sides | 1 in. (25.4mm) | Rear | 2 in. (50.8mm) |
| Top | 2 in. (50.8mm) | Closet front | 2 in. (50.8mm) |

| A | 1 in. (25.4mm) | C | 2 in. (50.8mm) | E | 25.7 in. (653mm) |
| B | 23.4 in. (595mm) | D | 2 in. (50.8mm) | F | 2 in. (50.8mm) |
Undercounter installation
| Sides | 1 in. (25.4mm) | Rear | 2 in. (50.8mm) |
| Top | 2 in. |

| A | ≥ 35.5 in. (≥ 901mm) | C | 23.4 in. (595mm) | E | 42.2 in. (1072mm) |
| B | 1 in. (25mm) | D | 1 in. (25mm) | F | 33.5 in. (850mm) |
TOOLS NEEDED

ELECTRICAL REQUIREMENTS
ELECTRICAL CONNECTIONS
You will need to purchase a UL dryer power cord kit, not provided with the unit unless the washer will be direct wired.
Turn off the circuit breaker.
The wiring diagram is located on the back board of the unit.
- The improper connection of the equipment grounding conductor can result in the risk of electric shock. Check with a qualified electrician or serviceman if you are in doubt as to whether your dryer is properly grounded. Do not modify the plug provided with your dryer. If it doesn't fit the outlet, have a proper outlet installed by a qualified electrician.
- To prevent unnecessary risk of fire, electrical shock, or personal injury, all wiring and grounding must be done in accordance with local codes, or in the absence of local codes, with the National Electrical Code, ANSI/NFPA No. 70 - Latest Revision (for the U.S.) or the Canadian Electrical Code CSA C22.1 - Latest Revisions and local codes and ordinances. It is your responsibility to provide adequate electrical services for your dryer..
An individual branch (or separate) circuit serving only your dryer is recommended.
DO NOT USE AN EXTENSION CORD
The dryer requires a 240 volt, 60Hz AC approved electrical service.
The electric service requirements can be found on the data label located on the back.
A 30-ampere fuse or circuit breaker on both sides of the line is required.
- If a power cord is used, the cord should be plugged into a 30 - ampere receptacle.
- The power cord is NOT provided with U.S. electric model dryers.
GROUNDING INSTRUCTIONS
This appliance must be grounded. In the event of malfunction or breakdown, grounding will reduce the risk of electric shock by providing a path of least resistance for electric current. This appliance is equipped with a cord having an equipmentgrounding conductor and a grounding plug. The plug must be plugged into an appropriate outlet that is properly installed and grounded in accordance with all local codes and ordinances.
Improper use of the grounding plug can result in a risk of electric shock.
Consult a qualified electrician or serviceman if:
- The grounding instructions are not completely understood.
- You are unsure that the appliance is properly grounded.
- You have any questions about the grounding or electrical instructions.
A 30-ampere fuse or circuit breaker on both sides of the line is required.- If a power cord is used, the cord should be plugged into a 30-ampere receptacle.
- The power cord is NOT provided with U.S. electric model dryers.
Improper connection of the equipment-grounding conductor can result in a risk of electric shock. Check with a qualified electrician or serviceman if you are in doubt as to whether the appliance is properly grounded.
RISK OF ELECTRIC SHOCK:
When local codes allow, the electrical supply of the dryer may be connected by means of a new power supply cord kit, marked for use with a dryer, that is UL listed and rated at a minimum of 240 volts, 30-ampere with three No. 10 copper wire conductors terminated with closed loop terminals, open-end spade lugs with turned up ends, or with tinned leads.
- Do not reuse a power supply cord from an old dryer. The power cord electric supply wiring must be retained at the dryer cabinet with a suitable UL-listed strain relief.
- Grounding through the neutral conductor is prohibited for (1) new branch-circuit installations, (2) mobile homes, (3) recreational vehicles, and (4) areas where local codes prohibit grounding through the neutral conductor. (Use a 4-prong plug for 4 wire receptacles, NEMA type 14-30R).
CONNECTING DRYER USING 3-WIRE CONNECTION:
3-Wire receptacle (10-30R)

Use a 3-wire power supply cord with ring terminals and UL listed strain relief. The 3-wire power supply cord, at least 4.92 ft. (1.5 m) long, must have 3 10-gauge solid copper wires and match a 3-wire receptacle of NEMA Type 10-30R, rated 240V, min 10A.
3-Wire system connections: Using a strain relief cord
- Remove the Neutral grounding wire from center terminal block screw of the dryer, then connect it to the external ground conductor screw and connect the neutral wire of the power cord to the center terminal block screw.
- Remove the two side terminal block screws and connect the other wires to the outer terminal screws. Be sure to cross the screw through the terminal ring and tighten the screw.
- Tighten the strain relief screws.
- Insert the tab of the terminal block cover into your dryer's rear panel slot. Secure the cover with a screw.
Ground Conductor
Please remove the Neutral grounding wire from center terminal block screw of the dryer, then connect it to the external ground conductor screw and connect the neutral wire to the center terminal block screw.

- Center terminal block screw
- External ground connector
- Neutral grounding wire (White)
- Neutral wire (white or center wire)
- ¾" (1.9cm) UL-listed strain relief
Ring-type terminals are recommended. If using strap terminals, make sure they are tightened.
CONNECTING DRYER USING 4-WIRE
CONNECTION
4-Wire receptacle
(14-30R)

Purchase a 4-wire power supply cord with ring terminals and UL listed strain relief. The 4-wire power supply cord, at least 4.92 ft. (1.5 m) long, must have 4 10-gauge solid copper wires and match a 4-wire receptacle of NEMA Type 14-30 R, rated 240V, min 10A. The ground wire (ground conductor) may be either green or bare. The neutral conductor must be identified by a white color.
4-Wire system connections: Using a strain relief cord

- Remove the center terminal block screw.
- Connect the ground wire (green or unwrapped) of the power cord to the external ground conductor screw.
- Connect the neutral wire (white or center wire) of the power cord and the appliance ground wire (white) under the center screw of the terminal block. Be sure to cross the screw through the ring of the power cord terminal and tighten the screw.
- Connect the other wires to the outer terminal block screws. Be sure to cross the screw through the terminal ring and tighten the screw.
- Tighten the strain relief screws.
- Insert the tab of the terminal block cover into your dryer's rear panel slot. Secure the cover with a screw.
Ring-type terminals are recommended. If using strap terminals, make sure they are tightened.
Risk Of Electric Shock
3-WIRE SYSTEM CONNECTION.
The dryer frame is grounded to the neutral conductor at the terminal block. A 4-WIRE SYSTEM CONNECTION is required for new or remodeled construction, mobile homes, or if local codes do not permit grounding through neutral conductor. If the 4-wire system is used, the dryer frame cannot be grounded to the neutral conductor at the terminal block. Refer to the "Electric requirements" section for
3-WIRE or 4-WIRE SYSTEM CONNECTIONS.
Remove the terminal block cover plate.
Insert the power cord with a UL-listed strain relief through the hose provided in the cabinet near the terminal block.
- A strain relief must be used.
Do not loosen the nuts already installed on the terminal block. Be sure they are tight. Use a 3/8" (1 cm) deep well socket.
For Direct Wire Connections
If a power cord is not used and the electric dryer is to be permanently wired, this appliance must be connected to a grounded metal, permanent wiring system, or an equipment-grounding conductor must be run with the circuit conductors and connected to the equipment-grounding terminal or lead on the appliance.
- The permanent wiring must be covered with flexible metal conduit.
- Use 10 gauge copper wire.
- Use a UL-listed strain relief.
- Disconnect power before making electrical connections.
3 Wire Direct Connections
- Move the neutral grounding wire (white) to the green ground connector
- Connect the neutral wire (center wire) to the center terminal
- Connect the remaining 2 wires to the terminal block screws on both sides.
- Securely tighten all electrical connections.
- Replace the terminal block cover.
Failure to do so can result in death, fire or electrical shock.

- Outer terminal block screws
- Live wire
- Neutral wire (center wire)
- Neutral grounding wire (white)
- Green ground screw
4 Wire Direct Connections
- Connect neutral wire (white or center wire) to center terminal.
- Ground wire (green or bare wire) must be connected to green ground connector.
- Connect remaining two supply wires to remaining two terminals.
- Securely tighten all electrical connections.
- Replace the terminal block cover.
Failure to do so can result in death, fire or electrical shock.

- Outer terminal block screws
- Live wire
- Neutral wire (center wire)
- Live wire
- Green ground screw
For a permanently connected dryer:
This dryer must be connected to a grounded metal, permanent
wiring system, or an equipment-grounding conductor must be run with the circuit conductors and connected to the equipment-grounding terminal on the appliance.
Improper connection of the grounding conductor can result in a risk of electric shock. Check with a qualified electrician, or service representative or personnel, if you are in doubt as to whether the appliance is properly grounded.
TO PREVENT ELECTRIC SHOCK, DISCONNECT POWER BEFORE
SERVICING. This dryer should be connected to an individual branch circuit with 10 gauge copper wire minimum through a 30 amp fuse or circuit breaker. DO NOT fuse neutral. Use copper conductors only.
Leveling the Dryer
To ensure that the dryer provides optimal drying performance, it must be leveled. To minimize vibration, noise, and unwanted movement, the floor must be a perfectly level, solid surface.
Adjust the leveling legs only as much as necessary to level the dryer. Extending the leveling legs more than necessary can cause the dryer to vibrate.
The leveling legs can be adjusted by turning them to raise or lower the leg with an adjustable wrench (not included).

After positioning the unit at its final location, it should not rock when pressing down on the top corners of the unit. A leveler can also be used. If the unit is not stable, the leveling legs should be adjusted to stabilize.

Before Starting the Dryer
Make sure all electrical connections are complete. Plug in your dryer. Make sure the dryer is plugged into an electrical outlet and is properly grounded. The dryer should be leveled and is sitting firmly on the floor.
Start the dryer to confirm that it runs, heats, and shuts off.
CONNECTING THE DRAIN HOSE

- Disconnect the drain hose from the water tank by pulling it out (To assure water tightness, there is tension between the hose and the inflow and therefore an increased force is required for removal).
- Remove the drain hose from the bracket on the back of the unit.
- Insert the drain hose into the connector. Connect the drain hose extender to the other side of the connector.
- Allow the hose to drain into a sink or basin. (Should not exceed a height of 32" or it could flow into a drain on the floor).


TROUBLESHOOTING
BEFORE YOU CALL FOR SERVICE
IF THE UNIT FAILS TO OPERATE:
- Check to make sure that the unit is plugged in securely. If it is not, remove the plug from the outlet, wait 10 seconds and plug it in again securely.
- Check for a blown circuit fuse or a tripped main circuit breaker. If these seem to be operating properly, test the outlet with another appliance.
IF NONE OF THE ABOVE SOLVES THE PROBLEM, CONTACT OUR CUSTOMER SATISFACTION CENTER. DO NOT TRY TO ADJUST OR REPAIR YOURSELF.

DO NOT RETURN THIS PRODUCT TO THE STORE
If you have a problem with this product, please contact the BLACK+DECKER Customer Satisfaction Center at 844-299-0879.
DATED PROOF OF PURCHASE, MODEL # AND SERIAL # REQUIRED FOR WARRANTY SERVICE.
TROUBLESHOOTING
Troubleshoot your problem by using the chart below. If the unit still does not work properly, contact BLACK+DECKER customer service center or the nearest authorized service center. Customer must never troubleshoot internal components.
| SYMPTOMS | SOLUTIONS |
The unit doesn't start |
|
The unit doesn't heat |
|
Doesn't dry |
|
The unit is noisy |
|
The remaining time changes abnormally |
|
Clothes are unevenly dried |
|
Shuts off before load is dry |
|
Odors remain |
|
Garments still wrinkled after Wrinkle-prevent |
|
Lint on clothes |
|
" " is lighting " is lighting |
|
" " is flashing " is flashing |
|
| Degree of dryness was not reached or drying time too long |
|
 " will flash and dryer will beep 5 seconds.
| Error | Possible Cause | Solutions |
 | Humidity | Please contact your local service center if the problem occurs. |
 | Temperature sensor error | |
 | Motor communication error | |
 | PCB communication |
SAFETY INFORMATION

Immediate hazards which WILL result in severe personal injury or death
Hazards or unsafe practices which COULD result in severe personal injury or death
Hazards or unsafe practices which COULD result in minor personal injury
IMPORTANT SAFETY INSTRUCTIONS
When using electrical appliances, basic safety precautions should be followed, including the following: READ ALL INSTRUCTIONS BEFORE USING THE UNIT
To reduce the risk of fire, electric shock, or injury to persons when using your appliance, follow basic precautions, including the following:
- READ ALL INSTRUCTIONS BEFORE USING THE APPLIANCE.
- Use this appliance only for its intended purpose as described in this Instruction Manual.
- Before use, the dryer must be properly installed as described in this manual.
- ALWAYS follow the fabric care instructions supplied by the garment manufacturer.
- Do not dry articles that have been previously cleaned in, washed in, soaked in, or spotted with gasoline, dry-cleaning solvents, other flammable or explosive substances as they give off vapors that could ignite or explode.
- Do not use the dryer to dry clothes which have traces of any flammable substance, such as vegetable oil, cooking oil, machine oil, flammable chemicals, thinner, etc., or anything containing wax or chemicals, such as mops and cleaning clothes. Flammable substances may cause the fabric to catch fire by itself.
- Do not store or use gasoline or other flammable vapors and liquids near this or any other appliance.
- Do not allow children to play on or in the appliance. Close supervision of children is necessary when the appliance is used near children.
- Before the appliance is removed from service or discarded, remove the door of the drying compartment.
- Do not reach into the appliance if the drum is moving.
- Do not install or store this appliance where it will be exposed to the weather or freezing temperatures.
- Do not tamper with the controls.
- Do not repair or replace any part of the appliance or attempt any servicing unless it is specifically recommended in the user-maintenance instructions or in published user-repair instructions that you understand and have the skills to carry out.
![]()
- Keep the area underneath and around your appliances free of combustible materials (lint, paper, rags, etc.), gasoline, chemicals and other flammable vapors and liquids.
- Do not place items exposed to cooking oils in your dryer. Items contaminated with cooking oils may contribute to a chemical reaction that could cause a load to catch fire. To reduce the risk of fire due to contaminated loads, the final part of a tumble dryer cycle occurs without heat (cool down period). Avoid stopping a tumble dryer before the end of the drying cycle unless all items are quickly removed and spread out so that the heat is dissipated.
- Packaging material can be dangerous for children. There is a risk of suffocation! Keep all packaging away from children.
- Always check the inside of the dryer for foreign objects before loading laundry. Keep the door closed when not in use.
- Do not use fabric softeners or products to eliminate static unless recommended by the manufacturer of the fabric softener or product.
- Clean the lint screen before or after each load.
- Keep the area around the exhaust opening and surrounding areas free from lint, dust, and dirt.
- Do not place items exposed to cooking oils in your dryer. Items contaminated with cooking oils may contribute to a chemical reaction that could cause a load to catch fire.
- This appliance must be grounded. See "Electric requirements" and "Grounding".
- This appliance must be properly grounded. Never plug the power cord into a receptacle that is not grounded adequately and in accordance with local and national codes. Refer to installation instructions for grounding this appliance.
- Ensure pockets are free from small irregularly shaped hard objects and foreign material, i.e. coins, knives, pins, etc. These objects could damage your dryer.
- Do not use heat to dry articles containing foam rubber or similarly textured rubber-like materials.
- Clothes dryer installation must be performed by a qualified installer. Install the clothes dryer according to the manufacturer's instructions and local codes.
- To reduce the risk of severe injury or death, follow all installation instructions.
- Save these instructions.
SAVE THESE INSTRUCTIONS
HOUSEHOLD USE ONLY
- Do not sit on top of the dryer.
- Do not dry clothing with large buckles, buttons, or other heavy metal or solid things.
- Install and use in accordance with the manufacturer's instructions.
- Do not place items in your dryer that have been spotted or soaked with vegetable oil or cooking oil. Even after being washed, these items may contain significant amounts of these oils.
- Residual oil on clothing can ignite spontaneously. The potential for spontaneous combustion increases when items containing vegetable oil or cooking oil are exposed to heat. Heat source such as your dryer can warm these items, allowing an oxidation reaction in the oil to occur.
- Oxidation creates heat. If this heat cannot escape, the items can become hot enough to catch fire. Piling, stacking, or storing these kinds of items may prevent heat from escaping and can create a fire hazard.
- Take care that children's fingers are not caught in door when closing it. This may result in injury.
Documents / ResourcesDownload manual
Here you can download full pdf version of manual, it may contain additional safety instructions, warranty information, FCC rules, etc.
Advertisement


Need help?
Do you have a question about the BDFH44M and is the answer not in the manual?
Questions and answers