Advertisement
Quick Links
Advertisement

Related Manuals for SVP DC-12V


Summary of Contents for SVP DC-12V
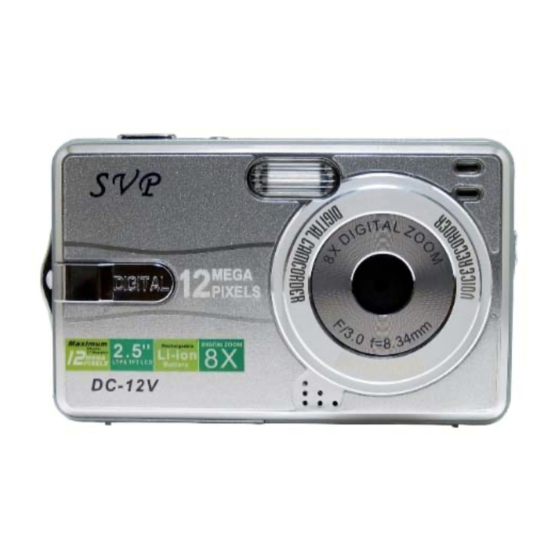
- Page 1 User`s Manual...
- Page 2 E N G L I S H Congratulations on your selection of this camera! This basic reference provides you with the general Basic Reference information you need to start using it. CONTENTS General Information ........Quick Reference........Driver and Software Installing....E-18 Downloading photos \ video to the PC..
- Page 3 Safety Precautions Should you ever notice smoke or a strange odor coming out the AC power outlet after you have switched off the camera.) of the camera, immediately turn it off. Next, taking care you Ensure that any connector cords or cables to other devices are do not burn your fingers remove the camera s battery and/or disconnected before moving the Camera.If the Digital camcorder unplung the AC adaptor cord from the power outlet.
- Page 4 Package Contents Please check if the fo llowing items are in the package when purchasing the product: Camera Rechargeable Li-ion battery Strap CD-ROM USB cable AC adaptor Pouch AV cable Basic reference Pouch Strap Handling Precautions The camera may become slightly warm during u se . This is normal and does not i ndicate malfun ction.
- Page 5 Basic Reference Getting to know your Video Camera Playback button Flash Record button SET button Lens Direction button Menu button Display button LCD screen Shutter button Battery cover Power and memory card slot Microphone Tripod Macro switch Strap holder USB port TV port...
- Page 6 Loading the battery into the camera the camera discharges very small amounts of power even 1. Slide the battery cover and then swing it open. when power is off, whicn can lead to a dead battery or the (+ -) (+ -) 2.
- Page 7 Using a Memory Card Monitor Screen 1.The camera has 16 MB built-in memory for recording. 2.The camera support max 2GB SD card or MMC card. Note: EV+0.5 When there is a memory card inserted, it will be the top priority for saving date. If you want to store date in the buit in memory, please remove the memory card first.
- Page 8 Recording an image 1.Press to enter the capture mode. 2.Point the camera at the subject, and use the monitor screen to compose the image. [SHUTTER] 3.Holding the camera still, gently press the button. When the image shown on the screen turning left, indicating the image is recorded.
- Page 9 Icon indicator 4000x3000 4000 1MIN Power Single Auto Save 2048x1536 2048 2MIN Continuous Sunny Cancel 1600x1200 1600 Default Capture White 10 S Setup 1024X768 1024 10 s Se lf-timer Tungsten mode Balance Resolu- tion 640X480 Built-in Fluorescent Movie memory 320X240 Recording Cloudy Voice recording...
- Page 10 CAPTURE White Balance Function: Five different effects can be selected. According to your requirement, you can adjust the color of pictures. Flash Function: You can select different capture mode ,movie (AVI) or voice ( WAV ). Note: When you are taking pictures, please hold the camera stably in Function: According to the light source, select the right flash mode order to shoot good pictures.
- Page 11 EV shift Resolution Function: According to your requirement, adjust the different Function: According to the current light source, adjust the resolution. exposure value. Normally, when the light is dark, the value should be plus; contrarily, the other way should be minus. Note : If the LCD is to dark, please adjust EV shift.
- Page 12 Time Stamp Setup mode Function: Before setting time stamp, please adjust time in setup mode. When it is set to ON , the capture time will be stamped on the below right of the photo. Animation Frame Rate Function: When this mode is set to be on , a logo which appointed Function: According to your requirement, set the frame rate of by the system will be shown after the digital video is turned on.
- Page 13 Beep Format Function: Formating the current media deletes all the data Function: Beep in use can be convenient to make sure your including protected images stored in it. Note that the data deleted operations to the menu have been done. by formatting can not be recovered.
- Page 14 Language Version Function: You can select your native language in eight supported language. Function: You can check the firmware version of your digital camera system. Sleep USB mode Function: When you set up to 1 minute or 2 minutes, the camera will turn off automatically when no operation is performed for 1 Function: Browse and edit the files in the camera via your minute or 2 minutes.
- Page 15 Fw Upgrade TV out Function: You can select the right TV- OUT system to fit your Function: You can upgrade the firmware version of your digital TV set. ( The TV-OUT system for US is NTSC.) camera system. Date Time How to get the fine pictures 1.
- Page 16 Recording Video Recording Voice 1. Press to select video mode, an icon will display on screen. 1. Press to enter the capture mode. [SHUTTER] 2. Holding the camera still, press the release [MENU] 2. Press to enter capture mode menu select button fully to start video recording.
- Page 17 Playback Delete Current 1.Press playback button 2.Use until the image you want to display. [SET] When the file is movie or voice, press to play, press [SET] again to stop. SET] When the file is photo format, please press button [MENU] [DISP] and press...
- Page 18 Start up USB MODE In USB mode, you can choose mass storage to use the camera as a removeable disk, and choose PC camera as a webcam. Mass Storage Download photos and video to computer Install Device Driver for USB Driver only use under WIN 98 / 2000 XP.
- Page 19 PC camera How to connect with a TV You can skip your pictures and videos on TV 1. Have your camera power on. Set your camera to PC mode. 2. Connect your camera and computer with the USB cable. Note: 3.
- Page 20 How to connect with a computer Installation mass storage driver and PC camera driver. Select the icon of Install Windows ME/2000/XP Driver the installation could be finished as the indication shown on the screen. Turn the camera into the PC Camera mode; connect the camera to the computer with the USB cable attached in the package.
- Page 21 Downloading photos / video to the PC Downloading photos / video to the PC Take Windows XP for example: b. Click Install Windows ME/2000/XP Driver , and the following a. Don not connect the camera to computer. Insert the dialog box appear: software CD into the CD-ROM, and the CD will run automatically.
- Page 22 Downloading photos / video to the PC Downloading photos / video to the PC d. Click Install to copy the document, the following dialog box c. Click NEXT , the following dialog box appears: appears: Set up- Video Camera Drivers Set up- Video Camera Drivers Ready to Install Completing the Video Camera...
- Page 23 Downloading photos / video to the PC Downloading photos / video to the PC f. Welcome to the Xvid Setup Wizard, click NEXT to continue. g. Please read the following License Agreement. You must accept the terms of this agreement before continuing with the installation. Set up- Video Camera Drivers Next Next...
- Page 24 Downloading photos / video to the PC Downloading photos / video to the PC i. Click NEXT , the following dialog box appears: h. Select Destination Location, and click NEXT to continue. Next Next...
- Page 25 Downloading photos / video to the PC Downloading photos / video to the PC k. Click Install to continue with the installation. j. Select the additional tasks you would like Setup to perform while installing XviD, then click NEXT. Next Install...
- Page 26 Downloading photos / video to the PC TROUBLE SHOOTING l. Click Finish to complete installation. Power does not turn on The battery is not oriented correctly. Please orient the battery correctly. The battery is dead. Please charge the battery. After turning on, camera suddenly turns off. The battery goes dead soon.
- Page 27 TROUBLE SHOOTING TROUBLE SHOOTING Image is not recorded when the shutter button Camera can not work as web cam over a USB is pressed. Connection. The camera is not in the capture or video mode. Please press The USB mode is not set as PC camera .
- Page 28 TROUBLE SHOOTING Cannot set protection or copy for the photos, video or voice. Please check if the files are selected or not. Camera becomes warm. This is normal and does not indicate malfunction. The image is blurry. You are moving the camera. Hold the camera still for a moment when you shoot or mount the camera on a tripod.
Need help?
Do you have a question about the DC-12V and is the answer not in the manual?
Questions and answers