Advertisement
Preface
Thank you for purchasing our laser engraving machine. This device is a high-tech product that integrates light, machinery, and electricity. In order for you to use and maintain the equipment better, please read the user manual carefully and follow the steps in the manual.
Disclaimer
Any losses caused by improper use or failure to follow the steps in the user manual will be borne by the individual. The final interpretation of the user manual belongs to our company, and we reserve the right to modify any information, data, technical details, etc. in the manual.
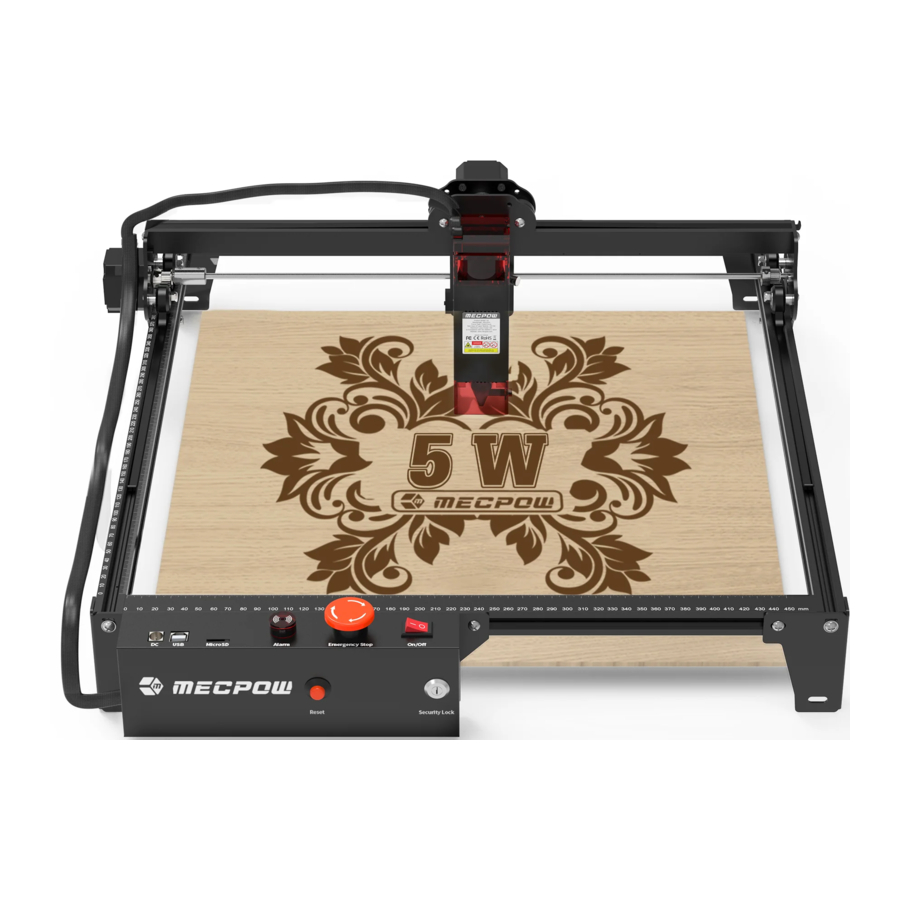
Diagram

- Rear X-Axis
- Left Y-Axis with Markings
- Right Y-Axis
- X-Axis Assembly
- Laser Module
- Front X-Axis with Markings
- Control Box

|
|
Specifications
| Model | X3 | X3 Pro |
| Product Size | 510x460x117 mm | |
| Package Size | 659x249x117 mm | 800x249x117 mm |
| Weight | 3.62 kg (N.W.), 4.31 kg (G.W.) | 3.67 kg (N.W.), 5.14 kg (G.W.) |
| Size of Laser Module | 40x40x60 mm | 40x40x80 mm |
| Net Weight of Laser Module | 200 g | 220 g |
| Material of Main Frame | High-Strength Aluminium Alloy | |
| Power Adapter | AC 100-240V (Input), DC 12V 5A (Output) | |
| Electrical Power | 60W | |
| Input of Laser | 12V, 1.7A | 12V, 3.4A |
| Laser Power | 5±0.5W | 10±1W |
| Wavelength | 445±5 nm | |
| Focal Length | 40 mm | |
| Spot Size of Laser Beam | 0.05x0.07 mm | 0.06x0.08 mm |
| Engraving Area | 410x400 mm | |
| Engraving Speed | 10000 mm/min | |
| Engraving Accuracy | 0.01 mm | |
| Method of Data Transmission | Wired Connection: USB Port (Type-B) | |
| Materials for Laser Engraving | Wood, Acrylic, China, Fabric, Bamboo, Plastic Board, Leather, Fruit, Bread, etc. | |
| Heat Dissipation | Fan Cooling | |
| Service Life | ≥10000 Hours | |
| System Support | Windows, Mac | |
| Software Support | LaserGRBL, LightBurn | |
| File Format Support | JPEG, BMP, GIF, PLT, PNG, DXF | |
| Flow of Air Pump | \ | 30L/m |
| Input Voltage of Air Pump | \ | 120V(US)/230V(EU) |
| Tilt Alarm | 50±5° | |
Package List

Assembly Guide
Step 1: Connect the front X-axis and Y-axes

Step 2: Install the X-axis assembly Slide the X-axis assembly into the Y-axes in the direction shown.

Step 3: Install the rear X-axis and rear stands

Step 4: Install the control box and front stand

Step 5: Connect the limit switch on the Y-axis

Step 6: Install and tighten the belts

- Slide the belts through the wheels in the direction shown. Please note that the gears of the belt should face down.
- Loosen the M5*8 screws with gaskets.
- Slide the belts through the holes above the M5*8 screws.
- Drag the belts hard and tighten the M5*8 screws firmly to fix the belts.
Step 7: Install the laser module

- Slide the laser module into the sliding plate.
- Tighten the manual screw to secure the laser module.
- Plug the cable into the laser module.
 Note: It is recommended to power off the machine for 10 minutes after 4 hours of engraving or 1 hour of cutting.
Step 8: Focusing

- Place the focusing screen on the object.
- Move the laser head above the focusing screen.
- Hold the laser module with one hand and loosen the manual screw slightly with the other hand to slide the laser head down slightly till it touches the focusing screen.
- Tighten the manual screw and remove the focusing screen.
Step 9: Power up the machine

- Connect the power adapter.
- Connect the machine to your computer via the USB cable.
- Insert the key and turn it clockwise till it is aligned with the green spot.
- Turn the emergency stop clockwise.
- Press the power switch and check the indicator light on the top of the laser module. Please note that the laser head is ready to work when the light is on. If the light is off, please reconnect the lasercable or the power adapter.
Functions & Operations
| Parts | Functions | Operations |
| Alarm | The alarm will sound and fl ash when something abnormal occurs. |
|
| Emergency Stop | It stops the machine from working immediately. | Press the button to stop the machine from working and rotate the button counterclockwise to get the machine back to work. |
| Reset Button | It resets the machine. | Press the reset button for 3 seconds. |
| Security Lock | It locks and unlocks the machine. | Unlock: Insert the key and rotate it counterclockwise. Lock: Rotate the key clockwise. |
| Flame Sensor Switch | It turns the flame sensor on/off. | On: The machine stops working automatically after detecting flames. Off: The flame sensor stops working. |
| Flame Sensor | It detects if there is a fire in or around the machine and activates the alarm while also halting the machine's operation in the event of a fire. |
|
| ||
| Tilt Sensor | It detects the tilt angle of the machine. When the machine tilts beyond 50±5°, it will trigger the alarm and stop the machine from working. | Make the machine tilt less than 45°. |
| Limit Switches | They stop the movement of the laser module when it moves to the home point of the X-axis or Y-axis. |
|
Driver
- Download the driver from the link below.
https://mecpow.com/pages/driver-files - Contact the customer service to get the file of the driver.
Note:
- For Windows users, if you're using a system below Win10, you'll need to install the driver manually. If you're using the Win10 system or above, there is no need to install the driver.
- The driver for Mac users supports OS X 10.9 to OS X 10.15 and OS X 11.0 (Big Sur) and above.
- The driver for Linux users supports 32-bit and 64-bit systems.
- Please turn on the machine and connect it to your computer via the USB cable before starting the driver!
Installation
For Windows Users:
- Open the downloaded driver.
- Click "INSTALL".
- Click "OK" when the driver is installed successfully.


For Mac Users:
- Open the instructions.
- Open the downloaded driver and follow the instructions to install it.
![]()

For Linux Users:
- Open the file - README.
- Open the f le - driver, and follow the "README" to install it
![]()

Software
MKSLaser (App)
MKSLaser is a free mobile control software that supports Android and iOS devices.
- Scan the QR code and download it.
![]()
![www.apple.com]()
![]()
![play.google.com]()
- For detailed instructions on how to use the MKSLaser app, please download the user manual for the app from the link below. https://mecpow.com/pages/download-center


Laser GRBL
It's a free open-source software that supports Windows computers. Download it from: http://lasergrbl.com/download/
- Install it.
- Open the software. Select "COM3" and click "Connect".
![]()
- Click "Open File" to select the engraving file.
![]()
- Select the engraving mode and click "Next".
![]()
- Select the operating parameters for laser engraving or cutting. (M3 is for constant power carving, and M4 is for variable power. Please check section Recommended Operating Parameters for recommended operating parameters for engraving or cutting different materials.)
![]()
- Click "Framing" to preview the engraving range and adjust the engraving position.
![]()


- Click "Run Program" to start engraving
![]()
Light Burn
It's a paid professional software that supports MAC, Linux and Windows computers. Download it from: https://lightburnsoftware.com/pages/trial-version-try-before-you-buy
- Install it.
![]()
- Open the software and click "Find My Laser".
![]()
- Select your device and click "Add Device".
![]()
- Name your device and enter the X-axis and Y-axis lengths, then click "Next".
Name: Mecpow X3
X Axis Length: 400mm
Y-Axis Length: 410mm
![]()


- Select "Front Left" as the origin of your laser and click "Next".
![]()

- Click "Finish".
![]()

- Select Mecpow X3 and click "OK".
![]()
- Click "Edit" - "Settings" and set the unit to "mm/min", then click "OK".
![]()
- Select "Current Position" in the "Start From" section, and then select the circle in the lower left corner in the "Job Origin" section.
![]()
- Click "File" - "Import" to import engraving file.
![]()
- You can modify the engraving size on the top of the interface after importing the file.
![]()
- Select the engraving mode and set the operating parameters for laser engraving or cutting. (Recommended operating parameters for engraving or cutting different materials are listed in the next section.).
![]()
- Click "Frame" to preview the engraving range and adjust the engraving position, then click "Start" to start engraving.
![]()


Recommended Operating Parameters
Mecpow X3 (5W)
| Mode | Materials | Power (%) | Speed (mm/min) | Note |
| Engraving | Wood Board | 100 | 2500 | |
| Bamboo | 100 | 2500 | ||
| Solid Wood | 100 | 2500 | ||
| Leather | 100 | 2000 | ||
| Glass | 100 | 700 | The surface needs to be painted. | |
| Ceramics | 100 | 700 | The surface needs to be applied with heat transfer paper. | |
| Acrylic | 100 | 1500 | The surface needs to be painted. | |
| Stainless Steel | 100 | 300 | ||
| Anodized Metal | 100 | 800 | ||
| Fabric | 40 | 5000 | ||
| Cutting | 2mm Thick Board | 100 | 180 | |
| 3mm Thick Board | 100 | 120 | ||
| 4mm Thick Board | 100 | 90 | ||
| Cardboard | 100 | 1500 | ||
| Leather | 100 | 100 | ||
| Fabric | 100 | 1500 |
Mecpow X3 Pro (10W)
| Mode | Materials | Power (%) | Speed (mm/min) | Note |
| Engraving | Wood Board | 100 | 5000 | |
| Bamboo | 100 | 5000 | ||
| Solid Wood | 100 | 5000 | ||
| Leather | 100 | 4500 | ||
| Glass | 100 | 1200 | The surface needs to be painted. | |
| Ceramics | 100 | 1200 | The surface needs to be applied with heat transfer paper. | |
| Acrylic | 100 | 2500 | The surface needs to be painted. | |
| Stainless Steel | 100 | 600 | ||
| Anodized Metal | 100 | 1500 | ||
| Fabric | 20 | 5000 | ||
| Cutting | 2mm Thick Board | 100 | 300 | |
| 3mm Thick Board | 100 | 250 | ||
| 4mm Thick Board | 100 | 200 | ||
| 7mm Thick Board | 100 | 90 | ||
| Cardboard | 100 | 2500 | ||
| Leather | 100 | 2000 | ||
| Fabric | 100 | 2500 |
Troubleshooting
- The machine doesn't respond when powered on.
- Check if the machine is properly plugged into the socket and turned on.
- The machine fails to connect to the computer.
- Check if the USB cable is properly connected to both the computer and the machine.
- Install the driver as instructed, and make sure the computer recognizes the device as a serial port.
- Disconnect the USB cable and power supply, wait for 5 seconds, and then reconnect.
- The engraving is too light or non-existent.
- Make sure the machine is accurately focused according to the manual.
- Adjust the engraving speed. If it engraves too fast, it may not have enough time to burn the object.
- The image is too shallow. Imported images need to be clear, with fine lines, and not too light in color, as this will directly affect the engraving effect.
- Ensure the object being engraved is placed fl at and parallel to the machine to avoid focusing issues.
- The offline engraving process stops unexpectedly.
- This may be due to incomplete image downloads during machine connection. Try downloading the image again.
Security Statement
Safety Precautions
* Laser processing can be risky, and users should carefully consider whether the object to be processed is suitable for laser work.
* The object being processed and emissions must comply with local laws and regulations.* This machine uses a Class IV laser (high-power laser radiation), which may cause the following situations:
- Ignition of surrounding flammable materials;
- During laser processing, other radiation and toxic and harmful gases may be produced, depending on the object being processed;
- Direct exposure to laser radiation can cause harm to the human body. There must be fire-fighting equipment in the workplace, and flammable and explosive materials must not be stacked around the workbench or machine. Good ventilation must also be maintained.
* The environment in which the machine is located should be dry, free from pollution, vibration, strong electricity, strong magnetism and other interference. The working ambient temperature should be 5-30°C, and the working ambient humidity should be 35-65%RH.
* The working voltage of the machine is AC100-240V.
* During the operation of the machine, it must be monitored throughout. Before leaving, all power must be cut off to prevent any unforeseen issues. If an abnormal situation occurs, please immediately cut off the power and deal with it!
* It is strictly prohibited to place any reflective or diff use objects in the machine that are not relevant to its operation to prevent laser reflection on the human body or flammable materials.
* The machine should be kept away from electrical equipment sensitive to electromagnetic interference, which may cause electromagnetic interference to it.
* It is strictly forbidden for non-professionals to disassemble the laser engraver as there may be dangers such as high voltage inside the machine.

- The laser engraving machine can produce laser light. It is strictly prohibited to place any living organisms under the laser emission (the port is marked with a yellow warning sign).
- Photosensitive patients are prohibited from using or getting close to the laser engraver.
- When using the laser engraving machine, the operator and anyone near the machine must wear laser safety glasses. Do not operate the laser machine without laser goggles. Our machine comes with a pair of laser safety glasses. If you want to purchase additional goggles, the goggles should off er wavelength protection between 400-445nm (+-5nm), have an outer diameter of +5, and meet a minimum L5 level.
- When the laser engraving machine is in operation, the user must pay close attention and not leave it unattended to avoid ignition of the engraved material. Place the machine in a fireproof area and ensure good ventilation. It is recommended to have a fire extinguisher nearby in case of emergencies.
- Make sure there are no flammable materials near the laser engraving machine. We recommend placing a honeycomb working table under the machine.
- When operating the laser engraver, ensure that there is enough space around it. Engraving certain materials may produce smoke, which should be vented out using a specialized exhaust system.
- Do not touch the laser beam or the object being processed while the machine is in operation, as this could cause serious injury or beam reflection. Additionally, avoid touching the radiator as it may be hot due to the laser engraving machine working or just recently stopping.
- Children or teenagers (especially those under 14 years old) are not allowed to use the laser engraving machine alone and should be supervised by an adult at all times.
- The operating temperature of the machine is 5°F-86°F (-15°C-30°C).
- When laser engraving, there is a risk of fire. When the laser engraving machine is in use, it must be supervised by a skilled operator who can use a fire extinguisher to handle any accidents that may occur.
- Our laser engraving machine is equipped with a built-in flame sensor to maximize the safety of our equipment. But please note that no written or implied warranty is made regarding the availability or functionality of the flame sensor.
Documents / Resources
References
![mecpow.com]() Driver Files
Driver Files![www.apple.com]() App Store - Apple
App Store - Apple![play.google.com]() Google Play
Google Play![mecpow.com]() Mecpow
Mecpow![lasergrbl.com]() Download – LaserGRBL
Download – LaserGRBL![lightburnsoftware.com]() Download / Trial – LightBurn Software
Download / Trial – LightBurn Software

Download manual
Here you can download full pdf version of manual, it may contain additional safety instructions, warranty information, FCC rules, etc.
Advertisement
Need help?
Do you have a question about the X3 and is the answer not in the manual?
Questions and answers