Advertisement
Your Ford Mustang eBike
Please read through this user manual prior to assembling and riding your Ford Mustang eBike.
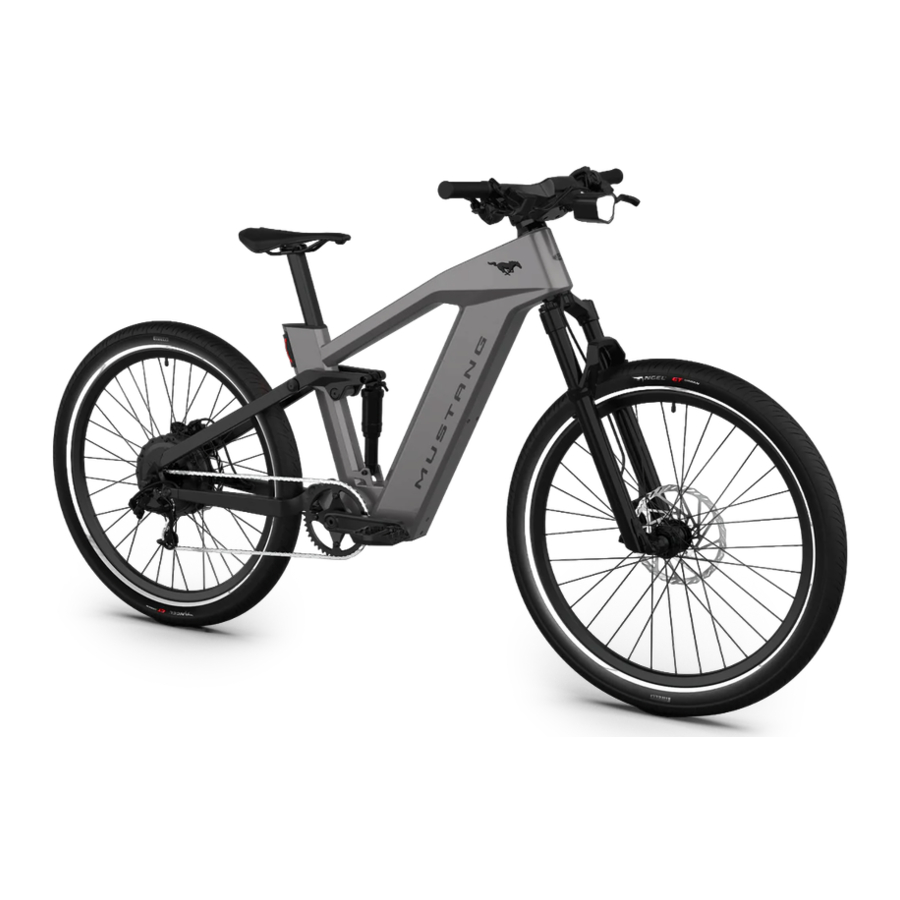
There's no mistaking the lineage of this bold, chiseled electric bike. Every line, curve, and angle has been inspired by Mustang, America's best-selling sports car^, and evokes sixty years of class-leading power and performance.
Your Mustang electric bike generates one horsepower (750W*) of electric boost that easily accelerates to 28 MPH** (in pedal assist, Class 3 mode with the rider pedaling) with plenty of torque on-demand.
Your new eBike features the iconic Mustang LED Sequential Taillights and an integrated one-piece cockpit cradles a full color display with telemetry graphics inspired by Ford's digital infotainment system. Designed for the street and tuned for fast rides with Pirelli tires and a dual suspension designed to keep the bike firmly planted despite any surface imperfections. Powered by a 48V, 15Ah | 720Wh battery, the Mustang electric bike can cruise up to 60 miles ***, and riders can take advantage of four power modes – Eco, Normal, Sport, and Track.
^ Based on CY Industry-reported total sales first half of 2024.
* 750W maximum Rated Power output in Watts.
** 28 MPH maximum pedal assist from the power unit. Any higher speeds achieved by rider input only.
*** 60 mile range is indicative and is affected by the rider's weight, the wind, wheel air pressure and terrain conditions.
Ford Mustang Assembly
Your Ford Mustang eBike has been fully assembled and tested at the factory. The bicycle is fully functional without any further adjustments being made once the assembly steps explained below have been completed. After carrying out assembly work, always do a test ride in an unfrequented place or on a quiet road.
Before your first ride, carry out the checks described in the section "Before every ride". On receiving your Ford Mustang eBike, carefully open the cardboard outer and inner packaging using a box cutter or knife with a very short blade. Never use any kind of knife on the bike itself.
The packaging includes your partiallyassembled Mustang eBike, with the rear wheel already installed. The seatpost and saddle and front wheel are included in the product packaging and must be installed. In addition, the packaging includes basic tools for use during assembly.
Correct assembly is essential for safe riding. If you have any concerns or are not comfortable assembling your Ford Mustang eBike, please contact our support team for further assistance.
Tools Required
- Provided allen key multi-tool.
- Torque wrench.
Seat post installation
- Loosen the seat post collar bolt.
- Install the seat post to seat tube and fit to preferred height (ensure maximum and minimum seat post insertion points on the rear of the seat post are not exceeded).
- Tighten the seat post collar bolt to 6-8Nm.
![]()

Minimum Insertion
The seatpost must be inserted in to the frame deep enough so the minimum insertion/maximum extension(min/max) mark on the seatpost is not visible. Minimum insertion of the seat post is 120mm.
Maximum Insertion
The seat tube contour changes part-way down. This contour change limits the insertion depth of the seatpost. When inserting the seatpost, there should be sufficient space between the bottom end of the seatpost and the contour so as to not cause any structural damage to the frame.
Max insertion - Size S: 180mm
Max insertion - Size M: 180mm
Max insertion - Size L: 260mm
To ensure your safety while riding your eBike, please be sure to adhere to all torque specifications listed in this user manual.
Headset and handlebar adjustment
- Ensure stem bolts are loosened, then ensure handlebar top cap is also loosened.
- Align the handlebar by looking straight down at the stem portion and making sure the stem is centered over the front fork.
- Ensure that no electrical cables or hydraulic brake hoses are caught between the handlebar and fork steerer tube.
- Tighten the headset top cap to 3-4Nm using the supplied allen key (confirm torque setting using a torque wrench).
- Ensure the stem remains aligned to center of the front suspension fork.
![]()
- Next, tighten both handlebar stem bolts to 5Nm (incrementally tightening top and bottom bolts). Finally, tighten both handlebar stem bolts to 6-8Nm.

Front wheel installation
- While holding the bike off the ground with one hand, unscrew the front axle from the fork and remove any protective packaging.
- Remove the front hydraulic disc brake caliper protective insert.
- With the bike in one hand, use your other hand to place the wheel into the fork, ensuring that the disc brake rotor is on the same side as the brake caliper. Guide the rotor into the caliper and the ends of the hub into the dropouts.
- Slide the axle into the hub from the right side of the bike (opposite the brake caliper). Tighten the axle to 10Nm. Rear axle torque setting 10Nm.
- Check for alignment of disc rotor and disc brake pads by slowly spinning the front wheel by hand whilst bike remains upside down (note — do not engage brakes whilst bike is upside down to avoid any risk of hydraulic brake malfunction).
- Refer relevantTektro user manual for further information.

Assembler is cautioned against the danger of damaging the handlebar stem to fork assembly and possible injury to rider resulting from over-tightening the handlebar stem bolts.

Charging your bike
- Only charge your eBike using the provided battery charger or certified replacement purchased from Ford Bikes.
- Using a third-party battery charger risks the life of the battery and presents a potential fire hazard.
- To charge your bike, connect the provided battery charger to the wall socket (ensuring wall socket is switched off). Connect the charger plug to the charging port, located at the internal face of the seat tube, just above the bottom bracket.
- Turn charger on.
- When the bike is fully charged, disconnect the bike and the wall socket.
Battery warnings
Keep your bike away from fire and heat.

Risk of explosion! Keep the rechargeable battery and the charger out of the reach of children. This equipment is not intended to be used at ambient temperatures less than 0°C (32°F) and 40°C (104°F). Never charge the battery when ambient temperatures are outside this range.
How To Ride Your Ford Mustang eBike

- Saddle / Seat
- Stem Cap
- Handlebar Assembly
- Head Tube
- Disc Rotor
- Brake Caliper
- Rear Hub Motor
- Rear Derailleur
- Seatpost
- Down Tube Battery
- Charging Port
Know before you ride
The rechargeable battery of your eBike must be charged before you set off for the first time. Before you set off, check that your battery is fully charged.
Stopping
Always maintain a safe distance between you and other road users or objects to ensure sufficient stopping distance. Adjust distances and braking force to suit riding conditions. For the most effective and safe braking, apply your brakes evenly and smoothly. Always keep your eyes on the road or trail ahead and adjust your speed in advance to avoid hard braking.
Hand brakes
The front brake provides more stopping power than the rear brake, so do not use it too forcefully or too abruptly. Gradually add pressure to both brakes until you slow to the desired speed or stop. If you must stop quickly, shift your weight back as you apply the brakes to keep the rear wheel on the ground.
Brake force applied to the front wheel suddenly or too fully could lift the rear wheel off the ground or cause the front wheel to slide out from under you. This could cause a decrease in control and result in a fall.
Shifting gears
The gears on your bicycle allow you to pedal comfortably in different conditions — like riding up a hill, pedaling into a headwind, or riding fast on flat terrain. Select the gear that is most comfortable for the conditions; a gear that lets you pedal at a constant and efficient rate. The rear derailleur moves your chain from one gear to another. You shift gears by pressing the handlebar mounted shifter which controls the derailleur. Shift gears only when the pedals and chain are moving forward.

Using the display
Your eBike is equipped with a custom integrated handlebar display. Press the ENGINE START STOP switch on the top tube to activate your bike. In the main interface, short press the "Power" button to switch to view different data information. Switch data display order: Trip mileage and total mileage, average speed and maximum speed, riding time and calories burnt.

Menu operation
- When the bike is stationary, long press the "i" button on the handlebar mounted control switch for two seconds to enter the user menu.
- After entering the menu, short press the "+" or "-" button on the handlebar control switch to select the setting option, then short press the "Power" button on the handlebar control switch to confirm the selection and modify the item.
- Short press the "+" or the "-" handlebar control switch button to adjust the value.
- Short press the "Power" button on the handlebar control switch to complete modification and return to the main menu.
- Long press the "i" button on the handlebar control switch for two seconds to exit the user menu interface.
Menu functions
Clear trip
Trip mileage, trip total time, maximum speed, average speed, total calories can be cleared.

Switch display unit
Switch between metric or imperial display units.

Backlight brightness setting
Screen brightness can be manually adjusted or set to automatic which will adjust screen brightness according to the ambient light.

Automatic power off time
Display automatic power off time can be predetermined.

Automatic headlight
Auto headlight mode can be set. When set to ON, it will turn on or turn off headlight automatically according to the ambient light and set OFF will turn off auto headlight function.

Menu functions
Set time
The display time can be set. Default modified option is hour after entering the setting. Setting order is hours / minutes.

System information
Current system information.

Set password
Display four-digit pass code can be set.

Turning your eBike on and off
Ensure the bike is sufficiently charged.
Press ENGINE START STOP switch to activate your bike.
Switching Power Assist (PAS) levels
Using the handlebar control switch, short press the "+" button to increase the assist level; short press the "-" button to decrease the assist level. Press Engine START STOP switch to activate your bike.
Press and hold the walk-mode button to activate walk mode. Release the walk-mode button to stop.
Your Ford Mustang eBike has four Power Assist levels: Eco, Normal, Sport, Track. Normal is the default power assist level.
Lights
Auto headlight mode can be set. When set to ON, it will turn on or turn off headlight automatically according to the ambient light and set OFF will turn off auto headlight function. Light settings are manually controllable (sequentially) via handlebar control switch. Single press the control light switch to cycle between low and high beam settings. The position light will remain on if auto headlight mode is toggled ON.
How to ride your eBike
The functions of your eBike are operated with the buttons of the control switch on the handlebar.
Front light control and power assist levels are controlled via the handlebar control switch.
Set off for your first ride in the lowest power assist setting ("Eco"). Gradually increase power assist levels as you become accustomed to the power application. Practice typical riding actions (starting off, turning the bike, stopping the bike) to become accustomed to the different handling from that of a conventional bicycle.
Pedal assistance
When power assistance is engaged, the mid drive motor will automatically apply power during pedaling. Sensors within the motor measure your pedaling and control the automated power assistance according to the power assist setting chosen. The level of power supplied to the drive train depends on power assist setting chosen, speed and amount of force applied to the pedals. Power assistance switches off when applicable maximum speed is reached.
Be mindful that the power assistance may require changes to riding style.
Be sure to cease pedaling earlier than usual before cornering or stopping, to disengage the pedal assist and navigate safely.
Frame size, saddle height adjustment.
Prior to riding your eBike for the first time, you should take care to adjust and personalize your position on the bike. Stand over the top tube of your eBike and confirm there is sufficient clearance between the top tube and your crotch (at least one hand width).
The saddle should be set to a height from which you can just reach the pedal in its lowest position (crank arms positioned vertically) whilst seated on the saddle. Also check that when seated on the saddle your toes can just reach to the ground.
To avoid damage to the seat post or bike frame, do not position the saddle beyond the minimum insertion line on the seat post. Riding with a frame that is too big can cause discomfort and injuries.

Do a test ride on private roads or a private space before riding on public roads or infrastructure. Make yourself familiar with the increased acceleration and become accustomed to the braking distances. Never ride without a region-specific fully certified helmet.
Do not step on the pedals before being fully seated on the bike. If any of the power assistance modes are engaged, pressure on one pedal will engage the mid drive motor and could cause an accident. Always have the brakes ready to engage when you first set off with power assist levels switched on. Due to the increased power through the drive train, rear tire traction may be marginally reduced. Keep this in mind when riding in adverse conditions (for example wet road surfaces, snow or gravel). Always ride to the conditions. Note that other road or trail users may underestimate your speed. Always wear reflective and suitably bright clothing.
Bed-in your disc brakes
New disc brakes require a bed-in (burn-in) process. The process helps ensure consistent and powerful braking feel, along with the quietest braking in most riding conditions.
The bed-in process requires you to perform heavy braking. You must be familiar with the power and operation of disc brakes.
Braking heavily when not familiar with the power and operation of disc brakes could cause you to crash, which could lead to serious injury or death. If you are unfamiliar with disc brakes, you should have the bedin process performed by your bike shop.
- On a flat surface, while sitting on the saddle, accelerate the bike to a moderate speed.
- Then firmly apply the brakes until you are at walking speed. Repeat approximately twenty times.
- Accelerate the bike to a faster speed, then firmly apply the brakes until you are at walking speed. Repeat approximately ten times.
- Allow the brakes to cool prior to any additional riding.
![]()
Disc brakes can get hot during use. Therefore, do NOT touch disc brake rotors, shoes or calipers directly after stopping.
Before every ride
During production, your bike was quality checked repeatedly. Regardless, be sure to complete the following precautionary safety checks before every ride.
- Check the handlebar
- Check the handlebar is at 90 degrees to the wheel.
- Check handlebar grips are properly installed and are in good condition (no cuts, tears or worn out areas).
- Check that the handlebar is properly tightened so that it cannot twist or move.
- Check the wheels
- Check that the thru-axles for both front and rear wheel are properly installed (threads aligned correctly) and tightened to the correct torque.
- Are both tires in good condition and are both tires suitable inflated? Check for abnormal or increased tire wear. Check tread indicators on your tires to determine if tires should be replaced. Note that the increased weight of the eBike may necessitate slightly higher than usual tire pressure.
- Spin the wheels to check if the rims are true. Check for any tire sidewall damage or spoke damage at the same time.
- Check electrical parts
- Check that the electrical connections are secure.
- Is the battery fully charged? Remember to fully recharge the battery after each long ride (e.g. where battery charge level drops below 50%). Check charge of the battery via the handlebar display dashboard (battery indication level detailed on the right of screen).
- Check that the handlebar display does not show any error codes. Do not ride your bike if an error code displays on the handlebar display.
If you want to ride on public roads, ensure that all applicable safety requirements have been met (for example, rear light or reflectors installed). Always abide by local laws and regulations.
- Test the brakes
- Test the brakes while standing by firmly pulling the brake levers towards the handlebar. A pressure point should be reached after a short time. Ensure that the lever does not touch the handlebar. Check the hydraulic brake lines for any visible signs of leaks.
- Check drive train
- Check for chain wear and ensure correct chain tension.
- Check that the chain has no kinks, rust, broken pins, plates, or rollers.
- Bounce test
- Test all componentry and accessories are firmly fastened to the bike. Complete a small bounce test, bouncing your bike tires on the ground from a small height (10cm above ground is sufficient). If there is any rattling noise, inspect the bike to ensure all components and attachments are firmly fastened. Check the bearings, bolts and proper installation of the battery if necessary to isolate any unwanted noise.
- Check suspension
- Check your front and rear suspension by pressing down on both the front and rear of the bike to ensure that the suspension retracts and extends as usual.
- Check reflectors, lights and accessories
- Check reflectors are clean and positioned perpendicular with the rim.
- Check that both front and rear light is correctly attached.
- Check the operation of both front and rear light.
- Check pedals
- Check that your pedals are correctly attached to the crank arms, spin freely and are free of any debris that might interfere with the pedal system.
- Riding Spares
- It is recommended that a small tool bag be taken on all rides. Basic tools including two plastic tire levers, commonly used hex head keys, spare inner tube(s), tire repair kit and a tire pump are recommended.
Range
The range of your eBike is dependent on a range of factors. Road or trail condition, weather, weight of the rider, pedal force, power assist settings chosen, frequent stops, topography or tire pressure. The battery charge level can be determined from the handlebar display dashboard page (shown right hand side).
Pay close attention to the battery charge indication on screen throughout your ride, ensuring that you will have sufficient battery charge to complete your journey with the necessary or required assistance. To extend your battery range, it is recommended that low or zero power assistance is applied when descending or riding on flat terrain and that maximum power assistance is applied only when topography or weather requires.

You can take a number of precautions to help extend battery range:
- Check tire pressure regularly (before each ride).
- Reducing unnecessary additional user weight (ie removing excess luggage).
Maintaining Your Ford Mustang eBike
Servicing
Special tools and skills are necessary for servicing some aspects of your eBike. If a repair or adjustment is not specifically listed in this manual or you require assistance, please contact support or get in contact with your local bike shop. If a component requires replacing, it is recommended that only original, authorized spare parts are used. Substitution of spare parts (e.g. brake pads, disc brake rotors or drivetrain components) with nonidentical parts may result in damage to your bike and cause risk of accident.
Tool list
- 7 in 1 folding hex tool.
- Battery charger.
- Handlebar spacer.
Storing your eBike
Do not leave your eBike unattended in public places. Whilst your display is equipped with password control, your bike can still be ridden manually. Ensure your bike is always secured and parked in a safe, dry place away from the elements where possible.
Tires
Checking your tires and ensuring correct tire pressure will help ensure safe and comfortable riding. Using a tire pressure gauge or a pump equipped with a gauge, inflate your tires to the recommended tire pressure.
Use a hand pump to inflate your tires to the air pressure recommended on the sidewall of the tire or to the pressure recommended for the rim, whichever is lower. Make sure your pump is suitable for your valve: Presta, Schrader, or Dunlop/Woods. Your eBike is equipped with a Presta valve tube.
With a Presta valve, you must loosen the top valve two turns before trying to inflate the tire. Do not over-inflate your tires. If your tire is over the recommended range, release air and recheck the pressure.
Remove your tire
- Deflate the inner tube (follow steps above to loosen the Presta valve).
- Loosen the tire from one side of the rim (specific tire lever tools may be required).
- With one side of the tire removed, you can remove the inner tube.
Replace your tire
- Place a new, slightly inflated inner tube (ensure that the inner tube dimensions are correctly matched to the tire and rim dimensions – refer to support or your local bike store for assistance as required) within the tire so it occupies the full confines of the tire. Insert the tube valve through the valve hole in the rim.
- Using only your hands, begin to re-install the tire to the rim. You may require tire levers to complete the installation. Ensure that the inner tube is completely within the tire bead and is not caught at any point between the external tire bead and the rim.
- Inflate the tube and tire to recommended inflation pressure. Do not exceed recommended inflation pressure. A recommended pressure range is located on the sidewall of each tire.
- Check to make sure that the tire is correctly seated on the rim. If the tire appears to wobble or the installation is incorrectly completed, deflate the tire and complete these steps again to ensure correct re installation of the inner tube.
Cleaning
Clean your eBike with water or a mild detergent and non-abrasive sponge to remove any excess mud or debris. Never spray your eBike with pressurized water, as this can cause damage to seals, bearings and electrical componentry. Proper lubrication will keep your drive train running smoothly and quietly. It is recommended to clean the chain with degreaser prior to chain lubrication. It is recommended to use a biodegradable degreaser. Apply degreaser to the bottom length of the chain and scrub with a brush or other specific chain cleaning tool. Wash off the degreaser with mild detergent and water and complete with a final rinse with fresh water. Ensure you dry the chain following this process. New chain lubricant is best applied to a clean, dry chain. TIP: Apply the lubricant to the bottom length of the chain and hold a rag under the chain. This will keep the lube from dripping on your chainstay (frame) or wheel and make the process less dirty.
Brake pads and brake rotors
Inspect disc brake pads for wear every month. When the thickness of the metal plate and pad wear material is 2.5mm or less, they are worn and need to be replaced with new disc brake pads. Rotor wear will vary by product model. This is normal. Change the rotor when changing the pad material, or when the thickness is less than the minimum stated on the rotor.
Suspension
As an integral working component on your bike, suspension should be checked prior to and after every ride. Clean dirt from upper tubes and wiper seals on you front suspension every ride to improve wiper seal lifespan and minimize damage to upper tubes and minimize lower leg contamination. It is recommended that a lower leg service for the front suspension fork is completed every 50 hours, and a damper and spring service every 200 hours. It is recommended that full service of suspension be undertaken by your local bike store given the complexity of suspension systems.
Charging your bike
The battery of your eBike will show signs of wear over the years. Gradual degradation of the lithium-ion battery will result in reduced range and charge capacity over time. After a certain period of time it may be necessary to replace the battery.
A rechargeable battery that has reached the end of serviceable life must not be disposed of in regular household rubbish. Dispose of the battery responsibly at relevant battery drop off point. Should your battery need replacement, be sure to replace it with a new battery from Ford eBikes.
Only charge your battery system using the provided battery charger.
Using a third-party battery charger risks the life of the battery and presents a potential fire hazard.
To charge your bike, connect the provided battery charger to the wall socket (ensuring wall socket is switched off). Connect the charger plug to the charging port, located on the front face of the seat tube.
When the battery is fully charged, disconnect the battery from charging system and disconnect the charging system from the wall socket.
As with all mechanical components, eBike is subjected to wear and high stresses. Different materials and components may react to wear or stress fatigue in different ways. If the design life of a component has been exceeded, it may suddenly fail, possibly causing injuries to the rider. Any form of crack, scratches or change of coloring in highly stressed areas indicate that the life of the component has been reached and it should be replaced.
If an error code displays on your eBike handlebar display, please cease using the eBike immediately and contact Support.
Please reach out to our Support team via our website and provide the applicable error code so we are able to best assist you.
Safety and Disclaimer
- "Electric bicycle" shall mean a bicycle equipped with fully operable pedals, a saddle or seat for the rider, and an electric motor of less than 750 watts that meets the requirements of one of the following three classes:
- "Class 1 electric bicycle" shall mean an electric bicycle equipped with a motor that provides assistance only when the rider is pedaling, and that ceases to provide assistance when the bicycle reaches the speed of 20 miles per hour.
- "Class 2 electric bicycle" shall mean an electric bicycle equipped with a motor that may be used exclusively to propel the bicycle, and that is not capable of providing assistance when the bicycle reaches the speed of 20 miles per hour.
- "Class 3 electric bicycle" shall mean an electric bicycle equipped with a motor that provides assistance only when the rider is pedaling, and that ceases to provide assistance when the bicycle reaches the speed of 28 miles per hour.
Your Ford Mustang eBike complies with the equipment and manufacturing requirements for bicycles adopted by the United States Consumer Product Safety Commission (16 C.F.R. part 1512).
Safe riding
Ride smart—know your skill level and do not ride above it. Like any sport, riding an eBike involves risk of injury. By choosing to ride an eBike, you assume the responsibility for that risk. It's important that you understand and practice the rules of safe and responsible riding and proper use and maintenance to reduce the risk of injury. This manual contains WARNINGS and CAUTIONS concerning the consequences of failing to adhere to safe riding practices and properly maintain your eBike.
The word
indicates a potentially hazardous situation that, if not avoided, could result in serious injury or death.
The word

indicates a potentially hazardous situation or unsafe practice that, if not avoided, could result in minor or moderate injury, serious damage to your eBike and the voiding of your warranty. Maximum system (bike, rider, and accessories) weight: 130 kg / 287 lbs
Adhere to local regulations regarding children using this product. Adult supervision is required. No person under the age of sixteen (16) may operate a class 3 electric bicycle. A person under the age of sixteen (16) may ride as a passenger on a class 3 electric bicycle that is designed to accommodate passengers. Adhere to local regulations regarding eBike use. It is the customer's sole responsibility to ensure that the eBike is at all times used in accordance with all relevant laws, regulations and rules (as updated or amended from time to time) which may vary depending on the location where the eBike is used.
In some instances, the use of an eBike may not be permitted or lawful on public roads or paths, and public area and relevant laws should always be adhered to.
- When riding, be sure to keep your gaze where you're going and on your surroundings. Looking at the screen could cause you to hit an obstacle, lose control, and a fall.
- Do not ride too fast. Higher speed creates higher risk, and results in higher forces if a crash occurs. You may be surprised at the power of an eBike.
- When riding the Ford Mustang eBike, keep both hands on the handlebar grips and the brake levers within reach at all time in order to be able to immediately respond to any circumstances. Failure to hold the handlebars whilst riding may cause a loss of control over the bicycle.
- Do not ride while intoxicated or while using medications that can make you drowsy or less attentive.
Different riding conditions
A bicycle can be dangerous, especially if you try to ride beyond the limits of your ability. Know your skill level and don't ride beyond it.
Take extra precautions when you ride in wet or snowy weather, because the grip of your tires is greatly reduced. Braking distances increase in wet weather. Apply your brakes earlier and use extra caution than when riding in dry conditions.
Riding a bike at night is much more dangerous than during the day. If you choose to ride under conditions of poor visibility, be sure you comply with all local laws about night riding. Ensure all reflectors and front and rear light are clean, clearly visible and functioning correctly. Ride with greater caution, avoid traffic, road hazards and if possible, ride familiar routes.
Liability and waivers
It's always important to ride safely, no matter your skill or experience level.
Helmet
Always wear a fully certified and approved helmet (as per local regulations) when riding your eBike. Be sure to affix the helmet properly using the chin strap and follow the manufacturer's instructions for proper use. All operators and passengers of electric bicycles shall wear a properly fitted and fastened bicycle helmet that meets the standards provided by either the United States Consumer Product Safety Commission or the American Society for Testing and Materials, or standards subsequently established by those entities.
Other safety equipment
It's a good idea to wear appropriate clothing when riding your eBike.
Avoid wearing loose clothing or accessories that may get caught in your wheels or other moving components. It's also a good idea to wear bright, fluorescent and reflective clothing to increase visibility to other trail and road users.
Ensure you use your front light and rear light on all rides. Make sure that your reflectors are clean and correctly positioned.
Trailers and carriers
Trailers, bicycle passenger seats and carriers are not permitted on the Ford Mustang eBike. The manufacturer will not assume liability or provide guarantee for the use of trailers, child seats and luggage carriers.
CONTACT US
AU +61 1800 683 600
USA +1 833 288 0417
UK / EU +44 330 808 4279
EMAIL customercare@Fordbikes.com
SOCIAL
 @Ford_bikes
 @Fordbikes
Documents / Resources
References
Download manual
Here you can download full pdf version of manual, it may contain additional safety instructions, warranty information, FCC rules, etc.
Advertisement


Need help?
Do you have a question about the Mustang eBike and is the answer not in the manual?
Questions and answers