Advertisement
- 1 Overview
- 2 What's in the box
- 3 Views
- 4 Setting up your webcam on a monitor
- 5 Setting up your webcam on a tripod
- 6 Features
- 7 Specifications
- 8 Dell Display and Peripheral Manager
- 9 FAQ
- 10 Presence Sensing Management and Settings
- 11 Frequently asked questions
- 12 Troubleshooting
- 13 Warranty
- 14 Getting Help
- 15 Documents / Resources
 NOTE: A NOTE indicates important information that helps you make better use of your computer.

A CAUTION indicates potential damage to hardware or loss of data if instructions are not followed.

A WARNING indicates a potential for property damage, personal injury, or death.
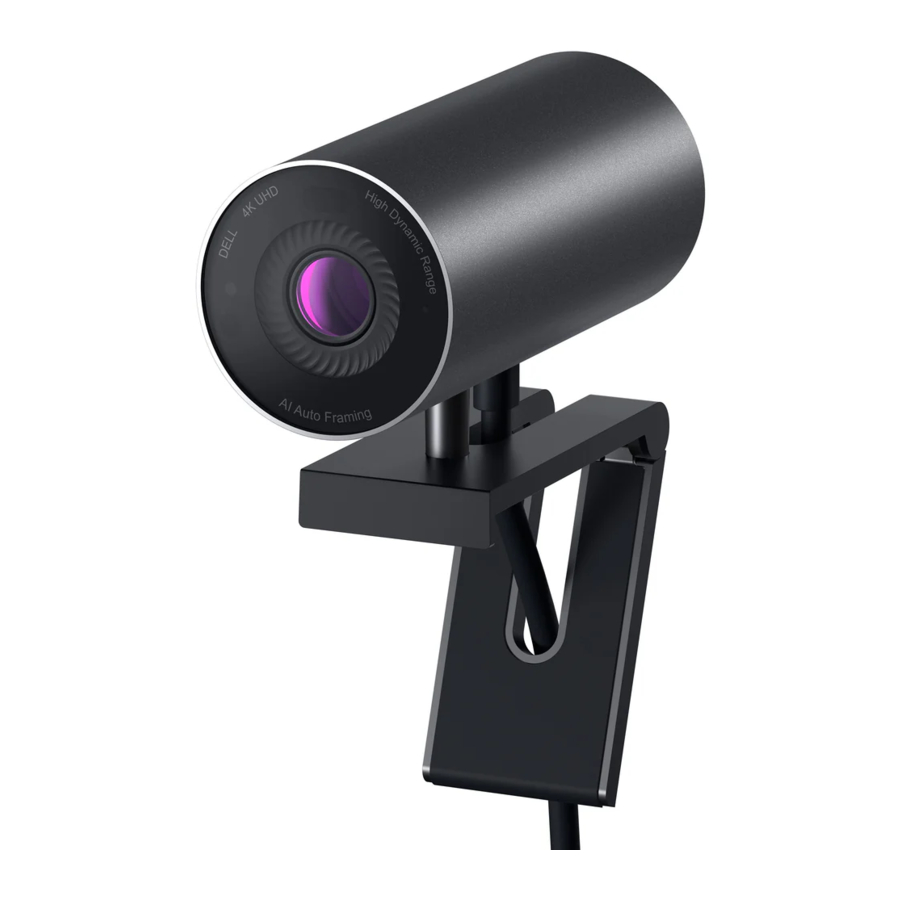
Overview
The Dell WB7022 webcam offers the following:
- 4K video at 30 fps and Full HD video at 60 fps
- AI Auto-framing
- 5x digital zoom
- Adjustable field-of-view with autofocus
- High Dynamic Range (HDR) and video noise reduction support
- Walk Away Lock and Wake on Approach support
- Windows Hello support
- Additional customization using Dell Display and Peripheral Manager
What's in the box

Views


|
|
*Tripod not included
Setting up your webcam on a monitor
NOTE: It is recommended to have an active internet connection on your computer for the best setup experience.
- Connect the USB-C end of the cable to the USB-C port of the webcam.
![information]() NOTE: Insert the cable connector completely into the USB-C port.
NOTE: Insert the cable connector completely into the USB-C port.
![]()
- Align and insert the webcam-mount head into webcam-mount slot on the webcam.
![]()
- Open the webcam-mount base and clamp the webcam-mount along with the webcam to the monitor's bezel.

- Press the base of the webcam mount towards the monitor's back cover to ensure the camera is attached firmly.

- Remove the magnetic lens cap and place it at the rear of the webcam.

![information]() NOTE: The webcam when mounted using the webcam mount can be tilted up and down as required.
NOTE: The webcam when mounted using the webcam mount can be tilted up and down as required.
![]()
- Connect the USB-A end of the cable to a USB-A 3.0 port on your notebook, desktop or monitor.

- Follow the instructions on the screen to customize the camera settings Dell Display and Peripheral Manager software.


Setting up your webcam on a tripod
- Align the thread on the tripod adapter with the mounting screw on the tripod. Rotate the tripod adapter until it is firmly fixed on the tripod.
![]()
- Connect the USB-C end of the cable to the USB-C port on the webcam.
![information]() NOTE: Insert the cable connector completely into the USB-C port.
NOTE: Insert the cable connector completely into the USB-C port.
![]()
- Align and insert tripod-adapter mount head into webcam-mount slot on the webcam.
![]()
- Remove the magnetic lens cap and place it at the rear of the webcam.
![]()
- Connect the USB-A end of the cable to a USB-A 3.0 port on your notebook, desktop or monitor

- Follow the instructions on the screen to customize the camera settings using Dell Display and Peripheral Manager software.


Features
Adjustable Field of View:
The Dell WB7022 webcam features a 90 degree field of view (FOV) and can be changed to 65 or 78 based on the user's preference. Adjusting the FOV allows you to personalize the video output to your external environment.
Auto-framing (Single user framing):
If the user is within 2 meters of the webcam, the webcam will enable the Auto-framing (single user framing) feature and adjust the frame to focus on the user. You can enable Autoframing to ensure the camera always keeps you in the center of the frame.
The user can adjust the following Auto-Framing settings when it is switch on:
- Camera Transition: Enables smooth transition by panning and zooming when the camera readjusts your position in the frame.
- Tracking Sensitivity: Quickly adjust the camera to respond to your movement and readjust your position in the frame.
- Frame Size: Adjust the frame size to narrow or standard.
NOTE: Update your webcam firmware to the latest version to access the Auto-Framing settings.
HDR and Video Noise Reduction:
The Dell WB7022 webcam's Digital Overlap HDR guarantees superior picture quality in extreme lighting environments, while video noise reduction automatically eliminates grainy images in low light.
Specifications
| Webcam camera stream data ports | One USB 3.1 Gen 1 (USB-C) port |
| Stream video out ports and resolutions | MJPEG encoding engine |
| Video format supported | 4K UHD at 30 fps Full HD at 30 or 60 fps HD at 30 or 60 fps |
| Field of View | 65 / 78 / 90 degree |
| Focus | Auto |
| Zoom | 5x digital zoom |
| Auto Light Correction |
|
| LED indicators | ON: Webcam is in use OFF: Webcam is turned off or not in use |
| Supported operating system | Windows 10, 64-bit Windows 11, 64-bit Mac OS 12.3.1 |
| Operating temperature (maximum) | The webcam can operate at a maximum ambient temperature of 40°C. |
Dell Display and Peripheral Manager
Dell Display and Peripheral Manager
Dell Display and Peripheral Manager is an app that helps you set up and configure your Dell monitors and peripherals. With this app you can make changes to settings of the device and provides additional customization like enabling HDR, AI Auto Framing, adjusting Field of View to 68, 4x Zoom and more.
For mac OS users, the application supports most of the webcam customization features excluding Presence Detection, ExpressSign-In, Capture and Auto Installation.
Installing Dell Display and Peripheral Manager
When you connect the device to your computer for the first time, you will be prompted to download and install the app on Windows OS.
NOTE: If you are a macOS user or the download prompt does not appear within a few minutes, you can manually install the software from Drivers & Downloads tab on www.dell.com/support/WB7022/downloads
For more details, please refer to the Dell Display and Peripheral Manager User Guide in the documentation tab.
")
Dell Display and Peripheral Manager (Windows)
")
Dell Display and Peripheral Manager (macOS)
FAQ
What is the recommended configuration to install the software?
Operating System
- Win 11/10 + 64 bit (x86): Home/Pro/Enterprise
- Win 11 ARM
Processor
- Intel (In line with Windows 11 Processor Guideline)
- AMD (In line with Windows 11 Processor Guidelines)
- ARM- (QUALCOMM 8380 above only)
NOTE: For macOS, the Dell Display and Peripheral Manager supports the following devices launched after 2018- MacBook Pro MacBook Air, Mac Mini, Mac Pro. It does not support the iMac. macOS versions 12, 13, and 14 are supported.
Presence Sensing Management and Settings
Presence Sensing Management and Settings
Dell WB7022 built-in presence sensor automatically wakes your device when you approach and turn off when you step away. This feature can help keep your PC more secure, save battery power and let you get back to work more quickly.
- Using Presence Sensing with Dell ExpressSign-in

Refer to below requirements to enable webcam presence detection for Proximity Sensor, Wake On Approach, Walk Away Lock feature on Dell Optimizer/Dell Display and Peripheral Manager software.- Ensure you are using a Dell PC system installed with Dell Display & Peripheral Manger software. If you do not have the software installed yet, please download from www.dell.com/support/DDPM
- Under Presence Detection section
- If "Proximity Sensor, Wake On Approach, Walk Away Lock" is shown

- Turn on the feature as desired
- If "Compatible Firmware" with link to Dell.com is shown
- Follow the link and download"Dell WB7022 Presence Sensing Configurator"
- Select"Dell Express Sign-in", click Next to perform Firmware update
- Launch Dell Display & Peripheral Manager -> Presence Detection -> Turn On "Proximity Sensor, Wake On Approach, Walk Away Lock" as desired
- Microsoft Presence Sensing with Windows 11

Follow the setting guide below to enable the webcam sensing detection with Windows 11 application.- Ensure your system has the latest version of Windows 11
- Open Settings.
- Click on Windows Update.
- Click the "Check for updates" button.
- Ensure firmware on Dell WB7022 webcam enables Microsoft Presence Sensing
- Follow the link and download "Dell WB7022 Presence Sensing Configurator"
- Select "Microsoft Presence Sensing", click Next to perform Firmware update
- Go to Windows → Settings → System → Power & Battery → Turn On Screen & Sleep / Presence
- Ensure your system has the latest version of Windows 11

NOTE: This setting/application does not support Windows 10 non Dell PC system and macOS system.
Frequently asked questions
- What is the recommended configuration to install the Dell WB7022 webcam?
Windows 11,/10, 64-bit or newer
Mac OS 12.3.1 or newer
One USB 3.0 type-A port - What is Windows Hello camera?
Windows Hello is an authentication method offered on Windows 10 and 11. It allows the user to authenticate themselves using fingerprint, facial recognition, or a secure PIN. The Dell WB7022 webcam supports Windows Hello and allows you to login to your PC using facial recognition.
To enable Windows Hello, go to Settings > Accounts > Sign-in options and configure Windows Hello. - What is a proximity sensor and what does it do?
Proximity sensors are used to detect the presence of any object if they come into the field of view of the sensor. The Dell WB7022 webcam has a proximity sensor that triggers Windows Hello and authenticates the user using facial recognition. The sensor also detects your presence and wakes up your computer from sleep. So when you approach your computer, it is ready to log you in using Windows Hello. Additionally, it detects when you walk away from the system and locks it providing complete security. - Why should I use USB 3.0 or higher to setup my Dell WB7022 webcam?
When Dell WB7022 is connected to a USB 3.0 port, it will support the webcam's full features. When connected to a USB 2.0 port, you may experience lower performance due to the bandwidth limitation. Below table indicates the features supportability when connecting the Dell WB7022 webcam to different USB port.
| USB 3.0 | USB2.0 | |
| Presence Detection | ✔ | ✘ |
| Windows Hello | ✔ | ✘ |
| 4K Resolution | ✔ | ✘ |
| Auto Framing | ✔ | ✘ |
| HDR | ✔ | ✘ |
- How do I know if my camera is on?
The Dell WB7022 webcam has a status-LED on the front lens that stays on (white light) when the camera is in use. The status-LED behaviour is as follows:
Webcam in use - Status LED is solid white
Windows Hello authentication in progress - IR LED blinks repeatedly - How do I configure Windows Hello through the Dell WB7022 webcam?
Currently Windows 10 (October 2020 update or earlier) does not support external webcam for Windows Hello facial recognition. However, you can set the Dell WB7022 webcam to work with Windows Hello by following these steps: Go to Camera Control in Dell Display and Peripheral Manager > Check "Prioritize External Webcam" option. For more information, go to the Dell Display and Peripheral Manager. - Can I use the Dell WB7022 webcam with a docking station or a USB Hub?
Yes, you can configure the webcam through a docking station or a USB hub connected to your computer. - Why doesn't Wake on Approach work when I put my computer to sleep?
If you put your computer to sleep manually, the Dell WB7022 webcam detects you in the FOV (field of view) before the system goes to sleep. This is when the Wake on Approach feature does not work. By design, it works only when the Walk Away Lock triggers the computer to go to sleep. When your presence is detected later, Wake on Approach will take less than 10 seconds to wake up the system. - Microsoft Presence Sensing failed to wake up the device when the system is in battery mode. We recommend updating the system to Windows 11 version 24H2 and later to resolve this issue.
- Microsoft Presence Sensing failed to wake up the device from S3 mode.
We recommend updating the system to Windows 11 version 24H2 and later with latest BIOS to resolve this issue.
Troubleshooting
| Problem | Possible solutions |
| Recommended steps for webcam issues | For any issues with the Dell WB7022 webcam, it is recommended to start by following these steps:
|
| Webcam not detected |
|
| Unable to select 4K resolution in camera settings |
|
| Walk Away Lock and Wake on Approach do not work | The Dell WB7022 webcam cannot utilize Walk Away Lock and Wake on Approach features on systems that support S3 state. For more details on the S3 state, see System Sleep States. |
| Image or video shows artefacts and flickering, due to interference from LED or Florescent light sources | To resolve this issue, additional customization is needed based on your environmental lighting. For details on how to resolve this, go to DDPM > Color and Image:
|
| Webcam's proximity detection feature does not work | This feature is not supported on non-Dell computers. If you are using a Dell computer, update the BIOS and drivers to the latest available version from the Dell support site. |
| Unable to install Dell Display and Peripheral Manager on ARM-based Windows computers | Dell Display and Peripheral Manager is not supported on ARMbased Windows computers. |
| Webcam does not work with Dell Display and Peripheral Manager and Windows Camera app after hotplugging the webcam to the computer | Wait for a few seconds after unplugging the camera before re-connecting it to the computer. |
| Webcam not detected when connected to a docking station or USB hub |
|
| Webcam is unable to automatically set the framerate and exposure | Auto-exposure and frame rate feature only function at low light condition and it is supported when HDR is turned off. Toggle off HDR on the Dell Display and Peripheral Manager to use auto-exposure and frame rate. |
| Auto-framing does not work when camera is set to run at 60 fps | The Dell WB7022 webcam does not support 60 fps at 4K. Auto-framing will stop working at 60 fps to avoid resolution drops. The webcam can only support autoframing when the webcam is configured to run at 24 or 30 fps. |
Warranty
Limited warranty and return policies Dell WB7022 webcam ships with a 3-year limited hardware. If purchased together with a Dell system, it will follow the system warranty.
For U.S. customers:
This purchase and your use of this product are subject to Dell's end user agreement, which you can find at www.dell.com/terms This document contains a binding arbitration clause.
For European, Middle Eastern and African customers:
Dell-branded products that are sold and used are subject to applicable national consumer legal rights, the terms of any retailer sale agreement that you have entered into (which will apply between you and the retailer) and Dell's end user contract terms.
Dell may also provide an additional hardware warranty—full details of the Dell end user contract and warranty terms can be found by going to www.dell.com, selecting your country from the list at the bottom of the "home" page and then clicking the "terms and conditions" link for the end user terms or the "support" link for the warranty terms.
For non-U.S. customers:
Dell-branded products that are sold and used are subject to applicable national consumer legal rights, the terms of any retailer sale agreement that you have entered into (which will apply between you and the retailer) and Dell's warranty terms. Dell may also provide an additional hardware warranty full details of Dell's warranty terms can be found by going to www.dell.com, selecting your country from the list at the bottom of the "home" page and then clicking the "terms and conditions" link or the "support" link for the warranty terms.
Getting Help
Contacting Dell
NOTE: If you do not have an active Internet connection, you can find contact information on your purchase invoice, packing slip, bill, or Dell product catalog.
Dell provides several online and telephone-based support and service options. Availability varies by country and product, and some services may not be available in your area. To contact Dell for sales, technical support, or customer service issues:
Steps
- Go to www.dell.com/support.
- Select your support category.
- Verify your country or region in the Choose a Country/Region drop-down list at the bottom of the page.
- Select the appropriate service or support link based on your requirement.
Documents / Resources
References
Download manual
Here you can download full pdf version of manual, it may contain additional safety instructions, warranty information, FCC rules, etc.
Advertisement


Need help?
Do you have a question about the WB7022 and is the answer not in the manual?
Questions and answers