Table of Contents
Advertisement
Quick Links
Advertisement
Table of Contents

Related Manuals for Freecom TOUGHDRIVE PRO 2.5


Summary of Contents for Freecom TOUGHDRIVE PRO 2.5
- Page 1 Freecom ToughDrive Freecom ToughDrive Rev. 531...
- Page 2 -whatsoever (including, without limitation, damages for loss of business profits, business interruption, loss of business information, or other pecuniary loss) arising out of the use of or inability to use this Freecom product, even if Freecom has been advised of the possibility of such damages.
-
Page 3: Table Of Contents
Daily use of the Freecom ToughDrive with Freecom Personal Media Suite software (PC) ........page 15 Chapter 5: The User Interface of the Freecom Personal Media Suite (PC) ..page 16 Chapter 6: Partitioning your Freecom ToughDrive (PC) ........page 31 Chapter 7: Troubleshooting ................. -
Page 4: General Information
Operating system: Mac OS X v10.1 or higher * USB 2.0 is downwards compatible to USB 1.1. To achieve optimal performance from the Freecom ToughDrive your PC should be equipped with an USB 2.0 port. USB 2.0 PCI Host Controllers are... - Page 5 USB cable or power cable and before switching off the device. Failing to do so may result in data loss. • Do not drop the Freecom ToughDrive or expose it to other kinds of sudden mechanical shocks as this may result in data loss and damage to the hard drive.
- Page 6 (FAT32 file system). The FAT32 format ensures maxi- mum interchangeability of the Freecom ToughDrive between different comput- ers. Should you choose to format the Freecom ToughDrive in another file system (e.g. NTFS), please be aware of possible problems when connecting the Freecom...
-
Page 7: Installation Of The Freecom Personal Media Suite Software (Pc)
Chapter 1: Installation of the Freecom Personal Media Suite software (PC only) If you want to use the SYNC function on the Freecom ToughDrive, you need to install the Freecom Personal Media Suite software first. Note: To use the functions of the Freecom Personal Media Suite described in this handbook, your Freecom ToughDrive has to be connected to your PC. - Page 8 Select the target folder and program folder in the start menu in which the Freecom Personal Media Suite symbol is to appear. 4. Default target folder is C:\Programs\Freecom Personal Media Suite. You can select a different target folder for the program files by selecting another...
- Page 9 6. Click on "Next" to start the installation. All necessary program files are now written on the hard drive of your computer. 7. In the last window, you will be asked whether you want to start Freecom Personal Media Suite now. It is recommended to select this option so that you can configure the software for your Freecom ToughDrive.
- Page 10 In order to remove the Freecom Personal Media Suite from your computer, please proceed as follows: 1. In the "Start" menu, please click on "Programs" - "Freecom Personal Media Suite". 2. Select "Uninstall Freecom Personal Media Suite". The software is now...
-
Page 11: Hardware Installation
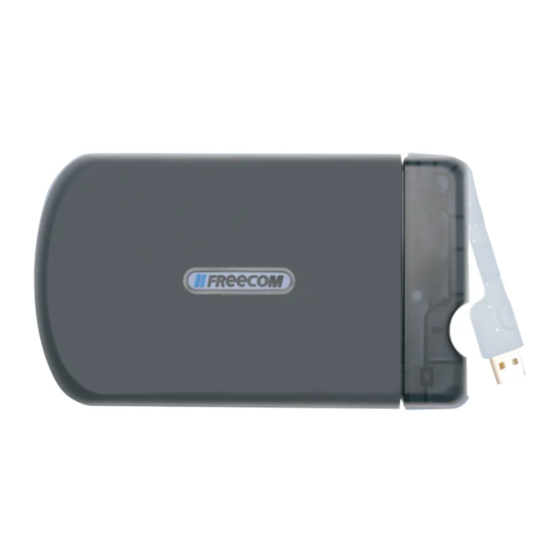
Connect the interface cable to the Freecom Hard Drive. Since USB 2.0 is backwards compatible with USB 1.1, the Freecom ToughDrive can be connected to all USB ports. When connected to a USB 1.1 port, however, the performance (data transfer rate) of the Freecom ToughDrive will be much lower than when the drive is connected to a USB 2.0 port. - Page 12 Freecom ToughDrive Chapter 3: Driver installation (PC only) Under Windows ME / 2000 / XP a separate Freecom driver is not required. The drivers will be installed automatically by the operating system after plugging in the Freecom ToughDrive into the USB port of the computer.
-
Page 13: Driver Installation (Pc)
Driver Installation 4. In the next window select "Search for the best driver for your device. (Recommended)". Click on "Next". 5. Make sure that the checkbox "CD-ROM drive" is activated in the next window. Continue by clicking on "Next". - Page 14 6. The Hardware Wizard finds a "Freecom ToughDrive". By clicking on "Next" the necessary files will be installed. Afterwards click on "Finish" to complete the installation. Congratulations! You’ve just finished to install the Freecom ToughDrive and the external hard drive is almost ready to use.
-
Page 15: Daily Use Of The Freecom Toughdrive With Freecom Personal Media Suite Software (Pc)
Media Suite software (PC only) Creating a SYNC folder (PC) After the installation of the Freecom ToughDrive is finished, the Freecom SYNC folder will be created automatically when Freecom Personal Media Suite was installed before. If not, please refer to chapter 5.4.2 (Creating a new SYNC... - Page 16 4 User menu 5 Connected Freecom ToughDrive (drive letter + available memory capacity) 6 Link to www.freecom.com. Click on this to access the Freecom homepage. Here you can find further information about your Freecom ToughDrive. 7 Quick Help for Freecom Personal Media Suite 8 Minimizes Freecom Personal Media Suite in the system tray.
-
Page 17: The User Interface Of The Freecom Personal Media Suite (Pc)
3. For folders, please select "Add folders" or pull a folder into the Autorun list field using drag&drop. 4. Alternatively, you can create a new folder on your Freecom ToughDrive using the "Add folder" function by clicking on "Create new folder", naming the... - Page 18 2. Click on "Change folder" and select the folder on your Freecom ToughDrive whose content is to be compressed and encrypted. 3. Alternatively, you can create a new folder to be encrypted on your Freecom ToughDrive using the "Change folder" function by clicking on "Create new folder", naming the folder (e.g.
- Page 19 "Secure&Compress". 2. Click on "Open folder" in order to open the Secure&Compress folder. 3. If the Freecom Personal Media Suite is already open and has started mini- mised in the taskbar, you can also open the Secure&Compress folder with a right-click on the taskbar symbol of the Freecom Personal Media Suite: 4.
- Page 20 Before the deletion, a security request is carried out whether you really want to delete the folder: 5.3.6 Changing the password 1. Open the Freecom Personal Media Suite and select the tab "Secure&Compress". 2. Click on "Change password". The following window opens: 3.
- Page 21 The computer serves as origin of the data. This data can be processed on any number of other computers. Example: You create a document at work and want to work on it at home (Freecom Personal Media Suite is installed on your PC at work): •...
- Page 22 2. Click on "Open folder" in order to open the SYNC folder. 2. If the Freecom Personal Media Suite is already open and has been started minimised in the taskbar, you can also open the SYNC folder through a right- click on the taskbar symbol of the Freecom Personal Media Suite.
- Page 23 5.4.5 Synchronisation of files and folders There are two possibilities for the synchronization of your files: 1. Click "Sync now" in the Freecom Personal Suite. Your data is now synchro- nized. 2. Synchronisation of the data when your Freecom ToughDrive is connected to your computer.
- Page 24 All files you want to work with on another computer have to be opened directly out of the Freecom SYNC folder! You should not copy them to another hard disk, as this might cause a later synchronization to perform incorrectly.
- Page 25 Synchronization of new or changed files This example shows how you can synchronize files which were changed or created on the Freecom ToughDrive, with the original files on the primary computer. 1. Connect the Freecom ToughDrive with the primary computer.
- Page 26 5.5.1 Handling deleted files Deleting files on either the primary computer or the SYNC folder on the Freecom ToughDrive results in a red X next to the file during the next synchronization.
- Page 27 The User Interface of the Freecom Personal Media Suite If you wish to keep the file, please click with the right mouse button on the file and select "Don’t Delete". The file will not be deleted and will be disregarded during the next synchronization.
- Page 28 Simply ‘send to’ your important files and directories to the SYNC folder on the Freecom ToughDrive and update your backup from time to time click "Sync now". This is extremely easy and very fast, because the SYNC tool only backups changed files via the fast USB 2.0 connection.
- Page 29 Or the first pictures and movies of your children! You do not want to loose those! The Freecom ToughDrive is ideal for making a safety backup, which stores your data independently from your computer. Simply 'send to' your important files and directories to the SYNC folder on the Freecom ToughDrive and update your backup from time to time click "Sync now".
- Page 30 Freecom ToughDrive This is what you have to do: Follow the instruction in the manual to install the Freecom ToughDrive and the SYNC folder. Mark the files and folders you want to copy to the SYNC folder. Click with the right mouse button on the files and folders, which contain the pictures or videos you want to be in a safe place and select 'Send to SYNC folder...'...
-
Page 31: Partitioning Your Freecom Toughdrive (Pc)
(PC only) 6.1 General information Your Freecom ToughDrive was partitioned and formatted to provide you with the maximum available capacity and compatibility. FAT32 was chosen as file system to assure that you will be able to read your files on any PC. It is recommended not to change the current configuration of your Freecom ToughDrive. - Page 32 NTFS file system is not recognized by Windows 98SE/ME data to be used on these operating systems must be stored on the FAT32 partition. Please follow the steps below to adapt the Freecom ToughDrive for your needs. 6.3 Partitioning your Freecom ToughDrive under Windows...
- Page 33 Partitioning your Freecom ToughDrive (PC only) 6.3.1 Deleting a partition on the Freecom ToughDrive under Windows 98SE / ME The following steps will explain how to delete a partition on your Freecom ToughDrive. 1. Click on the "Start" button. 2. Select "Run".
- Page 34 Freecom ToughDrive 1. Click on the "Start" button. 2. Select "Run". 3. Enter "fdisk" and confirm with "OK". 4. Answer the question "Do you wish to enable large disk support?" by pressing the 'Return' key. FAT32 is now activated. 5. Choose Option "5 (Change current fixed disk drive)" by pressing '5' and 'Return'.
- Page 35 Primary DOS partition?" If more than on partition is required go to the next section "Create two or more partitions on the Freecom ToughDrive under Windows 98 / Windows ME". Now the whole disk will be partitioned as one primary partition. Wait until the drive integrity check is completed.
- Page 36 As Windows tries to access your hard disk an error message will appear. This happens, because your hard disk is not yet formatted. 6.3.3 Creating two or more partitions on the Freecom ToughDrive un- der Windows 98SE / ME 1. Repeat steps 1 to 7 from the previous chapter (Create one partition on the Freecom ToughDrive under Windows 98SE/Windows ME).
- Page 37 Windows Help system. If you don't want to scan your disk, just close the message window. Repeat these steps for each partition if more than one partition was created. Now your Freecom ToughDrive is ready for use. You can use it like an internal hard disk for storing your data.
- Page 38 Freecom ToughDrive 6.4 Partitioning your Freecom ToughDrive under Windows XP / 2000 6.4.1 Deleting a partition on the Freecom ToughDrive under Windows XP / 2000 1. Click with the right mouse button on the "My Computer" icon on your desktop.
- Page 39 Partitioning your Freecom ToughDrive 5. Click with the right mouse button on the "unallocated" area and select the option "New Partition" (Windows 2000: "Create Partition Wizard"). The "New Partition Wizard" opens. Click on "Next". 6. Select "Primary partition" and click on "Next".
- Page 40 7. Now you can adjust the size of your partition. Click on "Next" if only one partition is to be created. See next chapter (Creating two or more partitions on the Freecom ToughDrive under Windows XP/2000) how to create more than one partition.
- Page 41 Partitioning your Freecom ToughDrive 10. Click on "Finish" to complete the partitioning of your Freecom ToughDrive. Your Freecom ToughDrive will be formatted now and is ready-to-use after- wards.
- Page 42 3. Select the option "Manage". 4. Select the option "Storage" -> "Disk Management". 5. Right-click on the unallocated space of your Freecom ToughDrive and select the option "New partition" (Windows 2000: "Create partition"). The "New Partition Wizard" (Windows 2000: "Create Partition Wizard") opens. Click on "Next".
- Page 43 Partitioning your Freecom ToughDrive 8. Click on "Finish" to create the "Extended partition". The unallocated space now changed to "Free space".
- Page 44 Freecom ToughDrive 9. Right-click on "Free Space" and select "New Logical Drive" (Windows 2000: "Create Logical Drive"). The "New Partition Wizard" (Windows 2000: "Cre- ate Partition Wizard") opens. Click on "Next". 10. "Logical drive" is already selected. Click on "Next".
-
Page 45: Troubleshooting
After I connected the Freecom • Install the Freecom Personal Media ToughDrive to my computer for the Suite software and safely remove and first time no Freecom SYNC folder has reconnect the Freecom ToughDrive been created automatically. • Follow the instructions on chapter 5.4.2 Creating a new SYNC folder. - Page 46 Freecom and (e) accidents, lightning, water, fire or any other such cause beyond the reason- able control of Freecom. With respect to all services provided, Freecom is not responsible for any damage to or loss of any programs, data or other information stored on any media or any part of any product serviced. Freecom is not liable for the consequence of business loss in case of system failure.
Need help?
Do you have a question about the TOUGHDRIVE PRO 2.5 and is the answer not in the manual?
Questions and answers