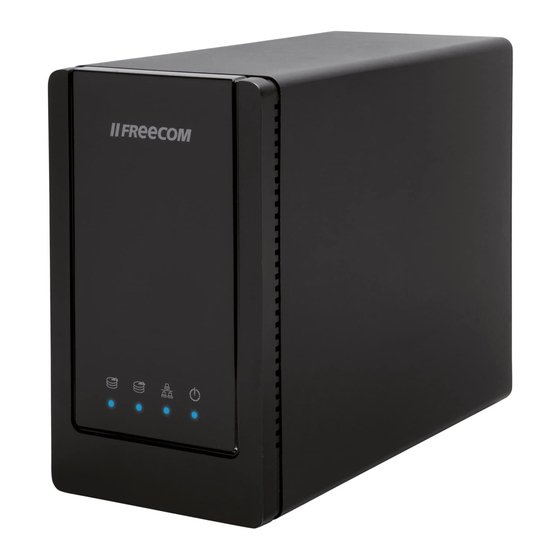
Freecom DUAL DRIVE NETWORK CENTER User Manual
External removable dual network hard drive / 3.5" / gigabit lan / usb 2.0 host
Hide thumbs
Also See for DUAL DRIVE NETWORK CENTER:
- Datasheet (2 pages) ,
- User manual (77 pages) ,
- Handbook (77 pages)

Subscribe to Our Youtube Channel
Related Manuals for Freecom DUAL DRIVE NETWORK CENTER


Summary of Contents for Freecom DUAL DRIVE NETWORK CENTER
-
Page 1: User Manual
USER MANUAL DUAL DRIVE NETWORK CENTER EXTERNAL REMOVABLE DUAL NETWORK HARD DRIVE 3.5" GIGABIT LAN USB 2.0 HOST Rev. 010... - Page 2 -whatsoever (including, without limitation, damages for loss of business profits, business interruption, loss of business information, or other pecuniary loss) arising out of the use of or inability to use this Freecom product, even if Freecom has been advised of the possibility of such damages.
-
Page 3: Table Of Contents
Installation of the application software ..............Page 15 Chapter 4: Accessing the Dual Drive Network Center..............Page 17 Chapter 5: Configuration of the Freecom Dual Drive Network Center........Page 21 Chapter 6: Dual Drive Network Center Functions ................ Page 23 Chapter 7: The Freecom Network Storage Assistant .. -
Page 4: System Requirements
• Operating system: Mac OS X v10.4 or higher In order to enable immediate use, your Freecom Dual Drive Network Center is pre- formatted and configured as RAID 0. You therefore have the maximum storage space available. If you value maximum data security, we recommend the configuration as RAID 1. -
Page 5: Precautionary Measures
General Information Precautionary measures To ensure that your Freecom Dual Drive Network Center functions properly, please take note of the following precautions. If these are not followed, you may void your warranty and damage the Freecom Dual Drive Network Center. -
Page 6: Freecom Dual Drive Network Center Setup Overview
Freecom Dual Drive Network Center Freecom Dual Drive Network Center – Setup overview FREECOM DUAL DRIVE NETWORK CENTER UPnP/DLNA HIFI AUDIO STREAMER MODEM & NETWORK ROUTER UPnP/DLNA VIDEO STREAMER COMPUTERS IN NETWORK INTERNET COMPUTER AT REMOTE LOCATION... -
Page 7: Hardware Installation
Hardware Installation Chapter 1: Hardware Installation 1. Plug the LAN cable into the Freecom Dual Drive Network Center. 2. Insert the power cord into the Freecom Dual Drive Network Center and plug the power supply into the socket. 3. Connect the other end of the LAN cable to a network router. - Page 8 Please turn the Freecom Dual Drive Network Center off when it is not in use. This conserves electricity and extends the life of the device. The power switch is located on the rear of the Freecom Dual Drive Network Center. Reset On/off switch...
-
Page 9: Computer Configuration
Computer Configuration Chapter 2: Computer Configuration 2.1 Check TCP/IP Settings in Windows XP 1. Open "Start" -> "Settings" -> "Control Panel". 2. Double-click on "Network Connections". 3. Right-click on your "Local Area Connection" and select "Properties". - Page 10 Freecom Dual Drive Network Center 4. The following screen will appear. Select "Internet Protocol (TCP/IP)" and click on the "Properties" button. 5. In the "General" tab, select "Obtain an IP address automatically" and "Obtain DNS server address automatically".
- Page 11 Computer Configuration 2.2 Check TCP/IP Settings in Windows Vista / 7 1. Open "Control Panel" -> "Network and Sharing Center". 2. Click on "Manage network connections".
- Page 12 Freecom Dual Drive Network Center 3. Right-click on "Local Area Connection" and select "Properties". 4. In the "Networking" tab, select "Internet Protocol Version 4 (TCP/IPv4)" and click on "Properties".
- Page 13 Computer Configuration 5. In the "General" tab, select "Obtain an IP address automatically" and "Obtain DNS server address automatically". 2.3 Check TCP/IP Settings in Mac OS X 1. Open "System Preferences" -> "Network".
- Page 14 Freecom Dual Drive Network Center 2. In the "TCP/IP" tab, select "Using DHCP" in the "Configure IPv4" settings.
-
Page 15: Installation Of The Application Software
3.1 Installation of the Freecom Network Storage Assistant Software (PC) The Freecom Network Storage Assistant quickly detects and performs the basic setup of your Dual Drive Network Center. When you start it, it displays all Freecom Network devices available in your network and helps you creating network folders. - Page 16 3.2 Installation of the Freecom Network Storage Assistant Software (Mac) The Freecom Network Storage Assistant quickly detects and performs the basic setup of your Dual Drive Network Center. When you start it, it displays all Freecom Network devices available in your network and helps you creating network folders.
- Page 17 Drive Network Center. Mac OS Mac OS X Vers.10.4 and higher Select 'Go To' -> 'Connect to Server...'from the menu bar. The Dual Drive Network Center address is: smb://ddnetworkcenter * or smb:// IP_ADDRESS in the address bar (IP_ADDRESS is the IP address of your Dual Drive Network Center).
- Page 18 Mac OS X 10.4 Mac OS X 10.5 You now need to select a shared folder on the next screen. Press OK to continue. After pressing OK, the Dual Drive Network Center is configured and an icon appears on your computer desktop. Mac OS X 10.4 Mac OS X 10.5 To access all the Dual Drive Network Center folders that your username has been assigned user privileges, simply double-click this icon.
- Page 19 1. Port forwarding Forward port 21 to the IP address of your Dual Drive Network Center. If you have changed the hostname or the IP address of the Dual Drive Network Center, please use the new settings here.
- Page 20 IP address changes. If your router supports this option, we recommend using this feature, otherwise you always need to know the WAN IP of your router to access the Dual Drive Network Center via FTP from the internet.
- Page 21 Drive Network Center. This tool offers the following functions: Accessing your Dual Drive Network Center web interface When you click this menu item, the web interface for your Freecom Dual Drive Network Center opens in your default browser. Adding and removing shared folders You can assign a drive letter to shared folders on your Freecom Dual Drive Network Center.
- Page 22 Repeat search for available Freecom Dual Drive Network Center Click here to repeat the search for your Freecom Dual Drive Network Center if it was not detected during the first search. Please make sure that your network is configured as described in this manual and that all cables are properly attached.
-
Page 23: Freecom Dual Drive Network Center
Chapter 6: Freecom Dual Drive Network Center functions This section describes the functions of your Freecom Dual Drive Network Center. Login Use the “Freecom Network Storage Assistant” to open the web interface of your Dual Drive Network Center, or start your browser and enter http://ddnetworkcenter in order to open the web interface. - Page 24 Freecom Dual Drive Network Center 6.2 Setup The section “Setup” enables the configuration of the basic settings of your Freecom Dual Drive Network Center. The following settings can be configured in the sub-menu “System” : Changing the device and group name under the menu item System...
- Page 25 Freecom Dual Drive Network Center is located. New name If you change the name of the Freecom Dual Drive Network Center, your device can be reached at http://NEW_NAME (NEW_NAME stands for the name you have given the device).
- Page 26 The maximum length of the group name is 15 characters. The only characters allowed are A-Z, a-z and 0-9. Click on “Apply” after you have changed the settings. Your Freecom Dual Drive Network Center will be restarted in order to accept the settings. Changing the administrator password Here you can change your administrator password.
- Page 27 Dual Drive Network Center Functions Power Management Here you can shut down or restart the device via the web interface. This is done by clicking with the mouse pointer on the Shutdown button or clicking the Reboot button. 6.2.3 Configuration of the network settings Go to Setup ->...
- Page 28 Automatic configuration If you select “Dynamic lP”, your Freecom Dual Drive Network Center will automatically receive an IP address from a DHCP server (normally your router). In the first step, please select “Dynamic IP” and then click on “Apply” in order to accept...
- Page 29 Note: Do not use the manual configuration if you are not sure what is to be done here. The manual configuration enables you to configure your Freecom Dual Drive Network Center with a static IP address. In the first step, please select “Static IP” and then click on “Apply” in order to accept the...
- Page 30 Freecom Dual Drive Network Center 6.2.4 Configuration of the DHCP server Go to Setup -> DHCP The following settings can be made under the sub-menu item DHCP: Configuration of the DHCP server Administration of clients DHCP Server You must select “Enable” in order to switch on the DHCP server. Now select the address area of the DHCP server and specify the standard gateway.
- Page 31 Dual Drive Network Center Functions DHCP Client List DHCP Client List shows you all the clients who access the DHCP server when you click on “Refresh”. This function also displays the MAC and IP addresses of the clients, and the remaining lease time per client.
- Page 32 Freecom Dual Drive Network Center Manual setting Select “Manually” in order to enter the date and time manually. Click on “Apply” in order to accept the changes. Automatic setting Select “Auto”, “Enable” and your time zone under Time Zone for the device to set the time itself. Click on “Apply” in order to accept the changes.
- Page 33 Dual Drive Network Center Functions 6.2.6 Configuration of the hard disks Go to Setup -> Disk Current Disk Volume Configuration/Current USB Volume Configuration Here you are shown an overview of the logical and physical drives and the current organisation of your logical drives. The overview will be updated if you click on “Refresh”.
-
Page 34: Disk Utility
JBOD: In this mode, the hard disks of your Dual Drive Network Center are configured as individual drives. RAID 0: In the mode “RAID 0”, the hard disks of your Dual Drive Network Center are combined, and data is always distributed alternately between both hard disks. This offers the advantage that reading and writing takes place significantly more quickly than with individual hard disks. - Page 35 Go to Setup -> Upgrade Upgrade Click on “Browse” and select the downloaded file from http://www.freecom.com. Mit The new firmware is installed by clicking on “Apply”. The device then restarts automatically New firmware normally rectifies faults and extends the functions of your Dual Drive Network Center.
- Page 36 Freecom Dual Drive Network Center 6.3 Settings The section “Settings” enables the loading, saving and resetting of configuration settings. 6.3.1 Save configuration In this menu, you can save the current configuration file on your computer. The name of the configuration file will be generated after clicking the button “Save”.
- Page 37 Dual Drive Network Center Functions 6.3.2 Restoring the configuration Click on “Browse”, select the previously saved Bin file and then click on “Load” in order to restore your saved settings. 6.3.3 Resetting to factory default settings Click on “Reset” in order to reset the device to the factory default settings.
- Page 38 Freecom Dual Drive Network Center 6.4 Log The section “Log” shows you an overview of the system operations. 6.4.1 System Log - Overview of the Kernel Log Go to Log -> System All events relating to the Kernels are displayed in the Kernel Log.
- Page 39 Dual Drive Network Center Functions 6.4.2 Connection Log Go to Log-> Connection All FTP connection events are displayed in the Connection Log. 6.4.3 Event Log - Overview of the Event Log Go to Log -> Event All service events (e.g. Samba) are displayed in the Event Log.
- Page 40 Freecom Dual Drive Network Center 6.5 Users (User administration) The section “Users” shows you an overview of all user accounts, the storage capacity used, and provides the facility of adding new users. 6.5.1 Creating users To create a new user, click on “Create”.
- Page 41 Dual Drive Network Center Functions A pop-up menu appears, in which you can assign the user name, password and storage space. 6.6 Folder Release The section “Folder release” provides you with the facility of activating various services (“Enable”) or deactivating them (“Disable”), and defining the size of the “Public” folder. The utilisation of the “Public” folder is also displayed, and you can manage folders.
- Page 42 Freecom Dual Drive Network Center The following services are available: Service Status This activates or deactivates the SMB function. Master Browser The Master Browser manages all computer names on the network. In Windows networks, Windows provides the Master Browser. In the normal case, the activation of the Master Browser is not necessary.
- Page 43 Dual Drive Network Center Functions In the Folder Manager you can add new folders, edit folders or delete them.
- Page 44 Freecom Dual Drive Network Center Click on “Add” in order to create a new folder. Then select the access authorisation and click on “Apply” in order to accept the change. If you click on “Edit” or “Delete”, you can then edit or delete the created folders.
- Page 45 Dual Drive Network Center Functions 6.7 FTP Server The section “FTP” gives you the facility of setting up and managing an FTP server. 6.7.1 FTP Setup Under FTP Setup you can activate (“Enable”) and deactivate (“Disable”) the FTP server, assign the service port and set the passive mode port range for the FTP server.
- Page 46 Freecom Dual Drive Network Center Anonymous Configuration Under “Anonymous Configuration” you can enable or disable the FTP access of anonymous users. You can also specify whether anonymous users will have read-and-write rights or only read rights to your FTP server.
-
Page 47: Media Server
Dual Drive Network Center Functions 6.8 Media Server The section “Media Server” offers you the facility, after entering the license key, to use the device as a media server or use the bit torrent client of the device. 6.8.1 DLNA/uPnP After entering the key, you can use and configure the DLNA/uPnP service. - Page 48 Freecom Dual Drive Network Center 6.9 iTunes Activate the service by clicking on “Enable”. Select one or more folders with multimedia contents and click on “Apply” in order to accept the changes. Your media releases must be in subsidiary folders of the released folders.
- Page 49 Dual Drive Network Center Functions 6.10.1 List Under “List”, you can add torrent files by clicking on “Upload torrents” and “Browse”. Then click on “Apply” in order to accept the changes. “Torrent List” shows you an overview of the torrent files in the bit torrent client which...
-
Page 50: The Freecom Network Storage Assistant
In this screen, you can set an IP address, subnet mask, device name and workgroup name for your Dual Drive Network Center. With this information, it is easy to locate your Dual Drive Network Center in the network without the FNSA. To change the settings, you have to enter the administrator password. - Page 51 The Freecom Network Storage Assistant (PC/Mac) 7.1.3 Adding and removing mapped network shares You can assign a drive letter to shared folders on your Dual Drive Network Center. This allows you to access files in Windows more quickly. 7.1.4 Start recovery procedure This procedure can reset and repair a Dual Drive Network Center to factory default settings if you cannot access your Dual Drive Network Center anymore.
- Page 52 7.1.5 Repeat search for available Freecom Network Storage devices Click here to repeat the search for your Dual Drive Network Center if it was not detected during the first search. Please make sure that your network is configured as described above in this manual and that all cables are properly attached.
- Page 53 7.2.4 Search again for available Freecom Network Storage devices Click here to repeat the search for your Dual Drive Network Center if it was not detected during the first search. Please make sure that your network is configured as described...
- Page 54 Be sure to exclude all parts not covered by this guarantee prior to returning the product to Freecom. Freecom is not liable for any loss or damage to these items. If during the repair of the product the contents of the hard drive are altered, deleted or in any way modified, Freecom is not liable whatsoever.
Need help?
Do you have a question about the DUAL DRIVE NETWORK CENTER and is the answer not in the manual?
Questions and answers